background image

– 38 –

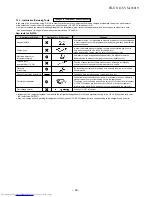
Operation

Measure

Item by symptoms

Check item

Conceivable principle 

cause

Parts

(R04, C01,

DB01, C50, IC08

IC11 and T01)

are defective.

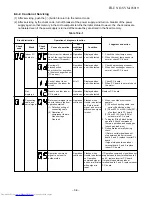
Be sure to disconnect the motor connector CN10 after shut off the power supply, or it will be a cause of
damage of the motor.

(1) Power is not turned on (Does not operate entirely)

3

FILE NO. SVM-05019

For 10/13k

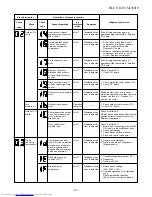
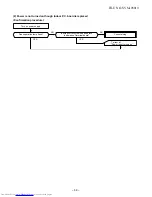
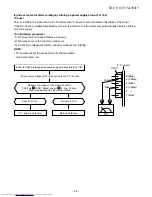
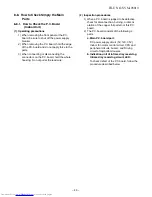
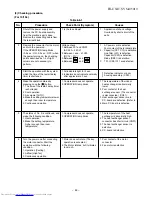
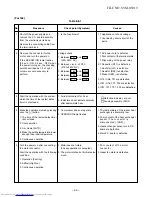
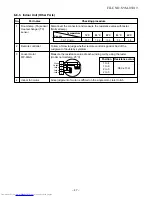
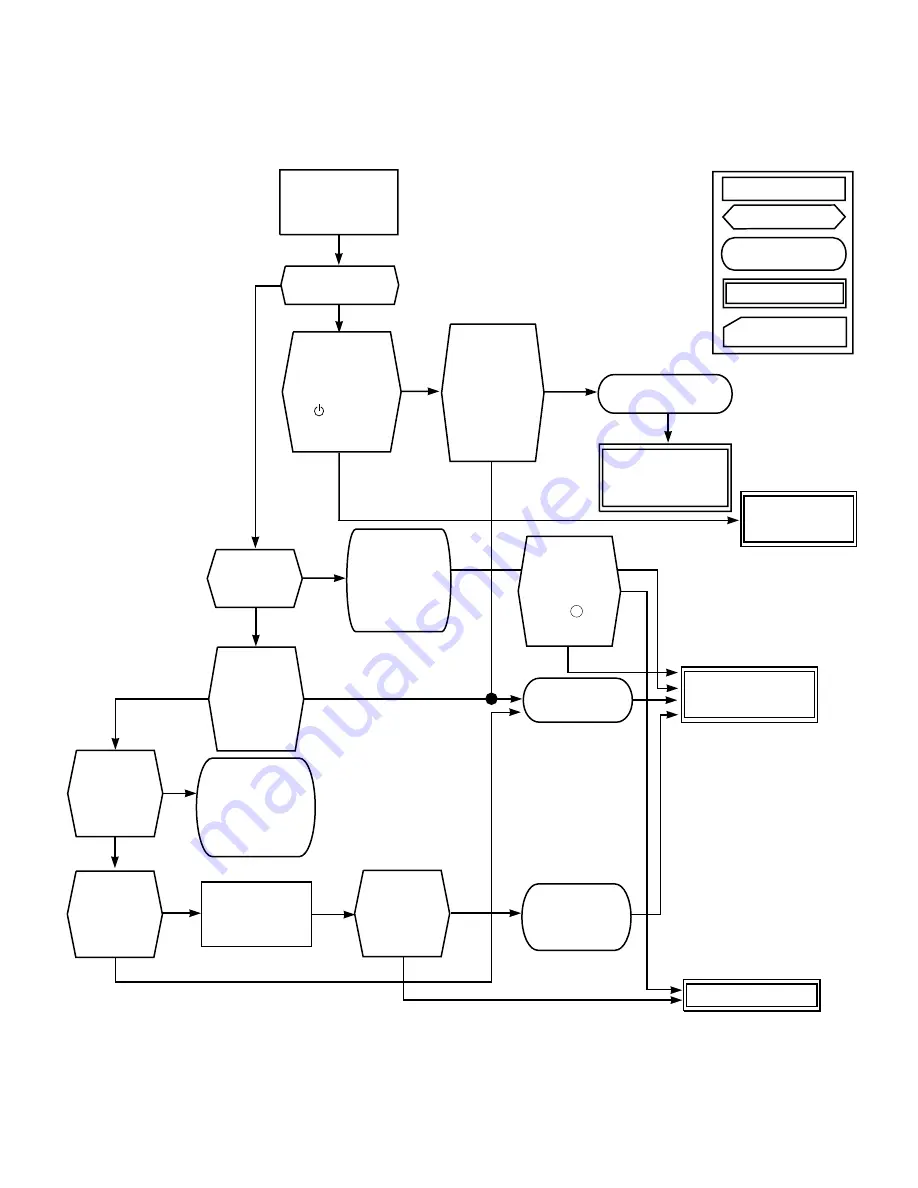
8-5.  Judgement of Trouble by Every Symptom

8-5-1. Indoor unit (Including remote controller)

Turn off power

supply once, and 5

second later, turn it

on again.

Is OPERATION

lamp blinking?

NO

YES

NO

NO

YES

YES

Is it possible to

turn on power

supply by

pressing

[    ] button

on remote

control?

Does

transmission

mark on

remote control

flash normally,

and is its signal

transmitted

properly?

Remote control is

defective.

Refer to (5)

Remote Control.

"

Is fuse (F01)

of indoor control

board blown?

Is voltage

(DC 12V or 5V)

indicated on

rear of indoor

control board

normal?

Microcomputer

is defective.

Replace main

P.C. board.

Refer to

<Primary check>

or this problem

is one step short

of power P.C.

Is the

voltage

14~31.4V DC

at C50?

YES

YES

NO

NO

NO

NO

YES

Does

fan motor

connector

between 1

and

short-circuit?

Unit operates

normally.

board block.

Are DC 5V,

DC 12V 

supplied 

to main

P.C. board?

Turn off breaker

once and turn it

on again after

removing motor.

Regulator IC

(IC08, IC11)

are defective

Replace motor

.

NO

NO

YES

YES

YES

Are DC 5V,

or DC 12V

supplied

to main 

P.C. board?

"Troubleshooting for

Summary of Contents for RAS-M10GKCV-E2

Page 1: ...SPLIT TYPE RAS M10NKV E RAS M13NKV E RAS M16NKV E RAS M10NKCV E RAS M13NKCV E RAS M16NKCV E R410A May 2005 This service manual provide information only on the indoor units For information on the outdoor unit please refer to the service manual of the outdoor unit ...

Page 2: ...tions of Electrical Parts Indoor unit only 5 Control Block Diagram Indoor unit only 6 Operation Description 7 Installation Procedure 8 How to Diagnose the trouble 9 How to Replace the main parts Indoor unit only 10 Exploded Views and Parts list Indoor unit only FILE NO SVM 05019 ...

Page 3: ...ight mm Width mm Depth mm Net weight kg Fan motor output W Air flow rate m3 h Piping Type connection Liquid side Gas side Refrigerant Wiring connection Interconnection 220 230 240V 1Ph 50 60Hz RAS M10NKV E RAS M13NKV E RAS M16NKV E 87 87 87 36 39 0 15 0 15 0 15 30 30 30 33 35 28 29 35 35 28 29 790 218 275 275 275 42 42 39 39 33 33 39 40 10 30 790 218 10 20 10 20 790 218 m3 h 570 610 590 620 650 66...

Page 4: ...er Drain hose 0 54m Connecting pipe 0 43m Flare 6 35 For stud bolt 8 10 For stud bolt 6 Installation plate outline Center line Minimum distance to ceiling 170 or more Minimum distance to ceiling 170 or more 65 or more Minimum distance to ceiling Wireless remote control 57 18 160 6 64 60 60 48 6 218 48 53 Knock out system Front panel Knock out system FILE NO SVM 05019 Heat exchanger Air filter Air ...

Page 5: ... transformer and the power supply circuit of the rated voltage 2 1 3 4 5 Check the voltage at the No 1 pin on CN10 connector and CN24 Check the F01 6 AC 220 240V 1 2 2 3 MCC 861 BLK HA JEM A CN21 TERMINAL BLOCK LOUVER MOTOR FUSE T3 15A 4 3 2 1 CN08 CN24 CN13 WHI CN25 WHI INFRARED RAYS RECEIVING AND INDICATING PARTS 1 3 4 5 6 7 8 11 2 1 2 3 4 5 6 7 8 9 10 11 10 9 1 2 3 4 5 6 7 8 9 10 11 1 2 3 4 5 6...

Page 6: ...the transformer and the power supply circuit of the rated voltage 2 1 3 4 5 DC325V Check the voltage at the No 1 pin on CN10 connector Check the DB01 R05 and C03 6 DC310 340V 2 2 3 MCC 861 BLK POWER SUPPLY CIRCUIT DC5V DC12V HA JEM A CN21 LOUVER MOTOR LINE FILTER FUSE T3 15A 4 3 1 DC MOTOR FAN MOTOR CN08 CN24 CN13 WHI CN25 WHI INFRARED RAYS RECEIVING AND INDICATING PARTS 1 3 4 5 6 7 8 11 2 1 2 3 4...

Page 7: ...1 R109 15G561K 560 V 13 Louver motor 24BYJ48 DC 12V No Parts name Type Specifications 1 Fan motor for indoor ICF 340 30 2 DC 340 V 30 W 2 Thermo sensor TA sensor 10 kΩ at 25 C 3 DC DC transformer T01 SWT 70 DC 390 V Secondary DC 15 V 12 V 7 V 4 Microcomputer µPD780024AGK 5 Heat exchanger sensor 10 kΩ at 25 C TC sensor 6 Line filter L01 SS11V 06270 27mH AC 0 6A 7 Diode DB01 D3SBA60 4A 600 V 8 Capac...

Page 8: ...ECONO Operation Mode Selection AUTO COOL DRY FAN ONLY REMOTE CONTROLLER 5 CONTROL BLOCK DIAGRAM 5 1 Indoor Unit Indoor Unit Control Panel Heat Exchanger Sensor Temperature Sensor Infrared Rays Signal Receiver Initiallizing Circuit Clock Frequency Oscillator Circuit Power Supply Circuit Noise Filter From Outdoor Unit M C U Functions Louver Control 3 minute Delay at Restart for Compressor Motor Revo...

Page 9: ... Indoor fan motor operation control LED display control Transferring of operation command signal Serial signal to the outdoor unit Reception of information of operation status Serial signal including outside temp data to the outdoor unit and judgment display of error Operations followed to judgment of serial signal from indoor side 2 Role of outdoor unit controller Receiving the operation command ...

Page 10: ...outdoor main circuit control section controls compressor motor speed by reduc ing motor speed so that value becomes closest to the command within the limited value Table 6 1 1 Compressor revolution range Operation mode COOL Combination of indoor units M10 M13 M16 In case that any multiple indoor units are combined Compressor revolution rps 20 to 28 20 to 43 20 to 53 20 to 66 31 to 69 31 to 69 6 1 ...

Page 11: ...ature below the specified value to prevent freezing of indoor heat exchanger 6 1 5 P M V Pulse Modulating Valve Using P M V refrigerant flow of refrigeration cycle is varied for the optimum temperature Controlling each unit separately by four P M V corresponds to difference of pipe length fan speed and unit tem perature If an error occurs on cycle temperature when power source of the air condition...

Page 12: ...e breaker flashes the operation lamp This is the display of power ON or notification of power failure When pushing button of the remote controller receive sound is issued from the main unit and the next operations are performed together with opening the vertical air flow louvers Compressor revolution rps Outdoor temp sensor TO 5 C TO TO 5 C ECONO operation TO 5 C TO 5 C TO is abnormal 20 3 33 3 33...

Page 13: ...if current value exceeds 11 5A When the current value lowers to 11 0A return the operation to the above item 1 Normal control 14 2 13 7 Current value Comp motor speed down Comp motor speed keep Fig 6 2 3 4 Outdoor temperature release control The outdoor temperature release is controlled by changing the current release points 14 2 and 13 7 in the above item according to temperature detected by the ...

Page 14: ...erat ing compressor motor speed 1 Control 1 A zone Normal operation zone When TD detect value is 101 C or lower the operation is performed with operating motor speed instructed by the serial signal 2 Control 2 B zone Slow up zone of motor speed When TD detect value is 101 C or higher operating motor speed is slowly up 3 Control 3 C zone Keep zone When TD detect value is 108 C or higher operating m...

Page 15: ...L and UL The compressor motor speed in control as shown in Fig 6 2 5 together with the timer OFF function Each time of pressing COMFORT SLEEP button the off timer setting changes in the sequence of 1 3 5 or 9 hours 10 Hi POWER operation control When the Hi POWER button is pushed Hi Power operation is performed by change set temperature and air flow display on the remote control does not change Fig...

Page 16: ...t change 4 Changing of louver position If the room temperature is higher than setting temperature by 3 5 C or more the louver is automatically set to the maximum air flow position If it is not position of louver is not change When room temperature is reach to setting temperature The louver moves back to set position 11 Quiet operation control When the QUIET button is pushed the fan is restricted t...

Page 17: ...ed after operation start and room temp is higher than set temp 3 C When 25 minutes or more passed after operation start Room temp Set temp 3 5 C The outdoor unit controls the outdoor fan based upon the operation signal sent from the indoor unit and also controls revolution speed of the compres sor motor The power coupler IC20 for four way valve is turned on and turned off in defrost operation 1 He...

Page 18: ...rformed once 2 Defrost operation Operation of the compressor is stopped once turn off power coupler for four way valve after 10 seconds and then exchange the four way valve After 20 seconds restart operation of the compressor Turn off the outdoor fan just when the compressor stopped If temperature of the indoor heat exchanger lowered than 38 C stop the indoor fan 3 Defrost reset Resetting operatio...

Page 19: ...ontrol changes in the sequence of 1 3 5 or 9 hours When the Hi POWER button is pushed Hi Power operation is performed by changing setting temperature and air flow display on the remote control does not change 8 Hi POWER operation control 1 Changing of setting temperature Fig 6 2 12 between room temperature and setting temperature are increased automatically 3 Changing of air flow Fan setting One o...

Page 20: ...ects downward When the room tem perature gains access to the set temperature it becomes cool memory position 6 3 Temporary Operation Temporary Auto operation existence of Auto Restart and Temporary Cooling operation can be set by the RESET button of the indoor controller 6 3 1 Temporary Auto Operation When the RESET button is pushed the Auto operation with set temperature fixed at 24 C starts Cont...

Page 21: ...rt function proceed as follows The power supply to the unit must be on the function will not set if the power is off Push the RESET button located in the center of the front panel continuously for three seconds The unit receives the signal and beeps three times The unit then restarts operating automatically in the event of power supply being accidentally shut down While the filter check lamp is on...

Page 22: ... filter check lamp 6 5 1 How to turn off filter check lamp Push RESET button on the indoor unit Note If RESET button is pushed while the filter check lamp is not indicating the indoor unit will start the Automatic Operation Operation Motions Push RESET button for more The unit is on standby than three seconds The unit starts to operate The orange lamp is on After approx three seconds The unit beep...

Page 23: ...F Push this button to set the OFF timer On timer button ON Push this button to set the ON timer Reserve button SET Push this button to reserve setting of time ON timer or OFF timer A receiving beep is heard Cancel button CLR Push this button to cancel ON timer and OFF timer A receiving beep is heard High power button Hi POWER Push this button to start the high power operation A receiving beep is h...

Page 24: ...and clock time display The time set for timer operation or clock time is indicated The present time is always indicated except for TIMER operation Hi POWER display Indicates when the Hi POWER operation starts Push the Hi POWER button to start and push it again to stop the operation PRESET display Flashes for 4 seconds when the PRESET button is pushed and hold to memorize mark is indicated when PRE...

Page 25: ...ARD PLACE THE UNIT WELL AWAY MORE THAN 2 M FROM HEAT SOURCES SUCH AS RADIATORS HEAT REGISTORS FURNACE STOVES ETC WHEN MOVING THE AIR CONDITIONER FOR INSTALLING IT IN ANOTHER PLACE AGAIN BE VERY CAREFUL NOT TO GET THE SPECIFIED REFRIGERANT WITH ANY OTHER GASEOUS BODY INTO THE REFRIGERATION CYCLE IF AIR OR ANY OTHER GAS IS MIXED IN THE REFRIGERANT THE GAS PRESSURE IN THE REFRIGERATION CYCLE BECOMES ...

Page 26: ...e have been changed to 1 2 UNF 20 threads per inch When purchasing a charge hose be sure to confirm the port size As pressure is high and gasification speed is fast it is difficult to read the indicated value by means of charging cylinder as air bubbles occur The size of opposite sides of flare nuts have been increased Incidentally a common wrench is used for nominal diameters 1 4 and 3 8 By incre...

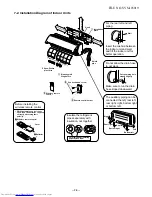
Page 27: ...re 5 Sasa Zeolite plus filter 6 Bio enzyme The auxiliary piping can be connected the left rear left rear right right bottom right or bottom left Right Rear right Bottom right Left Rear left Bottom left Gingko filte 2 Wireless remote control 8 Pan head wood screw 4 Remote control holder Before installing the wireless remote control With the remote control cover open load the batteries supplied corr...

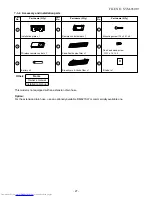
Page 28: ...a Zeolite plus filter x 1 Bio enzyme Ginko filter x 1 Part No Part No 1 2 3 4 5 6 7 8 B Others Name Owner s manual Installation manual This model is not equipped with an extension drain hose Option For the extension drain hose use an optionally available RB 821SW or commercially available one Part name Q ty Mounting screw 4 x 25 l x 6 Pan head wood screw 3 1 x 16 l x 2 27 B Label x 1 9 ...

Page 29: ...ce The location of the remote control should be determined as shown below CAUTION Direct sunlight to the indoor unit wireless receiver should be avoided The microprocessor in the indoor unit should not be too close to r f noise sources For details see the owner s manual Top view Indoor unit Axial distance Reception range Reception range Remote control Indoor unit Remote control Side view Hook Anch...

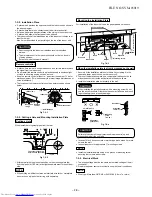
Page 30: ...cable can be carried out without removing the front panel 1 Remove the air inlet grille Open the air inlet grille upward and pull it toward you 2 Remove the terminal cover and cord clamp 3 Insert the connecting cable according to the local cords into the pipe hole on the wall 4 Take out the connecting cable through the cable slot on the rear panel so that it protrudes about 15 cm from the front 5 ...

Page 31: ...e make sure to insulate both the connecting pipes Use polyethylene foam as insulating material When bending a pipe carefully do it not to crush it NOTE If the pipe is bent incorrectly the indoor unit may unstably be set on the wall After passing the connecting pipe through the pipe hole connect the connecting pipe to the auxiliary pipes and wrap the facing tape around them Installation plate Auxil...

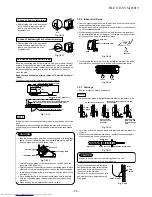
Page 32: ...emote controller are different There is no relation between A setting B setting and A room B room when connecting the piping and cables 1 Setting of remote controller switch at the indoor unit side Fig 7 2 19 How to remove the front cabinet 1 Stop the operation of the air conditioner and turn turn off its main power supply 2 Pull the air inlet grille toward you to open it and remove the air inlet ...

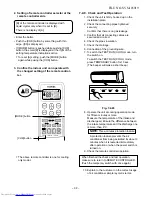
Page 33: ...k the drainage 6 Connection of the grounding wire 7 To switch the TEST RUN COOL mode turn the switch on To switch the TEST RUN COOL mode press TEMPORARY button for 10 sec The beeper will make a short beep The above remote controller is one for cooling only model Fig 7 2 23 8 Operate the unit at cooling operation mode for fifteen minutes or more Measure the temperature of the intake and discharge a...

Page 34: ...door unit flashes Compressor may not operate even if the room temperature is within range of compressor ON In DRY and ECONO mode FAN air flow display does not change even though FAN air flow select button is operated Increasing of compressor motor speed stops approx 30 seconds after operation started and then compressor motor speed increases again approx 30 seconds after The set value of the remot...

Page 35: ... is blinking 5Hz C OPERATION lamp is blinking 5Hz D OPERATION lamp is blinking 5Hz E OPERATION lamp is blinking 5Hz F OPERATION and TIMER lamps are blinking 5Hz G OPERATION TIMER and FAN ONLY lamps are blinking H OPERATION TIMER and FAN ONLY lamps are blinking Power failure when the power supply is turning on Thermo sensor TA short or break Heat exchanger sensor TC short or break Indoor fan motor ...

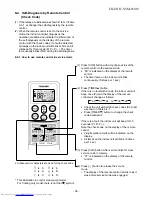
Page 36: ...mes per 1 sec 2 Press TIMER 8 button If there is no fault with a code the indoor unit will beep once Pi and the display of the remote control will change as follows Check the unit with all 35 check codes 00 to 22 as shown in Table 9 4 1 Press TIMER 9 button to change the check code backwards If there is a fault the indoor unit will beep for 10 seconds Pi Pi Pi Note the check code on the display of...

Page 37: ... board 3 Check 3 15A fuse F04 of outdoor main P C board 2 To display Other block during operation check compressor thermo operation and supply gas check gas leak also 3 Unit operates normally during check If Return serial signal does not stop between indoor terminal board 2 and 3 replace inverter P C board If signal stops between indoor terminal board 2 and 3 replace indoor P C board If Operation ...

Page 38: ...error is detected Displayed when error is detected Displayed when error is detected Displayed when error is detected Displayed when error is detected Judgment and action Even if trying operation again all operations stop immediately Replace P C board 1 Even if connecting lead wire of compressor is removed position detect circuit error occurred Replace P C board 2 Measure resistance between wires o...

Page 39: ...on on remote control Does transmission mark on remote control flash normally and is its signal transmitted properly Remote control is defective Refer to 5 Remote Control Is fuse F01 of indoor control board blown Is voltage DC 12V or 5V indicated on rear of indoor control board normal Microcomputer is defective Replace main P C board Refer to Primary check or this problem is one step short of power...

Page 40: ...P C board is replaced Confirmation procedure YES YES NO NO To item of Power is not turned on Turn on power supply Does operation lamp flash Is wired correctly to white and black lead wires of terminal board Correct wiring 39 FILE NO SVM 05019 ...

Page 41: ...ue to prevent temperature rising cause of incompleted connecting Does the cross flow fan rotate normally Is the rotation signal DC 5 V 0 V output between 2 gray lead wire and 3 brown lead wire of the motor connector CN11 when rotating the cross flow fan by hand in no operating status 1 pulse one turn Turn on the power supply Repair the bearing of the fan Turn the power supply Shut off the power su...

Page 42: ...or from motor Then press button on remote control to stop blinking lamp on indoor unit Replace indoor fan motor Replace main P C board Is it possible to detect DC 15V between 4e and 3d of motor connector CN10 Turn off indoor unit and remove connector from motor Then start to operate indoor unit with remote control Start to operate the indoor unit At this time is it possible to detect DC 1V or more...

Page 43: ...hile the fan rotating NOTE Do not disconnect the connector while the fan rotates Use a thin tester rod Indoor fan starts rotating when power supply breaker is turned ON Check output voltage DC of the fan motor on P C board Measure the voltage of the motor connector CN10 pin 2 GND Black and pin 5 V line Yellow under condition that the indoor fan rotates Above DC 0 4V P C board is defective 5 Yellow...

Page 44: ... housing Do not pull at the lead wire 2 Inspection procedures 1 When a P C board is judged to be defective check for disconnection burning or discol oration of the copper foil pattern or this P C board 2 The P C board consists of the following 2 parts a Main P C board part DC power supply circuit 5V 12V 35V Indoor fan motor control circuit CPU and peripheral circuits buzzer and Driving circuit of ...

Page 45: ...t indicate normally after approximate 3 sec 1 Compressor does not operate 2 OPERATION lamp blinks 1 Compressor does not operate 2 OPERATION lamp blinks 1 Motor does not rotate The key operation is accepted 2 The Motor rotates but it vibrates too much Shut off the power supply and remove the P C board assembly from the electronic parts base Remove the connecting cable from the terminal block Remove...

Page 46: ...dicators light for 3 sec 2 Indicators do not indicate normally after approximate 3 sec Start the operation with the system which the time of the restart delay timer is shortened 3 1 Compressor does not operate 2 OPERATION lamp flashes Make the operation status by pressing once the button 1 The time of the restart delay timer is shortened 2 Cool operation 3 Air volume AUTO 4 Make the setting temper...

Page 47: ...rature C TD Discharge temp sensor TA Room temp sensor TC Heat exchanger temp sensor TO Outdoor temp sensor TGa Gas side temp sensor TGb Gas side temp sensor TGc Gas side temp sensor TGd Gas side temp sensor TA TC TO TGa TGb TGc TGd TD Sensor characteristic table FILE NO SVM 05019 ...

Page 48: ...sing the tester Under normal temp 25 C Since judgment of motor is difficult on the single motor refer to 8 5 No 1 2 3 4 Position Resistance value 1 to 4 1 to 6 380 10 Ω 2 to 3 2 to 5 Temperature Sensor TA TC kΩ 8 8 3 Indoor Unit Other Parts Part name Room temp TA sensor Heat exchanger TC sensor Remote controller Louver motor MP 24GA Indoor fan motor 10 C 20 C 25 C 30 C 40 C 20 7 12 6 10 0 7 9 4 5 ...

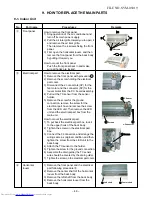
Page 49: ...ove the screw for the electrical part box and remove the screw from the LED unit Then remove the LED unit and the electrical part box from the main unit How to mount the electrical part 1 To put back the electrical part box lock it to the upper hook of the back body 2 Tighten the screw on the electrical part box 3 Connect the 3 connectors and arrange the wiring same as original condition and then ...

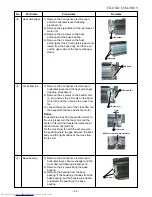
Page 50: ...w fan then separate the fan and the fan motor Notice To assemble cross flow fan and fan motor to the unit please turn the fan motor unit the center of its terminal meets the lowest point of band motor R point A Fix the cross flow fan with the set screw at the position where the gap between the back body and the right surface of the cross flow fan is 4 mm 1 Remove the front panel electrical part ho...

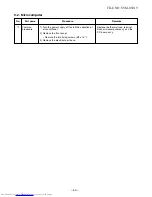
Page 51: ...air conditioner 2 Remove the front panel Remove the two fixing screws Ø4 x 14 3 Remove the electrical part base No Remarks Replace the thermal fuse terminal block microcomputer ass y and the P C board ass y Part name Common procedure 9 2 Microcomputer FILE NO SVM 05019 ...

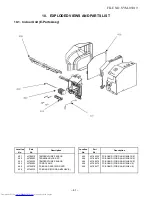
Page 52: ... PC BOARD FOR RAS M16NKCV E 402 43T60002 TERMINAL BLOCK 3P 406 43T69474 PC BOARD FOR RAS M10NKCV E 403 43T69320 TEMPERATURE SENSOR 406 43T69475 PC BOARD FOR RAS M13NKCV E 404 43T62003 CORD CLAMP 406 43T69476 PC BOARD FOR RAS M10NKV E 405 43T69079 PC BOARD ASSY WRS LED 406 43T69477 PC BOARD FOR RAS M13NKV E 406 43T69332 PC BOARD FOR RAS M16NKV E Description Description ...

Page 53: ...22 WIRELESS REMOCO WC H01EE 209 43T21321 MOTOR STEPPING FOR RAS M10 13 16NKV E 210 43T44364 REFRIGERATION CYCLE ASSY 224 43T69471 WIRELESS REMOCO WH H02EE FOR RAS M10 13NKV E NKCV E FOR RAS M10 13 16NKCV E 210 43T44365 REFRIGERATION CYCLE ASSY 225 43T85410 OWNER S MANUAL FOR RAS M16NKV E NKCV E 225 43T85411 OWNER S MANUAL 211 43T47006 PIPE DELIVERY 225 43T85412 OWNER S MANUAL 212 43T47005 PIPE SUC...

Page 54: ...TOSHIBA CARRIER THAILAND CO LTD 144 9 MOO 5 BANGKADI INDUSTRIAL PARK TIVANON ROAD TAMBOL BANGKADI AMPHUR MUANG PATHUMTHANI 12000 THAILAND ...

Reviews: