background image

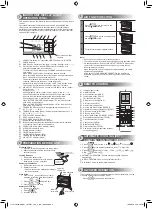
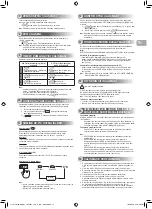
TROUBLESHOOTING (CHECK POINT)

17

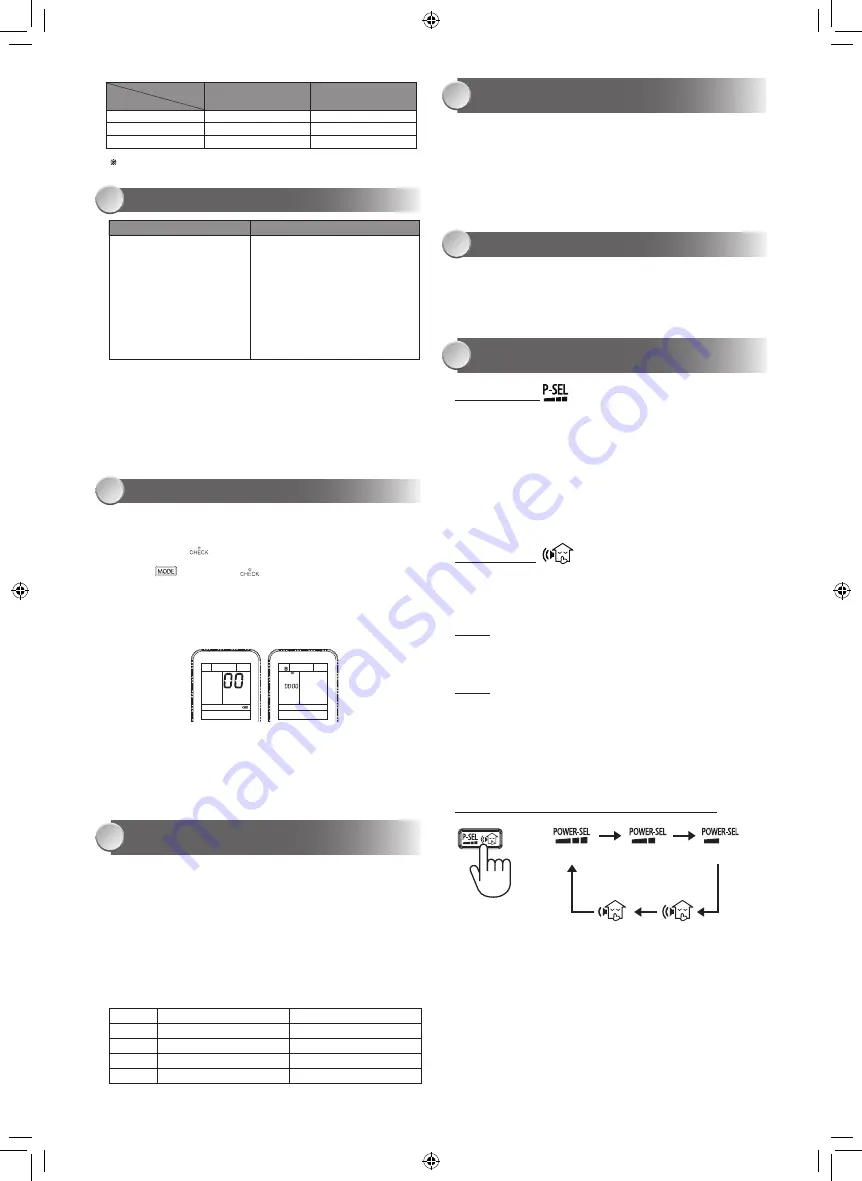
The unit does not operate.

Cooling or Heating is abnormally low

•   The power main switch is

    turned off.

•   The circuit breaker is activated

    to cut off the power supply.

•   Stoppage of electric current.

•   ON timer is set.

•   The filters are blocked with dust.

•   The temperature has been set

    improperly.

•   The windows or doors are opened.

•   The air inlet or outlet of the outdoor

    unit is blocked.

•   The fan speed is too low.

•   The operation mode is DRY.

•   POWER SELECTION function is

    set 75% or 50% (

This function is

    depend on remote controller

).

Note:  

When there is an abnormality in the product, abnormal code

      (2 digits) will be displayed on the unit display panel. Please contact

      the dealership.

In case of multiple connection

•   Check whether the operation mode is different from what has been selected

  for the units in the other rooms (The following combinations of operations

  cannot be performed: COOL and HEAT, DRY and HEAT).

•   Select the same operation mode as for the other rooms.

1.  Press and hold AIR OUTLET SELECT button then press MODE button

  for 3 times (All lamp of the unit display panel will be switched on). (At that

  time, please press and hold the AIR OUTLET SELECT button)

2.  Press and hold AIR OUTLET SELECT button on Unit display panel,

  then press TEMPERATION button (Up), (Down) for select the desired

 brightness.

3.  Brightness will be settled when AIR OUTLET SELECT button is released.

  Although the temperature indicator is switched off, if press the temperature

  button (up) and (down), the set temperature will be indicated, and then can

  adjust the temperature.

  10 seconds after stopped pressing the button, the temperature indication

  will be switched off.

4 stages of brightness can be changed.

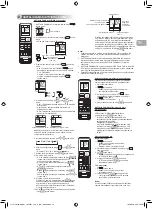
To separate using of remote control for each indoor unit in case of 2 air

conditioners are installed near.

Remote Control B Setup.

  1.  Push and hold 

 button on the Remote Control by the tip of the

    pencil. “00” will be shown on the display. (Picture 

1

)

  2.  Press 

 during pushing 

. “B” will show on the display and “00”

    will disappear and the air conditioner will turn OFF. The Remote Control

    B is memorized. (Picture 

2

)


Note:

  1. Repeat above step to reset Remote Control to be A.


2. Remote Control A has not “A” display.


3. Default setting of Remote Control from factory is A.

Unit B setup.

  Press and hold MODE button for more than 20 seconds.

  When A setup changed to B setup : 5 beeps will sound and operation lamp

  blinks for 5 seconds.

  When B setup changed to A setup : 5 beep will sound.

REMOTE CONTROL A-B SELECTION

18

1

2

ADJUSTING BRIGHTNESS OF UNIT

DISPLAY PANEL

19

Temperature indicator

Other lamp

1

Usual

Usual

2

Darkness

Darkness

3

Turn off

Darkness

4

Turn off

Turn off

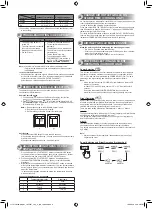
On cooling operation, whichever air outlet is set, only Upper is used when the

room temperature approaches the set temperature.

In case to keep up/down blowing, operate as below;

Press and hold AIR OUTLET SELECT button for more than 10 seconds (less

than 20 seconds) (4 beeps will sound then “1” indication at TEMPERATURE

indicator will light up for 5 seconds).

For return to the former status, press and hold AIR OUTLET SELECT button

for more than 10 seconds once again (In this time, 4 beeps will sound then “0”

indication at TEMPERATURE indicator will blinks for 5 seconds).

Wash the air inlet grille with water using the soft sponge or towel.


•   Dry it well in a shadow area after washing.


•   Scour heavy dirt with neutral detergent for kitchen, and rinse it with the


  water (Do not use the wire wool).


•   Do not press the front panel strongly. It may be cracked.

Power-Selection (

)

This function is used when the circuit breaker is shared with other electrical

appliances. It limits the maximum current and power consumption to 100%,

75%, or 50% and can be implemented by POWER-SELECTION. The lower

percentage, the higher saving and also longer compressor lifetime.

Note:

  •   When the level is selected, POWER-SEL level flashes on remote LCD

    display for 3 seconds.

    In case of 75% and 50% level, number “75” or “50” also flashes for 2

  seconds.

  •   Due to the reason that POWER-SELECTION function limits the

    maximum current, inadequate cooling or heating capacity may occur.

Silent Operation (

)

Keep outdoor unit operating silently to ensure either yourself or neighborhood

will have a tight sleep in nighttime. By this feature, the heating capacity will

be optimized to deliver such silent experience. The silent operation can be

selected from one of two purposes (Silent 1 and Silent 2).

There are three setting parameters: Standard level > Silent 1 > Silent 2

Silent 1:

Though operating silently, the Heating (or Cooling) capacity is still prioritized to

ensure having sufficient comfort inside the room.

This setting is a perfect balance between the Heating (or Cooling) capacity

and the Sound level of outdoor unit.

Silent 2:

Compromising the Heating (or Cooling) capacity to the Sound level in any

circumstance where the outdoor unit’s sound level is highly prioritized.

This setting has a purpose to reduce the maximum sound level of outdoor unit

by 4 dB(A).

Note:

  •   While activating of Silent operation, inadequate heating (or cooling)

    capacity may occur.

Power-Selection and Silent Operation (Outdoor Unit)

CHANGE AIR OUTLET GRILLE ON

STABLE TIME (COOLING ONLY)

POWER-SELECTION AND SILENT

OPERATION (OUTDOOR UNIT)

20

22

AIR INLET GRILLE MAINTENANCE

21

SILENT#2

[100%]

[75%]

[50%]

SILENT#1


Concerning multiple connections, please inquire to the dealership or refer

  to the catalog.

Operation        

Temp. Outdoor Temperature Room Temperature

Heating

-15°C ~ 24°C

Less than 28°C

Cooling

-15°C ~ 46°C

21°C ~ 32°C

Dry

-15°C ~ 46°C

21°C ~ 32°C

1112150136-00_S01_182x257_16p_S_p70_190923.indd   6

1/24/2020   2:58:40 PM

Summary of Contents for RAS-M10J2FVG-TR

Page 1: ... S MANUAL ENGLISH TÜRKÇE AIR CONDITIONER MULTIPLE TYPE For general public use Indoor unit RAS M10 13 18J2FVG TR 1112150136 R32 or R410A 1112150136 00_S01_182x257_16p_S_p70_190923 indd 1 1 24 2020 2 58 28 PM ...

Page 2: ...ate the unit when harmful gases e g flammable or corrosive are detected near the unit Do not expose your body directly to cool or warm air for a long time Do not insert your finger or any article into the air inlet outlet When an abnormality burning smell etc occurs stop the air conditioner and disconnect the power supply or turn off the breaker This appliance can be used by children aged from 8 y...

Page 3: ...appliance to heat flames sparks or other sources or ignition Else it may explode and cause injury or death Do not wash the unit with water It may cause an electric shock Do not use this air conditioner for other purposes such as preserving food breeding animal etc Do not step or put anything on the indoor outdoor unit It may cause an injury or damage the unit Do not touch aluminium fin because it ...

Page 4: ...louver button SWING 7 Set louver button FIX 8 Weekly timer setting button 9 Memory and Preset button PRESET 0 Fireplace 8 C heating operation button 8 C High power button Hi POWER Economy button ECO Comfort sleep button COMFORT SLEEP Floor warming mode button FLOOR Clock Reset button CLOCK Check button CHECK Reset button RESET Filter reset button FILTER Power selection Silent operation outdoor uni...

Page 5: ...matically 1 degree by 2 hours maximum 2 degrees increase For heating operation the internal set temperature will decrease Note Keep the remote control in accessible transmission to the indoor unit otherwise the time lag of up to 15 minutes will occur The setting will be saved for the next same operation Press to cancel the daily timer operation Set the timer when the air conditioner is operating F...

Page 6: ...tlet is set only Upper is used when the room temperature approaches the set temperature In case to keep up down blowing operate as below Press and hold AIR OUTLET SELECT button for more than 10 seconds less than 20 seconds 4 beeps will sound then 1 indication at TEMPERATURE indicator will light up for 5 seconds For return to the former status press and hold AIR OUTLET SELECT button for more than 1...

Page 7: ... select the day of the week and press to select program number to be confirmed Resetting the operation 3 Press to exit confirming mode Deactivating WEEKLY TIMER operation Press while WEEKLY is displayed on the LCD The WEEKLY indicator will disappear from the LCD However the program will remain in the remote control The TIMER lamp goes off To reactivate the WEEKLY TIMER operation press again LCD sh...

Page 8: ...tlama ya da yaralanmayı önlemek için ünitenin yakınında zararlı gazlar örneğin çabuk ateş alan ya da aşındırıcı algılandığında üniteyi kullanmayın Uzun süre doğrudan soğuk havaya maruz kalmayın Hava giriş çıkışına parmağınızı veya herhangi bir nesneyi sokmayın Anormal bir durum olduğunda yanma kokusu vb klimayı durdurun ve güç kaynağı fişini çekin veya sigortayı kapatın Bu cihaz emniyetlerinden so...

Page 9: ...eyin veya yakmayın Cihazı ısı alev kıvılcım veya diğer kaynaklara veya tutuşmaya maruz bırakmayın Aksi takdirde patlayabilir ve yaralanma veya ölüme neden olabilir Cihazı suyla yıkamayın Elektrik çarpmasına neden olabilir Bu klimayı yiyecek saklama ve koruma hayvan yetiştirme gibi başka amaçlar için kullanmayın İç dış ünite üzerine bir şey koymayın ve üzerine basmayın Yaralanmaya veya ünitenin zar...

Page 10: ...relerini çıkarın 2 Filtre elemanlarını takın ayrıntılar için aksesuarlar sayfasına bakın Pilleri Takma 1 Pil bölmesi kapağını çıkarın 2 2 yeni pili AAA boyunda ve konumlarına göre takın Pilleri çıkartma 1 Kapağı sökün ve pilleri çıkartın 2 Kapağı tekrar takın Kullanılmış pilleri lütfen yerel yönetmelikle uygun bir şekilde elden çıkartın Saat Ayarı 1 Kalem ucuyla CLOCK düğmesini itin Zamanlayıcı gö...

Page 11: ...dürmek için iç ünitedeki OPERATION düğmesine veya uzaktan kumanda üzerindeki FILTER düğmesine basın Not Filtre ışığı yaklaşık 1000 saat sonra yanar İç Ünite ve Uzaktan Kumanda İç üniteyi ve uzaktan kumandayı gerektiğinde nemli bir bezle silin Benzin tiner cila veya kimyasal temizleyiciler kullanmayın FİLTRENİN SIFIRLANMASI 14 Temizleme çalışması Klimanın içinde küf v b oluşumları azaltmak için kli...

Page 12: ... Kapalı Kapalı Soğutma çalışması sırasında Sıcaklık ayarlanan sıcaklığa yaklaştığında bu işlem üstte gerçekleşir Yukarı aşağı üflemeye devam etmek için aşağıdaki işlemleri yapın AIR OUTLET SELECT hava çıkışı seçimi düğmesini 10 saniyeden uzun bir süre basılı tutun 20 saniyeden az bir süre 4 bip sesi duyulur ve TEMPERATURE sıcaklık göstergesinde 1 yazısı 5 saniye boyunca gösterilir Bir önceki durum...

Page 13: ...ıda verilen 1 3 arası adımları izleyin 1 tuşuna basın Haftanın günü ve geçerli günün program numarası görüntülenecektir 2 Haftanın gününü seçmek için tuşuna onaylanacak program numarasını seçmek için tuşuna basın Çalışmanın sıfırlanması 3 Onay modundan çıkmak için tuşuna basın HAFTALIK ZAMANLAYICI işleminin devre dışı bırakılması LCD ekranda WEEKLY Haftalık ifadesi görüntülenirken tuşuna basın WEE...

Page 14: ...MEMO 1112150136 00_S01_182x257_16p_S_p70_190923 indd 14 1 24 2020 2 59 29 PM ...

Page 15: ...1112150136 00_S01_182x257_16p_S_p70_190923 indd 15 1 24 2020 2 59 29 PM ...

Page 16: ...lgiler için ürün tanıtım broşürlerine gerektiğinde Alarko Carrier Yetkili Satıcı ve Servislerine ulaşabilmek için 444 0 128 numaralı Müşteri Danışma Hattımıza başvurabilirsiniz 1112150136 00_S01_182x257_16p_S_p70_190923 indd 16 1 24 2020 2 59 29 PM ...

Reviews: