– 11 –
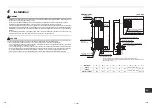
Installation of indoor unit
REQUIREMENT
In case of installing the indoor unit to the floor and the
wall other than wooden floor and wall, the six anchor
bolts (M8 × L50 or longer) are required.
Procure them at the local site.
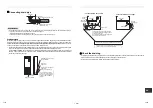
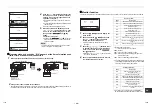
Fixing to the wall surface
Use the attached wall fixing bracket by inverting it at
upper side of the unit. Fix the indoor unit to the wall
surface using the attached screw bolts, anchor bolts or
etc. at two positions. Many holes for fixing the indoor
unit to wall surface and for fixing the indoor unit itself
are provided on the bracket. Sliding the bracket right
and left sides, select a position which can securely fix
the indoor unit and then fix it.
A hole on the wall fixing bracket for the indoor unit is a
long hole. Therefore the indoor unit can be fixed at any
position keeping clearance from 0 to 50 mm.
As shown below, it is also possible to fix the indoor unit
without inverting the bracket. (In this case, keep
clearance with length of head of the bolt between the
indoor unit and the wall.)
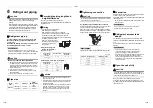
Fixing to the floor
Use the attached floor fixing bracket to fix the lower
right and left sides of the indoor unit to the floor.
To fix to the indoor unit, use the side plate screws and
use the screw bolts or anchor bolts for fixing to the floor
respectively, and then fix the indoor unit at total four
positions, two positions for right and left each.
(Unit: mm)
Indoor unit fixing figure
Wooden wall
Screw bolts
Concrete wall
Anchor bolts
0 mm
50 mm
177
0
mm
(F
ix
ing he
igh
t of
sc
rew
bo
lt or
anc
hor
bol
t)
1730
m
m
(F
ix
ing he
igh
t of
sc
rew
bo
lt or
anc
hor
bol
t)
Clearance
(Height of head
of fixing bolt)
Model
A
B
HM56 to HM80 type
88
30 to 80
HM110 to HM160 type
258
40 to 90
A
B
Wooden wall
Screws for
side plate
Concrete wall
Screws bolts
(Total 4 at right and left)
Screws for
side plate
Anchor bolts
(Total 4 at
right and left)
634 mm
Air intake grille
Bracket for
fixing to floor
Bracket for fixing to wall
Electrical control
box cover
Installation of wired remote controller (sold separately)
CAUTION
This model displays the status of the refrigerant leak detection sensor on the LCD (liquid crystal display) of the wired
remote controller, so be sure to use the wired remote controller.
<RBC-AMSU5 , AMTU3 >
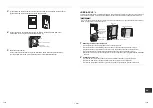
1
(1) Untie the cord of the air intake grille and remove the air intake grille.
(2) Unfasten the two screws fastening the upper cabinet. Lift up the upper cabinet and remove it.
(3) Unfasten the two screws fastened on the back of the upper cabinet and remove the foam cover.
(4) Push out the remote controller panel through the back of the upper cabinet and remove the panel.
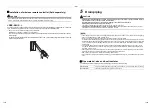
2
(1) Insert a flat-blade screwdriver or other tool into the slit (two places) in the bottom of the remote
controller and remove the rear case. (In the case of RBC-AMTU3 , remove the remote control cover.
The removed cover will be handed over to the customer together with the Installation Manual etc.)
(2) Mount the rear case of the remote controller with two screws (accessory).
Upper cabinet
Screws fastening
upper cabinet
(2 pieces)
Cords (2 pieces)
Intake grille
Foam cover
Remote controller panel
Pins (4 pieces)
Screws fastening foam cover (2 pieces)
Remote controller
panel
Remote
controller wiring
Rear case of
remote controller
Remote controller
(Rear side)
Remote
controller
[RBC-AMSU5 ]
[RBC-AMTU3 ]
Screws (accessory)
Remove the cover.
Remote controller
Square hole
Remote controller wiring
21-EN
22-EN
Summary of Contents for RAV-HM1101FT-TR
Page 60: ...EB99848001 ...

