– 23 –
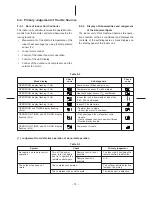
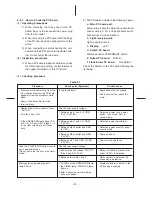
8-5-1. How to Check the PC Board
(1) Operating precautions
1) When removing the front panel or the PC
board, be sure to disconnect the power plug
from the AC outlet.
2) When removing the PC board, hold the edge
of the PC board and do not apply force to the
parts.
3) When connecting or disconnecting the con-
nectors on the PC board, hold the whole hous-
ing. Do not pull at the lead wire.
(2) Inspection procedures
1) When a PC board is judged to be failure, check
for disconnection, burning, or discoloration of
the copper foil pattern or this PC board.
2) The PC board consists of the following 4 parts:
a. Main PC board part:
Power relay, indoor fan motor drive circuit and
control circuit, C.P.U. and peripheral circuits,
buzzer drive circuit and buzzer.
b. Light receiving unit:
Light receiving circuit
c. Display: LED
d. Switch PC board:
Wireless-control, TEMPORARY switch
e. Buzzer PC board: Buzzer
f. Transformer PC board: Transformer
Check the defects of the PC board following the
list below.
(3) Checking procedure
Table 8-7
Procedure
• Disconnect the power plug from the
AC outlet and remove the PC board
assembly from the electronic parts
base.
• Remove the flat cable from the
terminal plate.
• Remove the motor connector from
“MOTOR”.
• Turn the power ON.
• If the OPERATION lamp flash (0.5
sec. ON, 0.5 sec. OFF), steps 1 – 3
in the right column are not neces-
sary.
Push the START/STOP button once to
set in operation mode.
(Do not set to the fan only or on-timer
mode.)
Start operation by using the anti-
restart timer.
Trouble cause
• Application of shock voltage
• Short-circuit of the indoor fan
motor
• Defective power cord, power
switch, fuse or line filter, or
wrong wiring
• Defective power transformer
• Defective power circuit or short-
circuited load
• Same as above
• Thermal fuse operation
• Relay coil cable is broken, relay
driver (IC181) is defective.
• Relay contact is defective, SL
connector is defective.
• Display is failure or defect in the
4P housing assembly.
Check point (Symptom)
Is the fuse blown?
Check power supply voltage.
1.Between pins 1 and 3 of CN01
(220 – 240V AC)
2.Between pins 1 and 3 of CN02
(12V AC)
3.Between Q01 emitter and GND
(5V DC)
4.Between Q03 emitter and GND
(12V DC)
5.Between pin 1 and GND of CN11
(12V DC)
Check power supply voltage.
1.Power relay coil voltage (12V DC)
(Pins 5 and 6 of RY07)
2.Between terminals 1 and 2
1.All LEDs of the OPERATION lamp,
the TIMER lamp, FAN ONLY lamp
light up.
2.After 3 seconds, normal display
does not appear.

