⎞
⎛
⎟
⎜
⎟
⎜
⎟
⎜
⎠
⎝
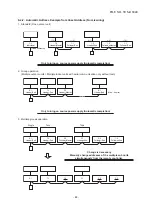
Setup value at saving
Code 0000
04
02
03
01
Electric parts box
Refrigerant pipe
Drain pipe
0001
0002
0003
0005
0004
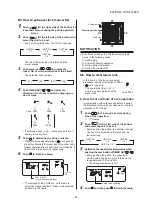
Code
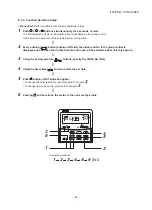
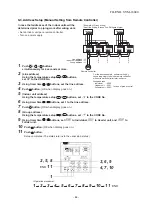
1
Push
UNIT
LOUVER
(At the right side of the button) for
4 seconds or more during stop of the operation.
•
flashes.
2
Push
UNIT
LOUVER
(At the left side of the button) and
select the unit to be set.
• Every pushing the button, the unit No. changes.
The fan of the selected unit rotates and the
louver swings.
3
Push temp. set
/
to display the
louver No. of which air direction is to be fixed.
• The selected louver swings.
4
Push TIMER SET
/
and select air
direction of the louver of which swinging you
do not want.
∗
F1 displayed at the CODE No. on the remote
controller means that the 01 louver was selected
as shown in the figure.
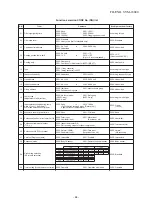
UNIT No.
1–1
UNIT No.
1–2
UNIT No.
1–3
UNIT No.
1–4
[F1]
[F2]
[F3]
[F4]
0001 to 0005
(Louver fixed position code)
Louver
No.
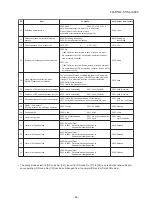
NOTIFICATION
• Even if louver lock works, the louver temporarily
moves in the following cases.
1) During stop
2) At start of heating operation
3) During defrost operation
4) During thermostat OFF
In the item 4 of the louver lock setup
procedure, set the air direction to 0000.
•
mark goes off.
The operations from 1 to 3, 5
and 6 are same as those of the
louver lock.
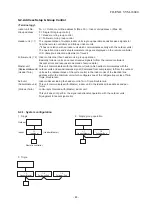
6. How to set contents of save operation
In combination with outdoor units before 4 series,
the displayed setup value exchanges, but the real
operation is “75% fixed”.
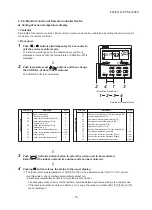
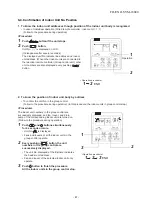
1
Push
SAVE
for 4 seconds or more during
stop of the operation.
•
flashes.
2
Push
UNIT
LOUVER
(At the left side of the button)
and select the unit to be set.
• Every pushing the button, the unit No. changes.
The fan of the selected unit rotates and the
louver swings.
3
Determine the capacity restricted value when
pushing the save button of TIMER SET
/
.
• Every pushing the button, the capacity re-
stricted value can be set at 1% interval in the
range between 100% and 50%.
∗
The setting at shipment is 75%.
4
Push
SET
and then push
TEST
to finish the setup.
UNIT No.
1–1
UNIT No.
1–2
UNIT No.
1–3
UNIT No. 1–4
∗
If selecting above and …, there may be fear of
dewing in cooling time.
5
Push
SET
to determine the setup contents.
• When the setup was determined,
mark goes on.
To set continuously the louver lock of the other unit,
repeat operations from 2 but from 3 to set the other
louver lock in the same unit, respectively.
6
Push
TEST
to finish the setup.
8-5. How to set louver lock (Louver fix)
8-6. How to clear louver lock
FILE NO. SVM-18040
- 81 -

