background image

– 9 –

Operation section

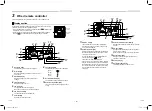
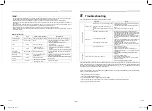
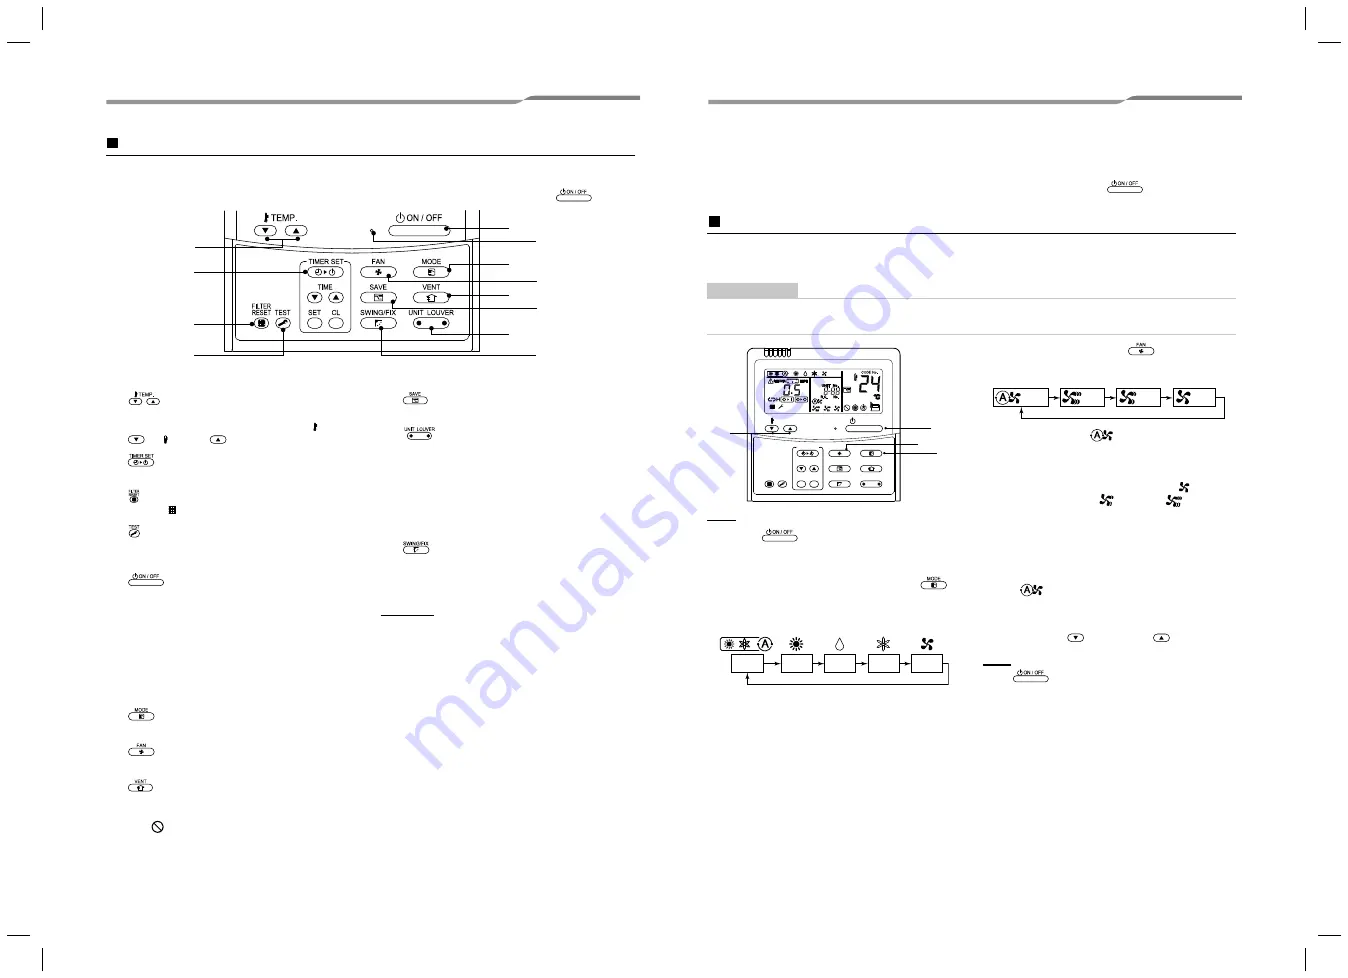
Push each button to select a desired operation.

‡

The control saves commands in memory and after the initial setting, there is no need for any additional 
settings unless changes are desired. The air conditioner can be operated by pushing the 

 button.

1

 button (Temperature set button)

Adjusts the set point.
Select the desired set point by pushing  TEMP. 

 or  TEMP. 

.

2

 button (Timer set button)

Use to setup the timer.

3

 button (Filter reset button)

Resets “

” display after cleaning filter.

4

 button (Test button)

Use only for service. 
(During normal operation, do not use this button.)

5

 button

When the button is pushed, the operation starts, 
and it stops by pushing the button again.
When the operation has stopped, the operation 
lamp and all the displays disappear.

6

Operation lamp

Green light illuminates when unit is on.
Although it flashes when operating the protection 
device or an error occurs.

7

 button (Operation mode button)

Selects desired operation mode.

8

 button (Fan speed button)

Selects the desired Fan speed.

9

 button (Ventilation button)

Use when a power ventilation kit (locally procured) 
is connected.

‡

If “

” is displayed on the remote controller 

when this button is pushed, no vent kit 
connected.

10

 button (Power save operation)

Use to initiate power saving mode.

11

 button (Unit / Louver select button)

Selects a unit number (left) and louver number 
(right).

UNIT:


Selects an indoor unit when multiple indoor units 
are controlled with one remote controller.

LOUVER: 
No Function.

12

 button (Swing / Louver direction 

button)

No Function.

OPTION:

Remote controller sensor

Usually the temperature sensor of the indoor unit 
senses the temperature. The temperature on the 
surrounding of the remote controller can also be 
sensed.
For details, contact the dealer from which you have 
purchased the air conditioner.

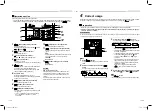
8

6

4

3

2

7

10

12

1

11

4

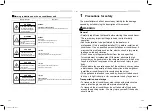
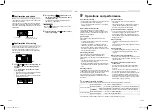
Correct usage

When the air conditioner is used for the first time or when the setting is changed, follow the steps below. Settings 
are saved in memory and are displayed anytime the unit is turned on by pushing the 

 button.

Preparation

‡

When the circuit breaker is turned on, the partition lines are displayed on the remote controller.

* After the circuit breaker is turned on, the remote controller does not accept any commands for approx. 

1 minute, this is not a failure.

REQUIREMENT

When the air conditioner is re-powered after it has not been used for a long period, turn on the circuit breaker at least 
12 hours before starting the air conditioner.

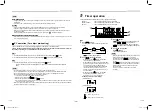
Start

1

Push


button.

The operation lamp illuminates, and the operation 
starts.

2

Select an operation mode with the “

” 

button.

One push of the button, and the display changes 
in the order shown below.

3

Select fan speed with “

” button.

One push of the button, and the display changes 
in the order shown below.

‡

When fan is in “

Auto”, fan speed is 

adjusted based on difference between set point 
and room temperature.

‡

In heating operation, if the room temperature is 
not heated sufficiently with speed “

Low” 

operation, select “

Med.” or “

High” 

operation.

‡

The temperature sensor detects the return air 
temperature at the indoor unit, which differs 
from the room temperature depending on the 
installation condition.
Set point is a target of room temperature. 
(

 “Auto” is not selectable in the Fan 

mode.)

4

Select the set point temperature by pushing 
the “TEMP. 

” or “TEMP. 

” buttons.

Stop

Push


button.

The operation lamp goes off, and the operation stops.

SET

TIME

TIMER SET

TEST

FILTER

RESET

TEMP.

CL

FAN

SAVE

SWING/FIX

VENT

MODE

ON / OFF

UNIT  LOUVER

4

Auto

Heat

Dry

Fan

Cool

      Auto

High

Med

Low

17-EN

18-EN

1116950231_EN.indd   9

1116950231_EN.indd   9

5/9/19   1:50 PM

5/9/19   1:50 PM

Summary of Contents for RAV-SM1101DTP-A

Page 1: ...PLIT TYPE Owner s Manual Indoor Unit Model name Concealed Duct High Static Pressure Type English 1116950231 RAV SM1101DTP A RAV SM1401DTP A RAV SM1601DTP A 1116950231_EN indd cover1 1116950231_EN indd cover1 5 9 19 1 50 PM 5 9 19 1 50 PM ...

Page 2: ...dren without supervision According to IEC 60335 1 This appliance is not intended for use by persons including children with reduced physical sensory or mental capabilities or lack of experience and knowledge unless they have been given supervision or instruction concerning use of the appliance by a person responsible for their safety Children should be supervised to ensure that they do not play wi...

Page 3: ...o installs repairs maintains relocates and removes the air conditioners made by Toshiba Carrier Corporation He or she has been trained to install repair maintain relocate and remove the air conditioners made by Toshiba Carrier Corporation or alternatively he or she has been instructed in such operations by an individual or individuals who have been trained and is thus thoroughly acquainted with th...

Page 4: ...ual WARNING General Carefully read Owner s Manual before starting the air conditioner There are many important things to keep in mind for daily operation Ask for installation to be performed by the dealer or a professional Only a qualified installer 1 is able to install an air conditioner If a non qualified person installs an air conditioner it may result in problems such as fire electric shock in...

Page 5: ... the electrical control box cover of the indoor unit or service panel of the outdoor unit set the circuit breaker to the OFF position Failure to set the circuit breaker to the OFF position may result in electric shocks through contact with the interior parts Only a qualified installer 1 or qualified service person 1 is allowed to remove the electrical control box cover of the indoor unit or servic...

Page 6: ...on 1 arrives Continuing to use the air conditioner in the trouble status may cause mechanical problems to escalate or result in electric shocks or other trouble If the fan guard is damaged do not approach the outdoor unit but set the circuit breaker to the OFF position and contact a qualified service person 1 to have the repairs done Do not set the circuit breaker to the ON position until the repa...

Page 7: ... or any kind of liquid Do not wash the air conditioner Doing so may result in electric shock Check whether the installation base and other equipment have become deteriorated after being used for a long time Leaving them such condition may result in the unit s falling down and causing injury Do not leave flammable sprays or other flammable materials near the air conditioner and do not spray flammab...

Page 8: ...EN Information on the transportation handling and storage of the carton Examples of indication on the carton Symbol Description Symbol Description Keep dry Do not drop Fragile Do not lay down Stacking height 6 cartons can be stacked in this case Do not walk on this carton This side up Do not step Handle with care Other cautions Description CAUTION Injury possibility Don t handle with packing band ...

Page 9: ... TIMER SET TEST FILTER RESET TEMP CL FAN SAVE SWING FIX VENT MODE ON OFF UNIT LOUVER Display section Operation section 1 8 6 16 4 2 3 5 7 13 15 14 17 9 12 11 10 Auto High Med Low 11 UNIT No display The selected indoor unit number is displayed Also number of indoor or outdoor unit which an error occurs is displayed 12 Central control display Displayed when the air conditioner is used under the cent...

Page 10: ...be sensed For details contact the dealer from which you have purchased the air conditioner 8 6 4 3 2 5 7 10 12 1 9 11 4 Correct usage When the air conditioner is used for the first time or when the setting is changed follow the steps below Settings are saved in memory and are displayed anytime the unit is turned on by pushing the button Preparation When the circuit breaker is turned on the partiti...

Page 11: ... maintenance of the air conditioner 1 Set the displayed temperature to 18 C in the heating mode by pushing TEMP button 2 Set the displayed temperature to 8 C by pushing TEMP button for at least 4 seconds 1 Set the displayed temperature to 18 C by pushing TEMP button The air conditioner returns to the normal HEAT mode Select a desired temperature and operation mode 5 Timer operation Three timer mod...

Page 12: ...ettings see To configure the power saving settings in Power saving mode Even when operation start stop operation mode change or power reset is performed during the power saving mode the power saving mode is retained until the next operation 7 Maintenance WARNING Cleaning the air filter and other parts of the air filter involves dangerous work in high places so be sure to have a qualified installer...

Page 13: ...e circuit breaker and inform the dealer where you purchased the product of the product number and symptom Do not attempt to repair the unit by yourself as doing so is dangerous If the check indicator e g is displayed on the remote controller LCD inform the dealer of its content as well If any of the following occur stop running the unit immediately turn off the circuit breaker and contact the deal...

Page 14: ...defrosting operation During the defrosting operation the defrosted water will be drained from the bottom plate of the outdoor unit Heating capacity In the heating operation the heat is absorbed from the outside and brought into the room This way of heating is called heat pump system When the outside temperature is too low it is recommended to use another heating apparatus in combination with the a...

Page 15: ...in an acidic or alkaline atmosphere in a hot spring area or near a chemicals factory or in a place subject to combustion emissions Corrosion may be generated on the aluminum fin and copper pipe of the heat exchanger Do not install the air conditioner near an obstacle such as air vent lighting equipment that disturbs discharge air Turbulent airflow may reduce the performance or disable devices Do n...

Page 16: ... 15 MEMO 1116950231_EN indd 15 1116950231_EN indd 15 5 9 19 1 50 PM 5 9 19 1 50 PM ...

Page 17: ... 16 EN ID ID MEMO 1116950231_EN indd 16 1116950231_EN indd 16 5 9 19 1 50 PM 5 9 19 1 50 PM ...

Page 18: ... 17 MEMO 1116950231_EN indd 17 1116950231_EN indd 17 5 9 19 1 50 PM 5 9 19 1 50 PM ...

Page 19: ...1116950231_EN indd 18 1116950231_EN indd 18 5 9 19 1 50 PM 5 9 19 1 50 PM ...

Page 20: ...144 9 Moo 5 Bangkadi Industrial Park Tivanon Road Tambol Bangkadi Amphur Muang Pathumthani 12000 Thailand 1116950231 1116950231_EN indd 19 1116950231_EN indd 19 5 9 19 1 50 PM 5 9 19 1 50 PM ...
Reviews: