background image

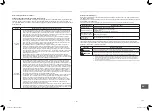
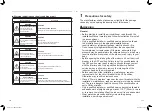
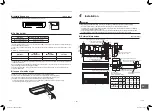
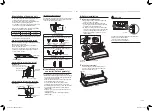
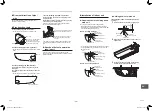
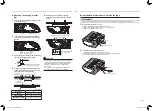
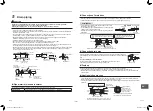
 Warning indications on the air conditioner unit

Warning indication

Description

WARNING

ELECTRICAL SHOCK HAZARD

Disconnect all remote 

electric power supplies 

before servicing.

WARNING

ELECTRICAL SHOCK HAZARD

Disconnect all remote electric power supplies before servicing.

WARNING

Moving parts.

Do not operate unit with grille 

removed.

Stop the unit before the 

servicing.

WARNING

Moving parts. 

Do not operate unit with grille removed. 

Stop the unit before the servicing.

CAUTION

High temperature parts.

You might get burned when 

removing this panel.

CAUTION

High temperature parts. 

You might get burned when removing this panel.

CAUTION

Do not touch the aluminum 

fins of the unit.

Doing so may result in injury.

CAUTION

Do not touch the aluminium fins of the unit. 

Doing so may result in injury.

CAUTION

         BURST HAZARD

Open the service valves before 

the operation,otherwise there 

might be the burst.

CAUTION

BURST HAZARD

Open the service valves before the operation, to avoid

unnecessary pressure built up which could lead to explosion.

1  

Precautions for safety

The manufacturer shall not assume any liability for the damage 

caused by not observing the description of this manual.

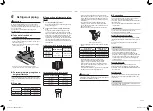
 WARNING

General


•  Before starting to install the air conditioner, read through the

  Installation Manual carefully, and follow its instructions to install

  the air conditioner.

•  Only a qualified installer or qualified service person is allowed 

  to do installation work. Inappropriate installation may

  result in water or refrigerant leakage, electric shock or fire.

•  Do not use any refrigerant different from the one specified

  for complement or replacement. Otherwise, abnormally high

  pressure may be generated in the refrigeration cycle, which may

  result in a failure or explosion of the product or an injury to your

 body.

•  Before opening the intake grille of the indoor unit, set the circuit

  breaker to the OFF position. Failure to set the circuit breaker to

  the OFF position may result in electric shocks through contact

  with the interior parts. Only a qualified installer or qualified

  service person is allowed to remove the intake grille of the

  indoor unit and do the work required.

•  Before carrying out the installation, maintenance, repair or

  removal work, set the circuit breaker to the OFF position.

  Otherwise, may result in electric shocks.

•  Place a “Work in progress” sign near the circuit breaker while the

  installation, maintenance, repair or removal work is being carried

  out. There is a danger of electric shocks if the circuit breaker is

  set to ON by mistake.

•  Only a qualified installer or qualified service person is allowed to 

  undertake work at heights using a stand of 19.7" (50 cm) or more 

  or to remove the intake grille of the indoor unit to undertake work.

•  Wear protective gloves and safety work clothing during

  installation, servicing and removal.

� 3 �

5-EN

6-EN

1115652713-1_EN,FR,ES.indd   4

25/3/2565   15:46:05

Summary of Contents for RAV-SM182CTP-UL

Page 1: ... name Ceiling Type RAV SM182CTP UL RAV SM242CTP UL RAV SM302CTP UL RAV SM362CTP UL RAV SM422CTP UL RAV SM482CTP UL For commercial use Pour usage commercial Para uso comercial Installation Manual 1 English 1115652713 1 1115652713 1_EN FR ES indd 1 25 3 2565 15 46 05 ...

Page 2: ...or safety follow the Installation Manual attached to the outdoor unit ADOPTION OF NEW REFRIGERANT This Air Conditioner uses R410A an environmentally friendly refrigerant Contents 1 Precautions for safety 3 2 Accessory parts 7 3 Selection of installation place 7 4 Installation 8 5 Drain piping 12 6 Refrigerant piping 13 7 Electrical connection 14 8 Applicable controls 16 9 Test run 21 10 Maintenanc...

Page 3: ... this electrical work as stipulated by the local laws and regulations and he or she is a person who has been trained in matters relating to electrical work on the air conditioners made by Toshiba Carrier Corporation or alternatively he or she has been instructed in such matters by an individual or individuals who have been trained and is thus thoroughly acquainted with the knowledge related to thi...

Page 4: ...ioner Only a qualified installer or qualified service person is allowed to do installation work Inappropriate installation may result in water or refrigerant leakage electric shock or fire Do not use any refrigerant different from the one specified for complement or replacement Otherwise abnormally high pressure may be generated in the refrigeration cycle which may result in a failure or explosion...

Page 5: ...r wear shoes with additional protective toe caps To transport the air conditioner do not take hold of the bands around the packing carton You may injure yourself if the bands should break This appliance is intended to be used by expert or trained users in shops in light industry or for commercial use by lay persons Selection of installation location When the air conditioner is installed in a small...

Page 6: ...not meet the specifications may give rise to electric shocks electrical leakage smoking and or a fire Connect earth wire grounding wire Incomplete grounding causes an electric shock Do not connect grounding wires to gas pipes water pipes and lightning conductor or telephone earth wires After completing the repair or relocation work check that the grounding wires are connected properly Install a ci...

Page 7: ... relocated by an unqualified individual since a fire electric shocks injury water leakage noise and or vibration may result When carrying out the pump down work shut down the compressor before disconnecting the refrigerant pipe Disconnecting the refrigerant pipe with the service valve left open and the compressor still operating will cause air or other gas to be sucked in raising the pressure insi...

Page 8: ...m food oils are formed such as kitchens where food oils are used Blocked filters may cause the air conditioner s performance to deteriorate condensation to form the plastic parts to be damaged and other such problems to result Locations near obstructions such as ventilation openings or lighting fixtures where the flow of the blown air will be disrupted a disruption of the air flow may cause the ai...

Page 9: ...g height SM182 SM242 SM302 Up to 13 1 4 0 m SM362 SM422 SM482 Up to 14 1 4 3 m Model RAV SM182 SM242 SM302 SM362 SM422 SM482 SET DATA Standard Factory default Up to 11 5 3 5 m Up to 11 5 3 5 m 0000 High ceiling 1 Up to 13 1 4 0 m Up to 14 1 4 3 m 0003 The lighting time of the filter sign notification of filter cleaning on the remote controller can be changed according to installation conditions Wh...

Page 10: ...generate on the pattern size due to temperature and humidity be sure to confirm the size For installation of the remote controller follow the Installation Manual attached with the remote controller Pull out the remote controller cord together with the refrigerant pipe or drain pipe Pass the remote controller cord through upper side of the refrigerant pipe and drain pipe Do not leave the remote con...

Page 11: ...ar side Make the diagonally shaded hole when you do not use the Elbow Piping Kit Hanging bolt locally procured Hanging bolt locally procured Hanging bolt locally procured Ceiling surface Ceiling surface Ceiling surface Washer Accessory Washer Accessory Washer Accessory Washer Accessory Double nut locally procured Double nut locally procured Double nut locally procured Double nut locally procured 0...

Page 12: ...cket Bolts for fastening the hanging bracket Fasten the bolts tight Use bolts to fasten the hanging bracket Grommet Grommet Electrical cover 1 hole Electrical cover 2 holes Indoor Unit Ceiling surface inside dimension Hanging bracket fixing board N 0 3 7 to 0 5 12 Bolts for fastening the hanging bracket Loosen these bolts Adjust the length of the bolts for fastening the hanging bracket Hanging bol...

Page 13: ...t the attached hose band to the end of the pipe connecting port and then tighten it securely Connect the hard vinyl chloride pipe locally procured to the mounted drain hose which was attached When Plug is detached the drain pipe is not damaged It causes the water leak In case of taking pipe from the left side In case of taking pipe from the left side exchange the plug from left to right Push in th...

Page 14: ... of the valve Use the tightening torque levels as listed in the table below Work using double spanner Tightening with an excessive torque may crack the nut depending on installation conditions Use a leak detector manufactured exclusively for HFC refrigerant R410A R134a For the tools such as charge hose use those manufactured exclusively for R410A The refrigerant pipe connecting sections are locate...

Page 15: ... supply specifications follow the Installation Manual of outdoor unit Do not connect 208 230V 60Hz power to the terminal blocks A B for control wiring Otherwise the system will fail Do not damage or scratch the conductive core and inner insulator of power and system interconnection wires during peeling them Perform the electric wiring so that it does not come to contact with the high temperature p...

Page 16: ...supply System interconnection wires System interconnection wires System interconnection wires Simultaneous twin system L1 L1 L1 L1 L2 L2 L2 L2 S S S S L1 L1 L1 L1 L1 L2 L2 L2 L2 L2 S S S S S Wire connection Connect the wires matching the terminal numbers Incorrect connection causes a trouble Pass the wires through the bushing of wire connection holes of the indoor unit Keep a margin Approx 3 9 100...

Page 17: ...he settings cannot be changed using the wireless remote controller sub remote controller or remote controller less system for central remote controller only Therefore install the wired remote controller to change the settings Basic procedure for changing settings Set only the CODE No shown in the following table Do NOT set any other CODE No If a CODE No not listed is set it may not be possible to ...

Page 18: ...rn the DIP switch settings to the factory defaults set SW501 1 and SW501 2 to OFF connect a separately sold wired remote controller and then set the data of CODE No 5d to 0000 SET DATA SW501 1 SW501 2 0000 Factory default OFF OFF 0003 OFF ON SW501 2 SW501 1 MCU IC501 To secure better effect of heating Filter sign setting According to the installation condition the filter sign term Notification of ...

Page 19: ...ontrol may not be used for setting the Energy saving operation depending on the settings of the central control remote control or the outdoor unit The Energy saving schedule operation is not available when the clock display is blinking the clock has not been adjusted NOTE Remote controller switch monitoring function This function is available to call the service monitor mode from the remote contro...

Page 20: ...dress 2 1 2 Address 3 3 1 Address 3 1 2 Address 2 2 2 Address 1 2 2 Indoor unit Indoor unit Indoor unit Indoor unit Remote controller Indoor unit Outdoor unit Outdoor unit Outdoor unit Outdoor unit Indoor unit Remote controller Max 8 units Indoor unit Finish of address setup by power ON Indoor unit Indoor unit Indoor unit One remote controller can control maximum 8 indoor units as a group Required...

Page 21: ...o select Code DN with the F1 button then set Code DN with the button CODE No 14 Group address 2 Change the SET DATA from 0001 to 0002 with Move the cursor to select Data with the F2 button then set Data with the button SET DATA Header unit 0001 Follower unit 0002 3 Push the MENU button to set the other Code DN and Data After Continue is displayed on the screen push the Yes F1 button 6 If there is ...

Page 22: ...ops to below zero 1 Push the MENU button to display the menu screen Push and hold the MENU button and the button at the same time to display the Field setting menu Push and hold the buttons for more than 4 seconds Push the CANCEL button to return SET DATA 46 F 8 C Operation setting 0000 None Factory default 0001 46 F 8 C Operation setting Push the button to select DN setting on the Field setting m...

Page 23: ...ntenance If is displayed on the remote controller maintain the air filter Daily maintenance Cleaning of air filter 1 Push the button to stop the operation then turn off the circuit breaker 2 Open the air intake grille Remove the screws of air intake grille fixing knob on a side of each filter Slide the air intake grille fixing knobs two positions toward the arrow direction OPEN and then open the a...

Page 24: ...y clogging or drain water is polluted Maintenance List Part Unit Check visual auditory Maintenance Heat exchanger Indoor outdoor Dust dirt clogging scratches Wash the heat exchanger when it is clogged Fan motor Indoor outdoor Sound Take appropriate measures when abnormal sound is generated Filter Indoor Dust dirt breakage Wash the filter with water when it is contaminated Replace it when it is dam...

Page 25: ...ation continued F10 ALT Indoor unit room temp sensor TA error Indoor Room temp sensor TA indoor P C board Open circuit or short circuit of the room temp sensor TA was detected Auto reset Wired remote controller display Wireless remote controller Sensor block display of receiving unit Main defective parts Judging device Parts to be checked error description Air conditioner status Indication Operati...

Page 26: ...board or indoor DC fan over current or lock etc is detected Entire stop P15 ALT Gas leakage detected Outdoor There may be gas leakage from the pipe or connecting part Check for gas leakage Entire stop P19 ALT 4 way valve error Outdoor Indoor 4 way valve indoor temp sensors TC TCJ An error was detected due to temperature drop of the indoor unit heat exchanger sensor when heating Auto reset P20 ALT ...

Page 27: ...here is an effective opening with the adjacent room for ventilation of leaking refrigerant gas opening without a door or an opening 0 15 or larger than the respective floor spaces at the top or bottom of the door 3 If an indoor unit is installed in each partitioned room and the refrigerant piping is interconnected the smallest room of course becomes the object But when a mechanical ventilation is ...

Page 28: ...144 9 Moo 5 Bangkadi Industrial Park Tivanon Road Tambol Bangkadi Amphur Muang Pathumthani 12000 Thailand 1115652713 1 1115652713 1_EN FR ES indd 84 25 3 2565 15 50 03 ...

Reviews: