


– 4 –
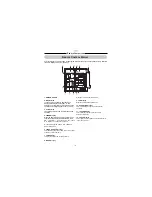
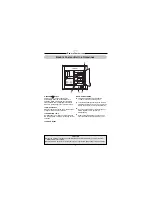
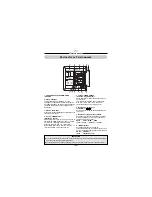
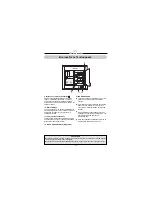
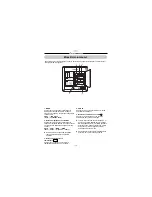
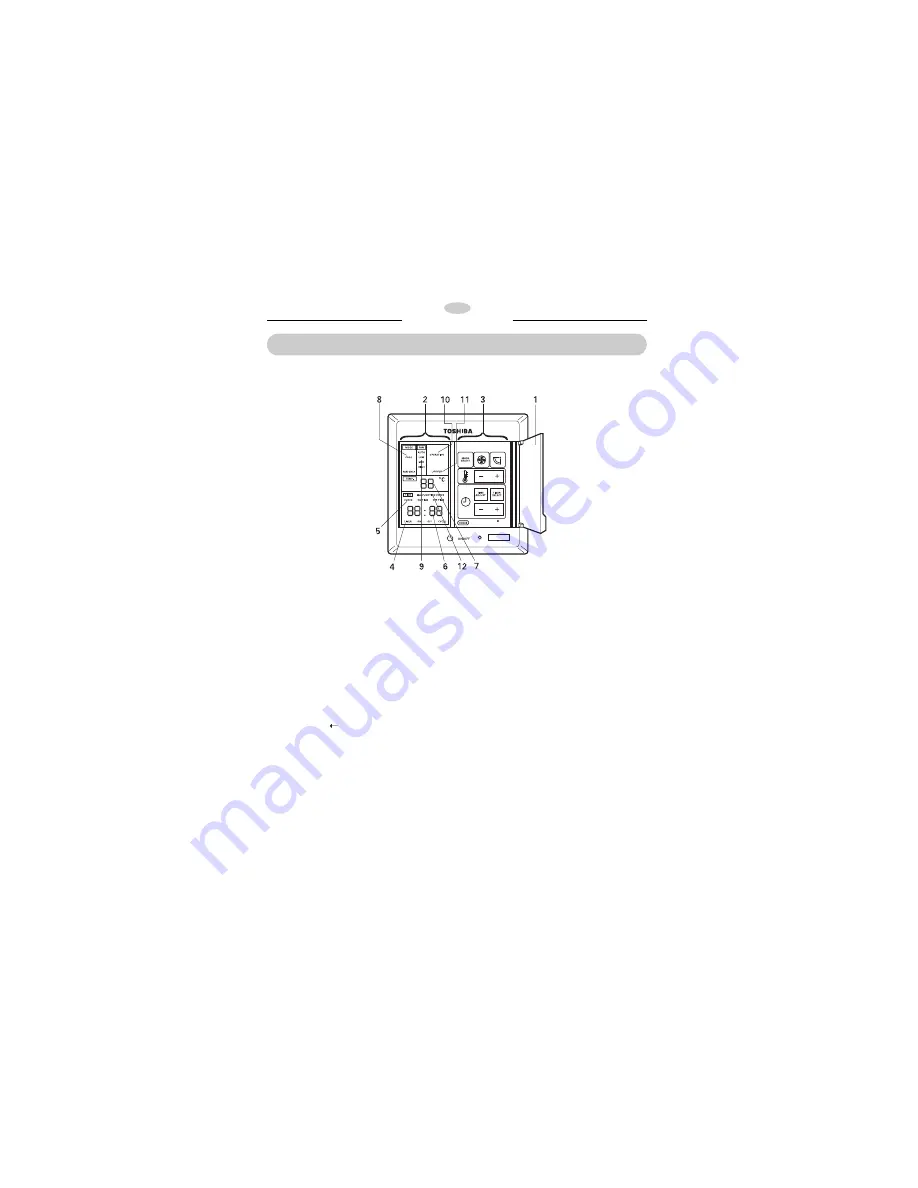
1. SWITCH COVER
2. Display Area
In order to make it easier to describe each
display, all the displays are shown. In fact,
however, only the displays corresponding to the
operation and settings appear at any one time.
3. Control Area
The switches are pressed to select the desired
operation.
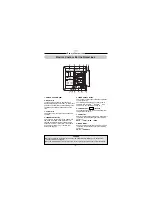
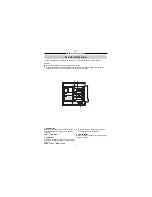
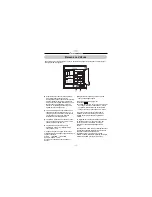
4. TIMER Display
When the timer is being used to operate the air
conditioner, this display indicates the ON, OFF,
ON
Ý
OFF, ON
OFF or CYCLE mode. There
is no display for continuous operation.
5. These indicate the CLOCK, ON TIME and
OFF TIME modes.
6. TIME OR CHECK Display
This indicates the present time, ON or OFF times
or the inspection numbers.
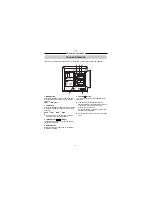
7. TEMP Display
This display shows the set temperature.
8. MODE Display
Displays selected operation mode.
9. FAN Display
Displays selected fan speed mode.
10. OPERATION Display
This is displayed during the air conditioner
operation.
11. LOUVER Display
This indicates that the outlet louvers are
automatically driven.
12. CHECK Display
This display appears when the air conditioner is
in the “check” mode.
R
EMOTE
C
ONTROL
D
ISPLAY
All of the display items are shown in the diagram below for the purpose of explanation. Only selected
items are displayed in actual operation.
GB
R
EMOTE
C
ONTROLLER


