background image

EN-20

EN-19

10


„

Airtight test/Air purge, etc.


For airtight test, air purge, addition of refrigerant, and gas leak check, follow the Installation Manual attached to 
the outdoor unit.

REQUIREMENT

Be sure to use the tool such as charge hose exclusive to R410A.
Do not turn on the power until the airtight test and the vacuuming have 

fi

 nished.

(If turning on the power, the incorporated PMV is closed fully and the period until the vacuuming 

fi

 nishes 

elongates.)


„

Open fully valves of the outdoor unit


„

Gas leak check


Check with a leak detector or soap water whether gas leaks or not, from the pipe connecting section.

REQUIREMENT

Use a leak detector manufactured exclusively for HFC refrigerant (R410A, R134a, etc.).


„

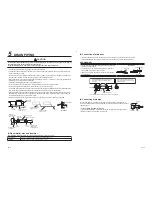
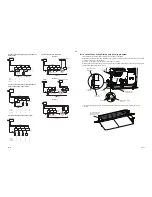
Heat insulating process

Perform heat insulating for each pipes 
separately.
In cooling time, temperature at both liquid 
and gas sides becomes lower.
Therefore, perform heat insulating process 
suf

fi

 ciently to avoid dewing.

•  For heat insulator of pipe at gas side, be 

sure to use one with heat-resisting temp. 
120°C or more.

•  Using the attached heat insulating pipe, 

perform heat insulating process securely 
for pipe connecting part of the Flow 
Selector units without clearance.


The slit shall be 
upper side.

Flow Selector unit

Heat insulating 
pipe (Attached)

Heat insulator

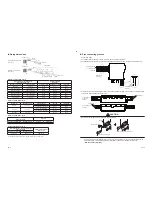
• 

Indoor unit side

• 

Outdoor unit side

Heat insulating pipe
(Accessory)

Heat insulating pipe
(Accessory)

(Stopper-pipe)

Heat insulating pipe
(locally procured)

Binding band 
(Accessory)
[Port with the pipe connected.]

Binding band 
(Accessory)
[Side with the pipe connected.]

Binding band 
(Accessory)
[Port without the pipe.]

Binding band 
(Accessory)
[Side without the pipe connected.]

Heat insulating pipe
(Accessory)

Heat insulating pipe
(locally procured)

Heat insulating pipe
(locally procured)

(Stopper-pipe)

Heat insulating pipe
(Accessory)

REQUIREMENT

Apply the heat insulation to the pipe connecting section of the Flow Selector unit securely up to the root without 
exposure of the pipe. (The pipe exposed to the outside causes water leak.)

7

ELECTRICAL CONNECTION

 CAUTION

•  If incorrect / incomplete wiring is carried out, it will cause an electrical 

fi

 re or smoke.

•  Use the cord clamps attached to the product.
•  Do not damage or scratch the conductive core and inner insulator of power and communication wires when 

peeling them.

•  Use the power cord and communication wire of speci

fi

 ed thickness, type, and protective devices required.

•  Do not connect 220-240 V power to the terminal blocks (

A

B

) for communication wiring. (Otherwise, the system 

will fail.)

•  Perform the electric wiring so that it does not come to contact with the high-temperature part of the pipe.
  The coating may melt resulting in an accident.

REQUIREMENT

•  For power supply wiring, strictly conform to the Local Regulation in each country.
•  After connecting wires to the terminal blocks, provide a trap and 

fi

 x wires with the cord clamp.

•  Run the refrigerant piping line and communication wiring line in the same line.
•  Do not turn on the power of the Flow Selector unit until vacuuming of the refrigerant pipes completes.
•  This Flow Selector unit has multiple ports. So piping and wiring to the same indoor unit shall be connected to the 

same number (1, 2, 3, 4 … ) of port.


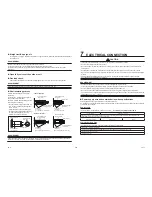
„

Power supply wire and communication wires speci

fi

 cations

Power supply wire and communication wires are locally procured.
For the power supply speci

fi

 cations, follow to the table below. If capacity is little, it is dangerous because overheat

or burnout may be caused.

Power supply

•  Power supply wire speci

fi

 cation: Cable 3-core 2.5 mm², 

in conformity with Design 60245 IEC 57.

Power supply

220-240 V ~, 50 Hz

Power supply switch / circuit breaker or power supply wiring / fuse rating for Flow Selector units should be selected by the 
accumulated total current values of the Flow Selector units.

Power supply wiring

Below 50 m

2.5 mm²

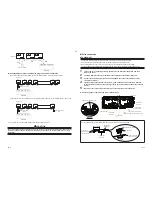
Communication wiring

•  2-core with non-polarity wire is used for wiring of the communication wiring.

•  Wire size :  0.5 mm² to 2.0 mm²
•  Up to 200 m total length of wiring between indoor units and Flow selector unit. (L2 + L3)
•  Up to 300 m (L1 + L2 + L3)
•  Up to 300 m (L1)

Summary of Contents for RBM-Y1801F4PE

Page 1: ...INSTALLATION MANUAL 1 English RBM Y1801F4PE RBM Y1801F6PE Installation Manual Multi Port Flow Selector Unit ...

Page 2: ...hoose one according to the capacity of the units ADOPTION OF NEW REFRIGERANT This Super Heat Recovery Multi Air Conditioner is a new type which adopts a new refrigerant HFC R410A instead of the conventional refrigerant R22 in order to prevent destruction of the ozone layer Be sure to use an indoor or outdoor unit in combination with the new refrigerant CONTENTS Accessory parts and Parts to be proc...

Page 3: ...Ø22 2 Ø15 9 1 1 Ø22 2 Ø12 7 1 1 Ø22 2 Ø9 5 1 1 Binding band L300 2 2 For fixing heat insulation of flexible hose Binding band L200 16 24 For fixing heat insulating pipes Binding band L100 5 7 For fixing clamp filters Clamp filter 5 7 For reducing electrical noise of communication wires and float switch wire of drain pump locally procured Cable clamp 6 8 For fixing indoor unit communication cables ...

Page 4: ...t to enter any gaseous matter other than the specified refrigerant into the refrigeration cycle If air or any other gas is mixed in the refrigerant the gas pressure in the refrigeration cycle becomes abnormally high and it as a result causes pipe burst and injuries on persons Do not modify this unit by removing any of the safety guards or by by passing any of the safety interlock switches Exposure...

Page 5: ...gerant piping Piping material used for the conventional refrigerant cannot be used Use copper pipe with 0 8mm or more thickness for Ø6 4 Ø9 5 Ø12 7mm Use copper pipe with 1 0mm or more thickness for Ø15 9mm Ø19 1mm Ø22 2mm or more Use clean and new pipes for the refrigerant pipes and perform piping work so that water or dust does not contaminate the refrigerant 3 SELECTION OF INSTALLATION PLACE CA...

Page 6: ...ow Selector unit Procure hanging bolts washer and nuts for installing the Flow Selector unit these are not supplied Hanging bolt M10 or W3 8 4 pieces Nut M10 or W3 8 12 pieces Installation under high humidity atmosphere In some cases including the rainy season especially inside of the ceiling may become high humidity atmosphere dew point temperature 23 C or higher 1 Installation to inside of the c...

Page 7: ...al level of installed ceiling correctly in order to prevent vibration of ceiling board Attach the nuts and the M10 flat washers to the hanging bolt Put washers at up and down of the hanging bracket of the Flow Selector unit to hang down the Flow Selector unit Check that four sides are horizontal with a level gauge Horizontal degree Within 5 mm Hanging bolt W3 8 or M10 70 mm or less M10 flat washer...

Page 8: ...o the unit with proper heat insulation Improper heat insulation will cause condensation to form The drain pipe must be sloping downward at an angle of 1 100 or more and do not run the pipe up and down arched shape or allow it to form traps Doing so may cause abnormal sounds Restrict the length of the traversing drain pipe to 20 meters or less For a long pipe provide support brackets at intervals o...

Page 9: ...es not leak from the connect the pipes Check port Plastic container to pour water 6 REFRIGERANT PIPING WARNING If refrigerant gas has leaked during the installation work ventilate the room immediately If the leaked refrigerant gas comes in contact with fire noxious gas may be generated After the installation work confirm that refrigerant gas does not leak If refrigerant gas leaks into the room and...

Page 10: ... connection per one port Outdoor unit side pipe size 1 Total capacity codes of indoor units at the downstream side Outdoor unit side Upstream Equivalent to capacity Equivalent to HP Suction gas pipe Discharge gas pipe Liquid pipe Below 18 0 Below 6 4 Ø15 9 Ø12 7 Ø9 5 18 0 to below 34 0 6 4 to below 12 2 Ø22 2 Ø19 1 Ø12 7 34 0 to below 45 5 12 2 to below 16 2 Ø28 6 Ø22 2 Ø15 9 45 5 to below 56 5 16...

Page 11: ...re of the pipe The pipe exposed to the outside causes water leak 7 ELECTRICAL CONNECTION CAUTION If incorrect incomplete wiring is carried out it will cause an electrical fire or smoke Use the cord clamps attached to the product Do not damage or scratch the conductive core and inner insulator of power and communication wires when peeling them Use the power cord and communication wire of specified ...

Page 12: ...pply terminal block Cable clamp Accessory Clamp all cables Terminal on PCB for Communication wiring Communication wire Clamp the communication wire Detail a For each communication wire attach the Clamp filter accessory as the picture below Clamp filter Accessory Hook 2 nails Communication wire locally procured 1 turn Attach round shaped terminal locally procured Clamp filter Accessory Binding band...

Page 13: ...ng wires to the terminal 2 mm or less Communication wire Communication wiring A B A B Terminal block for remote controller wiring of indoor unit Communication wires locally procured FS unit terminal on PCB It s possible to come out the communication wires on the right side Cable clamp Accessory Clamp all cables Communication wire ...

Page 14: ...r power switch Header outdoor unit Follower outdoor unit Earth terminal Earth terminal Control wiring between outdoor units Control wiring between indoor and outdoor units Control wiring between indoor units Indoor unit Indoor unit Indoor unit Indoor unit Earth Earth Earth Earth Pull box Pull box Pull box Remote controller Remote controller Remote controller Earth Earth Indoor unit FS unit power s...

Page 15: ...r setup of address When connecting the indoor units to a branch of FS unit it is possible to connect with multiple groups and connect individually Indoor unit Piping FS unit Remote controller Group control How to set up CODE No 0E It is necessary to set up in case of the group control 2 4 1 3 5 1 Push and hold the and buttons at the same time for more than 4 seconds is displayed in the UNIT No win...

Page 16: ...Group control Group control Indoor unit In case of connecting Drain pump locally procured It s available to connect the operation off signal input cable of float switch At that time the cable is taken from the hole on the control box bottom side and connect to CN34 on PC board of unit No 1 showing 1 on the label Be sure to connect the energized indoor unit to unit No 1 of FS unit Attach Rubber bus...

Page 17: ...1118430099 TOSHIBA CARRIER THAILAND CO LTD 144 9 MOO 5 BANGKADI INDUSTRIAL PARK TIVANON ROAD TAMBOL BANGKADI AMPHUR MUANG PATHUMTHANI 12000 THAILAND ...

Reviews: