
48
Phone
Phone
Making calls
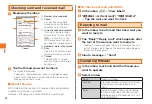
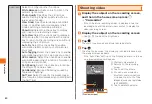
1
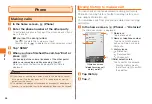
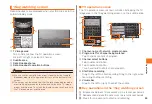
In the home screen, (Phone)
2
Enter the phone number of the other party
To call a landline phone, first input the city code, even if you
are in that city.
■If you input the wrong number
Tap
to delete the number you input.
Touch and hold
to delete the all the numbers you input.
3
Tap "SEND"
4
When you have finished the call, tap "End" or
press
M
You can adjust the volume (loudness of the other party)
while you are making a call by pressing
E
and
F
.
When you finish the call, the approximate call time is
displayed.
◎ If your face, or something, comes close to the proximity sensor
during a call, the display goes out, it is redisplayed by moving
away from the sensor.
◎ The alphabet is displayed on the keypad as an aspect of global design,
however it is not possible to enter the alphabet by tapping on the keypad.
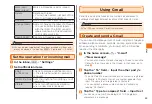
Using history to make a call
You can check your phone's dialed/incoming call history,
PC-mail's incoming history, Twitter incoming history, and
mixi update information, etc.
You can make calls from your phone's dialed and incoming
call history.
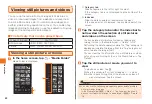
1
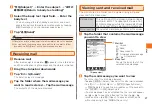
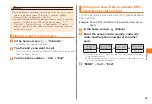
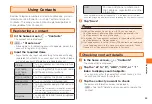
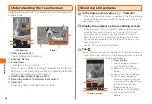
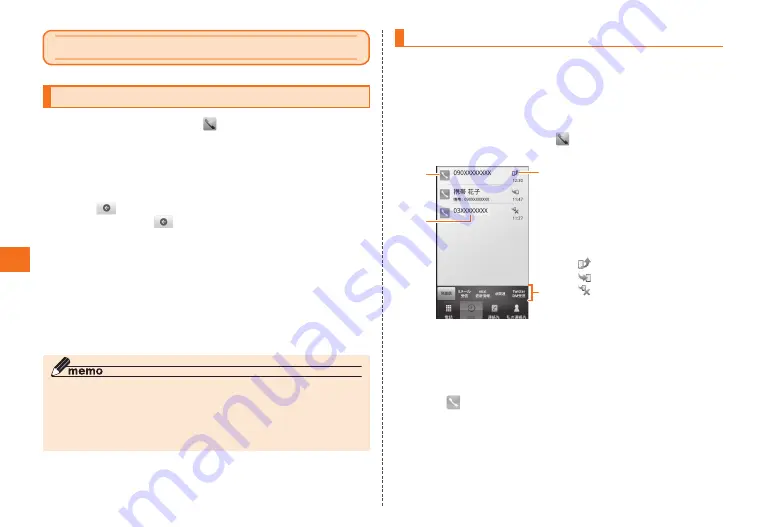
In the home screen, (Phone) → "Histories"
The Histories screen is displayed.
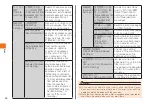
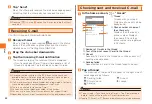
《Histories screen
(dialed/incoming call
history pallet)》
①
Dialed icon
Tap to make a call.
②
Name or telephone number
Touch and hold to make a
call, send C-mail, or add to
Contacts.
③
History icons
:Dialed call
:Received call
:Missed call
④Pallet selection tab
Tap to switch the screens.
• Flick the History area to
the left and right to switch
the palettes.
2
Tap History
3
Tap
①
③
④
②


