Learning the Basics
Swapping Drives in the SelectBay
106
Remove the Drive from the SelectBay
Follow these steps to remove the drive from the SelectBay:
1 Turn the computer upside down with the front of the com-
puter facing you.
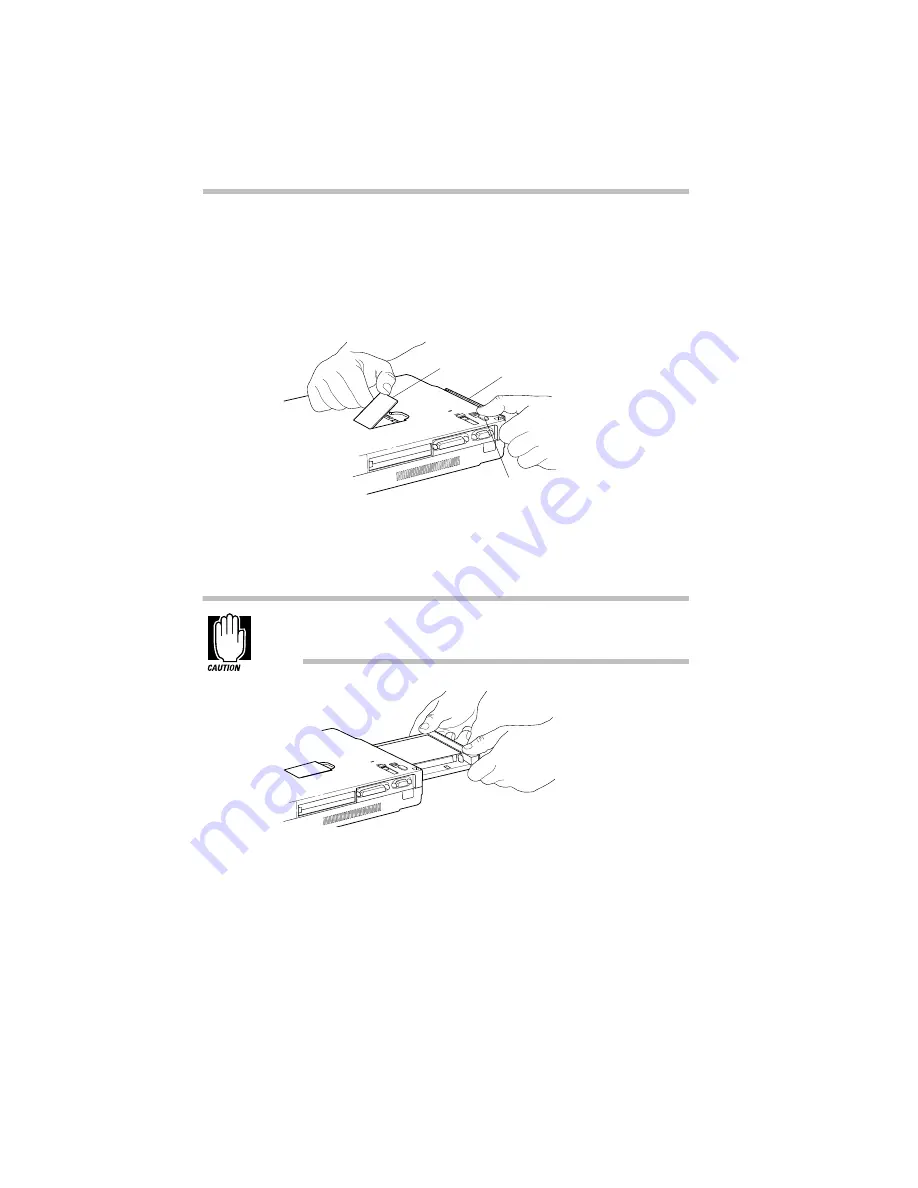
Releasing the drive from the SelectBay
2 Slide the bay release lock toward the rear of the computer.
3 Pull up on the bay release until the drive ejects slightly.
Pull the release only as far as needed to eject the drive. The
release is not intended to be pulled straight up.
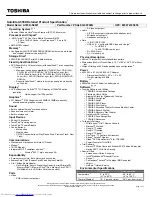
Removing the drive from the SelectBay
4 Grasp the drive and pull it out.
5 If you removed the diskette drive from the SelectBay, slide
it into the external chassis until you feel it click into place.
If you removed the CD-ROM drive, set it aside.
Bay release
Bay release lock
Drive
Summary of Contents for Satellite 200 Series
Page 48: ...Let s Start at the Very Beginning UsingTheElectronicGuide 49 ...
Page 117: ...Before You Go to a Computer Store BuyingHardware 121 ...
Page 174: ...Little Cards That Do Big Things RemovingaPCCard 181 ...
Page 201: ...Connecting to the World DiscoveringToshiba sOn lineResources 209 ...
Page 248: ...Making Life Easier ChangingtheDisplayMode 259 ...
Page 255: ...What s Really Going On WhatReallyHappensWhenYouTurntheComputerOn 267 ...
Page 290: ...If Something Goes Wrong IfYouNeedFurtherAssistance 303 ...
Page 321: ...Hardware Setup TheHardwareConfigurationOptionsDialogBox 339 ...
Page 336: ...TSETUP OTHERS 355 ...
Page 356: ...Specifications 379 ...
Page 364: ...Input OutputPortAddressAssignments Part III Appendixes 389 ...


