background image

Printed in Thailand

04/11   K

*J2E51001A*

2

14

22

29

34

39

Introduction

DIGITAL VIDEO

42

45

55

67

DVD VIDEO PLAYER & VIDEO
CASSETTE RECORDER

SD-K531SU2

OWNER’S MANUAL

©2004 Toshiba Corporation

This device does not tape-record copy protected DVD Video Discs.

Connections

Basic setup

Playback

(VCR)

Recording

(VCR)

Other functions

(VCR)

Basic playback

(DVD)

Advanced

playback

(DVD)

Function setup

(DVD)

Others

2

Introduction

IMPORTANT SAFEGUARDS

WARNING:

TO REDUCE THE RISK OF FIRE OR ELECTRIC SHOCK, do not expose this appliance to rain
or moisture.

CAUTION:

TO PREVENT ELECTRIC SHOCK DO NOT USE THIS POLARIZED PLUG WITH AN

EXTENSION CORD, RECEPTACLE OR OTHER OUTLET UNLESS THE BLADES CAN

BE FULLY INSERTED TO PREVENT BLADE EXPOSURE.

FCC NOTICE

:

This equipment has been tested and found to comply with the limits for a Class B digital device,
pursuant to Part 15 of the FCC Rules. These limits are designed to provide reasonable protection
against harmful interference in a residential installation. This equipment generates, uses and can
radiate radio frequency energy and, if not installed and used in accordance with the instructions,
may cause harmful interference to radio communications.
However, there is no guarantee that interference will not occur in a particular installation. If this
equipment does cause harmful interference to radio or television reception, which can be deter-
mined by turning the equipment off and on, the user is encouraged to try to correct the interference
by one or more of the following measures:

- Reorient or relocate the receiving antenna.
- Increase the separation between the equipment and receiver.
- Connect the equipment into an outlet on a circuit different from that to which the receiver is

connected.

- Consult the dealer or an experienced radio/TV technician for help.

CAUTION:

Changes or modifications not expressly approved by the partly responsible for compliance with the
FCC Rules could void the user's authority to operate this equipment.

CAUTION:

THIS DIGITAL VIDEO PLAYER EMPLOYS A LASER SYSTEM.

TO ENSURE PROPER USE OF THIS PRODUCT, PLEASE READ THIS USER'S GUIDE CARE-
FULLY AND  RETAIN  FOR  FUTURE  REFERENCE.    SHOULD THE  UNIT  REQUIRE  MAINTE-
NANCE, CONTACT AN AUTHORIZED SERVICE LOCATION.

USE OF CONTROLS, ADJUSTMENTS OR THE PERFORMANCE OF PROCEDURES OTHER
THAN THOSE SPECIFIED HEREIN MAY RESULT IN HAZARDOUS RADIATION EXPOSURE.

TO PREVENT DIRECT EXPOSURE TO LASER BEAM, DO NOT TRY TO OPEN THE ENCLO-
SURE.  VISIBLE LASER RADIATION MAY BE PRESENT WHEN THE ENCLOSURE IS OPENED.
DO NOT STARE INTO BEAM.

The  lightning  flash  with  arrowhead  symbol,  within  an
equilateral triangle is intended to alert the user to the presence
of  uninsulated  dangerous  voltage  within  the  product's
enclosure that may be of sufficient magnitude to constitute a
risk of electric shock to persons.

The exclamation point within an equilateral triangle is intended
to alert the user to the presence of important operating and
maintenance  (servicing)  instructions  in  the  literature
accompanying the appliance.

RISK OF ELECTRIC SHOCK

DO NOT OPEN

CAUTION

CAUTION:

TO REDUCE THE RISK OF ELECTRIC
SHOCK, DO NOT REMOVE COVER
(OR BACK). NO USER-SERVICEABLE
PARTS INSIDE. REFER SERVICING TO
QUALIFIED SERVICE PERSONNEL.  

Location of the required Marking
The rating sheet and the safety caution are on the rear of the unit.

CERTIFICATION: COMPLIES WITH FDA RADIATION PERFORMANCE
STANDARDS, 21 CFR SUBCHAPTER J.

3

Introduction

1. READ INSTRUCTIONS

All the safety and operating instructions should be read before the unit is operated.

2. RETAIN INSTRUCTIONS

The safety and operating instructions should be retained for future reference.

3. HEED WARNINGS

All warnings on the unit and in the operating instructions should be adhered to.

4. FOLLOW INSTRUCTIONS

All operating and use instructions should be followed.

5. CLEANING

Unplug this unit from the wall outlet before cleaning. Do not use liquid cleaners or aerosol cleaners.

Use a soft dry cloth for cleaning the exterior cabinet only.

6. ATTACHMENTS

The manufacturer of this unit does not make any recommendations for attachments, as they may cause

hazards.

7. WATER AND MOISTURE

Do not use this unit near water. For example, near a bathtub, washbowl, kitchen sink, laundry tub, in a wet

basement, or near a swimming pool.

8. ACCESSORIES

Do not place this unit on an unstable cart, stand, tripod, bracket, or table.

The unit may fall, causing serious injury, and serious damage to the unit.

8A. An appliance and cart combination should be moved with care. Quick stops,

excessive force, and uneven surfaces may cause the appliance and cart

combination to overturn.

9. VENTILATION

Slots and openings in the cabinet back or bottom are provided for ventilation,

to ensure reliable operation of the unit, and to protect it from overheating.

These openings must not be blocked or covered. The openings should never be blocked by placing the unit

on a bed, sofa, rug, or other similar surface. This unit should never be placed near or over a radiator or heat

source. This unit should not be placed in a built-in installation such as a bookcase or rack unless proper

ventilation is provided and/or the manufacturer’s instructions have been adhered to.

10. POWER SOURCE

This unit should be operated only from the type of power source indicated on the rating plate. If you are not

sure of the type of power supply to your home, consult your appliance dealer or local power company.

11. GROUNDING OR POLARIZATION

This unit is equipped with a polarized alternating-current line plug (a plug having one blade wider than the

other). This plug will fit into the power outlet only one way. This is a safety feature. If you are unable to

insert the plug fully into the outlet, try reversing the plug. If the plug should still fail to fit, contact your

electrician to replace your obsolete outlet. Do not defeat the safety purpose of the grounding-type plug.

12. POWER-CORD PROTECTION

Power-supply cords should be routed so that they are not likely to be walked on or pinched by items placed

upon or against them, paying particular attention to cords at plugs, convenience receptacles, and the point

where they exit from the appliance.

S3125A

PORTABLE CART WARNING

(symbol provided by RETAC)

IMPORTANT SAFEGUARDS

Summary of Contents for SD-K531SU2

Page 1: ...appliance RISK OF ELECTRIC SHOCK DO NOT OPEN CAUTION CAUTION TO REDUCE THE RISK OF ELECTRIC SHOCK DO NOT REMOVE COVER OR BACK NO USER SERVICEABLE PARTS INSIDE REFER SERVICING TO QUALIFIED SERVICE PERSONNEL Location of the required Marking The rating sheet and the safety caution are on the rear of the unit CERTIFICATION COMPLIES WITH FDA RADIATION PERFORMANCE STANDARDS 21 CFR SUBCHAPTER J 3 Introdu...

Page 2: ...ils to function simply unplug the unit from the AC outlet and plug it back in The unit should return to normal operation Polarized AC Cord Plug One blade is wider than the other AC Outlet Wider Hole and Blade Power source IMPORTANT SAFEGUARDS Power source 6 Introduction Notes on handling When shipping the DVD VCR the original shipping carton and packing materials come in handy For maximum protecti...

Page 3: ... 7 Contents 9 Identification of controls 10 Antenna connections 14 Cable TV connections 16 Connecting to a TV 18 Connecting to optional equipment 20 Introduction Recording a TV program 34 One touch Timer Recording OTR 36 Timer recording 37 Recording VCR Stereo recording and playback 39 Second Audio Program SAP 39 Duplicating a video tape 40 Recording a DVD CD disc 41 Other functions VCR Loading an...

Page 4: ...isposal Press POWER to turn the DVD VCR on or off Select your desired operating mode DVD or VCR using VCR DVD DVD or VCR indicator on the front panel will show you which mode is selected Press CH or CH to move through the channels one channel at a time The CH and SET are also used to navigate on screen menu system You can directly access specific channels using Number buttons Each press of VCR DVD...

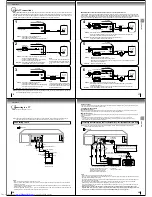
Page 5: ...te Audio video cable supplied To audio inputs Notes Refer to the owner s manual of the connected TV as well When you connect the DVD VCR to your TV be sure to turn off the power and unplug both units from the wall outlet before making any connections If your television set has one audio input connect the left and right audio outputs of the DVD VCR to a Y cable adapter not supplied and then connect...

Page 6: ...l digital stereo by connecting an amplifier equipped with a digital audio input and speaker system right and left front speakers Notes DO NOT connect the BITSTREAM PCM AUDIO OUT jack of the DVD VCR to the AC 3 RF input of a Dolby Digital Receiver This input on your A V Receiver is reserved for Laserdisc use only and is incompatible with the BITSTREAM PCM AUDIO OUT jack of the DVD VCR Connect the B...

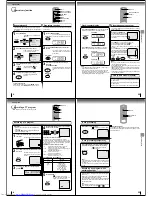
Page 7: ...ast Sunday in October you set to OFF ON OFF AUTO for manual setting forward one hour for manual setting back one hour for automatic setting read XDS in the signal DAYLIGHT SAVING TIME ON OFF AUTO ENTER MENU ATLANTIC GMT 4hours EASTERN GMT 5hours CENTRAL GMT 6hours MOUNTAIN GMT 7hours PACIFIC GMT 8hours ALASKA GMT 9hours HAWAII GMT 10hours AUTO AUTO SET GMT Greenwich Mean Time MENU ON ON OFF OFF TI...

Page 8: ...ithout STOP press PLAY Notes This VCR selects the playback tape speed SP LP or SLP au tomatically The Cassette tape and DVD disc can be played back simulta neously If you press VCR DVD selector the tape playback and DVD playback alternate with each other on the screen via CH3 4 or video connection 2To start playback Playback Rewind or forward the tape To rewind the tape Press REW To forward the ta...

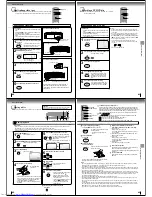
Page 9: ... reset to 00 00 00 The counter does not function on nonrecorded blank sections of the tape When you rewind fast forward or play tapes through blank sections the counter stops Clock counter display COUNTER CLOCK Press VCR DVD selector The DVD mode and the VCR mode alternate with each other in the display DVD mode VCR mode 3 INDEX NO up to 9 or is displayed STOP VCR DVD INDEX CLOCK COUNTER CLOCK COU...

Page 10: ... procedure To set daily weekly timer To confirm Timer program At step 1 on the previous page select TIMER REC SET and press ENTER The timer program list will appear on the screen 2 The current day Friday SU SA Sunday to Saturday MO SA Monday to Saturday MO FR Monday to Friday WKL WE WKL TH Weekly Thursday Weekly Wednesday One month later minus one day Weekly e g WKL TU each Tuesday or daily e g MO...

Page 11: ...input connected to the DVD VCR 1 3 4 5 Press ON STANDBY I The DVD VCR turns on Press VCR DVD SELECT to select the DVD mode The DVD indicator will light Press OPEN CLOSE The disc tray opens Place the disc on the disc tray With the playback side down There are two different disc sizes Place the disc in the correct guide on the disc tray If the disc is out of the guide it may damage the disc and caus...

Page 12: ...al File System HFS cannot be played The unit can play back baseline and progressive JPEG files 3 Press OPEN CLOSE The disc tray will open Place a disc on which MP3 or WMA files have been recorded onto the tray Press OPEN CLOSE or PLAY The disc tray closes automatically On the TV screen Reading will appear Reading will take as much time as the number of file A file menu screen will appear on the TV...

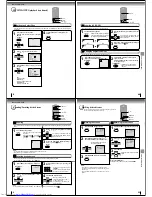
Page 13: ...the frame 1 Press to view a different part of the frame You may move the frame from the centrepositiontoUP DOWN LEFTor RIGHT direction In the zoom mode press ZOOM repeatedly to return to a 1 1 view Off 3 Notes You can select the Pause Slow or Search playback in the zoom mode Some discs may not respond to zoom feature ZOOM CANCEL 0 9 ENTER JUMP DISPLAY Locating desired scene DVD VCD CD Use the titl...

Page 14: ...PLAY CANCEL Advanced playback DVD 54 Press TOP MENU during playback Title menu appears on the screen Press or to select the desired title Changing angles Title selection DVD menu Changing angles Press ANGLE during playback The current angle will appear Advanced playback DVD When playing back a disc recorded with multi angle facility you can change the angle that you are viewing the scene from 1 1 ...

Page 15: ...TUP RETURN Function setup DVD 58 Function setup DVD Press SETUP in the stop mode or No Disc Press or to select Picture Press or ENTER then press or to select Tv Screen Press or ENTER Press or to select your desired screen type then press ENTER Setting the aspect ratio of TV screen 1 ENTER Setting the aspect ratio of TV screen You can select the aspect ratio for your TV The following pages describe...

Page 16: ...el 1 2 Press SETUP in the stop mode or No Disc Press or to select Parental Then press or ENTER Press number buttons 0 9 to enter the pass word you have stored Press ENTER The rating is now unlocked Press or to select Parental then press or to change the parental level To change the parental level Function setup DVD Language Password Parental 0 9 Cancel Enter Setup Return 1 Picture Parental Other S...

Page 17: ...IVE in the stop mode The progressive indicator on the display window will light The unit recognizes the picture source film or video of the current discaccordingtothediscinformation Press PLAY to start playback PLAY Notes Some discs may not be played back with the progressive scanning mode correctly because of the disc characteristics or recording condition If your TV does not accept the progressi...

Page 18: ...iscs have no subtitles Subtitles are cleared Press SUBTITLE Angle cannot be changed Multi angles are not recorded on the DVD disc The function is prohibited with the unit or the disc appears on the screen 56 54 44 No 4 3 16 9 picture The setup does not match your TV No on screen display Select Display On 58 59 No surround sound The setup does not match your stereo system The unit or remote operati...

Reviews: