background image

52

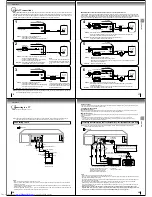
Repeat playback of Title, Chapter and Track

1

Press PLAY MODE during playback or stop mode.

DVD
Press 

/

 or ENTER once or twice to select

“Chapter” or “Title”.

ENTER

/

/

Repeat playback/A-B Repeat playback

CD/VCD
Press 

 to select “Repeat”.

Press 

/

 or ENTER once or twice to select

“Track” or “All”.

Press  PLAY  MODE  again  to  make  the  screen
disappear.
Press PLAY to start Repeat playback.
To resume normal playback, select Repeat “Off”.

3

Notes:
Some discs may not work with the repeat operation.

A-B Repeat playback

1

Press A-B RPT during playback.

The start point is selected.

Press A-B RPT again.

The  end  point  is  selected.  Playback
starts  at  the  point  that  you  selected.
Playback  stops  at  the  end  point,  re-
turns  to  Point  A  automatically,  then
starts again.

A-B repeat playback allows you to repeat material between
two selected points.

2

PLAY MODE
A-B RPT

Advanced playback (DVD)

2

Repeat

/Enter/Play Mode

Off

:

Chapter

:

Repeat

/Enter/Play Mode

Repeat

Title

:

/Enter/Play Mode

Play Mode

Off

Repeat

Off

/Enter/Play Mode

:
:

Track

Play Mode

Off

Repeat

:
:

/Enter/Play Mode

Repeat

Play Mode

Off
All

:
:

/Enter/Play Mode

DVD
VCD

CD

A

Notes:
• In A-B repeat mode, subtitles near point A or B may not

appear.

• A-B Repeat playback is not available in multi-angle scenes.
• A-B Repeat playback does not work when Repeat playback

is on.

• You may not be able to set A-B Repeat, depending on the

scenes of the DVD.

• A-B repeat does not work with an interactive DVD, MP3/

WMA/JPEG CD and Video CD with PBC.

To resume normal playback

Press A-B RPT again.

Off

” appears on the screen.

A B

DVD
VCD

CD

SP/SLP

PLAY MODE

SET +

SET –

CH –

CH +

ENTER

SET +

SET –

CH –

CH +

ENTER

A-B RPT

A-B RPT

A-B RPT

PLAY

53

Basic 

playback 

(DVD)

Program playback

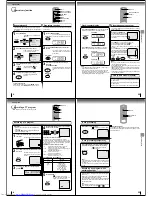
Press PLAY MODE in the stop mode.

Press 

 or 

 to select Play Mode, then press

/

 or to select “Program”.

Press 

/

 or 

/

 to select the programming

position. Use Numbered buttons (0–9) to input
the Track numbers.

• To program others, repeat Step 3.
• If you input a wrong number, press

CANCEL.

1

Press 

/

 or 

/

 to select “Program

Playback” and press ENTER.

The programmes you selected will start
to playback in the order.
To return to normal playback, select
Play Mode: “Off”.

4

To cancel program playback
Select “Clear” and press ENTER.

• The program is canceled when

you open the disc tray or turn the
power off.

Program playback/Random playback (CD)

You can arrange the order of tracks on the disc.

VCD

CD

2

Play Mode

Program

:
: Off

Repeat

Clear

Program Playback

/Enter/0–9/Cancel/Play Mode

1
2
3

4
5
6

7
8
9

10
11
12

3

Play Mode

Program

:
: Off

Repeat

Clear

Program Playback

/Enter/0–9/Cancel/Play Mode

1
2
3

9
3
11

4
5
6

7
8
9

10
11
12

Random playback

VCD

CD

Press PLAY MODE in the stop mode.

Press 

/

 to select Play Mode, then press

/

 to select “Random”.

1

Press PLAY.

The Random Playback will start.

3

2

Repeat

Play Mode

: Random
: Off

/Enter/Play Mode

ENTER

/

/

/

PLAY MODE

PLAY

0–9

0

8

7

9

6

5

4

3

2

1

Play Mode

Program

:
: Off

Repeat

Clear

Program Playback

/Enter/0–9/Cancel/Play Mode

1
2
3

9
3
11

4
5
6

7
8
9

10
11
12

Note:
In playing back the Video CD with PBC, you cannot set
Random playback.

Note:
In playing back the Video CD with PBC, you cannot set
Program playback.

Play Mode
Repeat

Off

/Enter/Play Mode

:
:

Off

SET +

SET –

CH –

CH +

ENTER

SET +

SET –

CH –

CH +

ENTER

SET +

SET –

CH –

CH +

ENTER

SP/SLP

PLAY MODE

SP/SLP

PLAY MODE

SET +

SET –

CH –

CH +

ENTER

SET +

SET –

CH –

CH +

ENTER

PLAY

CANCEL

Advanced 

playback 

(DVD)

54

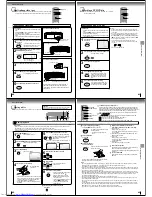
Press TOP MENU during playback.

Title menu appears on the screen.

Press 

/

 or 

/

 to select the desired title.

Changing angles/Title selection/DVD menu

Changing angles

Press ANGLE during playback.

The current angle will appear.

Advanced playback (DVD)

When playing back a disc recorded with multi-angle facility, you can change the angle that you are viewing the scene from.

1

1/9

Press ANGLE repeatedly until the desired angle
is selected.

2

Note:
Depending on the DVD, you may not be able to change the
angles even if multi-angles are recorded on the DVD.

Title selection

Two or more titles are recorded on some discs. If the title menu is recorded on the disc, you can select the desired title.

1

Press ENTER or PLAY.

The playback of the selected title will
start.

3

Note:
Depending on the DVD, you may not be able to select the title.
Depending on the DVD, a “title menu” may simply be called a
“menu” or “title” in the instructions supplied with the disc.

2

DVD menu

Press MENU during playback.

The DVD menu appears on the screen.
• Press MENU again to resume

playback at the scene when you
pressed MENU.

Press 

/

 or 

/

 to select the desired item.

Some DVDs allow you to select the disc contents using the menu.
When you play back these DVDs, you can select the subtitle language and sound-track language, etc. using the menu.

1

Press ENTER.

The  menu  continues  to  another
screen. Repeat steps 2 and 3 to set
the item completely.

3

2

ANGLE

ENTER

/

/

/

TOP MENU

PLAY

MENU

COUNTER RESET

ANGLE

COUNTER RESET

ANGLE

TOP MENU

SET +

SET –

CH –

CH +

ENTER

SET +

SET –

CH –

CH +

ENTER

MENU

SET +

SET –

CH –

CH +

ENTER

SET +

SET –

CH –

CH +

ENTER

PLAY

Note:
Depending  on  the  DVD,  you  may  not  be  able  to  resume
playback from the scene point when you pressed MENU.

55

Advanced 

playback 

(DVD)

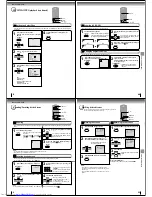
          During disc playback press AUDIO.

          Press 

 or 

 to select “On”.

1

Changing soundtrack language

1

2

Press AUDIO during playback.

The current soundtrack language will
appear.

Press  AUDIO  repeatedly  until  the  desired  lan-
guage is selected.

The on-screen display will disappear
after a few seconds.

Changing soundtrack language/
Setting surround sound

You can select the language when you play a multilingual disc.

Notes:
• If the desired language is not heard after pressing the

button several times, the language is not recorded on
the disc.

• Changing soundtrack language is canceled when you

open the disc tray. The initial default language or available
language will be heard if the disc is played back again.

 AUDIO


/

In case of Video CD playback

Audio type changes as follows each time you press AUDIO.

LR

Spatializer Off

L

Spatializer Off

R

Spatializer Off

Setting surround sound

This DVD/VCR equipped with a “SPATIALIZER VIRTUAL SURROUND”. It can produce the effect of being in a cinema
or a concert hall.

Certain audio features of this product manufactured under
a license from Desper Products, Inc. 

Spatializer 

®

 and the

circle-in-square device are trademarks owned by Desper
Products, Inc.

2

    To cancel Surround mode:
Follow the left steps 1~2, then press 

 or 

 to select the

“Off” position.

Note:
The “SPATIALIZER VIRTUAL SURROUND” is effective only
for the sound of disc.

DVD
VCD

CD

1/8 Eng Dolby Digital

Spatializer Off

1/8 Eng Dolby Digital

Spatializer On

1/8 Eng Dolby Digital

Spatializer Off

1/8 Eng Dolby Digital

Spatializer Off

2/8 Fra Dolby Digital

Spatializer Off

DVD

VCD

Function 

s

etup 

 (DVD)

AUDIO SELECT

AUDIO

AUDIO SELECT

AUDIO

AUDIO SELECT

AUDIO

SET +

SET –

CH –

CH +

ENTER

Function setup (DVD)

Summary of Contents for SD-K531SU2

Page 1: ...appliance RISK OF ELECTRIC SHOCK DO NOT OPEN CAUTION CAUTION TO REDUCE THE RISK OF ELECTRIC SHOCK DO NOT REMOVE COVER OR BACK NO USER SERVICEABLE PARTS INSIDE REFER SERVICING TO QUALIFIED SERVICE PERSONNEL Location of the required Marking The rating sheet and the safety caution are on the rear of the unit CERTIFICATION COMPLIES WITH FDA RADIATION PERFORMANCE STANDARDS 21 CFR SUBCHAPTER J 3 Introdu...

Page 2: ...ils to function simply unplug the unit from the AC outlet and plug it back in The unit should return to normal operation Polarized AC Cord Plug One blade is wider than the other AC Outlet Wider Hole and Blade Power source IMPORTANT SAFEGUARDS Power source 6 Introduction Notes on handling When shipping the DVD VCR the original shipping carton and packing materials come in handy For maximum protecti...

Page 3: ... 7 Contents 9 Identification of controls 10 Antenna connections 14 Cable TV connections 16 Connecting to a TV 18 Connecting to optional equipment 20 Introduction Recording a TV program 34 One touch Timer Recording OTR 36 Timer recording 37 Recording VCR Stereo recording and playback 39 Second Audio Program SAP 39 Duplicating a video tape 40 Recording a DVD CD disc 41 Other functions VCR Loading an...

Page 4: ...isposal Press POWER to turn the DVD VCR on or off Select your desired operating mode DVD or VCR using VCR DVD DVD or VCR indicator on the front panel will show you which mode is selected Press CH or CH to move through the channels one channel at a time The CH and SET are also used to navigate on screen menu system You can directly access specific channels using Number buttons Each press of VCR DVD...

Page 5: ...te Audio video cable supplied To audio inputs Notes Refer to the owner s manual of the connected TV as well When you connect the DVD VCR to your TV be sure to turn off the power and unplug both units from the wall outlet before making any connections If your television set has one audio input connect the left and right audio outputs of the DVD VCR to a Y cable adapter not supplied and then connect...

Page 6: ...l digital stereo by connecting an amplifier equipped with a digital audio input and speaker system right and left front speakers Notes DO NOT connect the BITSTREAM PCM AUDIO OUT jack of the DVD VCR to the AC 3 RF input of a Dolby Digital Receiver This input on your A V Receiver is reserved for Laserdisc use only and is incompatible with the BITSTREAM PCM AUDIO OUT jack of the DVD VCR Connect the B...

Page 7: ...ast Sunday in October you set to OFF ON OFF AUTO for manual setting forward one hour for manual setting back one hour for automatic setting read XDS in the signal DAYLIGHT SAVING TIME ON OFF AUTO ENTER MENU ATLANTIC GMT 4hours EASTERN GMT 5hours CENTRAL GMT 6hours MOUNTAIN GMT 7hours PACIFIC GMT 8hours ALASKA GMT 9hours HAWAII GMT 10hours AUTO AUTO SET GMT Greenwich Mean Time MENU ON ON OFF OFF TI...

Page 8: ...ithout STOP press PLAY Notes This VCR selects the playback tape speed SP LP or SLP au tomatically The Cassette tape and DVD disc can be played back simulta neously If you press VCR DVD selector the tape playback and DVD playback alternate with each other on the screen via CH3 4 or video connection 2To start playback Playback Rewind or forward the tape To rewind the tape Press REW To forward the ta...

Page 9: ... reset to 00 00 00 The counter does not function on nonrecorded blank sections of the tape When you rewind fast forward or play tapes through blank sections the counter stops Clock counter display COUNTER CLOCK Press VCR DVD selector The DVD mode and the VCR mode alternate with each other in the display DVD mode VCR mode 3 INDEX NO up to 9 or is displayed STOP VCR DVD INDEX CLOCK COUNTER CLOCK COU...

Page 10: ... procedure To set daily weekly timer To confirm Timer program At step 1 on the previous page select TIMER REC SET and press ENTER The timer program list will appear on the screen 2 The current day Friday SU SA Sunday to Saturday MO SA Monday to Saturday MO FR Monday to Friday WKL WE WKL TH Weekly Thursday Weekly Wednesday One month later minus one day Weekly e g WKL TU each Tuesday or daily e g MO...

Page 11: ...input connected to the DVD VCR 1 3 4 5 Press ON STANDBY I The DVD VCR turns on Press VCR DVD SELECT to select the DVD mode The DVD indicator will light Press OPEN CLOSE The disc tray opens Place the disc on the disc tray With the playback side down There are two different disc sizes Place the disc in the correct guide on the disc tray If the disc is out of the guide it may damage the disc and caus...

Page 12: ...al File System HFS cannot be played The unit can play back baseline and progressive JPEG files 3 Press OPEN CLOSE The disc tray will open Place a disc on which MP3 or WMA files have been recorded onto the tray Press OPEN CLOSE or PLAY The disc tray closes automatically On the TV screen Reading will appear Reading will take as much time as the number of file A file menu screen will appear on the TV...

Page 13: ...the frame 1 Press to view a different part of the frame You may move the frame from the centrepositiontoUP DOWN LEFTor RIGHT direction In the zoom mode press ZOOM repeatedly to return to a 1 1 view Off 3 Notes You can select the Pause Slow or Search playback in the zoom mode Some discs may not respond to zoom feature ZOOM CANCEL 0 9 ENTER JUMP DISPLAY Locating desired scene DVD VCD CD Use the titl...

Page 14: ...PLAY CANCEL Advanced playback DVD 54 Press TOP MENU during playback Title menu appears on the screen Press or to select the desired title Changing angles Title selection DVD menu Changing angles Press ANGLE during playback The current angle will appear Advanced playback DVD When playing back a disc recorded with multi angle facility you can change the angle that you are viewing the scene from 1 1 ...

Page 15: ...TUP RETURN Function setup DVD 58 Function setup DVD Press SETUP in the stop mode or No Disc Press or to select Picture Press or ENTER then press or to select Tv Screen Press or ENTER Press or to select your desired screen type then press ENTER Setting the aspect ratio of TV screen 1 ENTER Setting the aspect ratio of TV screen You can select the aspect ratio for your TV The following pages describe...

Page 16: ...el 1 2 Press SETUP in the stop mode or No Disc Press or to select Parental Then press or ENTER Press number buttons 0 9 to enter the pass word you have stored Press ENTER The rating is now unlocked Press or to select Parental then press or to change the parental level To change the parental level Function setup DVD Language Password Parental 0 9 Cancel Enter Setup Return 1 Picture Parental Other S...

Page 17: ...IVE in the stop mode The progressive indicator on the display window will light The unit recognizes the picture source film or video of the current discaccordingtothediscinformation Press PLAY to start playback PLAY Notes Some discs may not be played back with the progressive scanning mode correctly because of the disc characteristics or recording condition If your TV does not accept the progressi...

Page 18: ...iscs have no subtitles Subtitles are cleared Press SUBTITLE Angle cannot be changed Multi angles are not recorded on the DVD disc The function is prohibited with the unit or the disc appears on the screen 56 54 44 No 4 3 16 9 picture The setup does not match your TV No on screen display Select Display On 58 59 No surround sound The setup does not match your stereo system The unit or remote operati...

Reviews: