background image

64

Function setup (DVD)

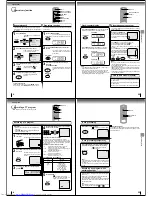
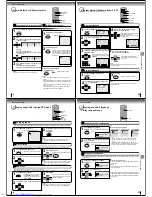
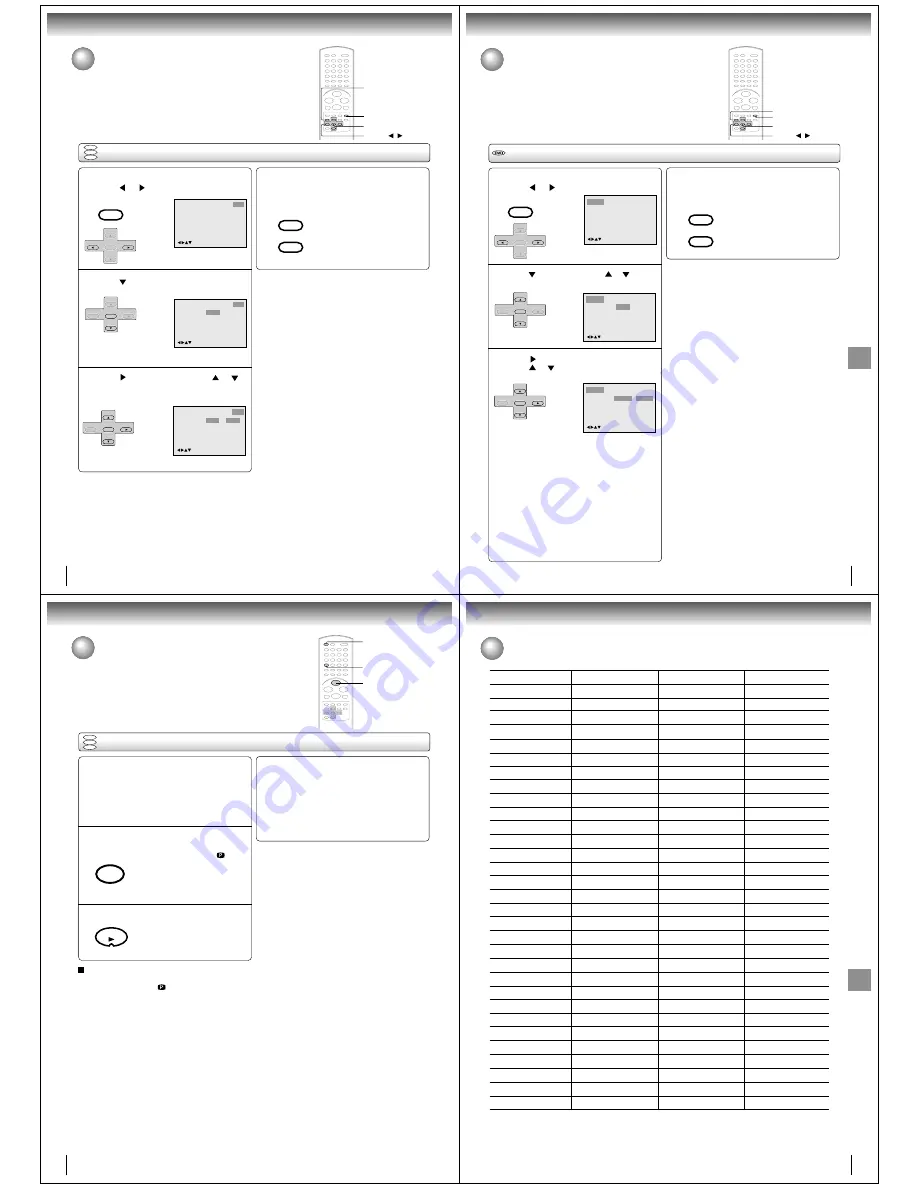
Setting OSD language

Press SETUP in the stop mode or No Disc.

Press 

 or 

 to select “Other”.

Press 

 or ENTER to select “OSD Language”.

DVD
VCD

CD

Language

Other

/Enter/Setup/Return

Picture

Parental

Sound

1

2

Language

OSD Language English

Other

/Enter/Setup/Return

Picture

Parental

Sound

To make SETUP screen disappear, press SETUP
or  RETURN  while  the  SETUP  screen  is  being
displayed.

4

If the unit does not operate properly: Static electricity,
etc., may affect the player's operation. Disconnect the
AC power cord once, then connect it again.

ENTER

/

/

/

RETURN

SETUP

Setting OSD language

The setup language can be selected.

VCR MENU

SETUP

SET +

SET –

CH –

CH +

ENTER

SET +

SET –

CH –

CH +

ENTER

VCR MENU

SETUP

RETURN

Press 

 or ENTER and then press 

 or 

 to

select  desired  language  (e.g.  English),  then
press  ENTER.

3

Language

OSD Language English

English
Francais
Espanol

Other

/Enter/Setup/Return

Picture

Parental

Sound

SET +

SET –

CH –

CH +

ENTER

65

Function 

setup 

 (DVD)

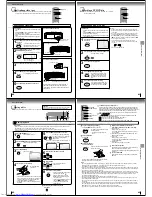
Setting language

1

Press SETUP in the stop mode or No Disc.
Press 

 or 

 to select “Language”.

Press 

 or ENTER, then press 

 or 

 to select

desired langugage item.

Press 

 or ENTER.

Press 

 or 

 to select your desired language,

then press ENTER.

English, Francais, Espanol:
The selected language will be heard or seen.
Other:
Other language can be selected (see “Language code
list” on page 67).
Original: (Audio)
The unit will select the first priority language of each
disc.
Automatic: (Subtitle)
• The unit will automatically select the same language in

the AUDIO setting.

• When the unit selects the same language as the AUDIO,

the subtitles will not appear during playback.

• When you do not use the same language as the AUDIO,

the subtitles will appear during playback.

Off: (Subtitle)
Subtitles do not appear.

Setting language

You can select the language of “Menu”, “Subtitle” and “Audio” if their languages
are recorded onto the disc more than one language.

To make SETUP screen disappear, press SETUP
or  RETURN  while  the  SETUP  screen  is  being
displayed.

4

2

3

/Enter/Setup/Return

Language Picture

Parental Other

Sound

Language Picture

Parental Other

Sound

Menu
Subtitle
Audio

English

Automatic

English

/Enter/Setup/Return

Menu
Subtitle
Audio

English

Automatic

English

Francais

English

Espanol

Other

Language Picture

Parental Other

Sound

/Enter/Setup/Return

ENTER

/

/

/

RETURN

SETUP

VCR MENU

SETUP

SET +

SET –

CH –

CH +

ENTER

SET +

SET –

CH –

CH +

ENTER

SET +

SET –

CH –

CH +

ENTER

VCR MENU

SETUP

RETURN

Note:

If the selected language is not recorded on the disc, the first-
priority language is selected.

66

Function setup (DVD)

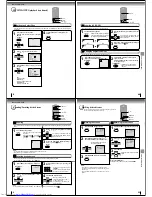
Selecting PROGRESSIVE scan

1

Selecting PROGRESSIVE scan

The progressive scan capability provides the highest resolution pictures with less
flicker and line structure.
If you are using the Component video jacks, but are connecting the DVD/VCR to
a standard (analog) television, set PROGRESSIVE to Off.
If you are using the Component video jacks for connection to a TV or monitor that
is compatible with a progressive scan signal, set PROGRESSIVE to On.

2

Preparation:

• Connect to a TV equipped with component jacks.
• Turn ON the TV and set it to the corresponding video input

mode.

• Set the S-VIDEO/COMPONENT video selector switch on

the rear panel to COMPONENT position.

• Press VCR DVD selector to select the DVD mode. (The

DVD indicator will light.)

Press PROGRESSIVE in the stop mode.

The progressive indicator “

” on the

display window will light.

• The unit recognizes the picture

source (film or video) of the current
disc according to the disc information.

Press PLAY to start playback.

PLAY

Notes:
• Some discs may not be played back with the progressive

scanning mode correctly because of the disc characteristics
or recording condition.

• If your TV does not accept the progressive scan format, the

picture will appear scrambled if you select progressive scan
output from the unit. In such a case, select PROGRESSIVE
scan Off.

• Once PROGRESSIVE scan On, all other video outputs are

disabled except component video outputs.

• You cannot make the progressive scanning mode active in

following cases.
– The unit is in the VCR mode.
– The disc is played back in the DVD mode.
– The S-VIDEO/COMPONENT video selector switch is set to

S-VIDEO position.

There are two types of source content in pictures recorded in
DVD video discs: film content (pictures recorded from films
at 24 frames per second) and video content (video signals
recorded at 30 frames per second).

When the unit plays back a film source material, uninterlaced
progressive  output  signals  are  created  using  the  original
information. When a video content is played back, the unit
interleaves  lines  between  the  interlaced  lines  on  each  to
create the interpolated picture and outputs as the progressive
signal.

 1

 2

DVD
VCD

CD

To select PROGRESSIVE scan Off

Press PROGRESSIVE in the stop mode.
The progressive indicator “

” on the display window will

go off.

VCR DVD

INPUT SELECT

PROGRESSIVE

67

Function 

setup 

 (DVD)

Language code list

Enter the appropriate code number for the initial settings “Menu”, “Subtitle” and/or “Audio” (see page 65).

Abkhazian

1112

Fiji

1620

Lingala

2224

Singhalese

  2919

Afar

1111

Finnish

1619

Lithuanian

2230

Slovak

  2921

Afrikaans

1116

French

1628

Macedonian

2321

Slovenian

  2922

Albanian

2927

Frisian

1635

Malagasy

2317

Somali

  2925

Amharic

1123

Galician

1722

Malay

2329

Spanish

  1529

Arabic

1128

Georgian

2111

Malayalam

2322

Sundanese

  2931

Armenian

1835

German

1415

Maltese

2330

Swahili

  2933

Assamese

1129

Greek

1522

Maori

2319

Swedish

  2932

Aymara

1135

Greenlandic

2122

Marathi

2328

Tagalog

  3022

Azerbaijani

1136

Guarani

1724

Moldavian

2325

Tajik

  3017

Bashkir

1211

Gujarati

1731

Mongolian

2324

Tamil

  3011

Basque

1531

Hausa

1811

Nauru

2411

Tatar

  3030

Bengali; Bangla 1224

Hebrew

1933

Nepali

2415

Telugu

  3015

Bhutani

1436

Hindi

1819

Norwegian

2425

Thai

  3018

Bihari

1218

Hungarian

1831

Oriya

2528

Tibetan

  1225

Breton

1228

Icelandic

1929

Panjabi

2611

Tigrinya

  3019

Bulgarian

1217

Indonesian

1924

Pashto, Pushto 2629

Tonga

  3025

Burmese

2335

Interlingua

1911

Persian

1611

Turkish

  3028

Byelorussian

1215

Irish

1711

Polish

2622

Turkmen

  3021

Cambodian

2123

Italian

1930

Portuguese

2630

Twi

  3033

Catalan

1311

Japanese

2011

Quechua

2731

Ukrainian

  3121

Chinese

3618

Javanese

2033

Rhaeto-Romance2823

Urdu

  3128

Corsican

1325

Kannada

2124

Romanian

2825

Uzbek

  3136

Croatian

1828

Kashmiri

2129

Russian

2831

Vietnamese

  3219

Czech

1329

Kazakh

2121

Samoan

2923

Volapük

  3225

Danish

1411

Kirghiz

2135

Sanskrit

2911

Welsh

  1335

Dutch

2422

Korean

2125

Scots Gaelic

1714

Wolof

  3325

English

1524

Kurdish

2131

Serbian

2928

Xhosa

  3418

Esperanto

1525

Laothian

2225

Serbo-Croatian 2918

Yiddish

  2019

Estonian

1530

Latin

2211

Shona

2924

Yoruba

  3525

Faroese

1625

Latvian, Lettish 2232

Sindhi

2914

Zulu

  3631

Language Name Code

Language Name Code

Language Name Code

Language Name Code

Others

Others

Summary of Contents for SD-K531SU2

Page 1: ...appliance RISK OF ELECTRIC SHOCK DO NOT OPEN CAUTION CAUTION TO REDUCE THE RISK OF ELECTRIC SHOCK DO NOT REMOVE COVER OR BACK NO USER SERVICEABLE PARTS INSIDE REFER SERVICING TO QUALIFIED SERVICE PERSONNEL Location of the required Marking The rating sheet and the safety caution are on the rear of the unit CERTIFICATION COMPLIES WITH FDA RADIATION PERFORMANCE STANDARDS 21 CFR SUBCHAPTER J 3 Introdu...

Page 2: ...ils to function simply unplug the unit from the AC outlet and plug it back in The unit should return to normal operation Polarized AC Cord Plug One blade is wider than the other AC Outlet Wider Hole and Blade Power source IMPORTANT SAFEGUARDS Power source 6 Introduction Notes on handling When shipping the DVD VCR the original shipping carton and packing materials come in handy For maximum protecti...

Page 3: ... 7 Contents 9 Identification of controls 10 Antenna connections 14 Cable TV connections 16 Connecting to a TV 18 Connecting to optional equipment 20 Introduction Recording a TV program 34 One touch Timer Recording OTR 36 Timer recording 37 Recording VCR Stereo recording and playback 39 Second Audio Program SAP 39 Duplicating a video tape 40 Recording a DVD CD disc 41 Other functions VCR Loading an...

Page 4: ...isposal Press POWER to turn the DVD VCR on or off Select your desired operating mode DVD or VCR using VCR DVD DVD or VCR indicator on the front panel will show you which mode is selected Press CH or CH to move through the channels one channel at a time The CH and SET are also used to navigate on screen menu system You can directly access specific channels using Number buttons Each press of VCR DVD...

Page 5: ...te Audio video cable supplied To audio inputs Notes Refer to the owner s manual of the connected TV as well When you connect the DVD VCR to your TV be sure to turn off the power and unplug both units from the wall outlet before making any connections If your television set has one audio input connect the left and right audio outputs of the DVD VCR to a Y cable adapter not supplied and then connect...

Page 6: ...l digital stereo by connecting an amplifier equipped with a digital audio input and speaker system right and left front speakers Notes DO NOT connect the BITSTREAM PCM AUDIO OUT jack of the DVD VCR to the AC 3 RF input of a Dolby Digital Receiver This input on your A V Receiver is reserved for Laserdisc use only and is incompatible with the BITSTREAM PCM AUDIO OUT jack of the DVD VCR Connect the B...

Page 7: ...ast Sunday in October you set to OFF ON OFF AUTO for manual setting forward one hour for manual setting back one hour for automatic setting read XDS in the signal DAYLIGHT SAVING TIME ON OFF AUTO ENTER MENU ATLANTIC GMT 4hours EASTERN GMT 5hours CENTRAL GMT 6hours MOUNTAIN GMT 7hours PACIFIC GMT 8hours ALASKA GMT 9hours HAWAII GMT 10hours AUTO AUTO SET GMT Greenwich Mean Time MENU ON ON OFF OFF TI...

Page 8: ...ithout STOP press PLAY Notes This VCR selects the playback tape speed SP LP or SLP au tomatically The Cassette tape and DVD disc can be played back simulta neously If you press VCR DVD selector the tape playback and DVD playback alternate with each other on the screen via CH3 4 or video connection 2To start playback Playback Rewind or forward the tape To rewind the tape Press REW To forward the ta...

Page 9: ... reset to 00 00 00 The counter does not function on nonrecorded blank sections of the tape When you rewind fast forward or play tapes through blank sections the counter stops Clock counter display COUNTER CLOCK Press VCR DVD selector The DVD mode and the VCR mode alternate with each other in the display DVD mode VCR mode 3 INDEX NO up to 9 or is displayed STOP VCR DVD INDEX CLOCK COUNTER CLOCK COU...

Page 10: ... procedure To set daily weekly timer To confirm Timer program At step 1 on the previous page select TIMER REC SET and press ENTER The timer program list will appear on the screen 2 The current day Friday SU SA Sunday to Saturday MO SA Monday to Saturday MO FR Monday to Friday WKL WE WKL TH Weekly Thursday Weekly Wednesday One month later minus one day Weekly e g WKL TU each Tuesday or daily e g MO...

Page 11: ...input connected to the DVD VCR 1 3 4 5 Press ON STANDBY I The DVD VCR turns on Press VCR DVD SELECT to select the DVD mode The DVD indicator will light Press OPEN CLOSE The disc tray opens Place the disc on the disc tray With the playback side down There are two different disc sizes Place the disc in the correct guide on the disc tray If the disc is out of the guide it may damage the disc and caus...

Page 12: ...al File System HFS cannot be played The unit can play back baseline and progressive JPEG files 3 Press OPEN CLOSE The disc tray will open Place a disc on which MP3 or WMA files have been recorded onto the tray Press OPEN CLOSE or PLAY The disc tray closes automatically On the TV screen Reading will appear Reading will take as much time as the number of file A file menu screen will appear on the TV...

Page 13: ...the frame 1 Press to view a different part of the frame You may move the frame from the centrepositiontoUP DOWN LEFTor RIGHT direction In the zoom mode press ZOOM repeatedly to return to a 1 1 view Off 3 Notes You can select the Pause Slow or Search playback in the zoom mode Some discs may not respond to zoom feature ZOOM CANCEL 0 9 ENTER JUMP DISPLAY Locating desired scene DVD VCD CD Use the titl...

Page 14: ...PLAY CANCEL Advanced playback DVD 54 Press TOP MENU during playback Title menu appears on the screen Press or to select the desired title Changing angles Title selection DVD menu Changing angles Press ANGLE during playback The current angle will appear Advanced playback DVD When playing back a disc recorded with multi angle facility you can change the angle that you are viewing the scene from 1 1 ...

Page 15: ...TUP RETURN Function setup DVD 58 Function setup DVD Press SETUP in the stop mode or No Disc Press or to select Picture Press or ENTER then press or to select Tv Screen Press or ENTER Press or to select your desired screen type then press ENTER Setting the aspect ratio of TV screen 1 ENTER Setting the aspect ratio of TV screen You can select the aspect ratio for your TV The following pages describe...

Page 16: ...el 1 2 Press SETUP in the stop mode or No Disc Press or to select Parental Then press or ENTER Press number buttons 0 9 to enter the pass word you have stored Press ENTER The rating is now unlocked Press or to select Parental then press or to change the parental level To change the parental level Function setup DVD Language Password Parental 0 9 Cancel Enter Setup Return 1 Picture Parental Other S...

Page 17: ...IVE in the stop mode The progressive indicator on the display window will light The unit recognizes the picture source film or video of the current discaccordingtothediscinformation Press PLAY to start playback PLAY Notes Some discs may not be played back with the progressive scanning mode correctly because of the disc characteristics or recording condition If your TV does not accept the progressi...

Page 18: ...iscs have no subtitles Subtitles are cleared Press SUBTITLE Angle cannot be changed Multi angles are not recorded on the DVD disc The function is prohibited with the unit or the disc appears on the screen 56 54 44 No 4 3 16 9 picture The setup does not match your TV No on screen display Select Display On 58 59 No surround sound The setup does not match your stereo system The unit or remote operati...

Reviews: