background image

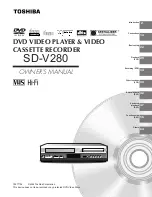
DVD VIDEO PLAYER & VIDEO
CASSETTE RECORDER

SD-V280

OWNER’S MANUAL

79077192

2

14

22

29

34

39

Introduction

Connections

Basic setup

Playback

(VCR)

Recording (VCR)

Other functions

(VCR)

DIGITAL VIDEO

 ©2002 Toshiba Corporation

42

47

56

64

Basic playback

(DVD)

Advanced

playback

(DVD)

Function setup

(DVD)

Others

This device does not tape-recorded copy protected DVD Video Discs.

 2A70901D (E)COV

1/6/2002, 22:56

1

Summary of Contents for SD-V280

Page 1: ...22 29 34 39 Introduction Connections Basic setup Playback VCR Recording VCR Other functions VCR DIGITAL VIDEO 2002 Toshiba Corporation 42 47 56 64 Basic playback DVD Advanced playback DVD Function setup DVD Others This device does not tape recorded copy protected DVD Video Discs ...

Page 2: ...ith the FCC Rules could void the user s authority to operate this equipment CAUTION THIS DIGITAL VIDEO PLAYER EMPLOYS A LASER SYSTEM TO ENSURE PROPER USE OF THIS PRODUCT PLEASE READ THIS USER S GUIDE CARE FULLY AND RETAIN FOR FUTURE REFERENCE SHOULD THE UNIT REQUIRE MAINTE NANCE CONTACT AN AUTHORIZED SERVICE LOCATION SEE SERVICE PROCEDURE USE OF CONTROLS ADJUSTMENTS OR THE PERFORMANCE OF PROCEDURE...

Page 3: ...laced near or over a radiator or heat source This unit should not be placed in a built in installation such as a bookcase or rack unless proper ventilation is provided and or the manufacturer s instructions have been adhered to 10 POWER SOURCE This unit should be operated only from the type of power source indicated on the rating plate If you are not sure of the type of power supply to your home c...

Page 4: ...e or other hazards Refer all servicing to qualified service personnel 19 DAMAGE REQUIRING SERVICE Unplug this unit from the wall outlet and refer servicing to qualified service personnel under the following conditions a When the power supply cord or plug is damaged b If liquid has been spilled or objects have fallen into the unit c If the unit has been exposed to rain or water d If the unit does n...

Page 5: ...820 40 of the NEC that provides guidelines for proper grounding and in particular specifies that the cable ground shall be con nected to the grounding system of the building as close to the point of cable entry as practical TO USE AC POWER SOURCE Use the AC polarized line cord provided for operation on AC Insert the AC cord plug into a standard 120V 60Hz polarized AC outlet Notes Never connect the...

Page 6: ...D VCR is a high technology precision device If the video head the head drum the optical pick up lens or disc drive parts are dirty or worn down the picture quality will deteriorate To obtain a clear picture we recommend regular inspection and maintenance cleaning or parts replacement every 1 000 hours of use depending on the operating environment For details contact your nearest dealer Notes on mo...

Page 7: ...contents Normally DVD video discs are divided into titles and the titles are sub divided into chapters VIDEO CDs and audio CDs are divided into tracks DVD video disc VIDEO CD audio CD Each title chapter or track is assigned a number which is called title number chapter number or track number respectively There may be discs that do not have these numbers Notes on copyright It is forbidden by law to...

Page 8: ...he same way as an audio CD VIDEO CD equipped with PBC function Version 2 0 In addition to operation of a VIDEO CD not equipped with the PBC function you can enjoy playback of interactive software with search function by using the menu displayed on the TV screen Menu Playback Some of the functions described in this owner s manual may not work with some discs Playable discs This DVD VCR can play the...

Page 9: ... tape 29 Cassette tape playback 30 Special playback 31 Convenience function 32 Playback VCR Setting the video channel 22 Setting the language 23 Clock setting 24 Tuner setting 27 Basic setup Playing a disc 42 Locationg a specific title chapter or track 46 Basic playback DVD Repeat playback Random playback 47 Playing in a favorite order 48 Zooming a picture 49 Selecting the camera angle 50 Selectin...

Page 10: ...en connecting the optical digital cable remove the cap and fit the connector into the jack firmly When not using the jack keep the cap inserted to protect it from dust intrusion AC power cord DVD COAXIAL DIGITAL AUDIO OUT jack RF IN jack DVD OPTICAL DIGITAL AUDIO OUT jack dust protection cap RF OUT jack 7230007448 DVD OUT DVD VCROUT LINE IN1 UHF VHF ANALOGAUDIO L Y PB PR VIDEO L R AUDIO VIDEO L MO...

Page 11: ...le Audio setting Subtitle setting Angle setting EAM E A M Enharced Audio Mode setting ZOOM To zoom a picture Audio Out Select setting To stop playback Playback starts from the beginning of the current chapter or track Fast reverse playback To start playback Fast forward playback To locate succeeding chapters or tracks To begin slow motion playback To pause playback To turn off the display Data tra...

Page 12: ...ton 32 48 STOP button 30 46 33 REC button OTR button 34 36 MENU button RETURN button 56 CANCEL button 37 CLOCK COUNTER button 33 ZOOM button CM SKIP button 31 49 A B RPT button 24 54 INPUT SELECT button 40 PAUSE STILL button SLOW button DVD VCR button 22 31 PLAY MODE button SP SLP button 34 47 AUDIO button AUDIO SELECT button 39 52 Direction buttons 48 Direct channel selection buttons Number butto...

Page 13: ...al short circuit insert the end first 3 Do not mix different types of batteries together e g Alkaline and Carbon zinc or old batteries with fresh ones 4 If the device is not to be used for a long period of time remove the batteries to prevent damage or injury from possible battery leakage 5 Do not try to recharge batteries not intended to be recharged they can overheat and rupture Follow battery m...

Page 14: ...ting an antenna system to a DVD VCR Find the type of antenna system you are using and follow the connection diagram If both VHF and UHF antennas have 300 ohm twin lead flat wires use a combiner having two 300 ohm inputs and one 75 ohm output Note Combination VHF UHF Antenna with 75 ohm Coaxial Cable Combination VHF UHF Antenna with 300 ohm Twin Lead Flat Wire Separate VHF and UHF Antennas DVD VCR ...

Page 15: ... UHF antenna input TV with 300 ohm UHFand 75 ohm VHF antenna inputs TV with 300 ohm UHF and 300 ohm VHF antenna inputs After you have connected the antenna to the DVD VCR you must connect the DVD VCR to the TV Below are 3 common methods of connecting your DVD VCR to a TV Find the type of TV you are using and follow the connection diagram This DVD VCR has a single 75 ohm output for connection to a ...

Page 16: ...rambled Using the programmable timer to record only the channel selected at the converter box Prevents Recording one channel while watching another Using the DVD VCR tuner to select channels DVD VCR Incoming Cable TV Converter Descrambler Incoming Cable TV TV To record from converter descrambler DVD VCR tuner must be tuned to the con verter output channel usually channel 3 or 4 Note DVD VCR DVD VC...

Page 17: ...ding of all channels through the converter box Prevents Watching scrambled channels while recording another channel Using the DVD VCR tuner to select channels DVD VCR Splitter Converter Descrambler TV DVD VCR Converter Descrambler A B Switch TV Incoming Cable Splitter Allows Recording of nonscrambled channels Recording of one channel while watching another Watching premium channels through the con...

Page 18: ...ideo input yellow red white Audio video cable supplied To audio inputs Notes Refer to the owner s manual of the connected TV as well When you connect the DVD VCR to your TV be sure to turn off the power and unplug both units from the wall outlet before making any connections If your television set has one audio input connect the left and right audio outputs of the DVD VCR to a Y cable adapter not ...

Page 19: ...component video inputs Connecting to an audio system and TV equipped with S video input component video inputs Signal flow To wall outlet To audio inputs of the amplifier red white red white To Y VIDEO OUT To PB VIDEO OUT To Y video input To PB video input TV or monitor with ColorStream component video inputs Audio system Component video ColorStream outputs inputs Some TVs or monitors are equipped...

Page 20: ...em Make the following setting Use DVD video discs or audio CDs encoded via the DTS recording system Make the following setting Be sure to set Audio Out Select to Analog 2ch when you enjoy sounds of Dolby Pro Logic Surround using this connection Connect one or two rear speakers The output sound from the rear speakers will be monaural even if you connect two rear speakers Make the following setting ...

Page 21: ... with a digital audio input 2 channel digital stereo You can enjoy the dynamic sound of 2 channel digital stereo by connecting an amplifier equipped with a digital audio input and speaker system right and left front speakers Notes DO NOT connect the BITSTREAM PCM AUDIO OUT jack of the DVD VCR to the AC 3 RF input of a Dolby Digital Receiver This input on your A V Receiver is reserved for Laserdisc...

Page 22: ...play window For a push button TV tuner If CH 3 or 4 corresponding to the video channel cannot be tuned on your TV proceed as follows set the VCR 3 4 channel selector and the TV to CH 3 or 4 play back a prerecorded tape and tune the TV to receive a sharp color picture from the video cassette recorder Refer to your TV owner s manual for details 3 CH 4 Notes If the unit does not operate properly or N...

Page 23: ...ESPAÑOL or French FRANCAIS then press ENTER 3 Press VCR MENU until the MENU screen is cleared 4 ENTER MENU MENU TIMER REC SET AUTO REPEAT ON OFF ON OFF SAP CH SET UP SYSTEM SET UP ENTER MENU SYSTEM SET UP CLOCK SET LANGUAGE IDIOMA LANGUE NO NOISE BACKGROUND AUTO CLOCK STANDARD TIME DAYLIGHT SAVING TIME ON OFF ON OFF Notes Both the VCR and the DVD have their own player menus 56 If no buttons are pr...

Page 24: ...uto clock adjustment will be updated at 12 00 PM everyday if you turn off the DVD VCR If you use a cable box and you want auto clock adjustment to be performed the cable box must be left on The auto clock adjustment is not effective when there is a difference of more than 5 minutes exists between the built in clock time and the actual time When shipped from factory the AUTO CLOCK is set to ON But ...

Page 25: ...IGHT SAVING TIME is set to AUTO position When the clock is not set Daylight Saving Time setting is not available When there is no Daylight Saving Time in your area always select OFF position in step 3 When you want to set the Daylight Saving Time manually on the first Sunday in April you set to ON and on the last Sunday in October you set to OFF ON OFF AUTO for manual setting forward one hour for ...

Page 26: ...SYSTEM SET UP press ENTER 2 Press SET or to select CLOCK SET then press ENTER 3 Press SET or to set the month then press ENTER 4 Set the day year and time as in step 4 5 ENTER MENU SYSTEM SET UP CLOCK SET LANGUAGE IDIOMA LANGUE NO NOISE BACKGROUND AUTO CLOCK STANDARD TIME DAYLIGHT SAVING TIME ON OFF ON OFF ENTER CANCEL MENU MONTH DAY YEAR TIME 3 1 WED 2000 12 00AM ENTER CANCEL MENU MONTH DAY YEAR ...

Page 27: ...ess DVD VCR to select the VCR mode The VCR indicator will light 1 Press SET or to select TV CATV 2 ENTER MENU CH SET UP TV CATV AUTO CH MEMORY ADD DELETE ENTER MENU MENU TIMER REC SET AUTO REPEAT ON OFF ON OFF SAP CH SET UP SYSTEM SET UP TV CATV selection Setting channels automatically Repeat left step 1 and press SET or to select AUTO CH MEMORY 1 Press ENTER Auto tuning will begin The channel dis...

Page 28: ...add or delete other channel 3 1 2 Tuner setting continued Noise elimination When you don t want to receive a weak signal broadcast a Blue back screen can be obtained by selecting the NO NOISE BACK GROUND ON When the unit is shipped from the factory the NO NOISE BACKGROUND is set to ON Repeat the steps 1 2 on page 26 and press SET or to select NO NOISE BACKGROUND 1 Press ENTER to select ON position...

Page 29: ...beled side facing up and the erase prevention tab positioned at your left An inverted cassette tape cannot be inserted Automatic playback When loading a cassette tape without an erase prevention tab playback will start automatically Automatic power ON When you insert a cassette tape the DVD VCR power will turn ON automatically 1 2 Erase prevention tab Adhesive tape Remove the cassette tape Erase p...

Page 30: ...nding press STOP To switch to playback directly without STOP press PLAY Notes ThisVCRselectstheplaybacktapespeedSP LPorSLPautomatically The Cassette tape and DVD disc can be played back simulta neously If you press DVD VCR the tape playback and DVD playback alternate with each other on the screen via CH3 4 or video connection When you select the VCR mode during DVD playback DVD playback will stop ...

Page 31: ...W MOTION During picture search mode there will be noise bars This is not a defect Playback will commence after approx 5 minutes to protect the video tape against excessive wear during pause mode Press ATR to reactivate automatic tracking again AUTO TR will appear on the screen AUTO TR PICTURE SEARCH SPEED PRESS TWICE TAPE SPEED PRESS ONCE SP Standard Play LP Long Play SLP Super Long Play 5 X 9 X 1...

Page 32: ...to the 00 00 00 counter position automatically Press CLOCK COUNTER The counter display shows the tape run ning time during playback or recording 1 Press COUNTER RESET at the desired tape position The counter display will be reset to 00 00 00 position e g the beginning of recording 2 Press STOP when playback or recording is completed Press ZERO RETURN The tape will automatically rewind or fast forw...

Page 33: ...ng of the tape the mark may not be found During INDEX search the tape may stop and begin to play at a slightly different location INDEX may not function properly with old or worn out video tapes INDEX marks may not be found if it is extremely close to the point where the search began In recording if you stop recording temporarily the INDEX mark is not recorded on the tape Video index search system...

Page 34: ...or CATV to the appropriate position 27 3 TV VHF UHF channels CATV CABLE TV channels Press Number button or CH to select the channel to be recorded 4 Press REC will appear on the screen for about 4 seconds and will appear on the display window 5 VHF UHF CATV CHANNELS TV CATV VHF 2 13 UHF 14 69 VHF 2 13 STD HRC IRC 14 36 A W 37 59 AA WW 60 85 AAA ZZZ 86 94 86 94 95 99 A 5 A 1 100 125 100 125 01 5A 1...

Page 35: ...l in the recording pause mode To stop recording temporarily While the VCR is recording select your desired channel on the TV When a TV is connected with an antenna cable only press TV VCR to select the TV position The VCR display will go off and recording will continue Select the TV channel you want to watch by using the TV channel selector Note Some CATV hookups do not permit viewing one channel ...

Page 36: ...speed SP or SLP The tape counter and SP or SLP will appear on the screen for about 4 seconds 2 Set TV or CATV option to the appropriate position 27 3 00 00 00 SP CH 110 CH 125 INDEX OTR 0 30 TV VHF UHF channels CATV CABLE TV channels Press Number button or CH to select the channel to be recorded 4 Press OTR Recording begins Press the button again to stop recording after 30 minutes Each additional ...

Page 37: ...aration Press DVD VCR to select the VCR mode Load a cassette tape with the erase prevention tab intact Check the time and date are correct 24 Example Program a timer recording for the 26th day channel 125 CATV 11 00 11 30 PM on timer program number 1 Tape speed SLP 1 Press SET or to select one of the program line then press ENTER 2 Press SET or to select the date then press ENTER 3 Set the start t...

Page 38: ...be made continuously until the recording is canceled or the tape reaches the end During timer recording the automatic rewinding mechanism does not function 8 00 11 00 9 00 10 00 Program 1 Prog 1 Deleted Parts Non Recorded Portion Parts Prog 2 Prog 3 Program 2 Program 3 Recording Control Settings ENTER CANCEL MENU DATE START END CH WKL WE ENTER CANCEL MENU DATE START END CH ENTER CANCEL MENU DATE S...

Page 39: ...ON display appears on the screen for several seconds Refer to the chart below Output selection Your DVD VCR is fitted with a SAP broadcast system which ena bles you to switch to a separate audio program when viewing a selected channel This function applies only when the program is broadcast in multi languages through the SAP broadcast system When the VCR is turned on or a channel selection is made...

Page 40: ...ack Playback Camcorder Connection with second video recorder Connection with Camcorder Press SP SLP to select the desired tape speed SP or SLP It is recommended that you set the Speed to the SP mode on the recording VCR for best results 1 Press INPUT SELECT once or twice to select AUDIO VIDEO input position L1 or L2 will appear in the display 2 Press REC on the recording VCR The duplicating proces...

Page 41: ...he DVD mode The DVD indicator will light 2 Press PLAY to start playback 3 Press REC to start recording The DVD VCR will change to the VCR mode automatically and the playback picture or sound will be duplicated on the video cassette tape 4 Press STOP if you finish recording If you wish to stop a DVD CD disc press DVD VCR to change the DVD mode then press STOP 5 Notes You may not be able to record t...

Page 42: ...AY Press the power button I The DVD VCR turns on Press DVD VCR to select the DVD mode The DVD indicator will light Press OPEN CLOSE The disc tray opens Place the disc on the disc tray With the playback side down There are two different disc sizes Place the disc in the correct guide on the disc tray If the disc is out of the guide it may damage the disc and cause the DVD VCR to malfunction Do not p...

Page 43: ...n will appear after playback of a movie is completed Prolonged display of an on screen menu may damage your television set permanently etching that image onto its screen To avoid this be sure to press the STOP button on your remote control once the movie is completed During the DVD playback if you change the operating mode from DVD to VCR the DVD will continue to play back the disc and stop after ...

Page 44: ...e normal playback Press PLAY Notes The DVD VCR mutes sound and subtitles during reverse and forward scan of DVD video discs However the DVD VCR plays sound during fast forward or fast reverse play of audio CDs The playback speed may differ depending on the disc Playing frame by frame Press PAUSE STILL during still playback Each time you press the PAUSE STILL button the picture advances one frame T...

Page 45: ...he beginning of a DVD video disc open and close the disc tray once with the OPEN CLOSE button before pressing the PLAY button Notes The DVD VCR s memory is also cleared when you change the parental lock setting 61 or select a disc menu language 59 you open the disc tray There may be a difference in the location where playback resumes depending on the disc Settings you changed using the on screen d...

Page 46: ...eding chapter or track Notes Some titles may not display chapter numbers When you set Title Stop to Off 63 you can access chapters in another title If you go back to the preceding title by pressing the SKIP button the DVD VCR locates the first chapter of the title When Title Stop is set to On you can access chapters only within the current title DVD video disc Title 1 Title 2 Chapter 1 Chapter 2 C...

Page 47: ...rts repeat playback of the selected segment A B 2 1 To resume normal playback Press CANCEL Notes Some discs may not permit A B repeat operation You cannot set the A B repeat function for a segment that includes multiple camera angles 50 You can specify a segment only within the current title or track VIDEO CD There may be a slight difference between point A and the location where playback actually...

Page 48: ... programmed selections will be cleared when you turn off the DVD VCR 4 CANCEL 3 2 Press MEMORY Press to select T or CT Use the number buttons to input the favorite number T Title number CT Chapter number or track number If you input a large number than the number that is recorded on the disc the bar will be skipped The input number into T for CD is not effective 1 2 1 T CT 2 T CT 3 T CT 4 T CT 5 T...

Page 49: ...s the buttons the zoom point shifts Pressing the CANCEL button restores the zoom point to the center of the picture To resume normal playback While ZOOM is selected press ZOOM repeatedly to turn off the icon Normal picture size is restored when the icon disappears The ENTER button cannot cancel zoom playback if you have turned off the icon by selecting EXIT To restore normal picture size press the...

Page 50: ...ress ANGLE or while the angle number is displayed on the TV screen Each time you press the ANGLE button the camera angle changes You can change the camera angle directly by pressing the number buttons corresponding to its angle number instead of using the buttons To turn off the angle number display Press CANCEL Notes You can change the camera angle during still playback The camera angle changes t...

Page 51: ...btitle setting is displayed on the TV screen to select On or Off Notes When you turn on the DVD VCR or replace a disc the player returns to the initial default setting 60 When you select a subtitle language which is not included on the disc the DVD VCR displays a prior language programmed on the disc During some scenes the subtitles may not appear immediately after you change the subtitle language...

Page 52: ...oose the appropriate language from the selections on the disc menu ENG2 D 2CH ENG1 PCM 2CH e g BITSTREAM PCM jack ANALOG AUDIO OUT jacks BITSTREAM PCM jack ANALOG AUDIO OUT jacks BITSTREAM PCM jack ANALOG AUDIO OUT jacks Bitstream Analog 2ch PCM Audio selection from the menu and output jacks on the rear panel Recording system Discs DVD video discs Audio CDs VIDEO CDs Linear PCM Dolby Digital DTS M...

Page 53: ...ss ENTER The sound enhancement menu appears To exit the audio enhancement selection Press CANCEL Notes Actual effects to audio may vary depending on the speaker system Make selection according to your preference Actual effects to audio may vary depending on the disc When the DVD VCR is connected to an amplifier equipped with Dolby Pro Logic Surround select Normal Otherwise Dolby Pro Logic Surround...

Page 54: ...er Track number Locate a title or track using the number buttons 46 Chapter number Locate a chapter using the number buttons 46 Elapsed time of the current title To enter the time to locate a desired location Audio setting 52 Subtitle setting 51 Angle setting 50 To turn off the display Title number Track number Locate a title or track using the number buttons 46 Chapter number Locate a chapter usi...

Page 55: ... may not be displayed properly depending on the disc The on screen display turns off Title number Track number Locate a title or track using the number buttons 46 Chapter number Locate a chapter using the number buttons 46 To stop playback 43 Playback starts from the beginning of the current chapter or track 46 Fast reverse playback 44 To start playback 42 Fast forward playback 44 To locate succee...

Page 56: ... settings Operational settings Initial setup 2 3 1 Note The on screen display disappears when you press the SET UP button Press to select the setting you want to change then press ENTER Change the selection by or other buttons by referring to the corresponding pages 57 then press ENTER Repeat steps 3 and 4 to change other settings To select another operation go back to step 2 Press SET UP The on s...

Page 57: ...elect a preferred language for on screen displays To select a preferred language for disc menus To select a preferred language for the sound track To select a preferred language for subtitles To turn on or de activate the operational status display on the TV screen To select the background color or background picture To turn the screen saver on or off To select the resolution of still pictures Fie...

Page 58: ...onforms to the actual TV in use DVD Setting details Audio Out Select Select the output sound format corresponding to your system connection For details of sound recording systems see 52 Bitstream Select when connected to an amplifier equipped with a Dolby Digital DTS MPEG1 or MPEG2 decoder 20 21 The DVD VCR outputs digital audio information in the bitstream format when you play a DVD video disc re...

Page 59: ...s in English French To display disc menus in French Spanish To display disc menus in Spanish Others To make a further choice After pressing the ENTER button follow steps 1 4 below 1 Obtain the abbreviation of the preferred language from the list 64 2 Select the first character by pressing the buttons 3 Press the buttons to shift and select the second character by pressing the buttons 4 Press the E...

Page 60: ...st character by pressing the buttons 3 Press the buttons to shift and select the second character by pressing the buttons 4 Press the ENTER button Note Some DVD video discs may be played in a different language than you selected A prior language may be programmed on the disc Subtitle Language English To display subtitles in English French To display subtitles in French Spanish To display subtitles...

Page 61: ...ing to their content The contents allowed by a parental lock level and the way a DVD video disc can be controlled may vary from disc to disc For example if the disc allowed you could edit out violent scenes unsuitable for children and replace them with more suitable scenes or lock out playback of the disc altogether DVD video discs may or may not respond to the parental lock settings This is not a...

Page 62: ...owing USA movie ratings Level 7 NC 17 Level 6 R Level 4 PG 13 Level 3 PG Level 1 G The parental lock levels for other countries areas than U S are included for future use Check the appropriate parental lock level when you buy a DVD video disc equipped with the parental lock feature in the future To change the parental lock level Follow steps 1 3 To change your 4 digit security code 1 After selecti...

Page 63: ... playing a PBC featured VIDEO CD DVD VCD Initial Setup 1 Press the buttons to select On Screen Language and press the ENTER button 2 Select a language pressing the buttons and press the ENTER button See page 59 On screen Language 3 Make your selection in the same manner as step 1 then step 2 See page 58 TV Shape See page 58 Audio Out Select DVD VCD CD Initial Setup TV Shape Audio Out Select On Scr...

Page 64: ...SG SH SI SK SL SM SN SO SQ SR SS ST SU SV SW TA TE TG TH TI TK TL TN TO TR TS TT TW UK UR UZ VI VO WO XH YO ZU Guarani Gujarati Hausa Hindi Croatian Hungarian Armenian Interlingua Interlingue Inupiak Indonesian Icelandic Hebrew Yiddish Javanese Georgian Kazakh Greenlandic Cambodian Kannada Kashmiri Kurdish Kirghiz Latin Lingala Laotian Lithuanian Latvian Lettish Malagasy Maori Macedonian Malayalam...

Page 65: ... etc cannot be performed Some discs may not do some of the functions When you press VCR MENU while watching a DVD with the connections of the DVD exclusive terminal S VIDEO cable or COMPONENT cable to a TV you cannot perform all the DVD functions In this case wait for approx 60 seconds with no pressing of any buttons 42 42 42 No CATV reception Check all CATV connections Station or CATV system prob...

Page 66: ... range F FWD REW time at 25 C 77 F Applicable disc Frequency range S N ratio Harmonic distortion Wow and flutter Dynamic range Operating conditions Specifications General input output supplied accessories GENERAL Input Output DVD VCR Video input 1 0 V p p 75 Ω negative sync pin jack x 2 Video output 1 0 V p p 75 Ω negative sync pin jack x 1 Audio input 300mV rms 50kΩ negative sync pin jack L R x 2...

Page 67: ...ranty for rental units begin with the first rental or thirty 30 days from the date of shipment to the rental firm whichever comes first Commercial Units Products sold and used for commercial use have a limited ninety 90 day warranty for all parts and labor Owner s Manual You should read the owner s manual thoroughly before operating this product You should complete and mail the enclosed Demographi...

Page 68: ...pect to the repair or replacement of any parts In no event shall TACP THI be liable for consequential or incidental damages No person agent distributor dealer or company is authorized to change modify or extend the terms of these warranties in any manner whatsoever The time within which an action must be commenced to enforce any obligation of TACP THI arising under the warranty or under any statut...

Page 69: ...onsible for compliance with the FCC Rules could void the user s authority to operate this equipment ALL 1 CAUTION THIS DIGITAL VIDEO PLAYER EMPLOYS A LASER SYSTEM TO ENSURE PROPER USE OF THIS PRODUCT PLEASE READ THIS USER S GUIDE CAREFULLY AND RETAIN FOR FU TURE REFERENCE SHOULD THE UNIT REQUIRE MAINTENANCE CONTACT AN AUTHORIZED SERVICE LOCATION SEE SERVICE PROCEDURE USE OF CONTROLS ADJUSTMENTS OR...

Page 70: ...TRY Do not push objects through any openings in this unit as they may touch dangerous voltage points or short out parts that could result in fire or electric shock Never spill or spray any type of liquid into the unit 17 OUTDOOR ANTENNA GROUNDING If an outside antenna or cable system is connected to the unit be sure the antenna or cable system is grounded to provide some protection against voltage...

Page 71: ...rench FRANCAIS then press ENTER 3 Press VCR MENU until the MENU screen is cleared 4 Setting the video channel Press POWER to turn on the DVD VCR Press DVD VCR to select the VCR mode Set the 3 4 Channel selector switch on the rear panel to CH 3 or 4 Turn ON the TV and set to CH 3 or 4 to correspond with the channel selected in step 3 Press TV VCR to select the VCR position Select any channel to rec...

Page 72: ...V CATV selection 1 2 3 4 TV VHF UHF channels CATV CABLE TV channels Press VCR MENU Press ENTER to select the TV or CATV mode The arrow indicates the selected mode Press SET or to select TV CATV Press VCR MENU until the menu screen is cleared Setting channels automatically Press ENTER Repeat left step 1 and press SET or to select AUTO CH MEMORY 1 2 To ADD DELETE channels 1 2 Repeat the step 1 on pa...

Page 73: ...digits in order Example Press 22 for 22 100 125 Press the 3 digits in order Example Press 110 for 110 Press Number button or CH to select the channel to be recorded Press REC 5 To stop recording 1 2 Load a prerecorded tape When loading a cassette tape without the erase prevention tab playback will start automatically Press PLAY Playback will start will appear on the screen for about 4 seconds To s...

Page 74: ...nd perform the DVD playback One touch Timer Recording OTR Load a cassette tape with the erase prevention tab intact The VCR will automatically turn on Press SP SLP to select the desired tape speed SP or SLP 1 2 The tape counter and SP or SLP will appear on the screen for about 4 seconds Set TV or CATV option to the appropriate position Press Number button or CH to select the channel to be recorded...

Page 75: ... VCR to select the DVD mode The DVD indicator will light Preparation Press OPEN CLOSE The disc tray will open Place a disc onto the tray Hold the disc position it with the printed label side up align it with the guides and place it in its proper position 1 2 3Press PLAY or OPEN CLOSE The disc tray closes automatically On the TV screen changes to Reading and then play back commences A menu screen w...

Page 76: ... within 30 angle on either side of the remote sensor up to a distance of Approx 7 meters It is forbidden by law to copy broadcast show broadcast on cable play in public and rent copyrighted material without permission This device does not tape record copy protected DVD Video Discs The device is not to be used for copying copyrighted content without the express written permission of the copyright o...

Reviews: