background image

241

SPECIFICA

TIONS,

AND OTHERS

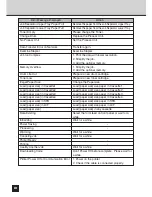
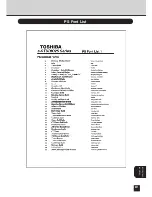
PS Font List

Summary of Contents for SmartLink e-STUDIO16

Page 1: ......

Page 2: ...tem The official name of Windows 98 is Microsoft Windows 98 Operating System The official name of Windows Me is Microsoft Windows Millennium Edition Operating System The official name of Windows 2000 is Microsoft Windows 2000 Operating System The official name of Windows XP is Microsoft Windows XP Operating System Microsoft Windows Windows NT Microsoft Internet Explorer and the brand names and pro...

Page 3: ...ork print functions procedures for set up and trouble shooting for the GA 1031 Printer Board and GF 1110 Network Interface Card Please thoroughly read this Operator s Manual prior to installation and use This manual should be used for reference to ensure cusp clean printed output and optimal networking functionality ...

Page 4: ...LITY 29 PEER TO PEER UTILITIES 30 Required Environment 30 INSTALLING THE PEER TO PEER UTILITY FOR TCP IP 31 Installation 31 INSTALLING THE PEER TO PEER UTILITY FOR IPX SPX 36 Installation 36 UNINSTALLING THE PEER TO PEER UTILITY 40 Uninstalling the Peer to Peer Utility for TCP IP 40 Uninstalling the Peer to Peer Utility for IPX SPX 41 SETUP THE PRINT SERVER WITH NetWare 3 x 43 NetWare 3 x SETUP 44...

Page 5: ...ion before setting up 66 Confirm Bindery Context 66 Set up Example 67 Setting up with PCONSOLE 68 Starting PCONSOLE 68 Creating a print queue 68 Creating the print server 69 Creating the printer 70 Assigning the print queue 71 SET UP THE PCONSOLE UTILITY OPTIONS 73 Setting Up Notify Options for the Printer 73 SETUP THE PRINT SERVER WITH NetWare 5 x 75 SETUP IN NDS MODE 76 Set up Example 76 Setting...

Page 6: ...37 Description of Screen 138 Getting Started with AGFA Font Manager 139 INSTALLING THE PRINTER DRIVER for Macintosh 141 INSTALLING THE PRINTER DRIVER 142 System Requirements 142 Copying the PPD File 143 Select the Driver 144 Option Setup 145 Printer Specific Options 147 NETPANEL FUNCTION 151 INSTALLING NETPANEL 152 Required Environments 152 Installing 153 Uninstalling 157 STARTING NETPANEL 159 Req...

Page 7: ...es 180 Paper Properties 181 Printer Setting Properties 182 PCL Font Properties 185 Group Management 186 NIC Configure 187 Protocols Configuration 187 IP Configuration 188 Apple Talk Configuration 189 System Configuration 190 Novell Configure 192 Novell Configuration 192 Device Password 193 Device Password 193 SERVER MANAGEMENT 194 Server Management Main Page 194 Server Management Main Page of Wind...

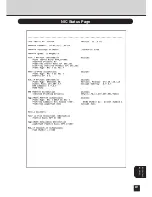
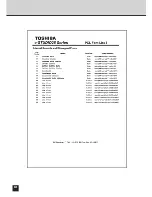
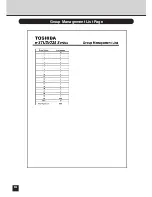
Page 8: ...FAULTS 226 TROUBLESHOOTING 227 NETPANEL ERROR 228 WHEN PRINTING CANNOT BE PERFORMED 231 SPECIFICATIONS AND OTHER INFORMATION 233 SPECIFICATIONS OF THE UNITS 234 Specification of the Printer Unit 234 Specification of the Network Interface Card 234 TEST PRINT SAMPLE 235 Demo Page 235 Configuration Page 236 NIC Status Page 237 PCL Font List 238 PS Font List 241 Status Log 243 Group Management List Pa...

Page 9: ...7 INTRODUCTION INTRODUCTION ...

Page 10: ...n order for the machine to operate on each network IPX SPX Network NetWare Server Novell NetWare 3 x 4 x 5 x Either PCONSOLE included with NetWare or NetWare Administrator must be available Client A computer that can be used as a NetWare client Protocol IPX SPX Microsoft Network Server Windows NT Server 4 0 Windows 2000 Server Client Windows 95 Windows 98 Windows Me Windows NT Workstation 4 0 Wind...

Page 11: ... Internet Information Server 5 0 or later For Windows 2000 Server Microsoft Internet Information Server 5 0 or later For Windows XP Home Edition Microsoft Internet Information Server 5 0 or later For Windows XP Professional Microsoft Internet Information Server 5 0 or later Netscape Navigator 3 0 or later or Internet Explorer 3 0 or later Client machine to use NetPanel The computer that can be con...

Page 12: ...nection on a peer to peer type network Print job transfer e STUIDIO16 20 25 Windows 95 client NetWare Server Windows NT Server Windows 2000 Server Windows 98 client Windows Me client Windows NT4 0 client Windows 2000 client Windows XP client Print job spool Print job transfer e STUIDO16 20 25 Windows 95 client Windows 98 client Windows Me client Windows NT4 0 client Windows 2000 client Windows XP ...

Page 13: ... x Setup in Bindery Mode Setup NetWare 4 x in NDS mode See SETUP THE PRINT SERVER WITH NetWare 4 x Setup in NDS Mode Setup NetWare 5 x in NDS mode See SETUP THE PRINT SERVER WITH NetWare 5 x Setup in NDS Mode Setup NetWare 3 x See SETUP THE PRINT SERVER WITH NetWare 3 x NetWare 3 x Setup Setup NetWare 4 x in bindery mode See SETUP THE PRINT SERVER WITH NetWare 4 x Setup in Bindery Mode Setup NetWa...

Page 14: ...er Utility for IPX SPX See USING WITH PEER TO PEER UTILITY Peer to Peer Utility for IPX SPX Setup Install the appropriate Printer Driver for the Operating System used and configure options See INSTALLING THE PRINTER DRIVER for Windows Install the appropriate Printer Driver for the Operating System used and configure options See INSTALLING THE PRINTER DRIVER for Windows Control Panel Setup Assign t...

Page 15: ...13 NETWORK SETUP NETWORK SETUP ...

Page 16: ...ddress using MAP P 19 The IP address can be assigned from a remote computer while also configuring various TCP IP settings such as WINS name SUPPLEMENT You can use the TOSHIBA Status Display to assign an IP address as well as configure other protocol settings However the e STUDIO16 20 25 must be connected locally via the LPT port in order for the TOSHIBA Status Display to assign an IP address If a...

Page 17: ... NETWARE 5 When the IP address can be obtained from the DHCP server continue to Use DHCP Server When the IP address is assigned manually continue to Assign IP Address Manually TCP IP 01 BOOTP DHCP 02 IP ADDRESS 03 SUBNET MASK SUPPLEMENTS When the IP address is obtained from the DHCP server TCP IP printing cannot be performed because the IP address changes each time the printer is powered on If the...

Page 18: ...TWORK menu TCP IP 01 BOOTP DHCP 02 IP ADDRESS 03 SUBNET MASK 4 Press on the Dial Keypad to select COMPLETE If you want to cancel the TCP IP setting press NETWORK 01 COMPLETE 02 TCP IP 03 NETWARE After 2 sec NETWORK Operation Completed INITIAL SETUP 01 DATE TIME 02 LANGUAGE 03 TERMINAL ID After 2 sec NETWORK Initializing 5 The network setting is executing The Initializing message appears After 2 se...

Page 19: ...isplay returns to the NETWORK menu TCP IP 01 BOOTP DHCP 02 IP ADDRESS 03 SUBNET MASK 5 Press on the Dial Keypad to select COMPLETE If you want to cancel the TCP IP setting press NETWORK 01 COMPLETE 02 TCP IP 03 NETWARE SUPPLEMENT When you want to assign the Subnet Mask and Gateway address continue the operation after the display returns to the TCP IP menu The set up is the same as the IP address T...

Page 20: ...work setting is executing The Initializing message appears After 2 sec the Operation Completed message appears Then the display returns to the INITIAL SETUP menu The Network Interface Card begins to initialize INITIAL SETUP 01 DATE TIME 02 LANGUAGE 03 TERMINAL ID After 2 sec ...

Page 21: ...s address for the Gateway address 1 Select Programs from the Start menu and click on MAP Setup in the Map folder The MAP Setup screen appears 2 Check on either Search for IPX based printers or Search for IP based printers depending on your network environment Check Search for IPX based printers if your network includes NetWare servers Check Search for IP based printers if your network includes DHC...

Page 22: ...rom the Start menu and click on MAP in the Map folder Start searching network printers Display the search results with your default browser 5 Click on your printer unit When you search for printers based on the IPX SPX protocol the printer unit name is displayed as MFP_XXXXXX where the X s correspond to the NIC serial number When you search for printers based on the TCP IP protocol the printer s I...

Page 23: ...e next time the printer is powered on instead of obtaining an IP address from the DHCP server In order to avoid any network address conflicts it is recommended that you do not use the IP Address in NVRAM option when using the Enable DHCP option If there is a WINS server and you want to use a WINS name for the NIC enter the NetBIOS Name and the IP address of the Primary NetBIOS Name Server When usi...

Page 24: ...heet is not printed use the ping command to confirm the IP address is assigned correctly Start the MS DOS Prompt and at the command prompt enter ping xxx xxx xxx xxx xxx xxx xxx xxx is the IP address that you assigned to the NIC Repeat this until the NIC replies 9 Scroll down to the bottom of the page 10 Enter a password and click on Accept Settings The default password is sysadm The entered passw...

Page 25: ...e Message Display Panel Press to display the desired item INITIAL SETUP 02 LANGUAGE 03 TERMINAL ID 04 NETWORK 4 Press on the Dial Keypad to select NETWARE NETWORK 01 COMPLETE 02 TCP IP 03 NETWARE NETWARE 01 IPX SPX 02 FRAME TYPE 5 Press on the Dial Keypad to select IPX SPX IPX SPX 1 ENABLE 2 DISABLE 6 Press on the Dial Keypad to select ENABLE The display returns to the TCP IP menu NETWARE 01 IPX S...

Page 26: ...e network uses 802 2 frame type Press to select 802 3 ETHERNET II The network uses 802 3 frame type Press to select ETHERNET II 802 3 SNAP The network uses ETHERNET II frame type Press to select ETHERNET SNAP 802 2 The network uses ETHERNET SNAP frame type FRAME TYPE 1 AUTO 2 802 2 3 802 3 FRAME TYPE 3 802 3 4 ETHERNET II 5 ETHERNET SNAP Press two times 9 Press The display returns to the NETWORK m...

Page 27: ...E TIME 02 LANGUAGE 03 TERMINAL ID After 2 sec NETWORK Initializing 11 The network setting is executing The Initializing message appears After 2 sec the Operation Completed message appears Then the display returns to the INITIAL SETUP menu The Network Interface Card begins to initialize ...

Page 28: ...anel Press to display the desired item INITIAL SETUP 02 LANGUAGE 03 TERMINAL ID 04 NETWORK 4 Press on the Dial Keypad to select APPLE TALK APPLE TALK is outside of the Message Display Panel Press to display the desired item NETWORK 02 TCP IP 03 NETWARE 04 APPLE TALK ETHER TALK 1 ENABLE 2 DISABLE 6 Press on the Dial Keypad to select ENABLE The display returns to the ETHER TALK menu APPLE TALK 01 ET...

Page 29: ...03 NETWARE After 2 sec NETWORK Operation Completed INITIAL SETUP 01 DATE TIME 02 LANGUAGE 03 TERMINAL ID After 2 sec NETWORK Initializing 9 The network setting is executing The Initializing message appears After 2 sec the Operation Completed message appears Then the display returns to INITIAL SETUP menu The Network Interface Card begins to initialize ...

Page 30: ...28 ...

Page 31: ...29 USING WITH PEER TO PEER UTILITY USING WITH PEER TO PEER UTILITY ...

Page 32: ... SPX protocol Choose either one according to the network protocol used Operating system OS Windows 95 Windows 98 Windows Me Windows NT 4 0 Windows 2000 Windows XP Network protocol TCP IP protocol Operating system OS Windows 95 Windows 98 Windows Me Windows NT 4 0 Windows 2000 Windows XP Network protocol IPX SPX protocol Required Environment For TCP IP Protocol For IPX SPX Protocol SUPPLEMENTS The ...

Page 33: ... the TCP IP protocol has been activated on the computer If not install it To install the protocol see the Windows HELP menu on the computer 3 Click on Setup utilities Installation 1 Insert the CD ROM into the CD ROM drive The menu screen appears If the menu screen is not automatically displayed or when the Peer to Peer Utility for TCP IP is installed via the network double click on TOSHIBA_e STUDI...

Page 34: ... the folder for the files to be installed then click on Next 7 Click on Yes The Choose Destination Directory screen appears 6 Installation Notes are displayed 5 Click on Next 4 Click on IP P2P setup The welcome screen appears ...

Page 35: ...r to be searched 0 Searches only the local area network where the workstation is directly connected 2 to 14 Searches the local area network on which the workstation is directly connected and the networks which are accessible within the specified number of routers 15 Searches all the networks that are connected 12 In most cases leave the IP Port as it is shown It is the default port number of the p...

Page 36: ...ame printer name 14 Click on Printers The Printers screen appears Make sure the printer is displayed under the Available Printers section Check if s is displayed in the Flag column If it is not displayed click on Select When the machine is displayed under Available Printers go to Step 20 When the machine is not displayed under Available Printers go to the next step 15 Click on Find Printers The sy...

Page 37: ...ed printer then click on Delete 18 The printer is added to the Available Printers list 19 Click on OK 20 21 Click on OK The completion message is displayed 22 Click on the OK SUPPLEMENTS After the peer to peer utility for TCP IP is installed please continue the operation for installing the printer driver The IP P2P program group and icon are added to the Start Menu You can re configure using the p...

Page 38: ...the Peer to Peer Utility for IPX SPX is installed via the network double click on TOSHIBA_e STUDIO16_20_25 exe in the Menu folder of the CD ROM which may be found in Windows Explorer 3 Click on Setup utilities NOTE When using the peer to peer utility for IPX SPX where no NetWare server is on the network it is recommended that you change the frame type of the IPX SPX compatible protocol installed o...

Page 39: ...Click on Next The Installation Notes screen appears 4 Click on IPX P2P setup The welcome screen appears 6 Click on Yes The Installation Notes screen appears 7 If necessary change the folder for the files to be installed then click on Next ...

Page 40: ...rk and displays the printer s found on the network NOTE If the printer is not found on the network make sure that the network conditions are satisfied 12 Make sure the printer displayed under Available Printers shows S flag in the Flags column The system begins searching for printers on your network and displays the printer s found on the network 13 Click on OK The Information screen appears 8 Cli...

Page 41: ...stallation is completed SUPPLEMENTS After the peer to peer utility for IPX SPX is installed please continue the operation for installing the printer driver The IPX P2P program group and icon are added to the Start Menu You can re configure using the program ...

Page 42: ...ams 2 5 Click on Yes The peer to peer utility for TCP IP is uninstalled NOTE Before uninstalling delete the printer driver or change the port of the printer driver If you uninstall the Peer to Peer utility before deleting the printer driver or changing the port the Peer to Peer utility may not be uninstalled completely To uninstall the printer driver see INSTALLING THE PRINTER DRIVER for Windows U...

Page 43: ...n OK Restart the computer UninstallingthePeer to PeerUtilityforIPX SPX 4 Select IPX P2P then select Add Remove See the illustration on the right Click on Start then select Settings 1 3 Select the Control Panel Double click on Add Remove Programs 2 ...

Page 44: ...42 6 Click on Yes The peer to peer utility for TCP IP is uninstalled 7 8 Click on OK Restart the computer 5 Click on OK ...

Page 45: ...43 SETUP THE PRINT SERVER WITH NetWare 3 x SETUP THE PRINT SERVER WITH NetWare 3 x ...

Page 46: ...mple is performed under the conditions stated below Check the conditions of the environment you are using Server NetWare server name NWSRV They must correspond with the names to be set for the printer using MAP Contents to be set Name the following as desired Print queue name TOS_QUE Printer name TOS_PRN Print server name TOS_SRV They must correspond with the names to be set for the printer using ...

Page 47: ...ng a print queue A list of file servers is displayed Select the file server on which you want to install the print server and press the Enter key If the name of the file server you want is not displayed press the Insert key to get a list of file servers Log in to the file server To be performed on the workstaiton Press the Esc key to return to the Available Options menu Print Queues appear Choose ...

Page 48: ...ame and press the Enter key Press the Insert key Choose Print Server Information from the Available Options menu and press the Enter key Enter the name of the print queue at New Print Queue Name and press the Enter key Press the Esc key The display returns to showing the Available Options menu 4 5 6 1 2 3 4 ...

Page 49: ...the Printer Configuration from the Printer Server Configuration Menu and press the Enter key Select a printer number where Not installed is displayed from the Configured Printers box and press the Enter key Configured Printers appears The Print Server Configuration Menu appears Enter the printer name and press the Enter key Printer X Configuration appears X is the printer number selected Confirm t...

Page 50: ...Esc key The printer is added to the Configured Printers list The display returns to showing the Print Server Configuration menu Choose Remote Other Unknown and press the Enter key Choose Yes and press the Enter key 11 12 13 14 15 16 ...

Page 51: ...g a print queue Defined Printers appears Select a created printer from Defined Printers and press the Enter key Choose Queues Serviced by Printer from the Print Server Configuration menu The queue assigning screen appears Press the Insert key 1 2 3 4 5 ...

Page 52: ...ecided in advance Enter the priority and press the Enter key The queue is assigned When assigning more than one queue repeat steps 5 through 9 Press the Esc key six times When Exit PConsole appears choose Yes and press the Enter key 6 7 8 9 10 11 SUPPLEMENTS Please set up the printer configuration for NetWare using MAP See MAP Setup NetWare at MAP ...

Page 53: ...n four hops and have no more than eight ticks propagation delay For extremely large or complex networks this allows a bounded search time on start up If the print server must attach to file servers beyond this range or if you wish to accelerate start up by eliminating the need to search all servers in the four hops eight ticks radius the file servers with which the print server is to operate may b...

Page 54: ...on the Print Server Configuration menu Select the printer from the Defined Printers list The screen appears which is blank for an initial installation Press the Insert key View a list of Notify Candidates Select the user or group from the list Press the Esc key and then after asked to Save Changes choose Yes Press the Esc key at each screen until you reach the Print Server Configuration menu If yo...

Page 55: ...to the menu Install the Print Server Card on each of the primary file servers The Preferred File Server can be identified within the Network Interface Card itself The registration of the preferred file server is offered at MAP If a preferred file server is listed the Network Interface Card will attach to this identified file server instead of initiating the automatic search for file servers If the...

Page 56: ...54 ...

Page 57: ...55 SETUP THE PRINT SERVER WITH NetWare 4 x SETUP THE PRINT SERVER WITH NetWare 4 x ...

Page 58: ...tWare server name NWSRV Directory tree name ORG They must correspond with the names to be set for the printer using MAP or NetPanel Print Server Context ORG They must correspond with the names to be set for the printer using MAP or NetPanel Contents to be set Name the following as desired Print queue name TOS_QUE Printer name TOS_PRN Print server name TOS_SRV They must correspond with the names to...

Page 59: ...istrator is found in the Public directory of the SYS volume Open the Public directory with Explorer and start Nwadmn3x exe If you are using Intranet Ware on Windows 95 Windows 98 or Windows Me start Nwadmin95 exe found in the Win95 directory of the Public directory Log in to the NetWare server as an Administrator Perform this on the workstation 1 2 ...

Page 60: ...58 Creating a print queue Choose Create in the Object menu Click on the container object to create the printer Choose Print Queues and click on OK The Class of New Object window appears 1 2 3 4 ...

Page 61: ...e Name The Select Object window appears Click on Browse of Print Queue Volume indicated by A in the figure at right Create Print Queues appears Click on Create Select a volume to create a print queue from the Available Object list and click on OK The print queue is created A 5 6 7 8 9 10 11 ...

Page 62: ...r Name Choose Printer and click on OK Choose Create in the Object menu The Class of New Object window appears Click on the container object to create the printer Turn on the check box for Define additional properties and click on Create The details of the created printer are displayed 1 2 3 4 5 6 7 8 ...

Page 63: ...screen switches to Assignments Click on Add Click on Assignments The Select Object window appears Select a created queue from Object and click on OK The screen switches to Configuration Click on of Printer Type and choose Other Unknown Click on Configuration 1 2 3 4 5 6 7 8 ...

Page 64: ...62 Click on OK The printer is created 9 10 ...

Page 65: ... in the Object menu The Class of New Object window appears Choose Print Server and click on OK The Create Print Server window appears Enter the name of the print server under Print Server Name Turn on the check box for Define additional properties and click on Create The details of the created print server are displayed 1 2 3 4 5 6 7 ...

Page 66: ...ct Object window appears The screen switches to Assignments Click on Add Click on Assignments The printer name is displayed under Printer Click on OK Select a created printer from the Available Object list and click on OK 1 2 3 4 5 6 7 ...

Page 67: ...er is created 8 SUPPLEMENTS Please set up the printer configuration for NetWare NDS mode using MAP See MAP Setup NetWare at MAP You can also set up the printer configuration for NetWare NDS mode using NetPanel See NETPANEL Printer Management Novell Configure ...

Page 68: ... steps by through the console prompt at the NetWare server Type load install and press Enter key Select NCF Files Options from the menu Select Edit AUTOEXEC NCF from the menu View the screen to Edit AUTOEXEC NCF file Search the file to see if you have a statement similar to the following included SET BINDERY CONTEXT 0U ENG If the Bindery Context is SET BINDERY CONTEXT 0U ENG that means the server ...

Page 69: ... the environment you are using Server NetWare server name NWSRV They must correspond with the names to be set for the printer using MAP Directory tree name ORG Contents to be set Name the following as desired Print queue name TOS_QUE Printer name TOS_PRN Print server name TOS_SRV They must correspond with the names to be set for the printer using MAP ...

Page 70: ...ery mode Log in to the NetWare server as an Administrator To use the bindery service log in through bindery connection Perform this on the workstation Print Queues appears Choose Print Queues and press the Enter key Enter the print queue name at New Print Queue Name and press the Enter key Press the Insert key The display returns to showing the Available Options menu Press the Esc key 1 2 1 2 3 4 ...

Page 71: ...s the Insert key Enter the print server name at New Print Server Name and press the Enter key Print Server appears The message as shown in the figure at right appears Press the Enter key Choose Print Server from the Available Options menu and press the Enter key 1 2 3 4 5 6 ...

Page 72: ...inter name at Printer and press the Enter key Defined Printers appears The Print Server Information menu appears Choose Printer from the Print Server Information menu and press the Enter key Choose the created print server and press the Enter key 1 2 3 4 5 6 ...

Page 73: ...the Parallel at Printer Type and press the Enter key Choose Other Unknown from Printer Type and press the Enter key NetWare Server Print Queue appears Press the Insert key Choose See list of Assign Print Queues and press the Enter key Select the created queue from Available Print Queues and press the Enter key Up to 10 queues can be selected When more than one queue is to be selected the priority ...

Page 74: ...ps 5 through 9 Press the Esc key twice When Save Changes appears choose Yes and press the Enter key Press the Esc key four times When Exit appears choose Yes and press the Enter key 10 11 12 13 14 15 SUPPLEMENTS Please set up the printer configuration for NetWare Bindery mode using MAP See MAP Setup NetWare at MAP ...

Page 75: ...r in the Defined Printers menu Enter a number for the First and Next intervals for notifying users about printer problems and press Enter key The First interval is the number of seconds the network waits before it notifies users about a print job problem The Next interval specifies how often in seconds users are notified Select the user or user group from the Notify Candidates screen The Notify In...

Page 76: ...74 ...

Page 77: ...75 SETUP THE PRINT SERVER WITH NetWare 5 x SETUP THE PRINT SERVER WITH NetWare 5 x ...

Page 78: ... using MAP or NetPanel Print Server Context ORG They must correspond with the names to be set for the printer using MAP or NetPanel Contents to be set Name the following as desired Print queue name TOS_QUE Printer name TOS_PRN Print server name TOS_SRV They must correspond with the names to be set for the printer using MAP or NetPanel NOTES Set up in the print server mode The remote printer mode c...

Page 79: ...tor is found in the Public Win32 directory of the SYS volume Open the Win32 directory with Explorer and start Nwadmn3x exe If you are using Intranet Ware on Windows 95 Windows 98 or Windows Me start Nwadmin95 exe found in the Win95 directory of the Public directory Log in to the NetWare server as an Administrator This is performed on the workstation 1 2 ...

Page 80: ...78 Creating a print queue Choose Create in the Object menu Click on the container object to create the printer Choose Print Queues and click on OK The Class of New Object window appears 1 2 3 4 ...

Page 81: ...ueue Name The Select Object window appears Click on Browse Print Queue Volume indicated by A in the figure at right Create Print Queues appears Click on Create Select a volume to create a print queue from the Available Object list and click on OK The print queue is created A 5 6 7 8 9 10 11 ...

Page 82: ...r Name Choose Printer and click on OK Choose Create in the Object menu The Class of New Object window appears Click on the container object to create the printer Turn on the check box for Define additional properties and click on Create The details of the created printer are displayed 1 2 3 4 5 6 7 8 ...

Page 83: ...screen switches to Assignments Click on Add Click on Assignments The Select Object window appears Select a created queue from Object and click on OK The screen switches to Configuration Click on of Printer Type and choose Other Unknown Click on Configuration 1 2 3 4 5 6 7 8 ...

Page 84: ...82 Click on OK The printer is created 9 10 ...

Page 85: ... in the Object menu The Class of New Object window appears Choose Print Server and click on OK The Create Print Server window appears Enter the name of the print server under Print Server Name Turn on the check box for Define additional properties and click on Create The details of the created print server are displayed 1 2 3 4 5 6 7 ...

Page 86: ...ct Object window appears The screen switches to Assignments Click on Add Click on Assignments The printer name is displayed under Printer Click on OK Select a created printer from the Available Object list and click on OK 1 2 3 4 5 6 7 ...

Page 87: ...er is created 8 SUPPLEMENTS Please set up the printer configuration for NetWare NDS mode using MAP See MAP Setup NetWare at MAP You can also set up the printer configuration for NetWare NDS mode using NetPanel See NETPANEL Printer Management Novell Configure ...

Page 88: ...86 ...

Page 89: ...87 SETUP THE PRINT SERVER WITH Windows NT 4 0 2000 SETUP THE PRINT SERVER WITH Windows NT4 0 2000 ...

Page 90: ...es Check the following before set up The e STUDIO16 20 25 and the computer are connected to the network The printer is powered up The printer has been configured with an IP address The TCP IP protocol and Microsoft TCP IP Printing Service are installed on Windows NT Choose Control Panel Click on Start and choose Settings Click on the Services tab Double click on Network Check that Microsoft TCP IP...

Page 91: ...g on to Windows NT as a user with Administrator or Power User group privileges Choose Printers to open the Printer Folder Double click on Add Printer to start the Printer Wizard Check that My computer is selected and click on Next 1 2 3 4 5 The printer created on the Windows NT server serves as a print server ...

Page 92: ...rinter Ports Type PORT1 at Name of printer or print queue on that server PORT1 must be entered in capital letters Enter the IP address for the printer at Name or address of server providing lpd Click on Close Click on OK Click on Add Port 6 7 9 10 11 12 8 ...

Page 93: ...led enter D ENGLISH ESTUDIO WINNT PCL6 Where the CD ROM drive is the D drive When the PS driver is installed enter D ENGLISH ESTUDIO WINNT PS Where the CD ROM drive is the D drive Click on Have Disk Verify that the check box for the added port IP address of the printer is turned on then click on Next The IP address of the printer is added to the list of Available ports in the Add Printer Wizard 13...

Page 94: ...y other printer drivers have been already installed select whether or not this printer will be used as the default printer If Yes this printer will be displayed first when printing applications 21 22 Click on Next Select the printer driver to be installed 19 20 Select Windows 95 from the list 23 Click on Next 24 ...

Page 95: ...for Windows 95 98 Me at Copy files from When the PCL6 driver is installed enter D ENGLISH ESTUDIO WIN95_98 PCL6 Where the CD ROM drive is the D drive When the PS driver is installed enter D ENGLISH ESTUDIO WIN95_98 ESTUDIO PS Where the CD ROM drive is the D drive 27 SUPPLEMENT Windows NT can save the printer drivers for Windows 95 98 Me so that the Windows 95 98 Me clients can install the printer ...

Page 96: ...94 The printer is created 29 SUPPLEMENT To install the printer driver to the client computer see INSTALLING THE PRINTER DRIVER for Windows INSTALLATION BY ADDING A PRINTER ...

Page 97: ...Shared Printer Click on Start and choose Settings Log on to Windows 2000 as a user with Administrator or Power User group privileges Choose Printers to open the Printer Folder Double click on Add Printer to start the Printer Wizard Click on Next 1 2 3 4 5 The printer created on the Windows 2000 server serves as a print server SUPPLEMENT You can also set up the print server on Windows XP by followi...

Page 98: ... the local area network with the TCP IP protocol select Local printer Printing can be performed using the TCP IP Printing See When Using the TCP IP Printing and continue the installation When the machine is connected to the Internet or Intranet select Network printer Printing can be performed using the IPP Internet Printing Protocol See When Using the IPP and continue the installation 5 When Using...

Page 99: ...ter the IP address of this machine at Printer Name or IP Address The port name is automatically entered at Port Name If required rename the port name 9 Click on Next 10 Select Custom and click on Settings The Configure Standard TCP IP Port Monitor screen appears 11 ...

Page 100: ...rinting in the Raw type the entire process of preparing the print job is done on the client computer LPR Printing is done through the LPD service When printing in the LPR type the process of preparing the print job is done on the print server When Raw is selected go to Step 13 When LPR is selected go to Step 14 12 Enter PORT1 for the Queue Name and check on SNMP Status Enabled public is automatica...

Page 101: ...fy the folder that contains drivers for Windows 2000 XP at Copy manufacturer s files from When the PCL6 driver is installed enter D ENGLISH ESTUDIO 2000 PCL6 Where the CD ROM drive is the D drive When the PS driver is installed enter D ENGLISH ESTUDIO 2000 PS Where the CD ROM drive is the D drive 19 20 21 Click on OK 15 Click on Next 16 Click on Finish 17 ...

Page 102: ...t Rename the Share Name if required Change the Printer name if necessary and click on Next 24 25 Enter the Location and Comment for the printer information and click on Next 26 Click on Next Select the printer driver to be installed 22 23 ...

Page 103: ... SUPPLEMENT When you want to enable the client computer to install the printer driver from the Windows 2000 server you must install the printer driver for Windows95 98 Me NT4 0 See Install the Printer Drivers for Different Version of Windows Choose Yes or No as necessary and click on Next 27 ...

Page 104: ...ting can be performed via the Internet Printing Protocol Select Connect to a printer on the Internet or on your intranet and enter http xxx xxx xxx xxx 631 Print at URL xxx xxx xxx xxx is the IP address of the machine The Connect to Printer screen appears 7 Click on OK 8 Click on Have Disk The Install From Disk screen appears 9 ...

Page 105: ...dows 2000 XP at Copy manufacturer s files from When the PCL6 driver is installed enter D ENGLISH ESTUDIO 2000 PCL6 Where the CD ROM drive is the D drive When the PS driver is installed enter D ENGLISH ESTUDIO 2000 PS Where the CD ROM drive is the D drive 10 11 12 Click on Finish 15 Click on OK Select the printer driver to be installed 13 14 ...

Page 106: ...104 The printer is created 16 ...

Page 107: ...oose Settings Log on to Windows NT as a user with Administrator or Power User group privileges Choose Printers to open the Printer Folder Select the printer driver and select Sharing from the File menu The Sharing screen of printer properties appears Click on Additional Drivers The Additional Drivers screen appears 1 2 3 4 5 SUPPLEMENT Windows XP clients can install the printer driver from the Win...

Page 108: ...98 Printer Drivers screen appears 9 Specify the folder that contains drivers for Windows 95 98 Me at Copy files from When the PCL6 driver is installed enter D ENGLISH ESTUDIO WIN95_98 PCL6 Where the CD ROM drive is the D drive When the PS driver is installed enter D ENGLISH ESTUDIO WIN95_98 PS Where the CD ROM drive is the D drive 10 Click on OK The system starts to copying files for the printer d...

Page 109: ...D ENGLISH ESTUDIO WINNT PCL6 Where the CD ROM drive is the D drive When the PS driver is installed enter D ENGLISH ESTUDIO WINNT PS Where the CD ROM drive is the D drive 13 Click on OK 14 The printer drivers are installed 15 SUPPLEMENT To install the printer driver to the client computer see INSTALLING THE PRINTER DRIVER for Windows INSTALLATION BY ADDING A PRINTER ...

Page 110: ...108 ...

Page 111: ...109 INSTALLING THE PRINTER DRIVER for Windows INSTALLINGTHE PRINTER DRIVER for Windows ...

Page 112: ...cations and printing a document with EPS images SUPPLEMENT Several printer drivers may be installed on one computer In order to utilize the printer functionality of the e STUDIO16 20 25 on your computer the printer drivers need to be installed The printer drivers are contained in the CD ROM included in the Printer kit NOTES The printer drivers are provided for each OS Be certain to use the right p...

Page 113: ... selection step by step and setup of the driver See page 112 Install by adding a printer This is performed by using the Add Printer wizard in Windows This type of installation is useful when the exclusive installer is not available See page 118 SUPPLEMENTS When using the Peer to Peer utility be certain to install the Peer to Peer Utility before installing the printer driver If the e STUDIO16 20 25...

Page 114: ...from all other programs in Windows SUPPLEMENTS This manual describes settings for Windows 95 The setting details are the same when Windows 98 Windows Me Windows NT4 0 Windows 2000 or Windows XP is used To install the printer driver on Windows NT4 0 Windows 2000 or Windows XP Full Control access rights are necessary A log on must be performed as a member of the Administrators or Power Users group F...

Page 115: ...g group number ask your administrator The Setup Type screen appears 5 Click on Next The Software License Agreement screen appears Please be sure to read through the agreement 4 Click on the appropriate Setup for Windows Version Click on Setup for Windows 95 98 Me for Windows 95 98 Me Click on Setup for WindowsNT4 0 for Windows NT4 0 Click on Setup for Windows2000 XP for Windows 2000 and Windows XP...

Page 116: ...ter Select this when the printer is connected to a peer to peer network Network Printer Select this when the printer is connected to a client server network 8 Select the Emulation and Default Paper Emulation This designates the type of driver Check the emulation to be used Multiple drivers may be installed Default Paper Select the default paper to be used 11 Click on Next If you selected Local Pri...

Page 117: ... Click on Browse You can also input or browse for the network path or network queue name of the printer in the field The Browse for Printer screen appears 14 Select the network printer and click on OK 15 Click on Next The Printer Name screen appears ...

Page 118: ...ct the drive and path for the components to be installed Change Path button The Select Folder screen appears from which a folder can be selected or created to install the application into Disk Space button The Available Disk Space screen appears from which a disk drive with sufficient space to install the application can be selected 19 Click on Next The Select Program Folder screen appears 16 Ente...

Page 119: ...1 Click on Next Start the file copy After completing the file copy the Setup Complete screen appears 22 Click on Finish 23 Complete the installation 20 Select the Program Folder to be created and click on Next The Start Copying Files screen appears ...

Page 120: ...es how to install the printer driver with the Add Printer function in Windows Windows 95 98 Me 1 Click on Start select Settings and then click on Printers The Printers folder opened 2 Double click on Add Printer The Add Printer Wizard begins 3 Click on Next ...

Page 121: ...eer network Network Printer Select this when the printer is connected to a client server network 5 Click on Next When you select Local Printer go to Step 9 When you select Network Printer go to Step 6 6 Click on Browse You can also input or browse for the network path or network queue name of the printer The Browse for Printer screen appears 7 Select the network printer and click on OK ...

Page 122: ...OM drive 11 Enter the path to the printer driver located in the CD ROM If you want to install the PCL 6 printer driver enter D ENGLISH ESTUDIO WIN95_98 PCL6 where the CD ROM driver is the D drive If you want to install the PS printer driver enter D ENGLISH ESTUDIO WIN95_98 PS where the CD ROM driver is the D drive 12 Click on OK 8 Click on Next When the selected network printer is created by Windo...

Page 123: ... printer drivers are already installed select whether or not this new printer should be designated as the default printer If Yes is selected the e STUDIO16 20 25 will be displayed as the first printer for printing your applications 16 Select to print a test page or not then click on Finish The printer driver is installed If Yes is selected for a test print the printer test is performed ...

Page 124: ...rinter Wizard begins 3 Select how the printer is to be controlled My Computer Select this when the printer is connected on a peer to peer network Network printer server Select this when the printer is connected on a client server network 4 Click on Next When you select My Computer go to Step 7 When you select Network printer server go to Step 5 ...

Page 125: ...gnated as the default printer If Yes is selected the printer s name will be displayed as the first printer for printing documents If the server connected to the e STUDIO16 20 25 is not a Windows NT server the message Click on OK if you wish to install the driver on your local machine appears Click on OK and go to Step 8 6 Click on Finish Installing the printer driver is complete The printer driver...

Page 126: ...ter D ENGLISH ESTUDIO WINNT PCL6 where the CD ROM driver is the D drive If you want to install the PS printer driver enter D ENGLISH ESTUDIO WINNT PS where the CD ROM driver is the D drive 11 Click on OK 13 If necessary change the Printer name then click on Next If other printer drivers are already installed select whether or not this new printer should be designated as the default printer If Yes ...

Page 127: ...125 INSTALLING THE PRINTER DRIVER for Windows 14 Select Not Shared then click on Next 15 Choose whether to print a test page or not then click on Finish ...

Page 128: ...rinter Wizard When using on Windows XP click on Add a printer link in the Printer Tasks menu Click on Next 2 3 1 Click on Start select Settings and then click on Printers When using on Windows XP click on Start and Printers and Faxes The Printers folder is opened ...

Page 129: ...or a printer then click on Next 7 Select the printer connected to the server and click on Next If the server connected to the printer has source files of the printer driver for Windows 2000 XP installation of the printer driver begins When other printer drivers are already installed select whether or not this new printer should be designated as the default printer If Yes is selected the printer na...

Page 130: ...ears 11 Insert the CD ROM included with the Printer kit into the CD ROM drive 12 Enter the path to the printer driver located in the CD ROM If you want to install the PCL 6 printer driver enter D ENGLISH ESTUDIO 2000 PCL6 where the CD ROM driver is the D drive If you want to install the PS printer driver enter D ENGLISH ESTUDIO 2000 PS where the CD ROM driver is the D drive 13 Click on OK ...

Page 131: ...Choose whether to print a test page or not then click on Next 15 If necessary change the Printer name then click on Next If other printer drivers are already installed select whether or not this new printer should be designated as the default printer If Yes is selected the printer name will be displayed as the first printer for printing your applications ...

Page 132: ...ing Copying the PageMaker PPD file If you would like to print using the PS printer driver from Adobe PageMaker you must copy the PPD file to your Adobe PageMaker program folder 1 Insert the CD ROM into the CD ROM drive 2 Browse the English eSTUDIO PageMaker folder in the CD ROM 3 Copy the TSBEST16 PPD to RSRC ENGLISH PPD4 folder in the Adobe PageMaker Program folder The directory of PPD4 folder in...

Page 133: ...XP click on start and Printers and Faxes 2 Select the icon for the printer and select Properties from the File menu The properties screen of the printer driver appears 3 Click on Option tab Before printing with the pritner driver you have to set the Options Configuration at the printer driver The functions of the printer driver for printing vary depeding on the Options ...

Page 134: ...how the Large Capacity Feeder is installed The Large Capacity Feeder is an option for e STUDIO20 25 Sereis only Stack Feed Bypass Selects this when the Bypass Tray is installed Others Select this when other optional devices are installed SUPPLEMENT For further information about Option tab refer to the OPERATOR S MANUAL FOR PRINTER FUNCTION Local Setup SETTING FOR PRINTING Option Tab 5 Click on OK ...

Page 135: ...tart removing programs SUPPLEMENT If the printer drivers were installed through the Add Printers or Plug and Play process then delete the printer icons from the Printer folder to uninstall the printer driver Please make sure that all Toshiba printer utilities have been shut down before uninstalling 3 After programs have been removed click on OK The INFORMATION screen appears If the TOSHIBA Status ...

Page 136: ...lled on your computer 3 Click on the Setup Font Manager 4 Click on the Setup The Choose Setup Language screen appears 1 Insert the CD ROM into the CD ROM drive The menu screen appears If the menu screen is not automatically displayed or when the AGFA Font Manager is installed via the network double click on TOSHIBA_e STUDIO16_20_25 exe in the Menu folder of the CD ROM that may be found in Windows ...

Page 137: ...le Disk Space screen appears from which a disk drive with sufficient space to install the application can be selected 8 7 Check the components you want to install Programs Files Install the AGFA Font Manager program Fonts Install the default fonts to the AGFA Font Manager 6 Click on Next The Select Components screen appears 9 Click on Next Installation of the AGFA Font Manager and fonts begins 5 S...

Page 138: ... installation is completed 11 SUPPLEMENT When installing the AGFA Font Manager from Windows 95 the message that announces you to restart your computer is displayed It is recommended to restart your computer before using the AGFA Font Manager on Windows 95 IMPORTANT While installation is under way do not take out the CD ROM Otherwise the AGFA Font Manager may not be installed correctly ...

Page 139: ... AGFA Font Manager 2 0 program group folder in the Programs folder The Confirm File Deletion screen appears 3 Click on OK Complete the uninstall process 2 Click on Yes Start removing programs SUPPLEMENT When uninstalling the AGFA Font Manager from Windows 95 the message that announces you to restart your computer is displayed It is recommended to restart your computer after uninstalling the AGFA F...

Page 140: ...ont grouping allows you to create custom collections of fonts and give them meaningful names Font collections can represent different working scenarios different users of your computer or different styles you want to convey AGFA Font Manager can manage your fonts in Windows It can Install and uninstall fonts in Windows Load new fonts from distribution diskettes Search your local and network drives...

Page 141: ...nts list or Installed Fonts list Click Print button Click OK in the Print Samples dialog box to print the samples You can search for fonts on floppy disks CD ROMs your hard disk or on the network Use the Search button Select where you want to search for fonts Click on OK Select one or more fonts to be uninstalled from the Installed Fonts list Click on the Un install button For more information abo...

Page 142: ...140 ...

Page 143: ...141 INSTALLING THE PRINTER DRIVER for Macintosh INSTALLINGTHE PRINTER DRIVER for Macintosh ...

Page 144: ...the LaserWriter 8 as a standard driver for the Mac Operating System The PPD file needs to be installed from the CD ROM in order to enable features specific to the e STUDIO16 20 25 INSTALLINGTHE PRINTER DRIVER System Requirement Hardware Display Resolution 640 x 480 dots or more Operating System Mac OS 8 0 8 5 8 6 9 0 System Requirements ...

Page 145: ...s used to make printer specific functions available and to provide optimum printing Install the PPD file and select the e STUDIO16 20 25 from Chooser in the Apple menu 1 Insert the CD ROM into the CD ROM drive 2 Double click on the boot drive icon and the System Folder appears Open the Extensions Folder in the System Folder 3 Double click on the CD ROM icon 4 Copy the PPD file e STUDIO16_20_25 PPD...

Page 146: ...ive If Active is selected for AppleTalk but no other Macintosh on the network is displayed please confirm that the network cable is connected and set properly 3 Select a zone that this machine belongs to from AppleTalk Zone This appears only when several zones exist on the same network Please ask an administrator which zone the printer is a part of 4 Select LaserWriter8 The printer list appears in...

Page 147: ...ppears after the file is installed 1 Select this machine from the Chooser screen and click on Setup 2 Click on Configure The Installable Options setting screen appears 3 Select items according to the options being used currently and click on OK InstallableOptions 1 Duplex Unit If the Duplex Unit is installed select Installed Cassette 2 If cassette 2 is installed select Installed Cassette 3 If cass...

Page 148: ...pacity Feeder If the Large Capacity Feeder is installed select Installed Stack Feed Bypass If the Stack Feed Bypass is installed select Installed Others If the Offset Stacker is installed select Offset Stacker If the Job Separator is installed select Job Separator If the Finisher is installed select Finisher ...

Page 149: ...Toner Saving function for printing Paper Destination Select the destination of the output Standard Output Tray As a default setting this is selected The printed paper is ejected into the general output tray Job Separator Upper Tray The printed paper is ejected on to the Upper Tray of the Job Separator This is available only when the Job Separator is installed Job Separator Lower Tray The printed p...

Page 150: ... Select this when using envelopes This is available only when the Bypass Tray is installed Transparencies Select this when using transparent sheets This is available only when the Bypass Tray is installed Labels Select this when using label paper This is available only when the Bypass Tray is installed Cardstocks Select this when using cardstock paper This is available only when the Bypass Tray is...

Page 151: ...2 Resolution This sets the resolution for printing NOTE It is set at 600dpi as a factory default 600 Select this to print documents with an emphasis on resolution over speed 300 Select this to print draft like documents or documents with an emphasis on speed over resolution ...

Page 152: ...150 ...

Page 153: ...151 NETPANEL FUNCTION NETPANEL FUNCTION ...

Page 154: ...S Windows NT4 0 Server and Workstation with service pack 3 or higher Windows 2000 Server and Professional with service pack 1 Windows XP Home Edition and Professional Service Microsoft Personal Web Server for Windows NT workstation 4 0 Microsoft Internet Information Server 4 0 or later for Windows NT Server 4 0 Microsoft Internet Information Server 5 0 or later for Windows 2000 Professional Window...

Page 155: ...erver for Windows NT 4 0 Server must be installed These are included on the Windows NT4 0 Option Pack 4 0 CD ROM that is provided from Microsoft For further detail about the Windows NT4 0 Option Pack see the Microsoft homepage Before installing the NetPanel to Windows 2000 or Windows XP Microsoft Internet Information Server 5 0 must be installed These are included on the Windows 2000 or Windows XP...

Page 156: ... 5 Click on Next The Software License Agreement screen appears 6 Click on Yes The Choose Destination Location screen appears 4 Click on Netpanel setup The welcome screen appears 3 Click on Setup utilities ...

Page 157: ...ry screen appears after copying files is completed 10 Enter the IIS virtual directory The directory is automatically entered Change the directory if required SUPPLEMENT The entered value for the IIS Virtual Directory becomes part of the HTTP address for Netpanel For example if the directory name set to NetPanel the HTTP address of NetPanel is http xxx xxx xxx xxx NetPanel cgi exe where xxx xxx xxx...

Page 158: ...ead the Readme file at this time When you click on Yes the Readme file is displayed When you click on No the Readme file is not displayed SUPPLEMENT Wait for the Setup Complete screen to appear It may take a few minutes while the system prepares to start the NetPanel service ...

Page 159: ...click on Add Remove Programs 2 5 Click on Yes The Remove Programs From Your Computer screen appears Be sure all users have exited from NetPanel before uninstalling the program SUPPLEMENT Windows may take a few minutes to remove the programs after the Remove Programs From Your Computer screen appears Wait for the computer to remove all the components of the program Uninstalling ...

Page 160: ...158 6 Click on OK ...

Page 161: ...he printers to be used You can search for printers based on certain criteria such as Pages Per Minute PPM Status Location Description etc Server management of network printer resources enables you to install remove and configure network printers shared through the server For the functions that can be operated by the standard users and the Administrators refer to OPERATING FLOW in this chapter SUPP...

Page 162: ...the server on which NetPanel is installed IIS Virtual Directory is the directory name that was assigned during the installation of NetPanel You can enter the server name that NetPanel is installed on instead of the server IP address Example http Host NetPanel cgi exe when the server computer name is Host and the IIS Virtual Directory is NetPanel 3 The log in page for NetPanel appears Browsing with...

Page 163: ...administrator can log in without entering the password the first time You can set the password for an administrator under NetPanel Settings Select a display resolution suitable for your monitor resolution SUPPLEMENT Although the menu items are displayed they will not become functional until after log in When NetPanel is started the log in page is displayed Log in to NetPanel as a Standard User or ...

Page 164: ...rver management Click on this to install or remove a printer on a print server You can also manage the print jobs on the print servers group management Click on this to configure and modify the printer groups such as adding removing printers into from a group and creating deleting a group netpanel setting Click on this to set the administrators password and URL refresh rates printer database updat...

Page 165: ...ch page Related help contents will be displayed depending on which page the help button is clicked from If the New Window for Help Document option from the NetPanel Setting WNP Setting page is set to disabled then the Help pages are displayed without opening a new window You can refer to Help when you need the descriptions or instructions for operating NetPanel ...

Page 166: ...operties Displays the printer system settings PCL Font Properties Displays a PCL Font settings System Properties All Of Properties Displays all printer network connection properties Network Displays the NIC properties such as the type and the transmission speed Novell NetWare Displays the printer Novell NetWare settings TCP IP Properties Displays the printer TCP IP settings Apple Talk Displays the...

Page 167: ...paper settings Printer Setting Properties Displays the printer system settings PCL Font Properties Displays a PCL Font settings System Properties All Of Properties Displays all printer network connection properties Network Displays the NIC properties such as the type and the transmission speed Novell NetWare Displays the printer Novell NetWare settings TCP IP Properties Displays the printer TCP IP...

Page 168: ...ntly processing Reset the printer and NIC or restore factory default settings Print a test page Continued from previous page PCL Font Properties Set the PCL Font settings for printing Protocols Configuration Set whether to enable the protocols for TCP IP IPX SPX and AppleTalk IP Configuration Set the IP Address Subnet Mask and Default Gateway System Configuration Set the Frame type and the serial ...

Page 169: ...d from previous page Input Username and Password Group Management Create delete and view the groups Add Remove a printer to from a group Create Group Create a group Delete Group Delete a group View Group View the groups Add Printer Add a printer to a group Remove Printer Remove a printer from a group NetPanel Setting Set how NetPanel performs the functions Admin Setting Set Administrator s passwor...

Page 170: ...ype other than All Devices or All in the Search Type box Search Criteria Enter the detail that defines the search criteria This must be entered when a type other than All Devices or All is selected for the Search Type The asterisk is automatically entered when the search criteria is required Sort by Select how the list of results should be sorted Search Click on this to begin searching for printer...

Page 171: ...perties Displays all printer properties General Properties Displays the general printer properties Input Tray Properties Displays the printer tray properties Output Bin Properties Displays the printer output bin properties Paper Properties Displays the printer default paper settings Printer Setting Properties Displays the printer system settings PCL Font Properties Displays the PCL Font settings R...

Page 172: ...ection properties Network Displays the NIC properties such as type and transmission speed Novell NetWare Displays the Novell NetWare printer settings TCP IP Properties Displays the TCP IP printer settings Apple Talk Displays the AppleTalk printer settings Status Diagnose Diagnose the selected printer and display the current printer status such as a Paper Jam and or Power Saving Refresh Status Clic...

Page 173: ...nagement function are added to the list Search Criteria Enter the detail that defines the search criteria This must be entered when a type other than All Devices or All is selected for the Search Type The asterisk is automatically entered when the search criteria is required Sort by Select how the list of searching results is sorted Search Click on this to begin searching for printers Search Type ...

Page 174: ...icking Search on the Printer Management Search Page the Printer Management Main Page appears Reset Printer Click this to reset the printer restore the printer to its factory default settings cancel a print job in progress and print test pages ...

Page 175: ...rties such as system location input tray output bin paper and system settings for the selected printer After you modify the printer configuration you must reset the printer to enable the settings General Properties Configure the system location and contact Input Tray Properties Select the default input tray Output Bin Properties Select the default output bin and options Paper Properties Set the de...

Page 176: ...k on this to update the status This button is not available when the Refresh Rate is set at the WNP Setting on the NetPanel Setting Device Password Click on this to change the device password After you modify the device password you must reset the printer to enable the settings Device Password Change the device password to a new password you prefer The current password has to be entered in order t...

Page 177: ...t Select this to reset the printer to factory default settings Device Password The device password is required to reset the machine The device password is automatically entered in the field Reset Printer Now Click on this to reset the printer Please Select Test Page Select the test page that you want to print Print Test Page Now Click on this to print a test page Reset Printer and Test Print Page ...

Page 178: ...is automatically entered in the field so that do not change the value 4 Click on Reset Printer Now 5 The operating result is displayed Please make sure that the operation has been performed successfully After you modify the configuration of the printer NIC Novell NetWare setting or device password setting you must restart the printer to enable the modified settings ...

Page 179: ...not change the value 4 Click on Print Test Page Now 5 The operating result is displayed and the test print page is printed Please make sure that the operation has been performed successfully After you modify the configuration and reset the printer you can print a test page to confirm that the configuration has been modified SUPPLEMENT See SPECIFICATIONS AND OTHER INFORMATION TEST PAGE SAMPLE for a...

Page 180: ...tact information Device Password The device password is required to save changes The device password is automatically entered in the field Change Now Click on this to save changes Printer Configure General Properties You can operate the following functions by clicking each link on the Printer Configure Display ...

Page 181: ...sette selected here is used to print before other cassettes when the Paper Source is set to AUTO NOTE It is set to OFF as a factory default Device Password The device password is required to save changes The device password is automatically entered in the field Change Now Click on this to save changes Input Tray Properties After you modify the settings please perform a Printer Reset to PowerOn to ...

Page 182: ...elect Duplex Mode Select ON when the Duplex function is used for printing This is available only when the Duplex Unit is installed If not a Module not installed message is displayed Device Password The device password is required to save changes The device password is automatically entered in the field Change Now Click on this to save changes Output Bin Properties After you modify the settings ple...

Page 183: ...s the paper printing direction to either Portrait or Landscape NOTE It is set to Portrait as a factory default Device Password The device password is required to save changes The device password is automatically entered in the field Change Now Click on this to save changes Paper Properties After you modify the settings please perform a Printer Reset to PowerOn to enable the new settings ...

Page 184: ...ure i e The text is printing from MS DOS NOTE It is automatically set depending on the paper size The Default of Line Page depending on the Paper Sizes After you modify the settings please perform a Printer Reset to PowerOn to enable the new settings 11 12 Orientation Paper Size Portrait Landscape A3 93 64 A4 64 43 A5 43 28 B4 79 54 LETTER 60 45 FOLIO 71 43 LEGAL 78 45 LEDGER 96 60 COMPUTER 84 60 ...

Page 185: ... without the printer driver NOTE It is set to On as a factory default Toner Save Mode This sets the toner save feature to be used when printing This only applies when printing is performed without the printer driver NOTE It is set to Off as a factory default Auto Continue Timeout This sets the duration that the printer will attempt to self recover from printer or print job errors NOTE It is set to...

Page 186: ...ng is performed without the printer driver PS The machine always uses the PS emulation when printing is performed without the printer driver Print Postscript Error Set this to print a PostScript Error Report when an error occurs during printing with the PS driver NOTE It is set to Off as a factory default Device Password The device password is required to save changes The device password is automa...

Page 187: ...the Typeface option Pitch Size This sets the pitch size for the selected font This setting applies when a non proportional font has been selected from the Typeface option Device Password The device password is required to save changes The device password is automatically entered in the field Change Now Click on this to save changes PCL Font Properties After you modify the settings please perform a...

Page 188: ... counters you want to reset Total Count of Printer Controller Displays the total number of pages printed through the printer controller Device Password The device password is required to save changes The device password is automatically entered in the field Reset Checked Group Counter Click on this to reset the counters of the selected groups Group Management ...

Page 189: ...Talk Select whether to Enable or Disable network communications on an AppleTalk network NOTE It is set to Disable as a factory default Device Password The device password is required to save changes The device password is automatically entered in the field Change Now Click on this to save changes NIC Configure Protocols Configuration You can operate the following functions by clicking each link on...

Page 190: ...r is to be accessed from a network outside the router Base Port Number Enter the base port number DHCP Select whether to Enable or Disable obtaining an IP address from the DHCP server NOTE It is set to Enabled as a factory default Device Password The device password is required to save changes The device password is automatically entered in the field Change Now Click on this to save changes IP Con...

Page 191: ...hich the machine is located Device Password The device password is required to save changes The device password is automatically entered in the field Change Now Click on this to save changes Apple Talk Configuration After you modify the settings please perform a Printer Reset to PowerOn to enable the new settings ...

Page 192: ...information about the print job such as who printed the document and what was printed The banner page can be printed when printing is performed in an LPR connection The sample for the LPD banner page is below NOTE It is set to Disabled as a factory default System Configuration After you modify the settings please perform a Printer Reset to PowerOn to enable the new settings LPD Banner Page ...

Page 193: ...up NOTE It is set at on as a factory default Type of Startup page Select the type of startup page NOTE It is set to ASCII as a factory default Device Password The device password is required to save changes The device password is automatically entered in the field Change Now Click on this to save changes ...

Page 194: ...DS Tree Name Enter the NDS tree name It is available only in NDS mode Queue Server Job Polling Interval Enter the time interval in seconds for the print server to scan the print queues NOTE It is set to 1 as a factory default Device Password The device password is required to save changes The device password is automatically entered in the field Change Now Click on this to save changes Novell Conf...

Page 195: ...ord Again Confirm the new password by entering it again Submit New Password Click on this to submit the new password Device Password Device Password You can operate the following functions by clicking a link on the Device Password Display NOTE Only non capital letters can be used for the Device Password After you modify the settings please perform a Printer Reset to PowerOn to enable the new setti...

Page 196: ...nage print jobs in progress The NetPanel supports only a Windows NT server Printers shared in Windows NT Server Select this to use a Windows NT Server which has NetPanel installed and acts as a print server The Server Management Main Page of Windows NT Server is displayed Server Management Main Page ...

Page 197: ...cel the print jobs Username Enter the Username for the Windows NT Server that NetPanel is installed on You should enter the Username and Password to enable installing uninstalling of the printer and Print Job management Password Enter the password for the Windows NT Server that NetPanel is installed on You should enter the Username and Password to enable installing uninstalling of the printer and ...

Page 198: ...r a name to indicate the installed printer select the printer driver for this printer and select or specify the printer 4 Click on Continue The confirmation of the printer details is displayed 5 Click on Continue This function allows system administrators to remotely create print shares on existing print servers Once installed users can connect to and send print jobs to network connected printers ...

Page 199: ...197 NETPANEL FUNCTION 6 The printer is installed to the File Server ...

Page 200: ... Click on Remove Printer on the Task bar 3 Select or specify the printer 4 Click on Continue The confirmation of the printer details is displayed 5 Click on Continue This function allows system administrators to remotely remove a printer from a File Server Once removed users can no longer connect and print to the printer from the selected print server ...

Page 201: ...199 NETPANEL FUNCTION 6 The printer is removed from the File Server ...

Page 202: ...k on Print Job Management on the Task bar 3 Select or specify the printer 4 Click on Continue The print job list for the selected printer is displayed 5 Check on the print jobs that you want to cancel printing and click Cancel This function allows system administrators to remotely cancel print jobs in progress on the Windows NT Print Server ...

Page 203: ...201 NETPANEL FUNCTION 6 The selected print jobs are canceled ...

Page 204: ...ters groups and quickly view the printer properties and status Create Group Click on this to create a new group Delete Group Click on this to delete a group View Group Click on this to view the group list You can select a group and view the properties for a printer belonging to that group Add Printer Click on this to add a printer to a group Remove Printer Click on this to remove a printer from a ...

Page 205: ... This function allows system administrators to create groups to classify printers Once a group is created you can add printers to the group Create a Group 4 The operating result is displayed Please make sure that the operation has been performed successfully SUPPLEMENT The Groups created are added to the Search Type list on the Printer Discovery Main Page and Printer Management Search Page ...

Page 206: ... the Printer Group Name or enter the Printer Group Name 3 Click on Delete This function allows system administrators to delete a group Delete a Group 4 The operating result is displayed Please make sure that the operation has been performed successfully ...

Page 207: ...is displayed When you click Show Status the status of selected printer is displayed 1 Click on View Group on the Task bar The list of groups is displayed 2 Select a group and click on OK The list of printers added to the selected group is displayed This function allows system administrators to display the group list and view the properties for a printer belonging to a group View Group and Printer ...

Page 208: ...nter status page The printer properties page is the same when clicking System Properties on the Task bar of the Searching Result Display The printer status page is the same when clicking Status Diagnose on the Task bar of the Searching Result Display ...

Page 209: ... printer that you want to add to the group This function allows system administrators to add a printer to a group Before you add a printer there must be at least one group created to add a printer Add a Printer to a Group 5 The operating result is displayed Please make sure that the operation has been performed successfully 4 Click on Add ...

Page 210: ...o remove a printer from This function allows system administrators to remove a printer from a group Remove a Printer from a Group 4 Select the printer that you want to remove from the list 3 Click on Continue The list of printers that are included in the group is displayed 5 Click on Continue ...

Page 211: ...209 NETPANEL FUNCTION 6 The operating result is displayed Please make sure that the operation has been performed successfully ...

Page 212: ...tPanel such as the background image refresh rate how many printers and groups are listed per page and whether the help contents are displayed in a new window or within the same frame Discovery Setting Click on this to set the options for Printer Discovery such as the protocols used for searching for printers on the network auto search function clearing the database updating the database and specif...

Page 213: ...d click on OK The password entered is indicated by asterisks 2 The Administrator Password is assigned Change the Administrator Password SUPPLEMENTS The Administrator Password accepts upper and lower case letters The length of the Administrator Password can be up to 20 alphanumeric characters If the Administrator Password field is left blank and you click OK the Administrator Password will be set t...

Page 214: ...t is set to 0 as a factory default If this is set to a number other than 0 the Refresh Status button on the System Properties Page Connection Properties Page and Status Diagnose Page disappears How Many Printers showed per page Enter the number of the printers to be displayed per page This must be greater than 0 NOTE It is set to 10 as a factory default New Window for Help Document Select whether ...

Page 215: ...ormat HH MM to automatically search for printers Click on OK to save the setting NOTE It is set with 00 00 as a factory default Clear Database Click on OK to clear the data preserved by NetPanel to quickly display the search results NOTE This is not available when a printer search is in progress Update Database Click on OK to start a printer search and save the search results NOTE This is not avai...

Page 216: ...214 ...

Page 217: ...215 MAP MAP ...

Page 218: ...e TCP IP protocol are installed on your computer Password for MAP To change settings using MAP the password must be entered to submit the change Password for MAP sysadm NOTE There are other items that can be setup in MAP and not in NetPanel Please do not change any other items except the items described in this manual CAUTION Do not forget the password Otherwise you will no longer be able to chang...

Page 219: ...nvironment OS Windows 95 Windows 98 Windows Me Windows NT4 0 Windows 2000 Windows XP Protocols IPX SPX and TCP IP must be installed For Windows 95 98 Me just install TCP IP It does not have to be set up WWW Browser Internet Explorer 3 0 or later Netscape Navigator 3 0 or later SUPPLEMENT If the browser is configured to use a proxy server either disable the browser s proxy setting or add the NIC s ...

Page 220: ... Destination Directory screen appears 6 Installation Notes are displayed 8 If necessary change the folder to which the files are to be installed then click on Next 5 Click on Next 4 Click on MAP setup The welcome screen appears ...

Page 221: ...219 MAP 9 10 Click on Next The files are installed 11 The completion message is displayed 12 Click on OK ...

Page 222: ... IP based printers depending on your network environment Check Search for IPX based printers if your network includes NetWare servers Check Search for IP based printers if your network includes DHCP servers 3 Click OK 4 Select Programs from the Start menu and click on MAP in the Map folder Start searching network printers Display the search results with your default WWW browser ...

Page 223: ...ur printer unit When you search for printers based on the IPX SPX protocol the printer unit name is displayed as MFP_XXXXXX where the X s correspond to the NIC serial number When you search for printers based on the TCP IP protocol the printer s IP address is displayed ...

Page 224: ...achine and the IP address assigned WWW Browser Internet Explorer 3 0 or later Netscape Navigator 3 0 or later SUPPLEMENT If the browser is configured to use a proxy server either disable the browser s proxy setting or add the NIC s IP address to the browser s no proxy list For Macintosh the MAP can be used by entering the URL for MAP at the WWW Browser Start MAP NOTE To access the MAP for the mach...

Page 225: ...X SPX Print Server Name Enter the name of the print server to be created It must match the setting in NetWare MFP_XXXXXX is set as a default name This is assigned as the port name when the Peer to Peer Utility IPX SPX is used Print Server Password Please do not change Password Retype Please do not change Preferred Bindery File Server Enter the preferred file server name It is available only in bin...

Page 226: ...cally restarted 3 4 5 6 Print Queue Scan Rate Set the print queue scan time interval for the print server using a range of 1 to 255 seconds It is set to 1 second as the default setting Ethernet Frame Type Select the preferred frame type you want to use when multiple NetWare frame types are in use For most situations the default setting is appropriate Disable Bindery Check this only when using NetW...

Page 227: ...k from Network Administrator page The AppleTalk Configuration Menu is displayed SETUP AppleTalk at MAP Start MAP open the AppleTalk setup page and configure the settings to enable the printer to operate in the AppleTalk environment 1 Click on Accept Setting Click on Clear Inputs if your want to cancel your changes and clear the input fields 4 The entered settings are applied and the message Update...

Page 228: ...tory default settings on the NIC by using MAP Click on Factory Defaults The Restore Factory Default page appears 1 Enter the password and click on Restore Factory Defaults The password is sysadm 2 The factory defaults are restored 3 Restart the printer 4 ...

Page 229: ...227 TROUBLE SHOOTING TROUBLESHOOTING ...

Page 230: ... the correct URL IP address of the HTTP server computer Ask the administrator about the IP address of the computer Assign an IP address to the printer TCP IP is required when using NetPanel Install TCP IP on the computer Communication between the computer and the printer unit is not available when the printer is restarting Please wait for the printer to restart and connect to the network NetPanel ...

Page 231: ... Paper Empty in SFB Load paper in SFB Stack Feed Bypass Paper Empty in Cassette1 Load the paper in Cassette 1 Paper Empty in Cassette2 Load the paper in Cassette 2 Paper Empty in Cassette3 Load the paper in Cassette 3 Paper Empty in Cassette4 Load the paper in Cassette 4 Paper Empty in LCF Load the paper in LCF Paper Jam in Bridge Cover Open the Bridge Cover and clear the paper jam Paer Jam in Dup...

Page 232: ... Paper size Load paper size in Cassette1 Load paper size size paper in Cassette 1 Load paper size in Cassette2 Load paper size size paper in Cassette 2 Load paper size in Cassette3 Load paper size size paper in Cassette 3 Load paper size in Cassette4 Load paper size size paper in Cassette 4 Load paper size in SFB Load paper size size paper in SFB Load paper size in LCF Load paper size size paper i...

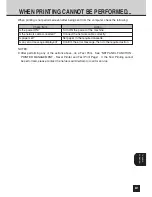
Page 233: ...nter and Test Print Page If the Test Printing cannot be performed please contact the network administrator or call for service Check Item Action Is the power ON Turn ON the power of the machine Is the network cable connected Connect the network cable correctly Is paper set Set paper in the required cassette Is any error message displayed Confirm the error message then do the required action WHEN P...

Page 234: ...232 ...

Page 235: ...233 SPECIFICATIONS AND OTHER INFORMATION SPECIFICATIONS AND OTHER INFORMATION ...

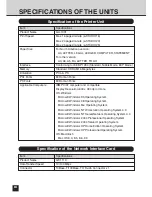
Page 236: ...ming to IEEE P1284 Standard Nibble Mode ECP Mode Memory Standard SDRAM 16 Megabytes Emulation PCL 6 PS PCL Fonts 80 Roman Fonts PS Fonts 80 Roman Fonts Applicable Computers IBM PC AT computer and compatible Display Resolution 640 x 480 dpi or more OS Windows Microsoft Windows 95 Operating System Microsoft Windows 98 Operating System Microsoft Windows Me Operating System Microsoft Windows NT Workst...

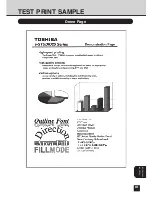
Page 237: ...235 SPECIFICATIONS AND OTHERS TEST PRINT SAMPLE Demo Page ...

Page 238: ...236 Configuration Page ...

Page 239: ...237 SPECIFICATIONS AND OTHERS NIC Status Page ...

Page 240: ...238 PCL Font List ...

Page 241: ...239 SPECIFICATIONS AND OTHERS ...

Page 242: ...240 ...

Page 243: ...241 SPECIFICATIONS AND OTHERS PS Font List ...

Page 244: ...242 ...

Page 245: ...243 SPECIFICATIONS AND OTHERS Status Log ...

Page 246: ...244 Group Management List Page ...

Page 247: ...245 SPECIFICATIONS AND OTHERS LIST OF INTERNAL PCL FONTS The following table shows the internal PCL fonts of this printer ...

Page 248: ...246 ...

Page 249: ...247 SPECIFICATIONS AND OTHERS LIST OF INTERNAL PS FONTS ...

Page 250: ...248 ...

Page 251: ...E1 17089B ...

Page 252: ...1 1 KANDA NISHIKI CHO CHIYODA KU TOKYO 101 8442 JAPAN Copyrights TOSHIBA TEC CORPORATION 2002 ALL RIGHTS RESERVED R01102004001 TTEC Ver01 2002 05 ...

Reviews: