background image

Installation

Installation

4

LVMU Installation Guide     03/06

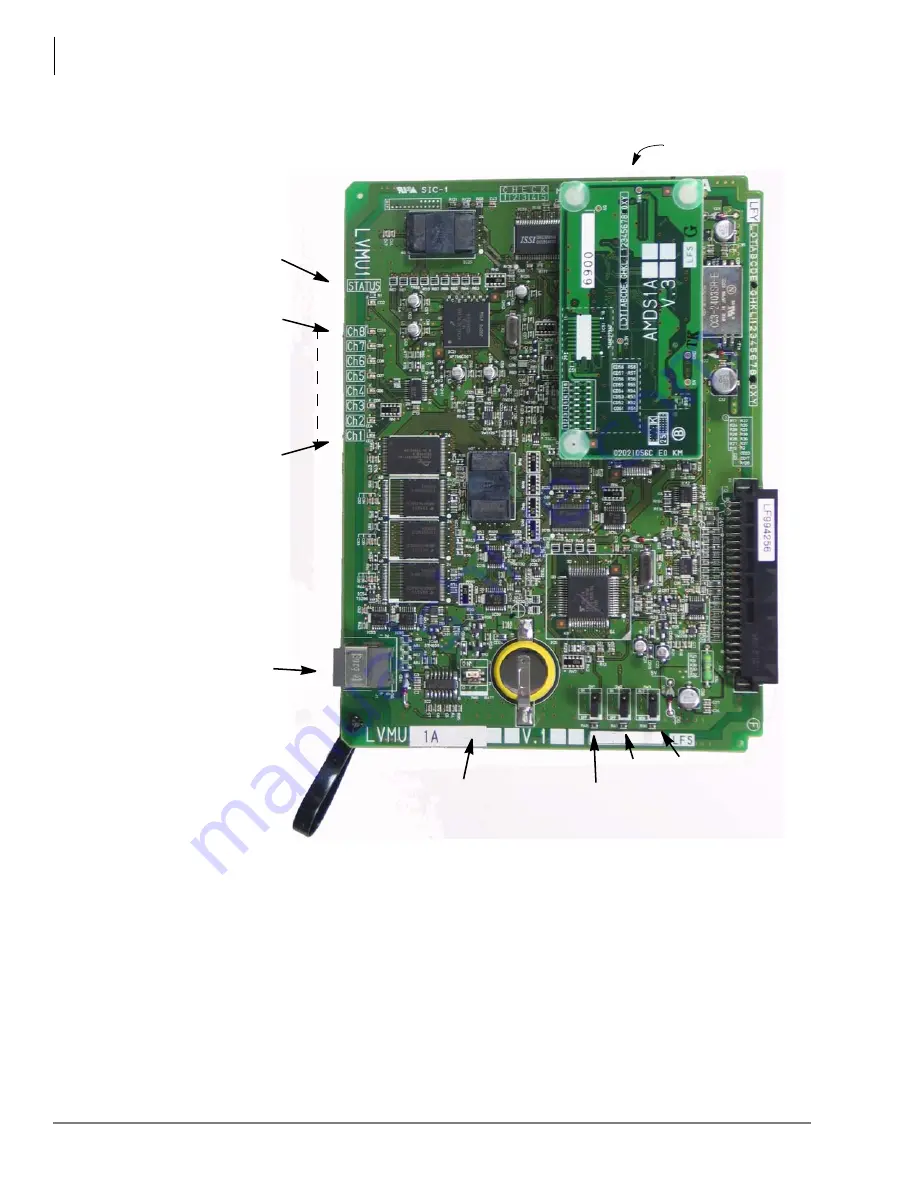
Figure 1

LVMU Circuit Card

Battery Jumper

CH7

CH1

CH8

Language Selection

Status

CH6
CH5
CH4
CH3
CH2

Serial cable
connector

Built-in modem

OFF - English
ON - Spanish

(Strap shown in ON position)

SW1

SW2

SW3

Summary of Contents for Strata CIX LVMU

Page 1: ...sing System LVMU Installation and Programming Guide Title Page Effective July 1 2017 all Telecom product ordering maintenance warranty and support obligations have been transferred to Mitel Networks Inc March 2008 ...

Page 2: ... loss of revenues or profits loss of goodwill inconvenience or exemplary special incidental indirect or consequential damages whatsoever or claims of third parties regardless of the form of any claim that may result from the use of this document THE SPECIFICATIONS AND INFORMATION PROVIDED HEREIN ARE FOR INFORMATIONAL PURPOSES ONLY AND ARE NOT A WARRANTY OF ACTUAL PERFORMANCE WHETHER EXPRESSED OR I...

Page 3: ...Y RIGHTS THE WARRANTY OF YEAR 2000 COMPLIANCE AND THE IMPLIED WARRANTIES OF MERCHANTABILITY AND FITNESS FOR A PARTICULAR PURPOSE THE ENTIRE RISK AS TO THE QUALITY AND PERFORMANCE OF THE SOFTWARE IS WITH YOU NEITHER TAIS NOR ITS SUPPLIERS WARRANT THAT THE FUNCTIONS CONTAINED IN THE SOFTWARE WILL MEET YOUR REQUIREMENTS OR THAT THE OPERATION OF THE SOFTWARE WILL BE UNINTERRUPTED OR ERROR FREE HOWEVER...

Page 4: ...g the malfunc tion by TAIS or its authorized dealer with new or refurbished parts at their option If TAIS or one of its autho rized dealers does not replace or repair such parts the retail customer s sole remedy will be a refund of the price charged by TAIS to its dealers for such parts as are proven to be defective and which are returned to TAIS through one of its authorized dealers within the wa...

Page 5: ...Systems 6 Local Access 8 Remote Access 8 Toshiba Plug and Play 9 Telephone System Configuration 10 Stratagy System Configuration 10 LVMU Playback Audio Level Adjustment 12 Chapter 3 Maintenance Tools 17 Backup Utility 17 Restore Utility 20 Upgrade the LVMU Software 21 Retrieve Trace File 22 Filecopy 23 Shut Down the LVMU 23 Methods of Shutdown 23 Diagnostics 25 ...

Page 6: ...This page is intentionaly left blank ...

Page 7: ...MU using Stratagy UAdmin 2 1 Stratagy UAdmin Release 2 software is compatible with the LVMU GVMU IPV8 and Stratagy DK R3 X UAdmin does not support Release 2 Stratagy DK systems Local Administration You ll need a PC 5MB hard drive space and 580KB free RAM You ll also need Toshiba s PPTC 9 to connect your PC to the LVMU Remote modem Administration Use UAdmin software with the internal soft 33 6Kbps ...

Page 8: ...This page is intentionally left blank ...

Page 9: ...nt versions on the Toshiba FYI web site or in print To find the most current version check the version date in the Publication Information on the back of the document s title page You can find additional detailed information about Stratagy in the following companion documents Stratagy Voice Processing General Description provides a system overview available hardware and features of the Stratagy sy...

Page 10: ...This page is intentlionally left blank ...

Page 11: ...ge in the voice mailbox and intercept the call Bilingual Language Support English and Spanish Voice Mail LCD Feature Prompting with Soft Key Operation English and Spanish Onboard remote maintenance modem AMDS1A Remote software update and prompt update capability Embedded Backup and Restore utility Stores Names Greetings Mailbox numbers and all other database parameters There is a RS232 maintenance...

Page 12: ...ware for maintenance and other functions More specifically this chapter discusses Access UADM2 Admin Compares the two methods for accessing the UADM2 Admin software locally or remotely Local Access Access UADM2 Admin software via a cable connecting the LVMU with a portable or desktop PC Remote Access Access LVMU via a modem from a portable or desktop PC System Startup How the Strata CIX voice proc...

Page 13: ...hen transporting system hardware CAUTION You will be handling the LVMU when it is most fragile unpacked and exposed The LVMU if handled properly will give long reliable service To ensure that the unit is not damaged during installation or maintenance follow these precautions Damage may not always be immediately evident e g no physical damage on the outside of the unit and system failure may result...

Page 14: ...LVMU Installation Guide 03 06 Figure 1 LVMU Circuit Card Battery Jumper CH7 CH1 CH8 Language Selection Status CH6 CH5 CH4 CH3 CH2 Serial cable connector Built in modem OFF English ON Spanish Strap shown in ON position SW1 SW2 SW3 ...

Page 15: ...t the LVMU ports are configured as follows The station type is enabled for SLT working FB 02 The circuit type is set to Voice Mail FB 03 The display DN FB 15 is set to that of the number assigned to the Pilot Hunt Group that the LVMU ports will be assigned to 4 Set up the Pilot Hunt Group for the LVMU Voice Mail ports CIX Program 209 Group Tab Ensure the following The Pilot Number FB 02 matches th...

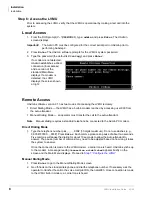
Page 16: ...Automatic as required 10 Optional Set up Voice Mail Call Monitor Code 870 feature to any flexible key CIX Program 205 Step 1 Shut Down Strata CIX Turn off the main power switch to the Strata CIX system Step 2 Install the LVMU Strata CIX Systems CAUTION See cautions under Step 1 Unpack and Inspect the LVMU on Page 3 before proceeding 1 Set the battery jumper to the ON position The jumper is located...

Page 17: ...xtension of the person you wish to reach greeting 1 in User ID mailbox 991 Install Admin Software UAdmin 2 1 Note Loading the Admin software can be done before after connecting the Admin PC to the LVMU The Admin PC connected to the LVMU must meet the following specifications IBM compatible 3 5 1 44 high density floppy disk drive optional Hard drive with a minimum of 5MB of available disk space 580...

Page 18: ...he auto attendant Manual Dialing Mode an operator must transfer the call to the auto attendant Note Manual dialing requires a standard telephone be connected to the Admin PC modem Direct Dialing Mode Type the telephone number plus 993 50 digits maximum Do not use dashes e g 9 9054703500 993 Press Enter Each comma produces a pause of about two seconds Five commas will pause the dialing for about 10...

Page 19: ...e do not use this function Instead set the pbx_type parameter in the Stratagy System Configuration screen Selecting this function Changes all the settings to the new Toshiba telephone system default values Deletes any User ID mailbox customizations Installs the LVMU default mailboxes Note Existing messages and mailbox greetings are not deleted when Plug and Play is selected For example if Mailbox ...

Page 20: ...nge the LVMU s system options and parameters Most Stratagy System Configuration options do not require modification We recommend that you modify the system password immediately All other options have default values but can be modified as required Configure the LVMU Software 1 From the Tools menu press 6 The system configuration file displays The parameters are listed in alphabetical order 2 Make c...

Page 21: ...rogram the Mailboxes Program the User mailboxes for the customer s application Step 9 Program the Applications Note See the Stratagy Installation Maintenance manual on OPGONLINE for details Step 10 Optional Back up Database Mailbox Names and Greetings When you finish the installation process we recommend you back up your new database mailbox names and greetings See Backup Utility on page 17 for in...

Page 22: ...tation assignment window 3 Make sure the equipment number shows the slot number the LVMU1A is programmed into 4 Use eManager to find an idle PAD group number by the following operation Go to Advanced Configuration System PAD Table then click on PAD Group Table View You will see following window This procedure uses PAD group 1 as am example Use a PAD group for the LVMU1A that has not been assigned ...

Page 23: ...U Playback Audio Level Adjustment LVMU Installation Guide 03 06 13 11 Fill PAD value in the PAD table Open PAD values table of view by clicking the PAD Values Table View icon The PAD values table view window will open ...

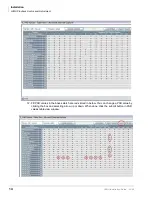
Page 24: ...tment 14 LVMU Installation Guide 03 06 12 Fill PAD values in the boxes which are red circled in below You can change a PAD value by clicking the box and selecting arrow up or down When done click the submit button in PAD values table view window ...

Page 25: ... 14 Check voice levels at IPT stations From IPT phone call VM pilot number and hear the prompt The prompt level should be same level as DKT s prompt Repeat until all LVMU1A ports are confirmed If you hear a high or low prompt level please make sure the correct PAD group and PAD table are assigned End of PAD level adjustment ...

Page 26: ... This function consists of multiple shutdown options Shutdown and Restart Current Version Shutdown and Trace Current Version Shutdown and Start New Version Shutdown and Start Old Version Shutdown Scandisk and Restart Shutdown and Stop for Power off and Backup and shutdown for power off This final option can take 32 minutes Diagnostics The LVMU has powerful troubleshooting tools The following three...

Page 27: ...vises that you perform the Backup Utility on site Tools Menu select menu item Backup Utility Stratagy System Configuration Edit Telephone Systems Dial Codes select dial codes Upgrade Stratagy Software Toshiba Plug and Play Restore Utility Edit System Integration Patterns Retrieve Trace File Filecopy Telephone System Configuration Parameters 7404_A Strata CIX40 Strata CIX40 w SMDI Strata CIX 100 St...

Page 28: ...ss UAdmin asks if the calls can be terminated If call termination is selected any current connection is disconnected and all ports are commanded to go off hook to prevent any further calls If call termination is denied the Backup or Restore procedure is halted If the connection between the Admin PC to the LVMU is lost communication can be re established by simply shutting down and restarting UAdmi...

Page 29: ...ed Backup time shown on your screen use the calculations shown below to estimate the required hard drive space Transmitting at Bytes Per Second bps written to hard drive 9600 bps800 bytes 4800 bps400 bytes 2400 bps200 bytes Example If UAdmin displays a five minute backup time and communication is at 9600 bps then 5 minutes 300 seconds 300 seconds x 800 bytes 240 000 bytes BPS values are not exact ...

Page 30: ...ent directory type over the default Press Enter Notes l Restoring files from the Admin PC s floppy disk drive is not supported l Be sure to enter the complete path including the drive letter 4 Optional If you entered selection 2 Restore Names Greetings in Step 2 you are asked to enter a beginning and ending mailbox number Press Enter after each entry Note Leaving both fields blank defines all mail...

Page 31: ...rect set of files obtained from Toshiba CAUTION Because of possible errors that can be induced through the telephone network Toshiba advises that you perform the Upgrade Utility on site 1 From the Tools menu press 3 The Upgrade screen displays shown at right 2 Copy the upgrade files to the C UADMIN21 folder 3 The default directory is A Your Admin PC uses a different drive change it to C UADMIN21 P...

Page 32: ...e directory where you want to copy the file The default is C UADMIN21 If you need a different directory type over the default Press Enter Be sure to enter the complete path If the directory already exists you are given the option of entering a new directory or overwriting the file The Trace Filter Setup screen displays 4 Select the items you want included in the TRACE OUT file Refer to the field d...

Page 33: ...e if necessary and the file name Note If a directory name is not entered Filecopy assigns the destination for the file to the Stratagy or UAdmin directory 7 Press Enter when finished While the LVMU copies the file a dialogue status box displays shown at right When the copy is complete this status box displays shown right 8 Press any key to continue Note Do not enter a drive letter when the Copy Fr...

Page 34: ...ess Alt S to save the changes To shut down the LVMU using the telephone dial pad 1 From the telephone dial pad call the LVMU Once you dial into the LVMU the system answers with the enter your security code greeting Press to bypass The LVMU prompts you to enter the User ID 2 Enter 983 The LVMU prompts you to enter the security code Important You must wait until the entire prompt has been played bef...

Page 35: ...r power off or Backup and Shutdown for power off option LVMU asks you to confirm the shutdown Type Y to confirm The DOS prompt C UADMIN21 displays To restart reset the LVMU system after selecting Shutdown and STOP for power off option Note If you select any of the first five options on the Shutdown Menu the LVMU automatically restarts 1 Holding the LVMU by the edges or the strap gently pull the ca...

Page 36: ...This is the last page of the document ...

Reviews: