background image

IP5000-series Telephone Quick Reference Guide  03/12

9

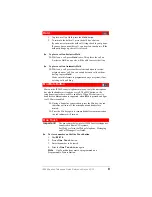
Hold

1. To place a call on Hold, press the 

Hold 

button.

2. To return to the held call, press the held line’s button.

If you do not return to the held call, it rings back to your phone. 
If you are busy on another call, you hear two tone bursts. If the 
held party hangs up, the call is released.

To place a call on Exclusive Hold

While on a call, press 

Hold

 twice. This places the call on 

Exclusive Hold; no one else will be able to access that line.

To place a call on Automatic Hold

While on a call, press another extension button to receive/
originate a new call. You can switch between calls without 
having to press 

Hold

.

Make sure this feature is programmed on your system; if not, 
existing calls will drop.

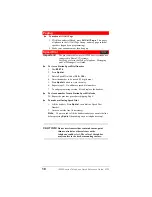
Mic/Mute Button

Mute on the IP5000-series telephones mutes not only the microphone 
but also the handset microphone as well. The MIC button on the 
telephones toggles between Mic and Mute. When Mic button is lit, 
handsfree communication is supported, when 

Mic

 is pressed and light 

is off, Mute is enabled.

During a handsfree conversation, press the Mic key, the red 
indicator will turn off; the microphone and handset are 
muted.

Press the Mic key again to resume hands free communication, 
the red indicator will turn on.

One Touch

Important!

The procedures below are for IP5000-series telephones 
connected to Strata CIX systems.
For IP

edge

 refer to the IPedge Telephone, Messaging 

and Call Manager User Guide.

To store a number on the One Touch button

1. Dial 

#9876

.


2. Press a 

One Touch

 button.

3. Enter the number to be stored.

4. Press the 

One Touch

 button again.

Note

One Touch buttons must be programmed on a 

Programmable Feature Button.

Summary of Contents for Strata IP5000 series

Page 1: ...TOSHIBA Business Telephones Helping You Communicate Better IP5000 series Telephone Quick Reference Guide ...

Page 2: ...000 series Telephone Quick Reference Guide 03 12 IP5000 Series Telephones A B C E F G J K I H 10 Programmable Feature Buttons 9 Line LCD D L M B E F G J K H I A 20 Programmable Feature Buttons 4 Line LCD C D ...

Page 3: ...ys D Programmable Feature Buttons E Message Waiting LED Button F Microphone LED Button G Speaker LED Button H Volume I Hold Button J Microphone K Tilt stand L Navigation Key M Toggle button Call Processing screen and HTML browser or Programming screens D B J K I A E F G H 10 Programmable Feature Buttons 4 Line LCD C ...

Page 4: ...trast on the backlit telephones 1 Press and hold down the Mic button 2 Press and release Vol or Vol repeatedly Note Holding down the Vol key does not continue to change the setting The key must be pressed for each step of contrast change Brightness Control To change the LCD back light brightness For the 4 line LCD telephones 1 Press Hold 3 6 9 simultaneously 2 To increase or decrease brightness pr...

Page 5: ...and Synchronized is selected the following steps can be completed to customize the backlight timer Note From an idle phone perform steps 1 3 first 5 Press FK2 located directly above FK1 to display Backlight Timer menu 6 Enter 2 digit value between 01 and 30 which represents 10 300 seconds respectively 7 Press Hold Hold to save your entry 8 Lift the handset off hook on hook to save settings For the...

Page 6: ...NTR Directory Number Names Dial Cancel directory get dial tone Press FIND to start the directory search Press NEXT to move forward Press BACK to move backwards Press CALL to connect to the directory entry selected Press CNCL to quit the directory search Notes If a directory is not selected and a name is entered all directories will be searched To enter names from the dial pad press the dial pad bu...

Page 7: ...xt 6021 Destination Number No Answer Press Ext 6031 Destination Number Timer seconds 2 digits Busy No Answer Press Ext 6041 Destination Number Timer seconds 2 digits Cancel Press Ext 6051 Call Park Orbits To park a call 1 While on a call press Call Park 2 Specify the Park Orbit using one of the following Press and the system automatically selects a General Park Orbit between 7000 7019 The chosen o...

Page 8: ...parties To transfer conference control Note When the person who initiates the conference master hangs up control transfers to the first internal station added to the conference If no internal stations are in the conference the call disconnects 1 Perform Steps 1 and 2 above to add the line to which you wish to transfer conference control 2 Announce the call and hang up to transfer the call This sta...

Page 9: ...alls will drop Mic Mute Button Mute on the IP5000 series telephones mutes not only the microphone but also the handset microphone as well The MIC button on the telephones toggles between Mic and Mute When Mic button is lit handsfree communication is supported when Mic is pressed and light is off Mute is enabled During a handsfree conversation press the Mic key the red indicator will turn off the m...

Page 10: ... Code 100 199 4 Enter the number to be stored 32 digits max 5 Press Spdial button to store the entry 6 Repeat steps 2 5 to add more speed dial numbers 7 To end programming session lift and replace the handset To clear a number from a Station Speed Dial code Repeat the previous procedure skipping Step 4 To make a call using Speed Dial 1 Lift the handset Press Spdial then dial the Speed Dial Number ...

Page 11: ......
Page 12: ...a com 2008 2012 Toshiba America Information Systems Inc Printed in U S A All product service and company names are trademarks registered trademarks or service marks of their respective owners Information including specifications content and contact information is subject to change without notice Some features require optional hardware to support full capabilities IP5000 QRG VB Version B March 2012...

Reviews: