Removing the fiscal base
This section provided information on how to remove the fiscal base from a fiscal printer. For information on
how to remove the fiscal base from a fiscal ready printer (see “Fiscal base” on page 69 in Appendix A,
“1NF fiscal ready printer,” on page 69 for information).
To remove the fiscal base, complete the following steps:
Note:
The fiscal base does not have to be removed to work on the printer or to remove the main cover.
You should only have to remove the cover if it is broken and in need of replacement.
1. Remove the fiscal tray from the printer (see “Removing the fiscal tray” on page 28 for information).
2. Remove the top and main covers ( see “Removing the paper door cover” on page 41 and “Removing
the main cover” on page 44 for information).
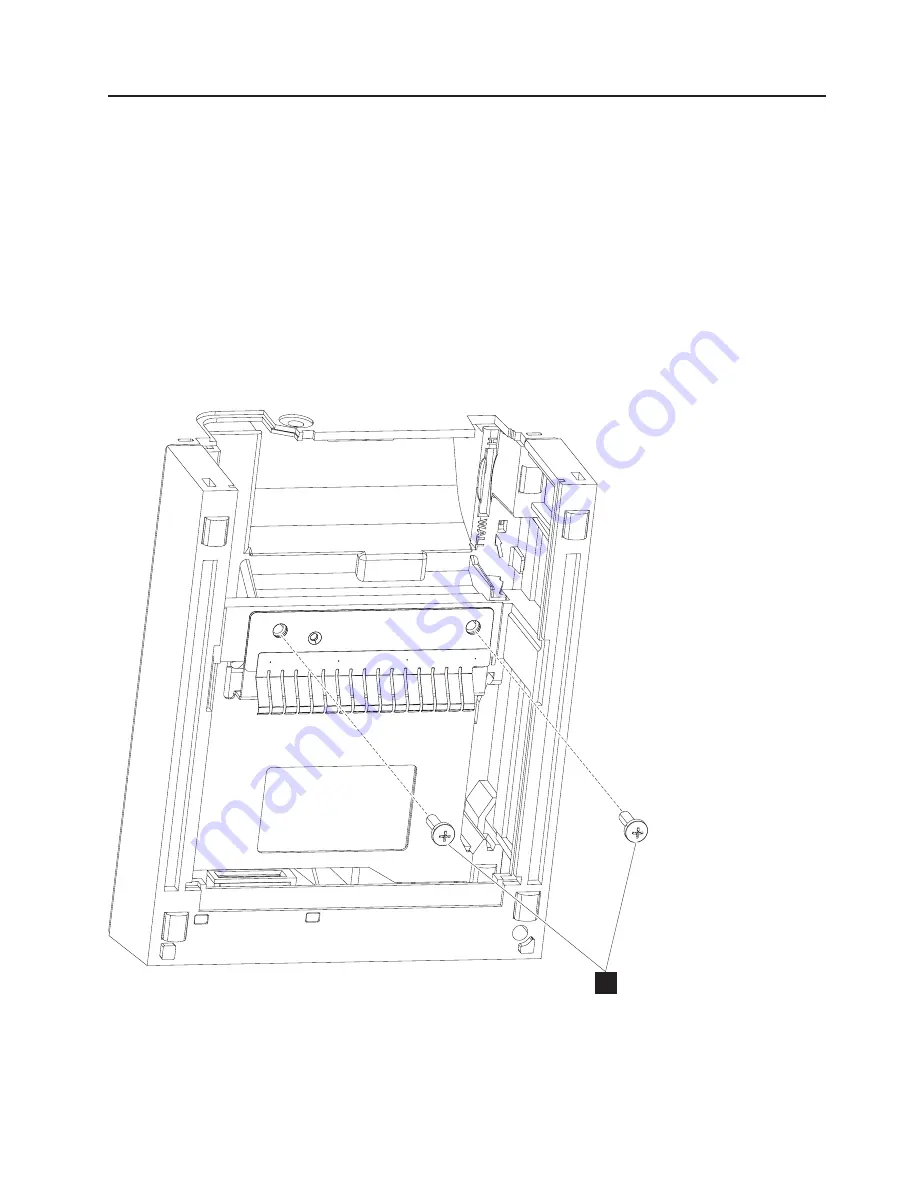
3. Remove the two screws
A
(Figure 22) securing the ground plate in place; then, remove the ground
plate from the printer and place the ground plate and the screws in a safe location for future use.
4. Remove the flex cable from the mount:
a. Place the printer on a flat surface front side down.
A
Figure 22. Remove ground plate
Removing and replacing FRUs
Chapter 5. Removing and replacing FRUs
47
Summary of Contents for SureMark 4610
Page 6: ...vi SureMark Hardware Service ...
Page 8: ...viii SureMark Hardware Service ...
Page 10: ...x SureMark Hardware Service ...
Page 14: ...xiv SureMark Hardware Service ...
Page 16: ...xvi SureMark Hardware Service ...
Page 18: ...xviii SureMark Hardware Service ...
Page 28: ...10 SureMark Hardware Service ...
Page 34: ...16 SureMark Hardware Service ...
Page 38: ...20 SureMark Hardware Service ...
Page 86: ...68 SureMark Hardware Service ...
Page 94: ...76 SureMark Hardware Service ...
Page 96: ...78 SureMark Hardware Service ...
Page 98: ...Assembly 1 Model 1NF 5 10 9 4 8 6 1 2 3 7 11 80 SureMark Hardware Service ...
Page 101: ...Appendix C Parts listing 83 ...
Page 102: ...Assembly 2 Model 1NF Fiscal drawer assembly 3 2 4 5 1 84 SureMark Hardware Service ...
Page 118: ...G362 0578 01 ...


