b. Locate the connector and push in on the two release tabs on either side of the connector while
pushing it up and out of the mount.
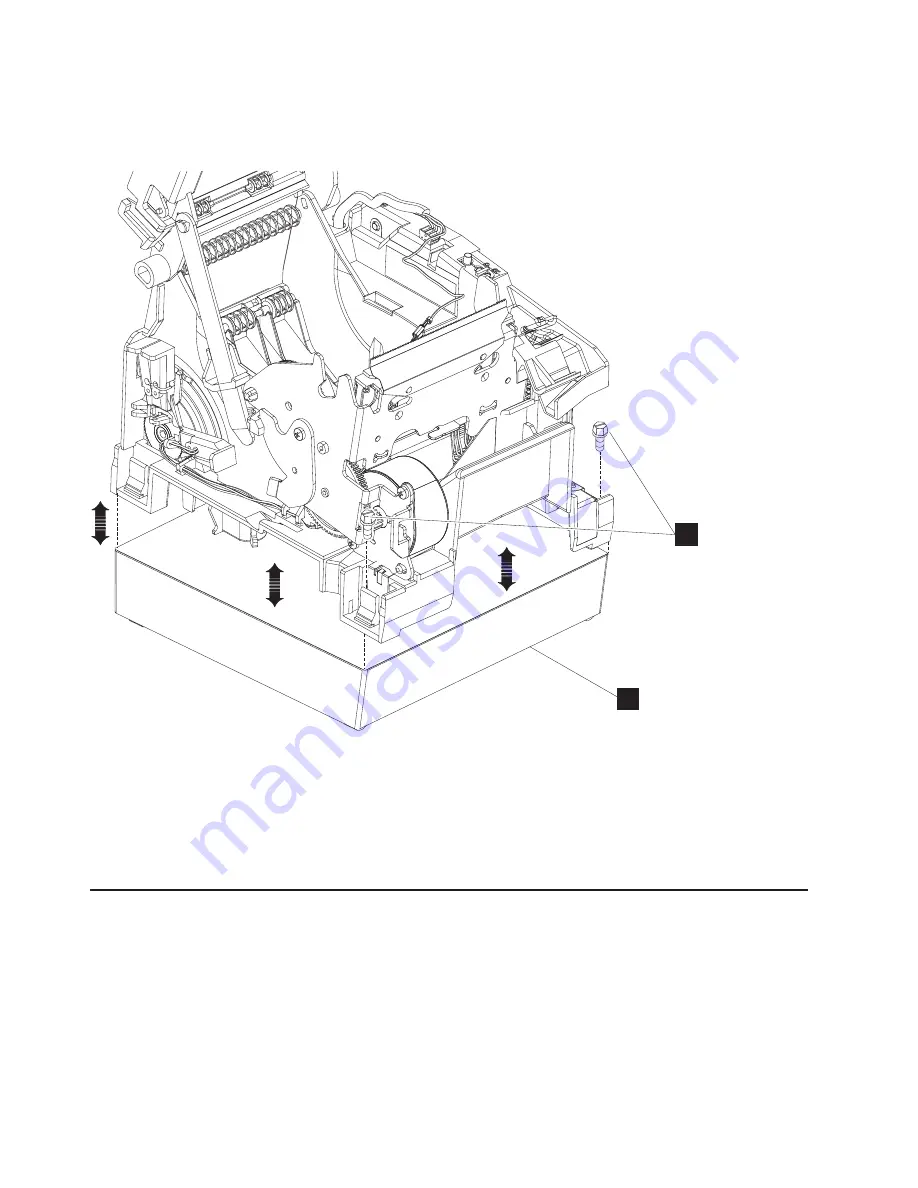
5. Remove the two screws securing the fiscal base from the printer:
a. Position the printer upright on a work surface with the front of the printer facing you.
b. Remove the two mounting screws from either side and place them in a safe place for future use.
6. Remove the fiscal base from the bottom of the printer.
Installing the fiscal base
This section provided information on how to install the fiscal base on a fiscal printer. For information on
how to remove the fiscal base from a fiscal ready printer see “Fiscal base” on page 69 in Appendix A,
“1NF fiscal ready printer,” on page 69.
To install the fiscal base on a fiscal printer, complete the following steps:
1. Place the frame of the printer on to the fiscal base.
2. Insert the two screws through the mounting holes on the rear of the printer and secure the fiscal base
to the bottom of the printer frame.
3. Orient the printer so that it is upside down.
B
A
Figure 23. Remove the bottom fiscal base from the printer.
Removing and replacing FRUs
48
SureMark Hardware Service
Summary of Contents for SureMark 4610
Page 6: ...vi SureMark Hardware Service ...
Page 8: ...viii SureMark Hardware Service ...
Page 10: ...x SureMark Hardware Service ...
Page 14: ...xiv SureMark Hardware Service ...
Page 16: ...xvi SureMark Hardware Service ...
Page 18: ...xviii SureMark Hardware Service ...
Page 28: ...10 SureMark Hardware Service ...
Page 34: ...16 SureMark Hardware Service ...
Page 38: ...20 SureMark Hardware Service ...
Page 86: ...68 SureMark Hardware Service ...
Page 94: ...76 SureMark Hardware Service ...
Page 96: ...78 SureMark Hardware Service ...
Page 98: ...Assembly 1 Model 1NF 5 10 9 4 8 6 1 2 3 7 11 80 SureMark Hardware Service ...
Page 101: ...Appendix C Parts listing 83 ...
Page 102: ...Assembly 2 Model 1NF Fiscal drawer assembly 3 2 4 5 1 84 SureMark Hardware Service ...
Page 118: ...G362 0578 01 ...


