31
Operations
30
ON/
STANDBY
AUTO
KEYSTONE
MUTE
AUTO SET FREEZE
INPUT
R-CLICK
PJ MODE
LASER
VOL.+
VOL.-
MENU
/
ENTER
RESIZE
OFF
■
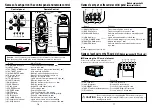
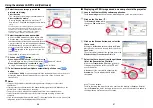
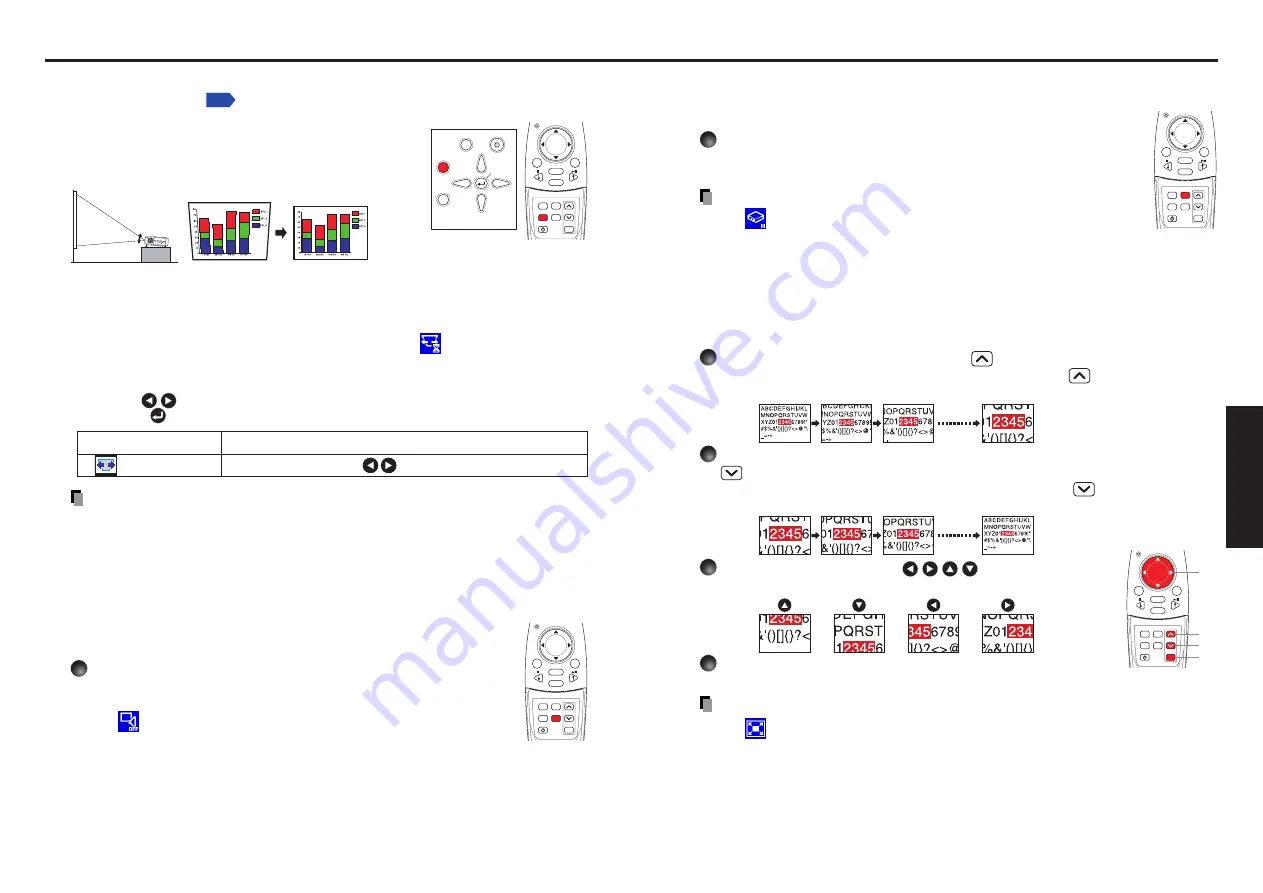
Freezing the image (Freeze)
The image being projected can be made to be frozen. This function is to
be used to pause a video during a presentation, etc.
Press the remote control’s FREEZE button.
The picture is paused. The Freeze function is released when
pressing the FREEZE button again.
Notes
• The
icon will appear while freeze is in effect.
• The freeze function can be used on the resize function. Other
operations will release the freeze.
• Even if an image is frozen on the projector, it is still changing on the video or other
equipment.
■
Enlarging the picture size (Resize)
The image being projected can be enlarged.
1
Press the remote control’s RESIZE
button.
The enlargement ratio is increased each time the RESIZE
button is pressed.
While the button is pushed, the image continues increasing to a limit.
2
To decrease the enlargement ratio, press the remote control’s RESIZE
button.
The enlargement ratio is decreased each time the RESIZE
button is pressed.
(The image cannot be shrunk to less than its original size.)
3
Press and hold down the
buttons to
move the enlarged area.
4
Press the OFF button to undo the resize.
The resize is released, and the image returns to its original size.
Notes
• The
icon will appear while resize is in effect.
• An enlarged image can be frozen using the FREEZE button. The resize function on
a frozen image can also be used.
• Operations other than freeze will release the resize.
• Since the enlargement is performed using digital processing, enlarging the image
will cause it to appear jagged.
• Rarely, the picture could become garbled while the enlarged area is being moved.
Remote
Control
ON/
STANDBY
AUTO
KEYSTONE
MUTE
AUTO SET FREEZE
INPUT
R-CLICK
PJ MODE
LASER
VOL.+
VOL.-
MENU
/
ENTER
RESIZE
OFF
Remote
Control
q
w
r
e
ON/
STANDBY
AUTO
KEYSTONE
MUTE
AUTO SET FREEZE
INPUT
R-CLICK
PJ MODE
LASER
VOL.+
VOL.-
MENU
/
ENTER
RESIZE
OFF
ON/STANDBY
INPUT
FAN
TEMP
LAMP
ON
VOL.+
VOL.-
AUTO
KEYSTONE
MENU
AUTO SET
ON/
STANDBY
AUTO
KEYSTONE
MUTE
AUTO SET FREEZE
INPUT
R-CLICK
PJ MODE
LASER
VOL.+
VOL.-
MENU
/
ENTER
RESIZE
OFF
Using handy features (Continued)
■
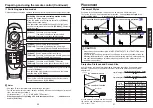
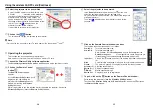
Correcting the keystone distortion (Keystone)
is used to change the
projection angle, the picture will undergo keystone (trap-
ezoidal) distortion.
This projector is capable of correcting this keystone
distortion.
Before correction After correction
USB
COMPUTER
( Y,PB/PR )
S-VIDEO
VIDEO
VIDEO
R - AUDIO - L
AUDIO
MONITOR
CONTROL
1
2
q
Press the AUTO KEYSTONE button.
The Keystone menu appears.
w
Press the AUTO KEYSTONE button again.
The keystone distortion is automatically corrected. The
icon will appear during
processing.
●
Manual adjustment
Use the
buttons for keystone adjustment. When the adjustment is finished,
press the
button. The menu disappears.
Notes
• Depending on the amount of keystone adjustment and the contents of images,
some information may be lost, or the picture quality may suffer.
• Keystone adjustment will not change the shape of the menus.
■
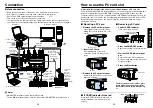
Cutting off the picture and sound temporarily (Mute)
When you want to temporarily project the images of another projector,
overhead projector, etc., this projector’s images and sound can be turned
off.
Press the remote control’s MUTE button.
The picture and sound are cut off. The Mute function is released
when pressing the MUTE button again.
The
icon will appear while mute is in effect.
Control panel
Remote
Control
Remote
Control
Keystone
Shrink screen bottom Shrink screen top
Item
Description

