background image

9

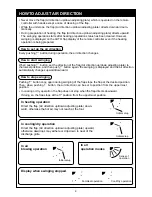
HOW TO ADJUST AIR DIRECTION

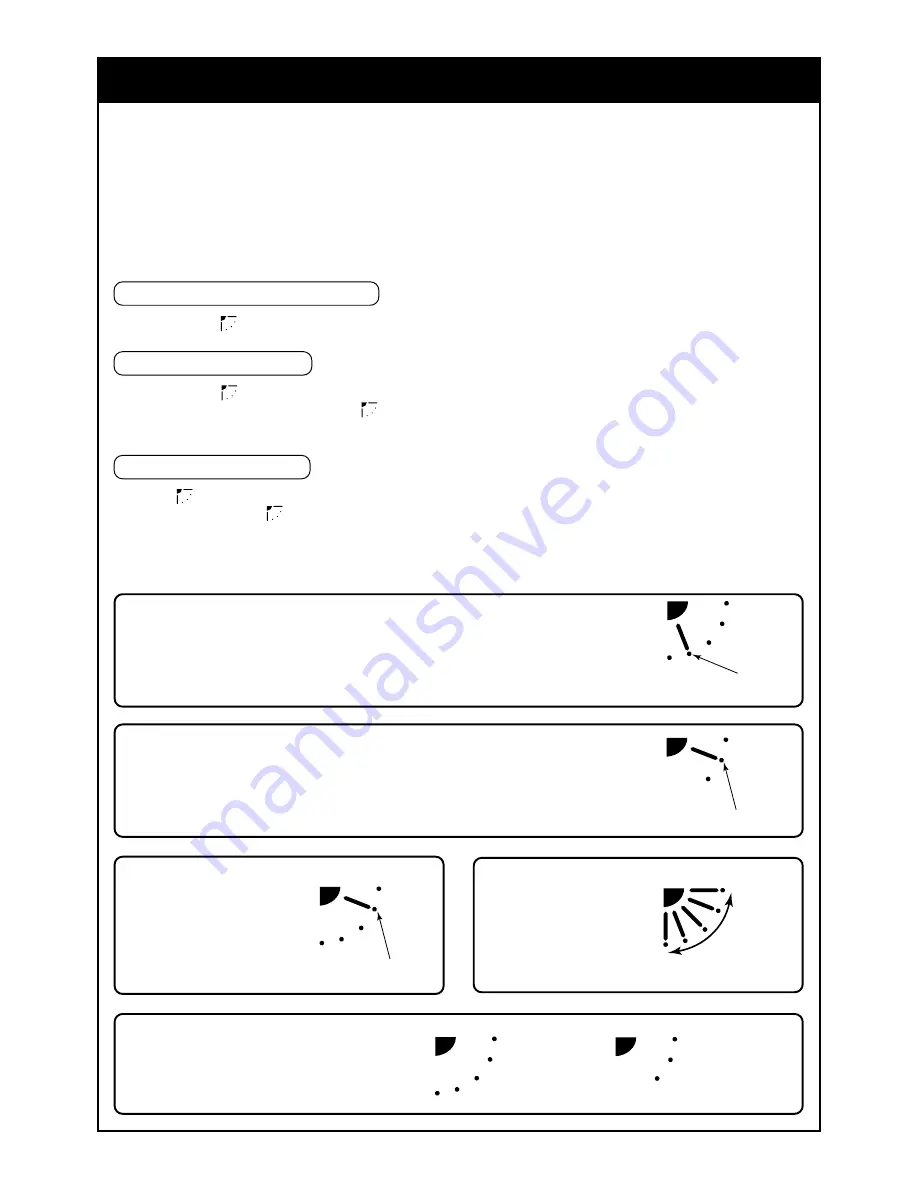
• Never move the flap (Air direction up/down adjusting plate) which is operated on the remote

controller with hands except a case of cleaning of the flap.

• While the unit stops, the flap (Air direction up/down adjusting plate) directs downward auto-

matically.

• During preparation of heating, the flap (Air direction up/down adjusting plate) directs upward.

The swinging operation starts after heating preparation status has been cleared. However,
swinging is displayed on the AUTO flap display of the remote controller even if the heating
operation is being prepared.

How to set up the air direction

Every pushing 

 button during operation, the air direction changes.

How to start swinging

When pushing 

 button, set the direction of the flap (Air direction up/down adjusting plate) to

the lowest position, and then push 

 button again, the swinging is displayed and the air direction

automatically changes upward/downward.

How to stop swinging

Pushing 

 button once again during swinging of the flap stops the flap at the desired position.

Then, when pushing 

 button, the air direction can be set to position from the uppermost

position.
• In cooling or dry operation, the flap does not stop when the flap directs downward.

If doing so, the flap stops at the 3

rd

 position from the uppermost position.

In heating operation

Direct the flap (Air direction up/down adjusting plate) down-
ward, otherwise the hot air may not reach at the foot.

In cooling/dry operation

Direct the flap (Air direction up/down adjusting plate) upward,
otherwise dewdrops may adhere or drip down to near of the
discharge grille.

In air
blowing operation

In all
operation modes

Display when swinging stopped

Initial setup

Initial setup

Initial setup

Series of 
operation

Fan/Heat operation

Cool/Dry operation

Summary of Contents for TCB-AX21U-E

Page 1: ...CONTROLADOR REMOTO PARA AR CONDICIONADO TIPO SPLIT AFSTANDSBEDIENING VOOR DE AIRCONDITIONER GESPLITST TYPE ÓYÓKEYH THËEXEIPIÓMOY ÃÉÁ ÊËÉÌÁÔÉÓÔÉÊÏ ÔÕÐÏÓ SPLIT Wireless Type Type sans fil Drahtloses System Tipo via radio Modelo inalámbrico Tipo Sem Fios Draadloos model Áóýñìáôïõ Ôýðïõ TCB AX21U W E OWNER S MANUAL MANUEL DU PROPRIETAIRE BETRIEBSANLEITUNG MANUALE DEL PROPRIETARIO MANUAL DEL PROPIETARI...

Page 2: ... Spiegare chiaramente il contenuto del Manuale del proprietario e consegnarne una copia all utente Muchas gracias por haber adquirido el control remoto TOSHIBA para su aparato de aire acondicionado Lea atentamente este manual del propietario antes de utilizar el control remoto para el aparato de aire acondicionado Asegúrese de que el fabricante o distribuidor le proporcione el Manual del propietar...

Page 3: ... 54 COME OTTENERE IL FUNZIONAMENTO D EMERGENZA 55 PRIMA DI RICHIERE UN INTERVENTO D ASSISTENZA O RIPARAZIONE 56 PRECAUCIONES PARA SU SEGURIDAD 57 NOMBRE Y FUNCIÓN 58 CÓMO AJUSTAR LA VELOCIDAD DEL VENTILADOR 60 CÓMO UTILIZAR LA UNIDAD 63 CÓMO UTILIZAR EL TEMPORIZADOR 64 CÓMO AJUSTAR LA DIRECCIÓN DE SALIDA DEL AIRE 65 CONMUTADOR DESLIZANTE 66 CÓMO COLOCAR LAS PILAS 66 CÓMO UTILIZAR EL CONTROL REMOTO...

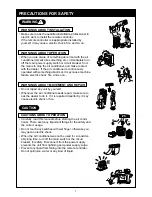
Page 4: ...ne failure electric shock fire and so on WARNINGS ABOUT MOVEMENT AND REPAIR Do not repair any unit by yourself Whenever the air conditioner needs repair make sure to ask the dealer to do it If it is repaired imperfectly it may cause electric shock or fire CAUTION CAUTIONS ABOUT OPERATION Carefully read this manual before starting the air condi tioner There are many important things for the safety ...

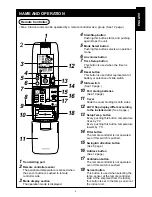
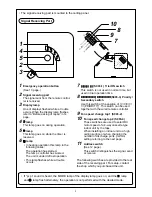
Page 5: ...itch 9 Slide switch See 10 page 10 Part storing batteries See 10 page 11 Cover Slide the cover holding its both sides 12 AUTO flap display differs according to the installed unit See 9 page 13 Setup Temp button Every pushing this button temperature rises by 1 C Every pushing this button temperature lowers by 1 C 14 Filter button The remote controller is not operated even if this switch is pushed 1...

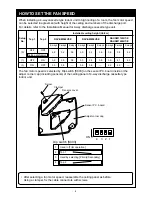
Page 6: ...リモコン親 リモコン親 リモコン親 リモコン親 リモコン親 リモコン子 リモコン子 リモコン子 リモコン子 リモコン子 S003 3 Priority Secondary switch Use this switch at the position of リモコン 親 PRIORITY This switch can be used together with the wired remote controller 9 Fan speed change tap 1 S003 2 10 Fan speed change tap 2 S003 4 These switches are used to select DC motor speed of a 4 way cassette type indoor unit by the taps When installing an indoor u...

Page 7: ...ssette type unit The fan motor speed is selected by Dip switch S003 on the sensor P C board inside or the adjust corner cap including sensors of the ceiling panel of 4 way discharge cassette type indoor unit After selecting a fan motor speed reassemble the ceiling panel as before Using a clamper fix the cable connectors with screws Setup No 0 1 3 Installable ceiling height Unit m RAV SM560UT E RAV...

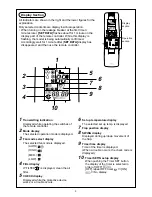
Page 8: ...Displayed while operating the switches of the remote controller 2 Mode display The selected operation mode is displayed 3 Fan mode select display The selected fan mode is displayed AUTO HIGH MED LOW 4 Filter display If FILTER is displayed clean the air filter 5 CHECK display Displayed while the protective device works or a trouble occurs 6 Set up temperature display The selected set up temp is dis...

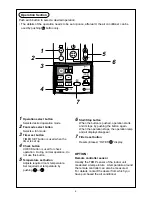
Page 9: ...ion do not use this button 5 Temperature set button Adjusts required room temperature Set required set temperature by pushing or 6 Start Stop button When the button is pushed operation starts and it stops by pushing the button again When the operation stops the operation lamp and all displays disappear 7 Filter reset button Resets Erases FILTER display OPTION Remote controller sensor Usually the T...

Page 10: ... contact the shop which you purchased the unit Automatic cool heat When all indoor units in the identical refrigerant system are controlled as a group the cooling heating operation is automatically performed with the difference between the setup temperature and the room temperature Dry operation There is no dry function according to the used indoor unit even if DRY is displayed on the display sect...

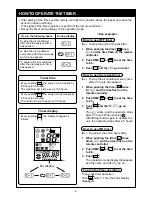
Page 11: ...anges as follows Use example How to use OFF timer Ex To stop the unit 30 minutes after 1 When pushing the timer SET once and the time flash on the remote controller 2 Push TIME or to set the time to 0 5 3 Push SET and the go on timer How to use the repeat timer Ex To stop the air conditioner every time after 2 5 hours has passed 1 When pushing the timer SET twice and the time flash on the remote c...

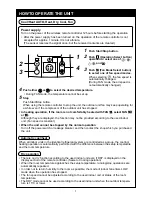
Page 12: ...g plate to the lowest position and then push button again the swinging is displayed and the air direction automatically changes upward downward How to stop swinging Pushing button once again during swinging of the flap stops the flap at the desired position Then when pushing button the air direction can be set to position from the uppermost position In cooling or dry operation the flap does not st...

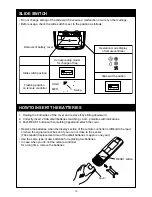
Page 13: ...ce the batteries when the display section of the remote controller is difficult to be read or when the signal cannot be sent if you are not close to the sensor The standard replacement time of the alkali batteries is approx one year Use the same type of new batteries for replacing two batteries In case when you do not the remote controller for a long time remove the batteries RESET button Cover S ...

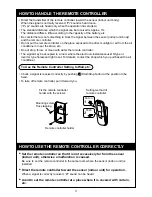
Page 14: ...stantaneous ON type or inverter type florescent light is set For details contact the shop which you purchased the air conditioner To Use the Remote Controller Setting to Wall etc Check a signal is received correctly by pushing Start Stop button at the position to be fixed To take off remote controller pull it toward you HOW TO USE THE REMOTE CONTROLLER CORRECTLY Set the remote controller so that i...

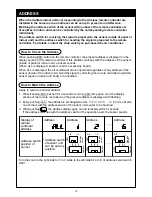
Page 15: ...ioner can be operated regardless of any address of the sensor inside of the indoor unit Send the signal by directing the remote controller toward the sensor panel or indoor unit body to be handled How to Match the Address Setup to remote controller address 1 When keeping ADR pushed for 4 seconds or more ADR lamp goes on at the display section of the remote controller and the present address is dis...

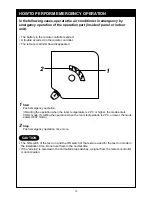
Page 16: ...rgency operation If starting the operation when the room temperature is 24 C or higher the mode enters COOL mode If starting the operation when the room temperature is 24 C or lower the mode enters HEAT mode 2 Stop Push emergency operation once more CAUTION The ON switch of the test run and the ON switch of the test are used for the test run mode in the installation time Do not use them in the nor...

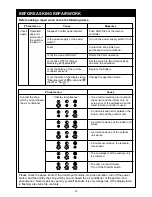
Page 17: ...attery Change the operation mode Phenomenon Contact the shop which you purchased the air conditioner Display lamp flashes Please check the above items If the trouble yet remains stop the operation turn off the power switch and then notify the shop which you purchased the air conditioner of the part No and phenomenon Never repair any part by yourself because it is very dangerous If the display lamp...

Reviews: