MAINTENANCE MANUAL
106
STE 85357
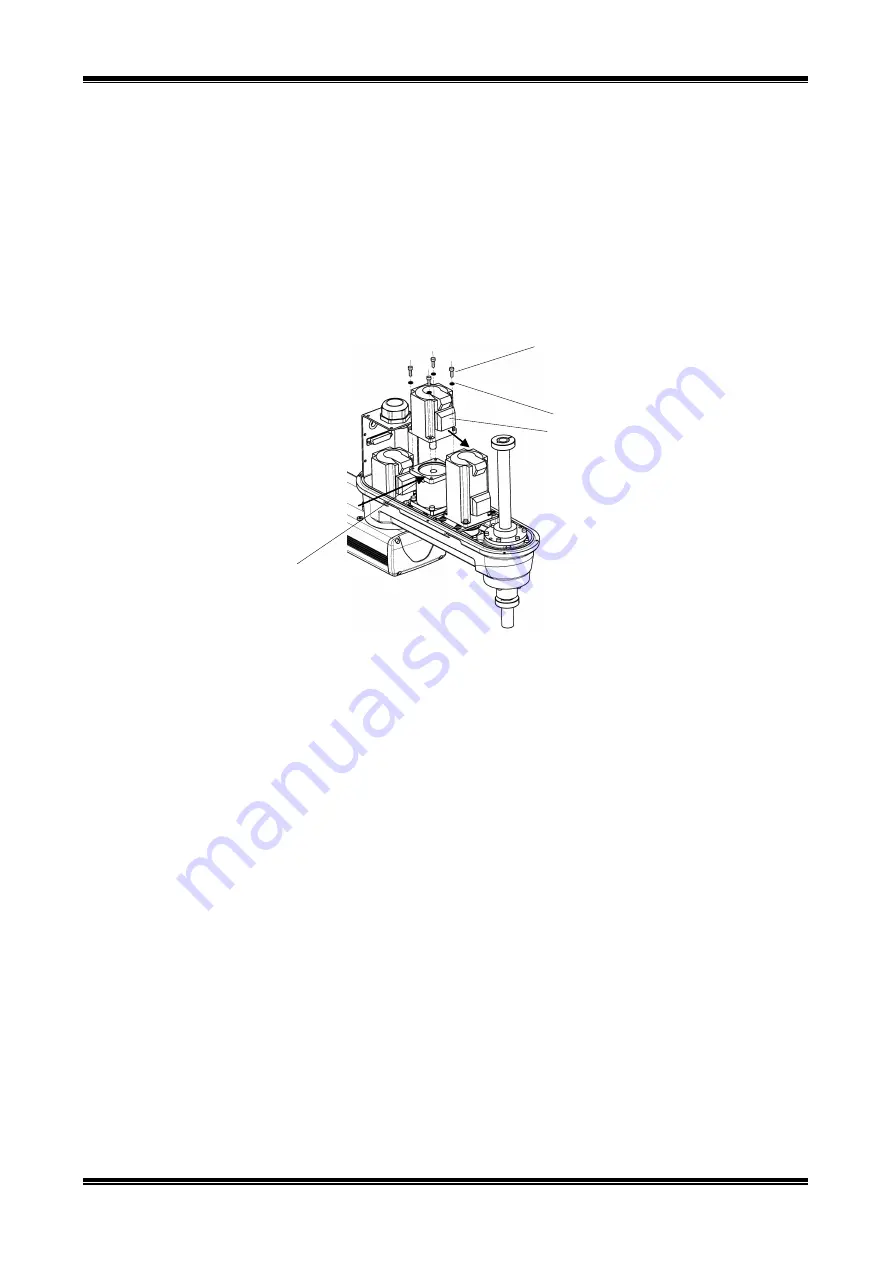
3.4.10 Mounting Axis 4 Motor
1)
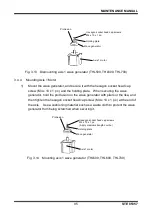
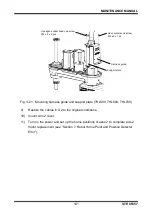
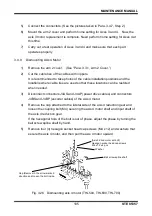
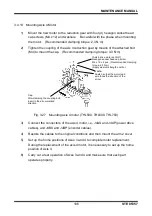
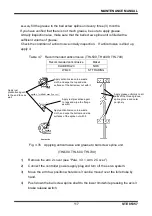
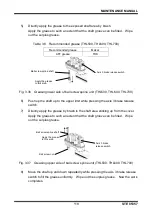
Mount the new motor to the reduction gear with four (4) hexagon socket head
cap screws (M4 x 12) and washers. Be careful with the phase when mounting
the motor. (Recommended clamping torque: 2.3 N·m)
2)
Tighten the coupling of the axis 4 reduction gear by means of the attached bolt
(M4) to mount the cap. (Recommended clamping torque: 4.3 N·m)
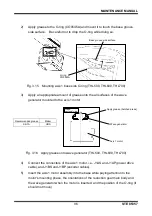
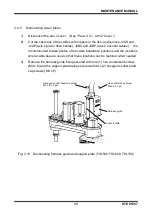
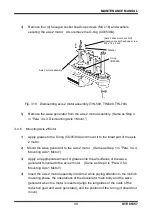
Fig. 3.27 Mounting axis 4 motor (THL500, THL600, THL700)
3)
Connect the connectors of the axis 4 motor, i.e., J4AS and J4AP (power drive
cables), and J4BS and J4BP (encoder cables).
4)
Restore the cables to the original conditions and then mount the arm 2 cover.
5)
Set up the home positions of Axes 3 and 4 to complete motor replacement.
During the replacement of the axis 4 motor, it is necessary to set up the home
position of Axis 3.
6)
Carry out a test operation of Axes 3 and 4 and make sure that each part
operates properly.
Cap
After clamping the coupling bolt,
insert in the arrow-marked
direction.
[Axis 4 drive motor set bolt]
Hexagon socket head cap screw
M4 x 12 x 4 pcs.
(Recommended clamping
torque: 2.3 N·m)
(Apply medium strength Loctite.)
Washer
Fasten so that the motor lead
wire faces the direction of the
arrow.

