TOSHIBA PJTV
Digital Convergence Alignment
Module No. TV-GEN-03
Page 17 of 20
Appendix C
16:9 Progressive Scan Units with Touch Focus
Section 1: OPTICAL & ELECTRICAL FOCUS
1. Follow the appropriate disassembly instructions to gain access to the CRTs.
2. If the wing nuts on the lenses are pointed toward the screen, reverse the lenses
on each tube so the wing nuts are facing the back of the set. Leave the lenses in
this position after servicing. Put the screen assembly back on.
Readme:
The wing nuts can be accessed from the front of units with a screen
size of 50 inches or larger. The bezel assembly can be raised approximately 6
inches and locked into place using an extra set of brackets.
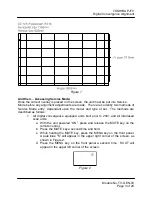
3. From the service mode press the 7 key on the remote control to display the
convergence crosshatch pattern.
4. Push the 100 key to turn off the red tube, and the CH RTN/ENT key to turn off
the blue tube.
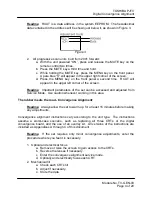
5. Position a mirror for viewing the screen from the rear of the set. From the rear of
the set, loosen the wing nut on the green lens, and adjust the lens for the best
focus in the center area of the screen.
Readme:
No mirror is needed for units that provide front access.
6. From the front of the set, adjust the electrical focus control for best focus in the
center of the screen.
7. Repeat the optical focus, and then tighten the wing nut.
8. Repeat the electrical focus.
9. Push the 100 key to turn on the red tube, and the 0 key to turn off the green tube.
10. Adjust the red optical and electrical focus in the same manner.
11. Push the CH RTN/ENT key to turn on the blue tube, and the 100 key to turn off
the red tube.
12. Adjust the blue optical and electrical focus in the same manner. Electrically
defocus the blue slightly, to maintain uniform brightness.
13. If the bezel assembly has been raised to allow front access, lower it into normal
position.
Section 2: MECHANICAL TILT ADJUSTMENT
1. With the set still in convergence mode, and the convergence overlay on the
screen, check each CRT’s tilt. If a CRT’s pattern is tilted loosen the appropriate
yoke with a non-magnetic screwdriver. Rotate the yoke until the pattern is
aligned vertically and horizontally. Re-tighten the yoke.
2. Press the 7 key on the remote to store the convergence data.
3. After the data is stored, “Please Press Touch Focus” will appear on screen.
Press the “Touch Focus” button on the unit control panel.

