Air to Air Heat Exchanger
Installation Manual
EN
Air to Air Heat Exchanger
Installation Manual
– 22 –
12
Test Run
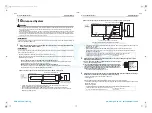
Before performing a test run
• Before turning on the power supply, carry out the following procedure.
Using 500 V-megger, check that resistance of 1 M
Ω
or more exists between the terminal block of the power
supply and the earth (earthing).
If resistance of less than 1 M
Ω
is detected, do not run the unit.
• When a test run is performed together with air conditioners, follow the Installation Manuals of the air conditioners.
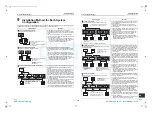
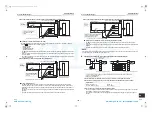
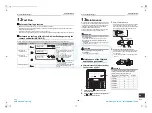
Performing a test run of the Air to Air Heat Exchanger using the
remote controller (NRC-01HE)
Confirm that the unit operates properly referring to the Owner's Manual of the Air to Air Heat Exchanger.
Operation item
Button
Display
Operation
1. Starting operation
The operation lamp lights up, then the
Air to Air Heat Exchanger starts
running.
2. Changing the
ventilation mode
Each time the ventilation mode button
is pressed, the mode changes as
follows:
→
→
3. Changing the
ventilation amount
Each time the ventilation amount
button is pressed, the ventilation
amount changes as follows:
→
*
or
is displayed only
when the imbalanced ventilation
Fan speed is valid.
4. Stopping operation
The operation lamp goes off, then the
Air to Air Heat Exchanger stops
running.
13
Maintenance
Running the Air to Air Heat Exchanger for a long period
causes the filter or heat exchange element to become
clogged with dust. If the filter or heat exchange element
is clogged, the ventilation amount is reduced and
ventilation effect will be deteriorated.
Clean the filter and heat exchange element regularly
according to the extent of dust accumulation.
WARNING
Before performing maintenance, stop the unit, then
turn off the breaker.
• Otherwise, an electric shock or injury may result.
Do not pour or spray water or detergent on the
electric parts.
• Otherwise, an electrical leakage may occur and a fire
or electric shock may result.
CAUTION
Wear protective gloves when performing
maintenance.
• Otherwise, an injury may result.
Maintenance of the filter and
heat exchange element
◆
Filter maintenance (Clean the filter
once or twice a year.)
1
Clean the filter if
is indicated on the
remote controller.
2
Press the
button after cleaning the filter.
The
indicator disappears.
1
Open the inspection cover.
Enter the ceiling cavity remove the screw of fixed
part of Inspection cover and remove the fixing
lever (support the inspection cover while removing
the brackets), then open the inspection cover.
2
Pull out the heat exchange elements.
Filters are attached to the heat exchange element.
Hold the handle of the heat exchange element,
then pull it out.
* 2 heat exchange elements are equipped with
this unit.
CAUTION
The table below shows the weight of each heat
exchange element. Handle the heat exchange
element carefully so as not to drop it.
2
1
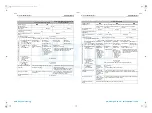
Model name
Weight (kg/unit)
Quantity
VN-M150HE
1.7
2
VN-M250HE
1.7
2
VN-M350HE
1.7
2
VN-M500HE
2.9
2
VN-M650HE
2.9
2
VN-M800HE
3.7
2
VN-M1000HE
3.7
2
Inspection cover
Fixing lever
Fixed part of
Inspection cover
Filters
43-EN
44-EN
+00ET9X463301_01EN.book Page 22 Thursday, January 20, 2011 4:41 PM
AMP Air Conditioning
www.ampair.co.uk | sales@ampair.co.uk

