<Replacement>
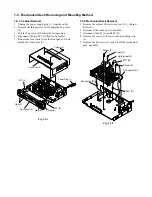
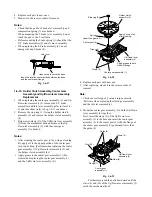
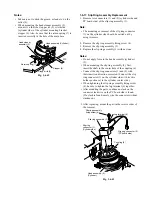
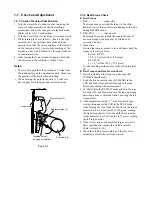
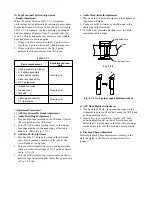
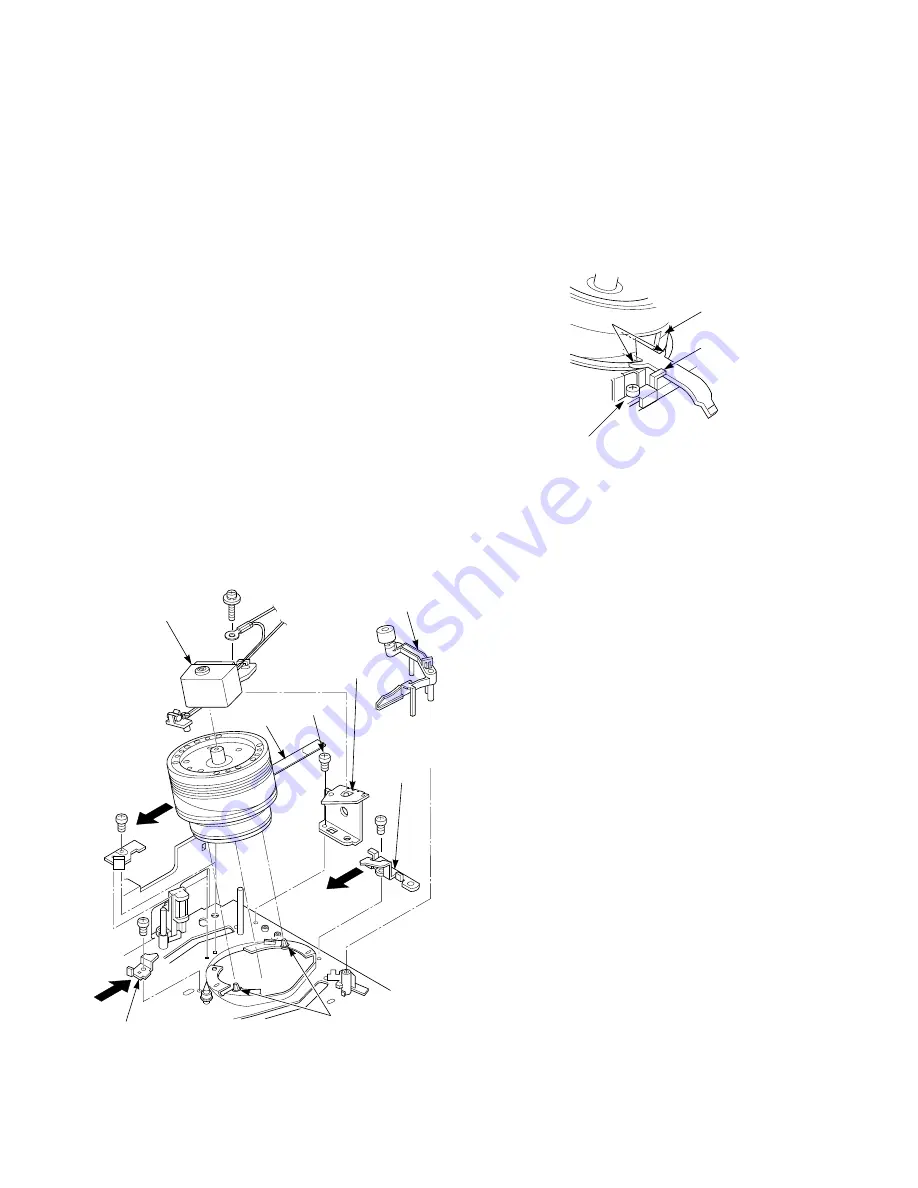
1. Remove the slip ring assembly. (Refer to item 1-6-17.)
2. Remove the head cleaner assembly. (Refer to item 1-
6-16.)
3. Remove the FPC (1) from the main PC Board.
4. Remove the screw (2) fixing the slip ring bracket (3)
and remove the slip ring bracket (3).
5. Remove the cylinder holding plates (4), (5) and (6).
(Refer to item 1-6-19.)
6. Remove the head assembly (cylinder) (7).
7. Replace the head assembly (cylinder) (7) with new
one.
8. When mounting, take care of the direction of the
head assembly (cylinder) (7).
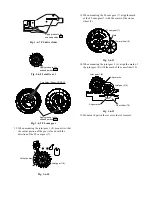
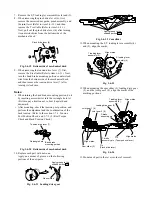
9. Remount the head assembly (cylinder) (7) in the
reverse order of removal. Fix it pressing slightly in
the direction shown by the arrow A for the cylinder
holding plate (4) pressing slightly in the direction
shown by the arrow B, and the cylinder holding plate
(4) pressing slightly in the direction shown by the
arrow C for the cylinder holding plate (6). (Tighten-
ing torque : 294 to 392 mN•m (3 to 4kg•cm))
Fix the slip ring bracket (1) with the screw (2) after
adjusting the boss of the mechanical deck to the boss
hole of the slip ring bracket (3). (Tightening torque :
294 to 392 mN•m (3 to 4kg•cm))
Slip ring assembly
FPC (1)
Head cleaner assembly
Slip ring bracket (3)
Cylinder
holding
plate (4)
Head
assembly (7)
(Cylinder)
Cylinder pin
Cylinder holding plate (5)
A
B
Cylinder
holding
plate (6)
C
Screw (2)
Fig. 1-6-47
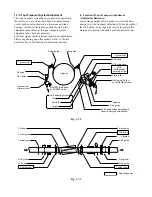
Notes:
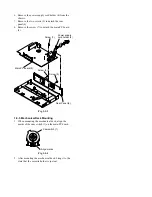
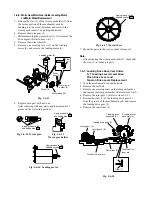
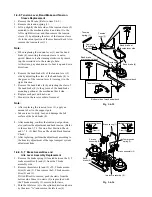
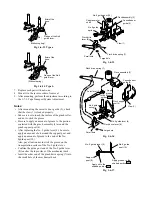
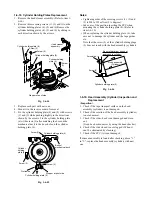
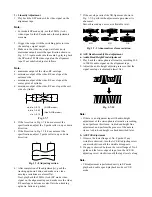
• When remounting the cylinder holding plate (4),
after confirming that the FPC (1) is hooked at the
groove on the lower head assembly properly, insert
the FPC (1) under the tip of the cylinder holding
plate.
However, this is not applied for the type which has
no cylinder window.
• When replacing, take much care not to touch the
video head directly and damage the cylinder.
Hook FPC on the groove.
(2 points)
Head assembly (9)
(Cylinder)
Cylinder holding plate (4)
FPC (3)
Insert FPC under
the cylinder tip.
Cylinder window
Fig. 1-6-48
9. After mounting, perform the adjustment according to
the 1-7-3. Tape Transportation System Adjustment.
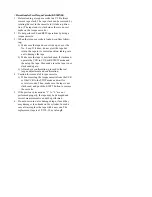
1-6-20. Capstan Motor Assembly and Reel Belt
Replacement
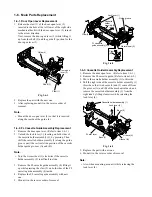
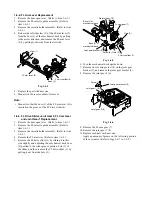
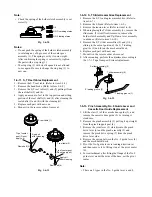
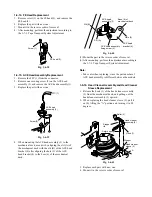
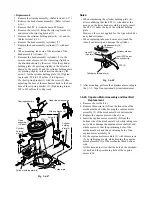
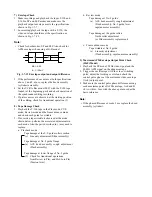
1. Remove the reel belt (1).
2. Remove three screws (2) from the front side of the
mechanical deck while keeping the capstan motor
assembly (3) of the mechanical deck bottom side.
3. Replace the capstan motor with new one.
4. Insert the capstan motor assembly (2) from the
bottom side of the mechanical deck while taking care
not to hit or damage the capstan motor shaft (4) and
whole motor, so that the positioning hole of the
mechanical deck and the positioning hole of the
capstan motor assembly fit.
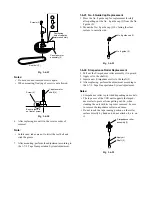
5. Fix the capstan motor assembly (3) with three screws
(2) by tightening evenly while keeping the capstan
motor assembly (3) of the mechanical deck bottom
side.
At this time, adjust it so that the hole of the mechani-
cal deck and the positioning hole of the capstan
motor is fit.

