background image

92

Exploring Your Computer’s Features

Using the Memory card reader

Removing memory media

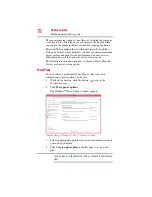
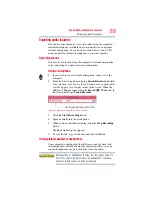
1

If you are not currently on the Desktop, choose the Desktop tile 
on the Start screen, otherwise skip to step 

2

.

2

Prepare the card for removal by clicking on the 

Show hidden 

icons 

button (

), if necessary, in the Notification area and 

then selecting the 

Safely Remove Hardware and Eject 

Media 

icon.

3

Highlight, and then click the item you would like to eject.

If the system is unable to prepare the media for safe removal, a 
message will tell you to try again later. If the media can be 
removed now, the system displays 

Safe to Remove Hardware

.

If the computer has a spring-loaded adapter slot, see step 

4

otherwise, skip to step 

5

.

4

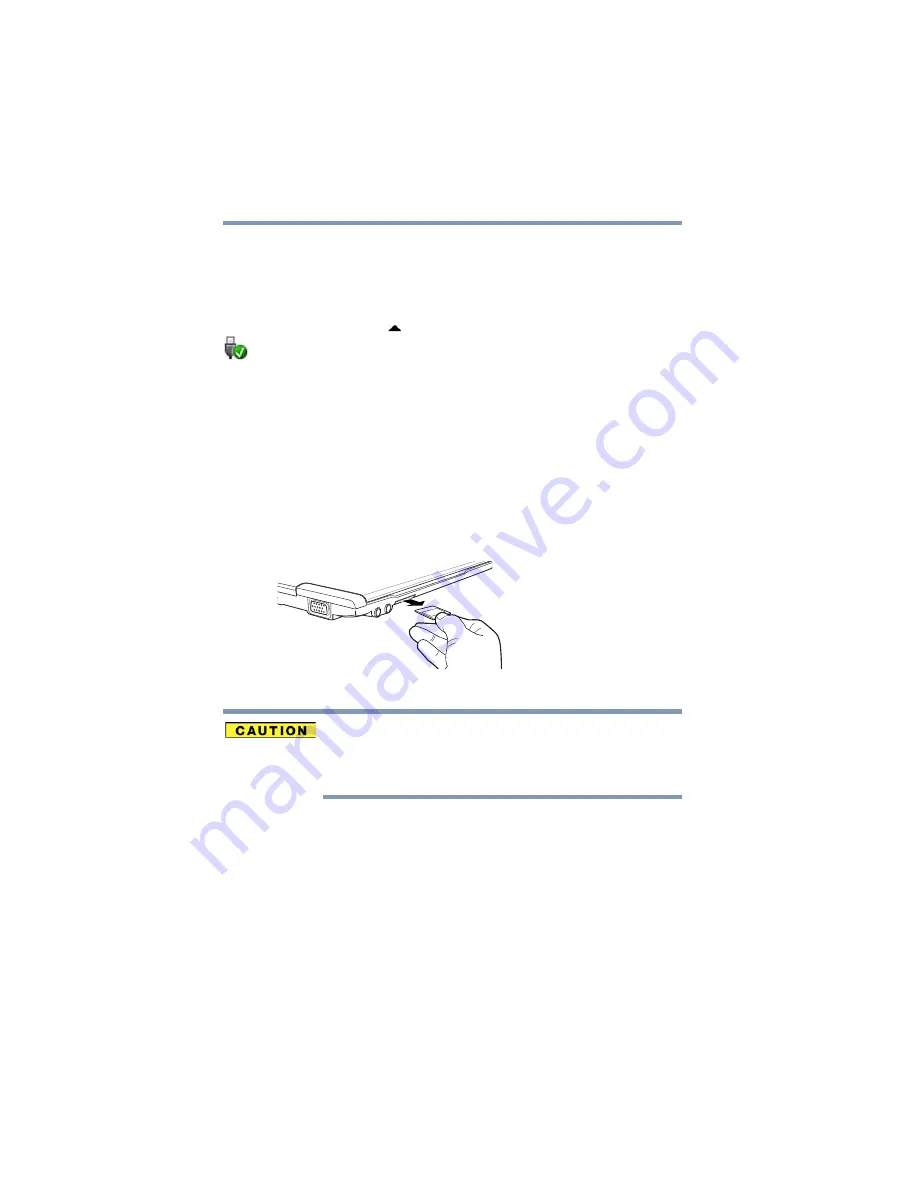
Gently press the card inward to release it.

The card pops out slightly.

5

Grasp the card and pull it straight out.

 Sample Illustration) Removing memory media

Do not remove memory media while data is being written or read. 
Even when the Windows

®

 message “copying...” disappears, writing 

to the media might still be in progress and your data could be 
destroyed.

Summary of Contents for Z930-Landis-PT235U-0600CWG1

Page 1: ... Web site at support toshiba com At this Web site you will find answers for many commonly asked technical questions plus many downloadable software drivers BIOS updates and other downloads For more information see If Something Goes Wrong on page 118 in this guide Portégé Z930Series User sGuide ...

Page 2: ...ERS DO NOT WARRANT THAT OPERATION OF THE PRODUCT WILL BE UNINTERRUPTED OR ERROR FREE YOU AGREE THAT TOSHIBA ITS AFFILIATES AND SUPPLIERS SHALL HAVE NO RESPONSIBILITY FOR DAMAGE TO OR LOSS OF ANY BUSINESS PROFITS PROGRAMS DATA NETWORK SYSTEMS OR REMOVABLE STORAGE MEDIA ARISING OUT OF OR RESULTING FROM THE USE OF THE PRODUCT EVEN IF ADVISED OF THE POSSIBILITY THEREOF Protection of Stored Data For yo...

Page 3: ...adiate radio frequency energy and if not installed and used in accordance with the instructions it may cause harmful interference to radio communications However there is no guarantee that interference will not occur in a particular installation If this equipment does cause harmful interference to radio or television reception which can be determined by turning the equipment off and on the user is...

Page 4: ...S radio technology and is compliant to The IEEE 802 11 Standard on Wireless LANs Revision A B G N as defined and approved by the Institute of Electrical and Electronics Engineers The Wireless Fidelity Wi Fi certification as defined by the Wi Fi Alliance The Wi Fi CERTIFIED logo is a certification mark of the Wi Fi Alliance Bluetooth and Wireless LAN devices operate within the same radio frequency ...

Page 5: ...like for example mobile phones Because Wireless LAN products operate within the guidelines found in radio frequency safety standards and recommendations TOSHIBA believes Wireless LAN is safe for use by consumers These standards and recommendations reflect the consensus of the scientific community and result from deliberations of panels and committees of scientists who continually review and interp...

Page 6: ...t to the following two conditions 1 this device may not cause interference and 2 this device must accept any interference including interference that may cause undesired operation of this device L utilisation de ce dispositif est soumis aux deux conditions suivantes 1 il ne doit pas produire de brouillage et 2 l utilisateur du dispositif doit être prêt à accepter tout brouillage radioélectrique re...

Page 7: ... TOSHIBA Europe GmbH Hammfelddamm 8 41460 Neuss Germany The European Union WEEE Waste from Electrical and Electronic Equipment Directive Information The European Union WEEE Waste from Electrical and Electronic Equipment Directive is intended to protect the quality of the environment and human health through the responsible use of natural resources and the adoption of waste management strategies th...

Page 8: ...able laws and regulations governing the disposal of this product For information on how to trade in or recycle your product visit www reuse toshiba com VCCI Class B Information Taiwan The legal communications mentioned in the above item refer to radio communications operated in accordance with telecommunication laws and regulations Article 14 Unless approved for any model accredited low power radi...

Page 9: ...es OFDM modulation 3 The interference range of this equipment is less than 40m 4 This equipment uses a frequency bandwidth from 2 400 MHz to 2 483 5 MHz It is possible to avoid the band of mobile object identification systems The frequency bandwidth of this equipment may operate within the same range as industrial devices scientific devices medical devices microwave ovens licensed radio stations a...

Page 10: ...hnical Regulation Conformity Certification and the Technical Conditions Compliance Approval and it belongs to the device class of radio equipment of low power data communication system radio station stipulated in the Radio Law and the Telecommunications Business Law of Japan The name of the radio equipment refer to the equipment label provided on the computer Approved by both the JAPAN APPROVALS I...

Page 11: ...our les enregistrements et licences veuillez contacter l IBPT Deutschland License required for outdoor installations Check with reseller for procedure to follow Anmeldung im Outdoor Bereich notwendig aber nicht genehmigungspflichtig Bitte mit Händler die Vorgehensweise abstimmen France Restricted frequency band only channels 1 to 7 2400 MHz and 2454 MHz respectively may be used outdoors in France ...

Page 12: ...device must be used with Access Points that have employed and activated a radar detection feature required for European Community operation in the 5 GHz bands This device will operate under the control of the Access Point in order to avoid operating on a channel occupied by any radar system in the area The presence of nearby radar operation may result in temporary interruption of operation of this...

Page 13: ... errors If you detect certain interference while you use Bluetooth cards from TOSHIBA always change the frequency move your computer to the area outside of the interference range of 2 4 GHz Wireless LAN devices 40 meters 43 74 yards or more or stop transmitting from your computer Please contact TOSHIBA computer product support on Web site http www toshiba europe com computers tnt bluetooth htm in ...

Page 14: ...oard airplanes or In any other environment where the risk of interference to other devices or services is perceived or identified as harmful If you are uncertain of the policy that applies on the use of wireless devices in a specific organization or environment e g airports you are encouraged to ask for authorization to use the device with Bluetooth wireless technology prior to turning on the equi...

Page 15: ...ulations is prohibited Notice The information contained in this manual including but not limited to any product specifications is subject to change without notice TOSHIBA CORPORATION AND TOSHIBA AMERICA INFORMATION SYSTEMS INC TOSHIBA PROVIDES NO WARRANTY WITH REGARD TO THIS MANUAL OR ANY OTHER INFORMATION CONTAINED HEREIN AND HEREBY EXPRESSLY DISCLAIMS ANY IMPLIED WARRANTIES OF MERCHANTABILITY OR...

Page 16: ...egistered trademarks or trademarks of Microsoft Corporation in the United States and or other countries MultiMediaCardandMMCareregisteredtrademarksofMultiMediaCardAssociation Secure Digital and SD are trademarks of SD Card Association Wi Fi is a registered trademark of the Wi Fi Alliance All other brand and product names are trademarks or registered trademarks of their respective companies License...

Page 17: ...icient use of resources and appropriate treatment of hazardous substances in accordance with recycling regulations in each state country and territory Toshiba wants to make it easy for customers to recycle products at the end of the life cycle To learn more about Toshiba s sustainability commitment visit us toshiba com green Reuse Donation Recycling Functional computers can be donated to a local c...

Page 18: ...28 Chapter 1 Getting Started 29 Selecting a place to work 29 Setting up a work environment 29 Keeping yourself comfortable 30 Computer user comfort recommendations 30 Good Working Posture 30 Using the notebook with an external keyboard mouse or monitor 31 Typing style 32 Taking breaks and varying tasks 32 Mobile computing tips 33 Transporting the notebook 33 Seeking additional help 33 ...

Page 19: ... 44 Recovering the Internal Storage Drive 44 Creating recovery media 46 Restoring from recovery media 48 Refresh your PC with user s data 49 Reset your PC 52 Installing drivers and applications 54 Using the touch pad 55 Adjusting touch pad settings 58 Disabling or enabling the touch pad 59 Scrolling with the touch pad 59 Control buttons 59 Connecting an external device 59 Using external display de...

Page 20: ...iba s online resources 70 Chapter 3 Mobile Computing 71 Toshiba s energy saver design 71 Running the computer on battery power 71 Battery Notice 72 Power management 73 Charging the main battery 73 Charging the RTC battery 74 Monitoring main battery power 74 Determining remaining battery power 75 What to do when the main battery runs low 76 Setting battery notifications 76 Conserving battery power ...

Page 21: ...b Camera 90 Using the Memory card reader 91 Inserting memory media 91 Removing memory media 92 Chapter 5 Utilities 93 Desktop Assist 94 Media Entertainment 95 Tools Utilities 96 Support Recovery 97 eco Utility 98 Setting passwords 99 Using a supervisor password 99 Using a user password 101 Deleting a user password 101 System Settings 102 Sleep and Charge 104 USB Sleep and Charge 104 Enabling Disab...

Page 22: ...ows operating system is not working 121 Using Startup options to fix problems 121 Internet problems 123 The Windows operating system can help you 124 Fixing a problem with Device Manager 124 Checking device properties 125 Memory problems 125 Power and the batteries 126 Keyboard problems 127 Display problems 127 Disk or storage drive problems 129 Error checking 129 Sound system problems 131 Printer...

Page 23: ...Display switch 145 Display brightness 146 Disabling or enabling wireless devices 146 Disabling or enabling the touch pad 146 Disabling or enabling the cursor control overlay 146 Disabling or enabling the numeric overlay 147 Disabling or enabling the scroll lock 147 Volume Mute 147 Keyboard Function keys 148 Zoom Display resolution 148 Appendix B Power Cord Cable Connectors 149 Glossary 150 Index 1...

Page 24: ...will provide the most stable operating environment and optimum system performance for both AC power and battery modes To conserve energy your computer is set to dim the display after 10 minutes of inactivity and enter the low power Sleep mode which shuts down the system after 15 minutes of inactivity in AC power mode We recommend that you leave this and other energy saving features active so that ...

Page 25: ...t suppliers to meet RoHS requirements and verifies its suppliers commitment to meeting RoHS requirements by conducting component sampling inspections during the product design approval process Certain Microsoft software product s included with this computer may use technological measures for copy protection IN SUCH EVENT YOU WILL NOT BE ABLE TO USE THE PRODUCT IF YOU DO NOT FULLY COMPLY WITH THE P...

Page 26: ...e accuracy of the information provided herein product specifications configurations prices system component options availability are all subject to change without notice For the most up to date product information about your computer or to stay current with the various computer software or hardware options visit Toshiba s Web site at support toshiba com This guide This guide introduces the compute...

Page 27: ...n death or serious injury Indicates a potentially hazardous situation which if not avoided could result in death or serious injury Indicates a potentially hazardous situation which if not avoided may result in minor or moderate injury Indicates a potentially hazardous situation which if not avoided may result in property damage Provides important information Other icons used Additional icons highl...

Page 28: ... computer comes with the following documentation An electronic version of the User s Guide this document A Quick Start document It may also contain guides for other applications that may come with your system For accessory information visit Toshiba s Web site at accessories toshiba com Service options Toshiba offers a full line of optional service programs to complement its standard limited warran...

Page 29: ...o avoid potential hazards that could cause bodily injury property damage or damage the computer Selecting a place to work Your computer is portable and designed to be used in a variety of circumstances and locations Setting up a work environment Place the computer on a hard flat surface that is large enough for the computer and any other items you are using such as a printer Leave enough space aro...

Page 30: ...uld be free of clutter so that your legs and feet are not restricted and you can get close enough to your notebook and other items that you use frequently Adjust the chair back rest it should match the curve of your back and provide comfortable back support Adjust the chair arm rests they should be about the same height as the keyboard and comfortably support your arms allowing your shoulders to r...

Page 31: ... level to prevent possible eye strain Keep your head level facing forward and balanced over your torso Adjust the font size of text on your screen to make viewing comfortable Rest your eyes periodically by focusing on objects that are farther away Using the notebook with an external keyboard mouse or monitor Sample Illustration Correct posture When using a notebook for long hours it may be more co...

Page 32: ...ing style Learn to touch type so that you don t have to look down at the keyboard Type with straight wrists Type lightly Learn the keyboard shortcuts for your applications You will be more productive Use the pointing device e g touch pad or tablet pen whichever is available with your notebook computer or other optional pointing devices like mouse or trackball with a comfortable hand posture Avoid ...

Page 33: ...creative when in a hotel room use a rolled up blanket or pillows to provide back support or to provide arm support To position the computer at a good height remember to operate the computer on a hard flat stable surface Using your computer on a carpet blanket or other soft materials can block the air vents including those located at the base of the computer and possibly cause overheating of your c...

Page 34: ... your hands and wrists aligned in a comfortable straight posture Are your arms supported in the forearm area not at the wrist Do you hold the mouse or trackball with a loose relaxed hand Do you use a light touch when typing or using the mouse Do you clean your mouse or trackball regularly Is the top of your monitor close to eye level Is the monitor about an arm length away Have you eliminated the ...

Page 35: ...generate heat under normal operating conditions as a function of system activity Avoid extended contact between the computer base or palm rest and your skin Under certain operating conditions such prolonged contact between the computer base or palm rest and your skin may result in skin irritation and or heat injury Consider using a hard computer insulating pad or similarly suitable hard insulating...

Page 36: ... your computer and AC adaptor have adequate ventilation and are protected from overheating when the power is turned on or when an AC adaptor is connected to a power outlet even if your computer is in Sleep mode In this condition observe the following Never cover your computer or AC adaptor with any object Never place your computer or AC adaptor near a heat source such as an electric blanket or hea...

Page 37: ...e Connecting to a power source Your computer requires power to operate Use the power cord cable and AC adaptor to connect the computer to a live electrical outlet or to charge the computer s battery Never pull on a power cord cable to remove a plug from a socket Always grasp the plug directly Failure to follow this instruction may damage the cord cable and or result in a fire or electric shock pos...

Page 38: ...us injury TOSHIBA assumes no liability for any damage caused by use of an incompatible adaptor Sample Illustration Power cord cable and AC adaptor To connect AC power to the computer 1 Connect the power cord cable to the AC adaptor Sample Illustration Connecting the power cord cable to the AC adaptor Handling the cord on this product will expose you to lead a chemical known to the State of Califor...

Page 39: ...ld result in an electric shock possibly resulting in serious injury The computer s main battery light gives you an indication of the main battery s current charge Glows amber while the main battery is being charged AC adaptor connected Glows green when the main battery is fully charged Flashes amber when the main battery charge is low and it is time to recharge the main battery or plug in the AC a...

Page 40: ...d to slowly open or close the display panel To avoid damaging the display panel do not force it beyond the point where it moves easily and never lift the computer by the display panel Do not press or push on the display panel and be careful to remove any pens or other objects from the keyboard area before closing the display panel Small bright dots may appear on your screen display when you turn o...

Page 41: ...s you through steps to set up your software Follow the on screen instructions Registering your computer with Toshiba Product registration is strongly recommended and allows Toshiba to send you periodic updates announcements and special offers applicable to your product Product registration can be completed by one of three methods 1 From the Toshiba Website at register toshiba com Type in the reque...

Page 42: ...torage drive light and the drive in use light are off If you turn off the power while a disk disc is being accessed you may lose data or damage the disk disc and or drive 3 In the lower right of the screen click the Power icon Sample Image Shut down 4 Highlight Shut down while holding the Shift key and then click the Shut down option The computer closes all open applications shuts down the operati...

Page 43: ... upper or lower right corner of the screen 2 When the Windows Charms appear click the Settings Charm If you power down using the Sleep command and the battery discharges fully your unsaved information will be lost Be sure to save your work first 3 In the lower right of the screen click the Power icon Sample Image Sleep mode 4 Highlight Sleep and then click the Sleep option Sleep mode saves the cur...

Page 44: ...d the computer at for more information on adding memory to your computer Toshiba will not be responsible for any product damage data loss service or part replacement made necessary by improper installation of a memory module Recovering the Internal Storage Drive To purchase an optional external writable optical disc drive or a USB Flash drive visit the Toshiba web site at accessories toshiba com Y...

Page 45: ...em for the first time See Creating recovery media on page 46 and Restoring from recovery media on page 48 During the recovery process your computer must be connected to an external power source via the AC adaptor When you restore your system only the operating system files applications and drivers originally shipped with the computer are restored Any files that you created are not restored during ...

Page 46: ...ked up to the external media and can be restored from this media Any files that you created are not backed up on the recovery media You will need to separately back up the files you created for more information see Backing up your work on page 69 When you create recovery media the system will prompt you to insert several blank DVDs or connect one or more USB flash drives of a certain minimum capac...

Page 47: ...age space required for copying your system s recovery files to USB flash drive s 4 Do one of the following If you are copying files to DVD connect an optional external writable optical disc drive to your computer and insert a blank DVD into the drive If you are copying files to a USB flash drive connect a USB flash drive of the required minimum capacity as specified in the TOSHIBA Recovery Media C...

Page 48: ...on page 69 During the recovery process your computer must be connected to an external power source via the AC adaptor If you have created recovery media for your system you can restore your system from such media if necessary For example if your original internal storage drive fails you can restore your system to a new internal storage drive from your recovery media For instructions on creating re...

Page 49: ...en press the ENTER key 5 A warning screen appears stating that when the recovery is executed all data on your internal storage drive will be deleted and rewritten Click Yes to continue 6 Follow the on screen instructions to complete the recovery process When the process is complete a message displays indicating that the drive has been recovered 7 Click Finish to restart the computer Refresh your P...

Page 50: ... NOTE Your data will be copied into the backup folder All of the data will be moved to this folder during the recovery process however the current directory structure will be retained 1 From the Start or Desktop screen move the pointer over the upper or lower right corner of the screen 2 When the Windows Charms appear click the Settings Charm 3 Click Change PC Settings The PC settings window appea...

Page 51: ... Image Refresh your PC screen Toshiba does not guarantee successful data back up Be sure to save your work to external media before executing the recovery see Backing up your work on page 69 6 Click the Next button to begin The Ready to refresh your PC screen appears Sample Image Ready to refresh your PC screen You will be prompted to refresh your system 7 Click the Refresh button ...

Page 52: ...rive Be sure to save your work to external media before executing the recovery see Backing up your work on page 69 During the recovery process your computer be must connected to an external power source via the AC adaptor 1 From the Start or Desktop screen move the pointer over the upper or lower right corner of the screen 2 When the Windows Charms appear click the Settings Charm 3 Click Change PC...

Page 53: ...ows and click Get Started The Reset your PC screen appears Sample Image Reset your PC screen 6 Click the Next button The Do you want to fully clean your drive screen appears Sample Image Do you want to fully clean your drive screen 7 Select one of the following options Just remove my files Fully clean the drive ...

Page 54: ...alling drivers and applications The TOSHIBA Application Installer allows you to reinstall the drivers and applications that were originally bundled with your computer To reinstall drivers and applications 1 From the Start screen begin typing TOSHIBA Application Installer and click your selection or if you are in the Desktop move your pointer over the upper or lower right corner of the screen When ...

Page 55: ...h pad Some of the touch pad operations described in this section are only supported in certain applications and only on certain models You can use the touch pad the small touch sensitive area in front of the keyboard and the adjacent control buttons to Move the pointer on the screen Select an item on the screen Open or activate an item on the screen Scroll through a document or information Zoom in...

Page 56: ...he following Example Move the on screen pointer Slide your finger across the touch pad in the direction you want to move the pointer To move the pointer a longer distance slide your finger several times across the touch pad in the preferred direction Sample Illustration Pointer moves to the right Select an item 1 Move the pointer to the item you want to select 2 Do one of the following Tap the tou...

Page 57: ...control button This feature varies by program Check your program documentation for specific instructions on right clicking Sample Illustration Click the secondary right hand control button Scroll vertically Slide your finger along the right edge of the touch pad in the direction you want to scroll Repeat to scroll a longer distance Sample Illustration Vertical scrolling active area Scroll horizont...

Page 58: ...otentially the item or text may be replaced by the next character you type Temporarily disable the touch pad so that it does not respond to touch or button presses while you type See Disabling or enabling the touch pad on page 59 Adjust the sensitivity of the touch pad so that it is less responsive to accidental light taps and lighter finger pressure Touch pad setting options vary by computer mode...

Page 59: ... step instructs you to click or choose an item move the cursor to the item then press and release the primary left hand button To double click press the primary button twice in rapid succession The primary button usually corresponds to the left mouse button The function of the secondary right hand button depends on the application you are using It usually corresponds to the right mouse button righ...

Page 60: ...cable Connecting an HDMI compatible television or display device To connect an HDMI compatible television or display device to the computer Connect one end of an HDMI cable not included with your computer to the HDMI Out port on the side of your computer and then connect the other end of the cable to your television or display device Refer to the manual that came with the television or display dev...

Page 61: ...nce you have connected an external display device you can choose to use the internal display only the external device only or both simultaneously Some modes are only available with the appropriate device attached and turned on The quickest way to change the display output settings is to use the P keys Press the P keys repeatedly until the setting you want takes effect Briefly pause each time you p...

Page 62: ...eo settings See the video device documentation for additional configuration steps Customizing your computer s settings There are several ways in which you can customize your computer to suit your particular requirements You can go into your computer settings to make adjustments to your computer to suit your needs From the Start or Desktop screen move your pointer over the upper or lower right corn...

Page 63: ...ce Cleaning the computer Keep liquids including cleaning fluid out of the computer s keyboard speaker and other openings Never spray cleaner directly onto the computer and or display Never use harsh or caustic chemical products to clean the computer To keep your computer clean gently wipe the display panel and exterior case with a lightly dampened cloth Moving the computer Before moving your compu...

Page 64: ...t accessories toshiba com Sample Illustration Computer lock cable To secure the computer 1 Wrap the cable through or around some part of a heavy object Make sure there is no way for a potential thief to slip the cable off the object 2 Pass the locking end through the loop 3 Insert the cable s locking end into the security lock slot on your computer then engage the locking device The computer is no...

Page 65: ... Saving your work on page 69 for further information HINT Some applications have an automatic save feature that can be activated This feature saves your file to the internal storage drive at preset intervals See your software documentation for details Back up your files to external media on a regular basis Label the backup copies clearly and store them in a safe place It is easy to put off backing...

Page 66: ...in Do not turn off the computer if a drive indicator light indicates a drive is active Turning off the computer while it is reading from or writing to a disk may damage the disk the drive or both The Windows operating system records information such as your desktop setup during its shutdown procedure If you do not let the Windows operating system shut down normally details such as new icon positio...

Page 67: ...functions when pressed Used in combination with the Fn key function keys marked with icons execute specific functions on the computer For example Fn F9 turns the touch pad ON OFF For more information see TOSHIBA Function Keys on page 143 Special Windows keys Sample Illustration Special Windows keys Your computer s keyboard has one key and one button that have special functions in Windows Windows k...

Page 68: ...g device 2 Adjust the settings as desired and then click OK Starting an app To Start an app on the Start screen move your pointer over the appropriate tile and click to open To Start an app from the Desktop move your pointer over the upper or lower right corner of the screen When the Windows Charms slide out from the right click the Start Charm Starting an app from the Start screen To Start an app...

Page 69: ...e external media flash media or optical disc This is one of the most important rules of computing Many applications offer a feature that saves documents at regular intervals Check your application s documentation to see if it has an automatic save feature Backing up your work Back up all the files you create in case something happens to your computer You can back up your files to different types o...

Page 70: ...ou may prefer to use a high capacity file recovery system such as an external hard drive Toshiba s online resources Toshiba maintains a number of online sites to which you can connect These sites provide information about Toshiba products give help with technical questions and keep you up to date with future upgrades For more information see Contacting Toshiba on page 141 ...

Page 71: ... number of other features that enhance its energy efficiency Many of these energy saving features have been preset by Toshiba We recommend you leave these features active allowing your computer to operate at its maximum energy efficiency so that you can use it for longer periods while traveling Running the computer on battery power The computer contains a Lithium Ion Li Ion battery that provides p...

Page 72: ... least once a month The Lithium Ion battery has no memory effect so it is not necessary to let the battery fully discharge each time However for better accuracy of the battery meter it is helpful to fully discharge the battery periodically Please see Maintaining your battery on page 81 for procedures If the computer is continuously operated on AC power either through an AC adaptor or a port replic...

Page 73: ...is on or off TECHNICAL NOTE The recharging of the battery cannot occur when your computer is using all of the power provided by the AC adaptor to run applications features and devices Your computer s Power Options utility can be used to select a power level setting that reduces the power required for system operation and will allow the battery to recharge The battery may not start charging immedia...

Page 74: ...TC battery may only charge while the computer is turned on To recharge the RTC battery plug the computer into a live electrical outlet and leave the computer powered on for 24 hours It is seldom necessary to charge the RTC battery because it charges while the computer is on If the RTC battery is low the real time clock and calendar may display the incorrect time and date or stop working When Hiber...

Page 75: ...r button light near the upper right corner of the keyboard When the ON OFF light or power button light flashes amber it indicates that the system is suspended using the Windows operating system Sleep command Sample Illustration Power and battery light locations Determining remaining battery power Wait a few moments after turning on the computer before trying to monitor the remaining battery power ...

Page 76: ...of the battery What to do when the main battery runs low When the main battery runs low you can Plug the computer into an external power source and recharge the main battery Save your work and turn off the computer If you do not manage to do any of these things before the main battery completely runs out of power the computer automatically enters Hibernation mode and turns itself off Hibernation m...

Page 77: ...larm settings to suit your needs Conserving battery power How long a fully charged battery lasts when you are using the computer depends on a number of factors such as How the computer is configured How much you use the internal storage drive or other optional devices Where you are working since operating time decreases at low temperatures There are various ways in which you can conserve power and...

Page 78: ... options to suit your own needs The following sections describe how to choose a Power Plan and discuss each power saving option Power Plans You can choose a predefined Power Plan or select your own combination of power options To do this 1 While on the desktop click the battery icon in the Notification area 2 Click More power options The Windows Power Options window appears Sample Image Windows Po...

Page 79: ...ced plan is a compromise between battery time and performance Using the eco power plan This computer may be equipped with the eco power plan Operating the computer with this power plan enabled reduces electrical power consumption by slightly lowering system performance For example when this power plan is enabled the brightness of the display is reduced and the interval before Sleep mode takes effe...

Page 80: ...e following sections offer tips on how to take care of your battery and prolong its life Safety precautions Always immediately turn the power off and disconnect the power cable cord plug from the plug socket and stop using the computer if you observe any of the following conditions Offensive or unusual oder Excessive heat Discoloration Deformation cracks or leaks Smoke Other unusual events during ...

Page 81: ...siderations For disposal reuse or recycling information please contact your local government In addition Toshiba s recycling initiatives include recycling programs events and consumer promotions For details please visit us toshiba com green Notice regarding CR coin cell batteries applicable to California U S A only Perchlorate Material special handling may apply See http www dtsc ca gov hazardousw...

Page 82: ...hrough airport security equipment The X ray equipment will not harm your computer Before using your computer aboard an aircraft make sure the Wireless antenna is OFF Airplane mode is ON To enable or disable wireless communication use the Fn F8 key For more information see TOSHIBA Function Keys on page 143 NOTE NOTE ...

Page 83: ... your pointer over the upper or lower right corner of your screen a list of Charms will slide out from the right These Charms perform various commands including basics tasks like turning off the power and advanced PC settings You can go to the Start screen by clicking the Start charm see Charms on page 84 You can also use the Windows key on your keyboard or on the LCD screen to go to Start screen ...

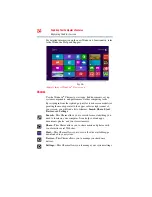
Page 84: ...se pointer to the upper or lower right corner of your screen you will find a list of charms Search Share Start Devices and Settings Search This Charm allows you to search for most anything you need to locate on your computer It can help you find apps documents photos and your favorite music Share This Charm allows you to share music and photos with your favorite social Web sites Start This Charm a...

Page 85: ...lightly different from the screens displayed by your system The differences are not significant and do not indicate any change in the functionality of your system Finding your way around the desktop Your computer s desktop includes several standard features icons taskbar Notification area notifications and background pattern Sample Image Windows Desktop screen Icons An icon represents a folder fil...

Page 86: ...u place the pointer over an icon a popup description of the file contents appears Your desktop may contain other icons depending on your configuration See Windows online Help for more specific information on each icon and how to use it Taskbar Each time you open an application a button associated with that application appears on the taskbar With some applications a button appears on the taskbar fo...

Page 87: ...otification shown on the Start screen tile using glyphs to indicate the number of applications that have updates available or the status of a running application Raw notifications These run a background task on behalf of an application while that application is not running in order to make available the latest content such as an online newspaper Windows Store Although many applications will be pre...

Page 88: ...eless networking device documentation or your network administrator To enable or disable wireless communication use the F12 key For more information see TOSHIBA Function Keys on page 143 When the Wireless antenna is ON the wireless indicator light will be lit For help with common Wi Fi networking problems see Wireless networking problems on page 132 Connecting your computer to a network You can co...

Page 89: ...top move your pointer over the upper or lower right corner of the screen When the Windows Charms appear click the Search Charm and in the Search field type Sound Recorder Sample Image Sound Recorder screen 3 Click the Start Recording button 4 Speak normally into the microphone 5 When you have finished recording click the Stop Recording button The Save As dialog box appears 6 To save the file type ...

Page 90: ...s on each speaker For headphones use the computer s volume control Using the Web Camera Available on certain models Your computer may come with a built in Web Camera With this Web Camera you can do the following Take pictures and record videos with your computer Chat with others and have them see you while using instant messaging IM applications Have video conference calls To email instant message...

Page 91: ...so support other types of media Do not use the Copy Disk function for this type of media To copy data from one media to another use the drag and drop feature of the Windows operating system Inserting memory media To locate your memory card reader please refer to your Quick Start document The following instructions apply to all types of supported media devices 1 Turn the media so that the contacts ...

Page 92: ...like to eject If the system is unable to prepare the media for safe removal a message will tell you to try again later If the media can be removed now the system displays Safe to Remove Hardware If the computer has a spring loaded adapter slot see step 4 otherwise skip to step 5 4 Gently press the card inward to release it The card pops out slightly 5 Grasp the card and pull it straight out Sample...

Page 93: ...nal options or change default options These utilities are described in this chapter The utilities described in this chapter and the icons shown in the sample images are applicable only if the related utility is available on your system Desktop Assist eco Utility Supervisor password User password System Settings Sleep and Charge Function Key Cooling Performance Diagnostic Tool PC Diagnostic Tool PC...

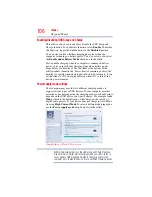
Page 94: ...k access to computer functions and allows you to customize a range of computer settings To access Desktop Assist from the Start screen begin typing Desktop Assist or while in the Desktop screen double click the Desktop Assist icon The Desktop Assist window appears Sample Image Desktop Assist window The Desktop Assist offers several options Media Entertainment Tools Utilities Support Recovery ...

Page 95: ...95 Utilities Desktop Assist Media Entertainment Sample Image Desktop Assist window Media Entertainment tab ...

Page 96: ...ist Tools Utilities The features that may be available in this category are eco Utility Fingerprint Utility Supervisor password System Settings Function Key User password Sample Image Desktop Assist window Tools Utilities tab ...

Page 97: ...es that may be available in this category are Cooling Performance Diagnostic Tool PC Diagnostic Tool PC Health Monitor Recovery Media Creator Service Station TOSHIBA Application Installer User s Guide Sample Image Desktop Assist window Support Recovery tab ...

Page 98: ...tart screen begin typing eco Utility or while in the Desktop screen double click the Desktop Assist icon 2 Click Tools Utilities 3 Click eco Utility The eco Utility window appears Sample Image eco Utility window 4 To activate the eco power plan select eco Mode on the left side 5 Click the eco Mode button 6 Click Close For more information on the eco power plan and utility click the Help button at ...

Page 99: ...ord or the user password must be deleted and then re entered after the supervisor password is set The user password can be set up under the supervisor password Using a supervisor password A supervisor password prevents other users from changing hardware configuration options Setting a supervisor password If you choose to set a supervisor or user password TOSHIBA strongly recommends that you save y...

Page 100: ...OK Deleting a supervisor password To delete a supervisor password 1 To access Supervisor Password from the Start screen begin typing Supervisor Password or while in the Desktop screen double click the Desktop Assist icon 2 Click Tools Utilities 3 Click the Supervisor Password icon A pop up screen appears asking for a password 4 Enter your password 5 Click Delete An authority verification pop up sc...

Page 101: ... typing User Password or while in the Desktop screen double click the Desktop Assist icon 2 Click Tools Utilities 3 Click the User Password icon 4 Click Set 5 Enter your password and then enter it again to verify 6 Click Set 7 Click OK to save your password as a text file 8 Click Save 9 Click OK Deleting a user password To cancel the power on password function 1 To access User Password from the St...

Page 102: ...ions Some of the tabs listed below may not be available on some machines The System Settings screen may have the following tabs General Allows you to view the current BIOS version or change certain settings back to their default values Sleep and Charge Allows you to set advanced features for sleep mode hibernate mode and shutdown state see Sleep and Charge on page 104 Button Setting Allows you to ...

Page 103: ...uter is running on battery power the CPU frequency mode is set to low for slower processing Switching the CPU to low allows you to conserve power and extend the operating time of your battery Always High Sets the CPU speed to high when using either the battery or the AC adaptor Always Low Sets the CPU speed to low when using either the battery or the AC adaptor Boot Allows you to modify the boot s...

Page 104: ...stem Settings 4 Click Sleep and Charge USB Sleep and Charge Your computer can supply USB bus power DC 5V to the USB port even when the computer is in Sleep mode Hibernation mode or shutdown state powered off This function can only be used for the port that supports the USB Sleep and Charge function hereinafter called compatible port Compatible ports are USB ports that have the symbol icon You can ...

Page 105: ...nnected to the compatible port when the AC adaptor is not connected to the computer the battery of the computer will be depleted even when the power of the computer is turned OFF As such we recommend that you connect the AC adaptor to the computer when using the USB Sleep and Charge function External devices connected to the USB bus power DC 5V function that interfaces with the power ON OFF of the...

Page 106: ...hould stop For example if you set the slider to 10 charging will stop when 10 or less of the battery power remains Power supply mode settings Your computer may provide two different charging modes to support various types of USB devices If your computer provides more than one charging mode the charging mode you should select depends on the USB device you want to charge For example Auto Mode which ...

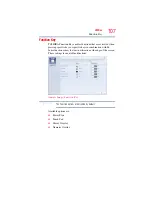
Page 107: ...specific keys or specific keys in combination with Fn Some functions show the toast notification at the edge of the screen These settings turn on off notifications Sample Image Function Key The Function options are disabled by default Available options are Power Plan Touch Pad Cursor Overlay Numeric Overlay NOTE ...

Page 108: ...fans are operating properly To use the Cooling Performance Diagnostic Tool 1 From the Start screen begin typing Cooling Performance Diagnostic Tool or while in the Desktop screen double click the Desktop Assist icon 2 Click Support Recovery 3 Click Cooling Performance Diagnostic Tool The Cooling Performance Diagnostic Tool window appears Sample Image Cooling Performance Diagnostic Tool window 4 Cl...

Page 109: ...PC Diagnostic Tool from the Start screen begin typing PC Diagnostic Tool or while in the Desktop screen double click the Desktop Assist icon 2 Click Support Recovery 3 Click PC Diagnostic Tool The PC Diagnostic Tool window appears 4 Click the Diagnostic Tool tab Sample Image PC Diagnostic Tool window 5 Select the device s that you would like to test by clicking the check box that appears to the le...

Page 110: ...ata uses a very small portion of the total hard disk capacity approximately 3 MB or less per year This information is used to identify and provide a notification of system conditions that may affect the performance of your TOSHIBA computer It may also be used to help diagnose problems should the computer require service by TOSHIBA or TOSHIBA s authorized service providers Additionally TOSHIBA may ...

Page 111: ... information on using the utility to create recovery media see Creating recovery media on page 46 Service Station The Service Station helps you keep your new computer running at its best by notifying you when updated software firmware documentation or other information is available for your computer The Service Station will alert you when updates are available and you can then choose to install th...

Page 112: ...ll TPM 1 From the Start screen begin typing Application Installer or while in the Desktop screen double click the Desktop Assist icon 2 Click Support Recovery 3 Double click TOSHIBA Application Installer and then click Yes 4 In the TOSHIBA Application Installer window click Next 1 Select Infineon TPM Software Professional Package and click Install 2 Follow the onscreen instruction 3 Restart the co...

Page 113: ...ler from the Start screen begin typing Application Installer or while in the Desktop screen double click the Desktop Assist icon 2 Click Support Recovery 3 Click TOSHIBA Application Installer The TOSHIBA Application Installer window appears 4 Click Next Sample Image TOSHIBA Application Installer screen 5 Click the item you want to install Sample Image TOSHIBA Application Installer selection screen...

Page 114: ...ise out of the use of the fingerprint software or utility Using the Fingerprint Utility To access the Fingerprint Utility 1 From the Start screen begin typing Fingerprint Utility or while in the Desktop screen double click the Desktop Assist icon 2 Click Tools Utilities 3 Double click Fingerprint Utility It is recommended that you complete the Fingerprint practice tutorial before starting fingerpr...

Page 115: ...int reader Failure to follow these guidelines and or procedures might result in damage to the reader or cause reader failure finger recognition problems or lower finger recognition success rate Do not scratch or poke the reader with your nails or any hard or sharp objects Do not press the reader with too much pressure Do not touch the reader with a wet finger or any wet objects Keep reader surface...

Page 116: ...ion success rate Enroll two or more fingers Enroll additional fingers if recognition failure occurs often using enrolled fingers Check your finger condition Changed conditions such as injured rough extremely dry wet soiled dirty oily soaked or swollen fingers may lower the recognition success rate Also if the fingerprint is worn down or the finger becomes thinner or fatter the recognition success ...

Page 117: ... will be displayed when recognition is abnormal or recognition is not successful within a fixed duration The recognition success rate may differ from user to user TOSHIBA does not guarantee that this fingerprint recognition technology will be error free TOSHIBA does not guarantee that the fingerprint reader will recognize the enrolled user or accurately screen out unauthorized users at all times T...

Page 118: ...on Toshiba s support services at the end of this chapter Problems that are easy to fix Your application stops responding If you are working with an application that suddenly freezes all operations chances are the application has stopped responding You can exit the failed application without shutting down the operating system or closing other applications To close an application that has stopped re...

Page 119: ...nother device such as a lamp Verify that the computer is on by looking at the ON OFF indicator If the indicator is glowing the computer is on Also try turning the computer off and then on If you are using an AC adaptor verify that the computer is receiving power from the external power source by looking at the AC power light If the indicator is glowing the computer is connected to a live external ...

Page 120: ...the computer plugged into a live wall outlet for several hours For more information see Changing the main battery on page 80 The AC power light is blinking If the AC power light is blinking try the following steps 1 Connect the AC adaptor to a different power outlet preferably in a different room If the computer starts normally there may be a problem with the AC outlet itself or the voltage level ...

Page 121: ...kes a long time to start The operating system responds differently from the normal routine The screen does not look right Unless a hardware device has failed problems usually occur when you change the system in some way such as installing a new application or adding a device If you experience any of these problems use the options in the Startup menu to fix the problem Using Startup options to fix ...

Page 122: ...puter settings are changed back to their defaults For more information see Reset your PC on page 52 Advanced options Clicking this option presents you with another set of options System Restore System Restore allows you to use a Restore point to return the computer to a state at which it was performing properly Restore points are created When new hardware or software is installed Manually by the u...

Page 123: ...g System is most likely working properly and that you should look to third party applications or drivers for the source of your problem Disable driver signature enforcement Allows drivers containing improper signatures to be installed Disable early launch anti malware protection Allows drivers to initialize without being measured by the Anti malware driver Disable automatic restart on system failu...

Page 124: ...n troubleshooting the problem Getting to the online Help will differ depending on which interface you are in Start screen Type Help and Support As soon as you begin typing the search feature automatically begins Desktop Press the F1 key When the Windows Help and Support screen appears do one or both of the following In the open search field type the topic you need help with and follow the on scree...

Page 125: ...on about the device The Resources tab which lists resources assigned to the device This tab does not appear if the device is not using resources The Driver tab which displays the drivers being used by the device This tab also provides options for updating the driver or rolling back the driver in case the new version is causing a problem The tabs that appear in the dialog box vary from one device t...

Page 126: ...scharged it will not begin charging immediately Leave the AC adaptor and power cord cable connected wait 20 minutes and see if the battery is charging If the battery light is glowing after 20 minutes let the computer continue charging the battery for at least another 20 minutes before you turn on the computer If the battery light does not glow after 20 minutes the battery may have reached the end ...

Page 127: ...nk Display Auto Off may have gone into effect Press any key to activate the screen If you are using the built in screen make sure the display priority is not set for an external monitor To do this press Fn F5 If this does not correct the problem press Fn F5 again to return the display priority to its previous setting HINT Pressing the Fn F5 key combination several times will advance through the di...

Page 128: ...ings and that the adapter type is incorrect or the current settings do not work with your hardware Reduce the size of the color palette to one that is supported by the computer s internal display To change the display properties 1 Right click in a blank area of the Windows desktop 2 Click Personalize and then Display 3 Use the menu on the right hand side of the page to Adjust resolution Adjust bri...

Page 129: ...y When the computer is operated on battery power the screen will dim and you may not be able to increase the brightness of the screen while on battery power Disk or storage drive problems Problems with the storage drive or with external media usually show up as an inability to access the drive or as sector errors Sometimes a drive problem may cause one or more files to appear to have garbage in th...

Page 130: ...icking Scan drive Error checking tests and repairs the storage drive Your hard disk seems very slow If you have been using your computer for a long time your files may have become fragmented Run Disk Defragmenter To do this 1 Move your pointer over the upper or lower right corner of the screen When the Windows Charms appear click the Search Charm click Settings and in the Search field type Defragm...

Page 131: ...ternal headphones or speakers check that they are securely connected to your computer If you are using external headphones or speakers check that they are securely connected to your computer The computer emits a loud high pitched noise This is feedback between the microphone and the speakers It occurs in any sound system when input from a microphone is fed to the speakers and the speaker volume is...

Page 132: ... will print Contact the software manufacturer for more information Wireless networking problems This section provides general troubleshooting tips for networking problems specifically wireless Wi Fi networking The terms and concepts used assume a basic understanding of networks and may be for more advanced users If you need assistance or if you are not familiar with the terminology please see Wind...

Page 133: ...er with a support technician at a later time To enable or disable wireless communication use the F12 key For more information see TOSHIBA Function Keys on page 143 Use IPCONFIG to verify that the computer has a useful IP address one other than the private address of 169 254 xxx xxx assigned by Windows 1 From the Start screen type Cmd 2 Click Command Prompt 3 Enter IPCONFIG ALL and then press ENTER...

Page 134: ...the adapter s management utility If the documentation that accompanies the adapter does not provide enough information to determine if this is the case contact that vendor s support group for further advice Develop good computing habits Save your work frequently You can never predict when your computer will lock forcing you to close an application and lose unsaved changes Many software application...

Page 135: ...tem offers some easy to use features for backing up your Windows settings and your data documents and other important files Take advantage of these features to protect yourself from much more difficult and time consuming restoration procedures and to safeguard your valuable data from loss Saving system configuration with restore points The System Restore feature of the Windows operating system qui...

Page 136: ...as successfully created 9 Click Close Then at a later time you can re establish your Windows configuration using the saved restore point To do this 1 From the Start screen type Control Click Control Panel from the list that appears 2 Click System and Security and then System 3 In the left pane click System Protection The System Protection tab of the System Properties window appears 4 Click System ...

Page 137: ...ent way to back up your computer or just your important files to optical disc drives or hard drives An external hard drive is recommended in case the internal storage drive fails No additional software is required Most of the optical disc drives built into recent Toshiba portable computer models can write to or burn as well as read from optical discs External optical disc writers are also widely a...

Page 138: ...37 Have your back up DVD s on hand in case you need any files from them Do not guess follow directions carefully It is often necessary to run an installation utility first before connecting a new hardware item to the computer If the device is connected first it may be very difficult to complete the installation successfully Always carefully follow the installation instructions that accompany the h...

Page 139: ... the TOSHIBA Sleep and Charge utility to check if the feature is disabled and to enable it if necessary For more information see Enabling Disabling USB Sleep and Charge on page 106 Try selecting a different charging mode in the TOSHIBA Sleep and Charge utility if your computer provides more than one charging mode For more information see Power supply mode settings on page 106 If you are attempting...

Page 140: ...t the device while the computer is turned on Before connecting the eSATA device to your computer and external power source read the documentation that came with the device and follow the manufacturer s instructions If you need further assistance If you have followed the recommendations in this chapter and are still having problems you may need additional technical assistance Since some problems ma...

Page 141: ... information in the USA www toshiba ca Canada www toshiba Europe com Europe www toshiba co jp index htm Japan latin toshiba com Mexico and all of Latin America acclaim toshiba com Toshiba USA Self Service support web site Australia Toshiba Australia Pty Limited 84 92 Talavera Road North Ryde NSW 2113 Sydney Australia Canada Toshiba Canada Ltd 191 McNabb Street Markham Ontario L3R 8H2 Canada France...

Page 142: ...to Piso Col Lomas de Chapultepec CP 11000 Mexico DF Spain Toshiba Information Systems España S A Parque Empresarial San Fernando Edificio Europa 1a Planta Escalera A 28831 Madrid San Fernando de Henares Spain United Kingdom Toshiba Information Systems U K Ltd Toshiba Court Weybridge Business Park Addlestone Road Weybridge Surrey KT15 2UL United Kingdom United States Toshiba America Information Sys...

Page 143: ...ide a quick way to modify selected system functions and to launch applications Functions TOSHIBA Function keys are used to set or modify the following system functions Lock Instant security Power Plan Sleep Hibernation Output Display switch Brightness control Wireless Touch pad Mute ...

Page 144: ...rently selectable power plans and cycles through the power plans The properties of each power plan and the power plans that are displayed by this function are set in the Power Options window see Power Plans on page 78 This TOSHIBA function key also allows you to enable notifications for power plans The notifications are disabled by default Fn This TOSHIBA Function key places the computer into Slee...

Page 145: ...vailable options Only the first option is available when you do not have an external monitor attached PC screen only Duplicate Extend Second screen only Sample Image Display mode options window All of the above modes are always displayed on the screen however only the available modes for your system are functional depending on the attached external display s NOTE ...

Page 146: ... increases the screen brightness Fn This TOSHIBA Function key enables disables the Wi Fi antenna in your computer The wireless modes are Disables the wireless antenna Airplane mode is ON Enables the wireless antenna Airplane mode is OFF Fn This TOSHIBA Function key enables disables the touch pad To enable disable the touch pad press Fn F9 For more information on using the touch pad see Using the t...

Page 147: ...abling the scroll lock Volume Mute Fn This TOSHIBA Function key enables disables the numeric overlay Fn This TOSHIBA Function key enables disables the scroll lock Fn This TOSHIBA Function key enables disables volume mute on your computer When volume mute is enabled no sound will come from the speakers or headphones ...

Page 148: ... takes a snapshot of your display screen Fn This TOSHIBA Function key allows you to zoom out Fn This TOSHIBA Function key allows you to zoom in Fn This TOSHIBA Function key decreases the speaker volume Fn This TOSHIBA Function key increases the speaker volume Fn Fn Space bar This TOSHIBA Function key switches screen resolution Cycle through the screen resolutions and then select the desired resolu...

Page 149: ...with the correct power supply for the country of purchase This appendix shows the shapes of the typical AC power cord cable connectors for various parts of the world USA UL approved Canada CSA approved United Kingdom BS approved Europe VDA approved NEMKO approved Australia AS approved ...

Page 150: ...AC Alternating Current BIOS Basic Input Output System BD ROM Blu ray Disc Read Only Memory bps bits per second CD Compact Disc CD ROM Compact Disc Read Only Memory CD RW Compact Disc Rewrite Memory CMOS Complementary Metal Oxide Semiconductor CPU Central Processing Unit DC Direct Current DMA Direct Memory Access DIMM Dual Inline Memory Module DOS Disk Operating System ...

Page 151: ...ce Consumer Electronics Control HTML Hypertext Markup Language IEEE Institute of Electrical and Electronics Engineers I O Input Output IRQ interrupt request ISP Internet Service Provider KB kilobyte LAN Local Area Network LCD Liquid Crystal Display LED Light Emitting Diode MB megabyte MBps megabyte per second MIDI Musical Instrument Digital Interface PC Personal Computer PCI Peripheral Component I...

Page 152: ...tive matrix displays are viewable from wider angles than most passive matrix displays adapter A device that provides a compatible connection between two units For example the computer s internal display adapter receives information from the software and translates it into images on the screen An adapter can take a number of forms from a microprocessor to a simple connector An intelligent adapter o...

Page 153: ...formation is passed between two devices This is the basic unit of measure used in modem communications and is similar but not identical to the baud rate See also baud rate boot To start the computer The term boot originates from bootstrap program as in pulling itself up by its bootstraps a program that loads and initializes the operating system See also reboot boot disk See system disk boot priori...

Page 154: ... Charms Start screen icons that slide out from the right side of the screen and direct you to various Windows functions chip A small piece of silicon containing computer logic and circuits for processing memory input output and or control functions Chips are mounted on printed circuit boards click To press and release the pointing device s primary button without moving the pointing device In the W...

Page 155: ... Printers disk drives and modems are examples of devices device driver A program called a driver that permits a computer to communicate with a device dialog box An on screen window displayed by the operating system or an application giving a direction or requesting input from the user Direct Current DC The type of power usually supplied by batteries DC flows in one direction Compare Alternating Cu...

Page 156: ...mouse button unless otherwise stated driver See device driver DVD An individual digital versatile or video disc See also DVD ROM DVD ROM Digital Versatile or Video Disc Read Only Memory A very high capacity storage medium that uses laser optics for reading data Each DVD ROM can hold as much data as several CD ROMs Compare CD ROM E emulation A technique in which a device or application imitates ano...

Page 157: ...tes a structure on the disk so the operating system can write information to the disk or read information from it frontside bus The primary pathway bus between the CPU and the computer s main memory Also called system bus See also bus Function key 1 A feature in which certain keys in combination with the Fn key can set system options or control system parameters such as the battery save mode 2 A k...

Page 158: ...om a computer while the computer is running and have the operating system automatically recognize the change I icon A small image displayed on the screen that represents a function file or application interlaced A method of refreshing a computer screen in which only every other line of pixels is refreshed Interlaced monitors take two passes to create a complete screen image Compare non interlaced ...

Page 159: ...creating light and dark pixels load To move information from a storage device such as a hard disk into memory for processing local area network See LAN logical drive A section of a disk that is recognized by the operating system as a separate disk drive A system s logical drives may differ from its physical drives For example a single hard disk drive may be partitioned into two or more logical dri...

Page 160: ... computer Online may refer to information being read from your own computer s internal storage drive such as online documentation or online Help or to information coming from another company on a company network or the Internet operating system A set of programs that controls how the computer works Examples of operating systems are the Windows Vista Home Basic and Windows 8 operating systems optic...

Page 161: ...nables you to move the pointer on the screen port A socket on the computer where you plug in a cable for connection to a network or a peripheral device processor See Central Processing Unit CPU program A set of instructions that can be executed by a computer The general classes of programs also called software are operating system application and utility See also operating system application utili...

Page 162: ...of memory is used to store your computer s BIOS which is essential instructions the computer reads when you start it up See also BIOS memory Compare RAM S Secure Digital SD A small portable non volatile memory card used to store and transfer data between digital products providing encryption capability for content security select To highlight or otherwise specify text data or graphics with the int...

Page 163: ...le to another computer through a modem or network See also download USB See Universal Serial Bus USB USB Flash drive A small portable flash memory card that plugs into a computer s USB port and functions as a portable hard drive They are smaller and more durable than an external hard drive because they do not contain any internal moving parts but have less storage capacity See also Universal Seria...

Page 164: ...ttery life 72 care 80 81 changing 80 charge indicator light 39 charging 40 charging the real time clock RTC 74 conserving power 77 determine remaining power 75 indicator light 75 installation 80 low charge 76 maintaining 81 maximum capacity 72 monitoring power 39 74 power management 73 power options 76 real time clock RTC 72 recharge time 72 RTC memory 72 running computer on battery power 71 safet...

Page 165: ...entilation 36 Cooling Performance Diagnostic Tool 108 customize computer settings 62 D data entire system backup troubleshooting 137 desktop creating new icon 85 exploring the 85 icons 85 recycle bin 86 standard features 84 85 Desktop Assist 94 Media Entertainment tab 95 Support Recovery tab 97 Tools Utilities tab 96 Device Manager fixing a problem 124 directing display output 61 disabling touch p...

Page 166: ...m Display resolution 148 function keys 67 H headphones using 89 I icon desktop 85 moving to desktop 85 recycle bin 86 safety 27 Shut down 42 43 Initial setup using your computer for the first time 41 installing battery 80 memory modules 44 internal storage drive recovery 44 K keyboard Alt keys 67 Ctrl keys 67 Fn key 67 function keys 67 special Windows keys 67 troubleshooting 127 using 66 keys Ctrl...

Page 167: ...h Monitor 110 port HDMI 60 RGB 60 power connecting cable to AC adaptor 38 cord cable 39 cord cable connectors 149 energy saving features 71 power management 73 optimum performance 73 power plans selecting power plan options 78 power saving options 77 precautions safety 34 printer troubleshooting 131 problem solving contacting Toshiba 141 Startup options 121 program starting 68 projector connecting...

Page 168: ...rd 41 software program starting 68 sounds recording 89 speakers using external 89 Start screen exploring the 83 starting a program 68 starting an app from Start screen 68 Startup menu problem solving 121 supervisor password deleting 100 supervisor password set up 99 system indicator lights AC power 37 LEDs 39 40 74 75 90 System Settings 102 T taking care of battery 80 taskbar 86 television adjusti...

Page 169: ...orrect flickers 128 slow Internet connection 123 sound system 131 trouble running programs 131 URL address not found 124 USB Sleep and Charge cannot use 139 USB Wakeup function does not work 140 Windows operating system not working 121 wireless networking 132 Trusted Platform Module TPM 112 U USB Sleep and Charge cannot use 139 USB Wakeup function does not work 140 user password deleting 101 user ...

Reviews: