


8
ELEVATE
®
PULL-UP
TM
OWNER’S GUIDE
GLIDEBOARD / START
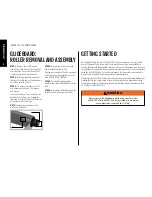
GLIDEBOARD:
ROLLER REMOVAL AND ASSEMBLY
STEP 1.
Remove the six M6 screws
from the Rail End Caps on the top end of
the rails with a 4 mm Hex Wrench (not
included) and remove the end caps.
STEP 2.
Roll the glideboard up and out
the top of the rails and set it upside down
on a clean smooth surface.
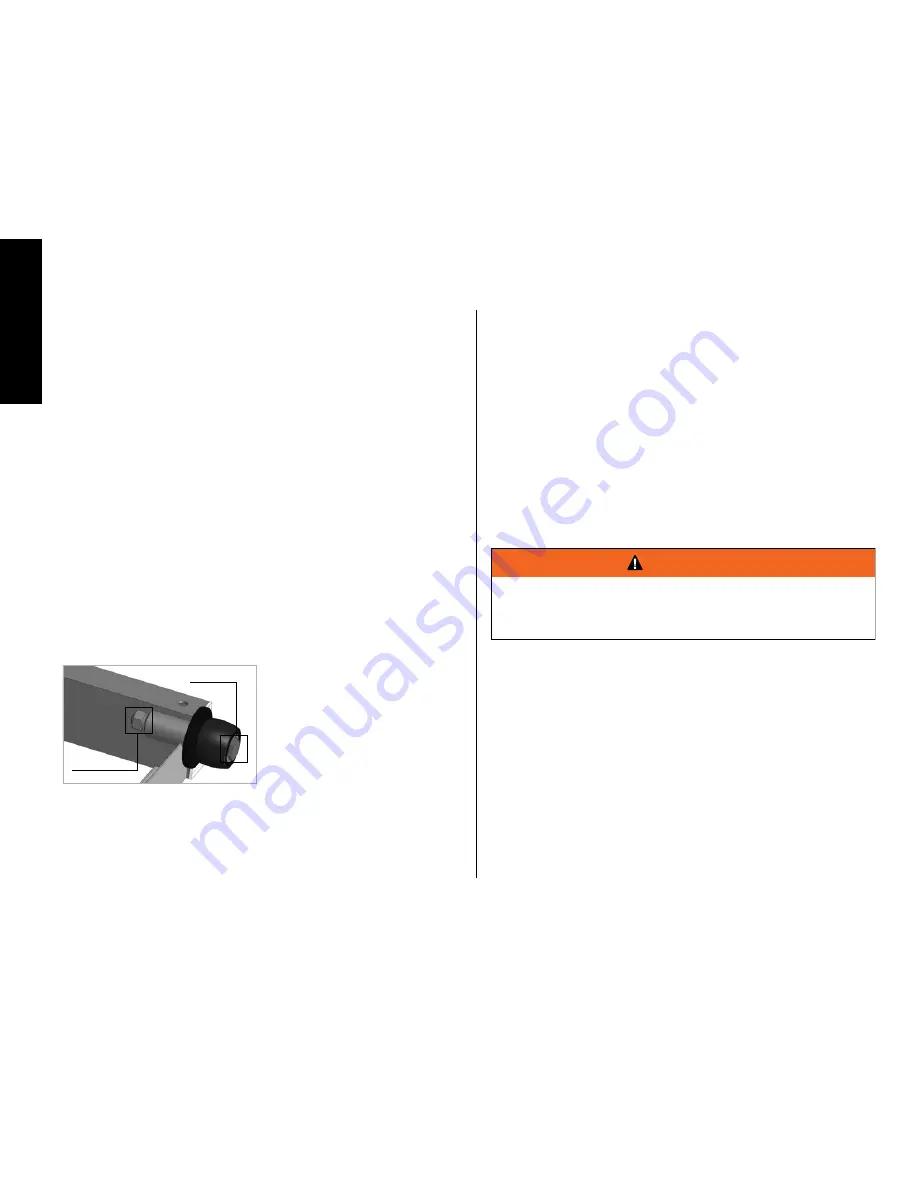
STEP 3.
To remove the rollers use a 13
mm socket wrench and a 13 mm open-
end wrench.
Insert socket wrench over the bolt on the
outside of the roller as you engage the
open-end wrench on the nut on the inside
of the frame; turn to unscrew.
NOTE:
Socket wrench and open-end
wrench not included.
Nut
Bolt
STEP 4.
Replace the rollers as needed
and reinstall the bolt and nut.
Tighten just enough so that the wheel can
roll but does not slide lengthwise on the
axle. DO NOT OVER TIGHTEN.
STEP 5.
Reinstall the glideboard by
carefully and slowly rolling it back into the
rails.
STEP 6.
Replace the Rail End Caps on the
rails and insure all 6 screws are tight.
GETTING STARTED
As a facility offering the use of a ELEVATE Pull-Up to customers, or as a personal
user of the product, you (as owner of the product), assume the responsibility to
become familiar with the guidelines relative to safe use of the product and to convey
these guidelines to all users. Read all safety, warnings and usage instructions before
using the ELEVATE Pull-Up. Care and maintenance for this product are included to
promote safe, enjoyable and prolonged use of this equipment.
When using your ELEVATE Pull-Up, wear athletic shoes and comfortable lightweight
clothing. Before you begin, check to ensure that all parts are in place and working
properly. Remember to control the glideboard at all times, particularly when getting
on or off your ELEVATE Pull-Up.
WARNING
Always control the glideboard while using your Total Gym
ELEVATE Pull-Up. ELEVATE Pull-Up is rated at a maximum
user weight capacity of 400 lbs [181 kg].


