English
MATERIAL TYPES:
Use materials recommended for use with a spray
gun.
Preparation of the spray material
Total Painter can be used to spray undiluted or
slightly diluted paint, lacquer and varnish.
If the paint needs to be diluted, start with a dilution
of 10%. Do this by filling a 1-litre container with the
paint to be used. The viscosity cup holds one decili-
tre, so cover the hole and fill it with the required thin-
ner. Add the thinner to the paint and stir thoroughly.
Then measure the viscosity using the guidelines
provided below. If the paint needs to be thinned fur-
ther, dilute it by a further 5% (half the capacity of
the viscosity cup) and measure the viscosity again.
If the paint has still not reached the recommended
viscosity, repeat the previous step until the right vis-
cosity is obtained.
This spray gun can be used with products with a vis-
cosity of 25 DIN/sec to a maximum of 50 DIN/sec.
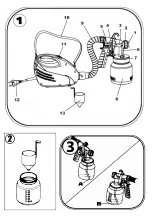
Submerge the viscosity cup in the material and fill it.
Then time how long it takes for the cup to empty (Fi-
gure 2). This time is known as “DIN/sec”. Apart from
these guidelines, you should also see the material
manufacturer’s instructions, as a guide to determine
whether the material requires further thinning.
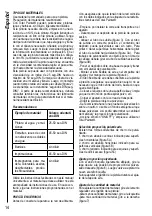
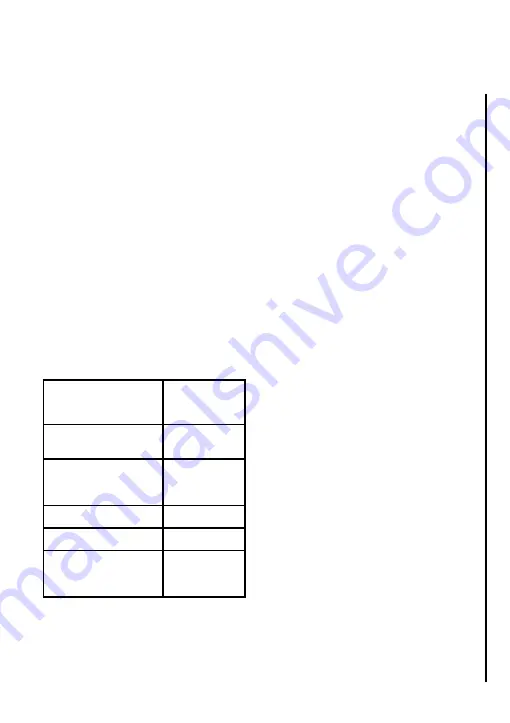
Guidelines:
Example of material
Approximate
DIN
values
Water-based paint and
emulsions
25-50 DIN/sec
Gloss paint, water-soluble
or solvent-based coloured
lacquers
45-50 DIN/sec
Varnishes
undiluted
Primers
45-50 DIN/sec
Wood impregnators,
stains, oils, disinfectants,
phytosanitary products
undiluted
Follow the instructions provided in this manual only
if the material you wish to use does not have its own
instructions for use. Otherwise, follow the instruc-
tions provided with the material.
GETTING STARTED
Before connecting the device to the mains power
supply, please ensure that the mains voltage mat-
ches the data shown on the Total Painter® product
rating plate.
- Begin by attaching the carry strap to the device.
- Unscrew the tank from the spray gun.
- Align the fluid hose (Figure 3). With the fluid hose in
the correct position, the contents of the tank can be
sprayed with almost no residue. To paint or for work
on horizontal objects, bend the fluid hose forward
(Figure 3A). For work on objects above head height,
bend the fluid hose backward (Figure 3B).
- Place the tank on a paper-covered surface and fill
with the spray material.
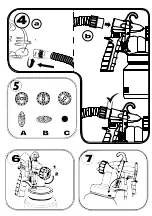
- Attach the flexible air hose to the connector on the
device and the spray-gun handle (Figure 4).
- The flexible air hose should be connected to the
spray gun. Make sure it is firmly attached. The hose
does not have to be completely inserted, but it must
be firmly in place.
- Place the device on a clean, flat surface to prevent
it from sucking in dust, etc.
- Hang the device from the carry strap.
- Aim the spray gun at the object to be sprayed.
- Carry out a test on a piece of cardboard or on a
surface similar to the one to be sprayed. This will
allow you to determine the amount of material and
the type of spray.
- Activate the “ON/OFF” button and start using Total
Painter®.
Choosing the Spray Pattern
The spray has three different patterns:
1. Vertical fan, recommended for horizontal surfaces
(Figure 5A)
2. Horizontal fan, recommended for vertical surfaces
(Figure 5B)
3. Round stream, recommended for corners and
hard-to-access surfaces (Figure 5C)
Adjusting the Spray
With the nozzle adjuster ring slightly loosened, turn
the air cap to the desired spray position (Figure 6).
Then tighten the nozzle adjuster ring again.
Never press the spray-gun trigger while adjusting
the air cap.
Adjusting the Material Flow
To adjust the material flow, turn the adjustment
screw on the spray-gun trigger:
- for less material, turn to the left.
9


