background image


Set up 

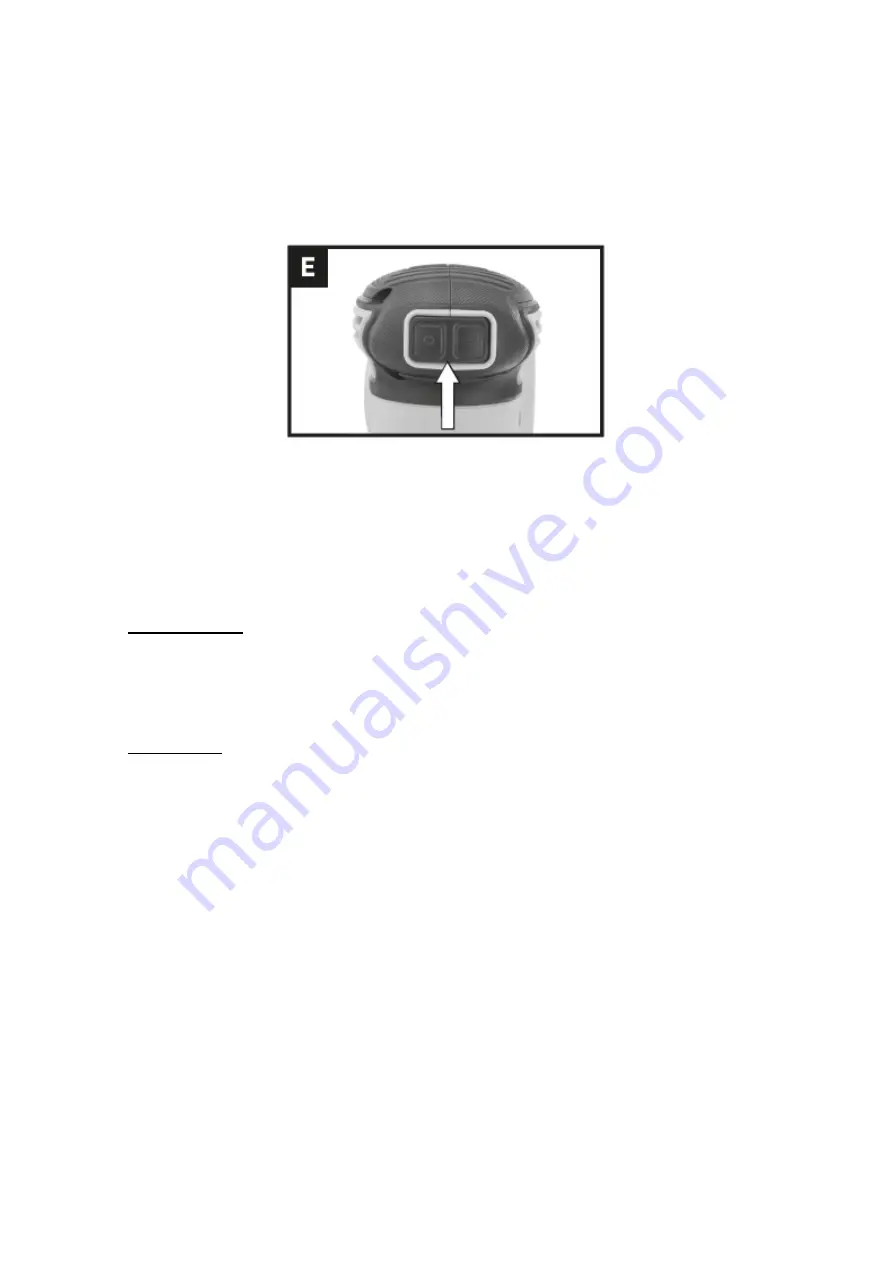
ON/OFF switch (see fig. E) 

  To turn on your sander, press the protective cover over the switch indicated by 

the "I" mark. 

  To stop your sander, press the protective cover indicated by the "0" mark. 

Note: Before using the tool, please read the instruction book carefully. 


Surface sanding 

  Place the machine with the full sandpaper on the surface to be worked on. 

  Ensure even sanding pressure: 

Less sanding pressure increases sanding capacity and protects the machine and 

sanding tool. 

  Sanding capacity and pattern are primarily determined by sandpaper selection 

(grit size), sanding pad spin speed, and applied pressure. 

Coarse sanding 

  Place coarse grit sandpaper in the machine. 

  Apply only light sanding pressure to achieve greater stock removal. 


Fine sanding 

  Put a fine grit sandpaper on the machine. 

  Using moderate pressure, move the machine in a circular pattern or alternately 

in the longitudinal and transverse directions over the work piece. 

  Do not tilt the machine to avoid sanding through the workpiece (eg when sanding 

sheet metal). 

  After finishing work, turn off the machine and lift it off the workpiece. 

Orbital sanding 

  Guide your sander parallel to the work surface and move it in circles or in a cross 

pattern. 

  Do not pick up the tool to avoid unwanted deep sanding marks. 

  The amount of material removed is determined by the speed of the sanding disc 

and the grit size used. 

  The speed of the sanding disc decreases in relation to the pressure applied to 

the tool. 

  For faster removal, don't increase the pressure on the tool, but use a coarser grit 

size. 

Summary of Contents for TRDSLI2001

Page 1: ...1 v BATTERY ORBIT SANDER...

Page 2: ...f electric shock d Never use the cord to carry pull or unplug the charger from the tool Keep the cable away from heat or oil e If using the tool in a damp location is unavoidable use a Residual Curren...

Page 3: ...oid contact If accidentally contacted rinse immediately with water If the liquid comes into contact with the eyes also seek medical help Liquid expelled from the battery can cause irritation or burns...

Page 4: ...ling advice Security alert Use only accessories supported by the manufacturer For indoor use only Batteries can enter the water cycle if not disposed of properly which can be dangerous for the ecosyst...

Page 5: ...nd remove all nails screws etc of the wood before sanding Avoid overheating the object being sanded as well as the sander Always empty the dust collector after and before each use Under unfavorable co...

Page 6: ...of wood plastic metal filler material and coated surfaces Machines with electronic speed control are also suitable for finer sanding Note Not all accessories illustrated or described need to be includ...

Page 7: ...r eyes never attempt to use the sander without the dust bag properly installed Also use the appropriate PPE for this type of sanding work Empty the dust bag see fig C1 C2 For the most efficient operat...

Page 8: ...only light sanding pressure to achieve greater stock removal Fine sanding Put a fine grit sandpaper on the machine Using moderate pressure move the machine in a circular pattern or alternately in the...

Page 9: ...best results sand the wood in the direction of the grain Do not start sanding without sandpaper in place Do not allow the sandpaper to wear away as it will damage the base The warranty does not cover...

Page 10: ...Never use caustic agents to clean plastic parts Water must not come into contact with this tool Problem solving If your tool does not work check to see if the battery is charged and properly fitted t...

Page 11: ...11 The machine accessories and packaging must be sorted for environmentally friendly recycling Plastic components are labeled for categorized recycling Exploded view...

Page 12: ...12 BATTERY ORBIT SANDER...

Reviews: