155
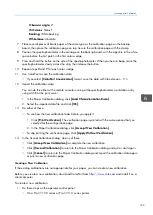
O
Ob
bsseerrvveerr a
anng
gllee:: 2°
IISSO
O sstta
attuuss:: Status T
B
Ba
acckkiinng
g:: White backing
W
Whhiittee b
ba
assee:: Absolute
7.
Place several pieces of blank paper of the same type as the calibration page on the backup
board, then place the calibration page on top. Secure the calibration page with the clamp.
8.
Position the spectrophotometer in the carriage on the backup board, with the aperture in the white
space before the first patch in the first color wedge.
9.
Press and hold the button on the side of the spectrophotometer. When you hear a beep, move the
spectrophotometer slowly across the strip, then release the button.
10.
Repeat steps 8 and 9 for each color wedge.
11.
Use ColorPort to save the calibration data.
• If you select [[C
CoolloorrPPoorrtt LLiinneea
arriizza
attiioonn]] format, save the data with file extension
.lin
.
12.
Import the calibration data.
You can do this either at the remote console running at the spectrophotometer workstation or by
using a USB at the print server.
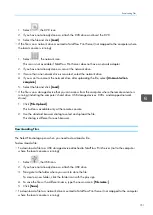
1. In the Paper Calibration dialog, click [[LLooa
ad
d C
Chha
arra
acctteerriizza
attiioonn D
Da
atta
a]].
2. Select the imported data file and click [[O
OK
K]].
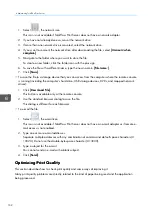
13.
Do either of these:
• To see how the new calibration looks before you apply it:
1. Click [[PPrriinntt V
Veerriiffiicca
attiioonn]]. The verification page is printed with the same options that you
selected for the configuration page.
2. In the Paper Calibration dialog, click [[A
Acccceep
ptt N
Neew
w C
Ca
alliib
brra
attiioonn]].
• To skip printing the verification page, click [[A
Ap
pp
pllyy W
Wiitthhoouutt V
Veerriiffiicca
attiioonn]].
14.
In the Accept Calibration dialog, do any of these:
• Click [[A
Acccceep
ptt N
Neew
w C
Ca
alliib
brra
attiioonn]] to complete the new calibration.
• Click [[D
Diisscca
arrd
d C
Ca
alliib
brra
attiioonn]] to return to the Paper Calibration dialog and quit or start again.
• Click [[C
Ca
anncceell]] to return to the Paper Calibration dialog and import the calibration data again
or print a new verification page.
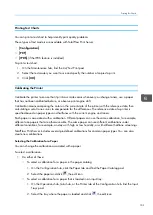
Creating a New Calibration
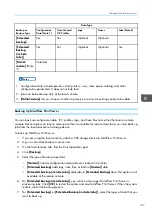
If the existing calibrations are not appropriate for your paper, you can create a new calibration.
Before you create a new calibration, download ColorPort from
and install it on a
client computer.
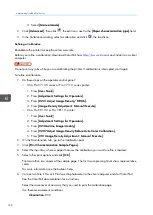
To create a new calibration:
1.
Do these steps on the operator control panel:
• On a Pro C7100 series or Pro C7110 series printer:
Summary of Contents for Print Server R-60
Page 2: ......
Page 14: ......
Page 56: ......
Page 62: ...2 60 ...
Page 102: ...4 100 ...
Page 150: ...5 148 ...
Page 162: ...6 160 ...
Page 172: ...7 170 ...
Page 178: ...8 176 ...
Page 198: ...10 196 ...
Page 208: ...206 ...
Page 218: ...Copyright 2015 2015 Ricoh Company Ltd All rights reserved ...
Page 219: ......

