2
PREPARATION
Before beginning assembly or operation
of product, make sure all parts are present. Compare parts with
package contents list and diagram above. If any part is missing or damaged, do not attempt to assemble,
install or operate the product. Contact customer service for replacement parts.
•
Estimated Assembly Time: 5 minutes
•
No tools required for assembly.
OPERATION INSTRUCTIONS
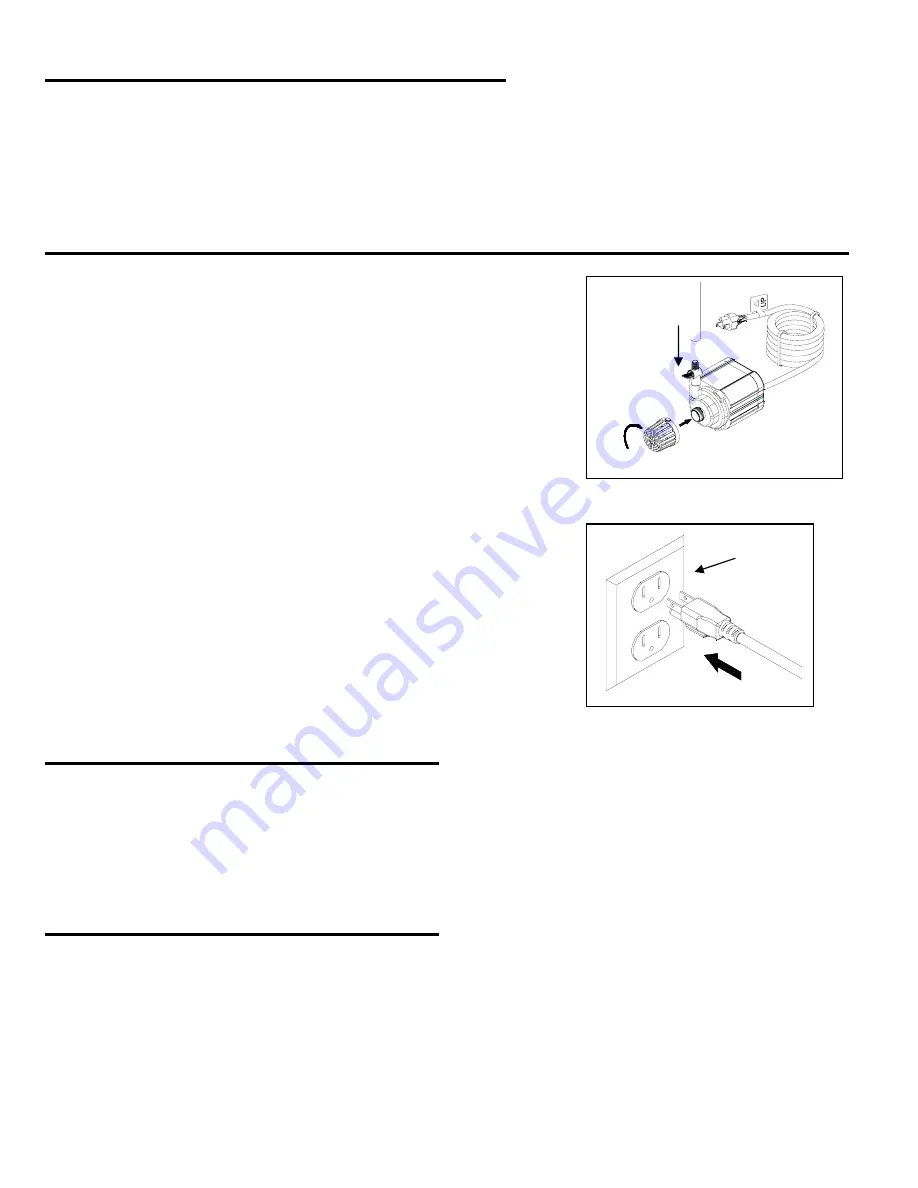
1. Screw the inlet screen to the intake of the pump, and then
connect tubing to the outlet of the pump with flow control.
Fig. 1
NOTE: Tubing is NOT INCLUDED.
Fig. 1
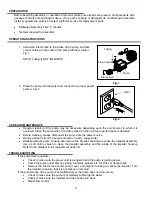
2. Place the pump into the water and connect to a proper power
source. Fig. 2
Fig. 2
CARE AND MAINTENANCE
•
Regular cleaning of the pump may be necessary depending upon the environment in which it is
operated. Clean the pump when it is visibly soiled or when a drop in performance is detected.
•
Before cleaning, always disconnect the pump from the power source.
•
Remove all parts from the pump and clean in warm, soapy water.
•
Disassemble the pump housing and remove the impeller housing to expose the impeller assembly.
Use a soft cloth or brush to clean the impeller assembly and the inside of the impeller housing.
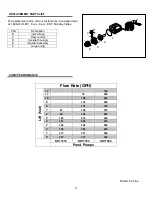
Refer to the diagram in the replacement parts list.
TROUBLESHOOTING
If the pump fails to operate:
•
Check to make sure the power cord is plugged in and the pump is getting power.
•
Check the pump outlet and any tubing, fountains, spitters etc. for kinks or obstructions.
•
Remove the inlet screen and/or pump cover, and impeller housing to expose the impeller. Turn
the impeller to ensure that it is not broken or jammed.
If the performance of the pump is not satisfactory or the pump does not flow evenly:
•
Check to make sure the pump is completely submerged in water.
•
Check to make sure the impeller and the housing are clean.
•
Adjust flow control.
Tubing
Pump
GFCI
Flow control
Inlet screen


