background image

6

ENGLISH

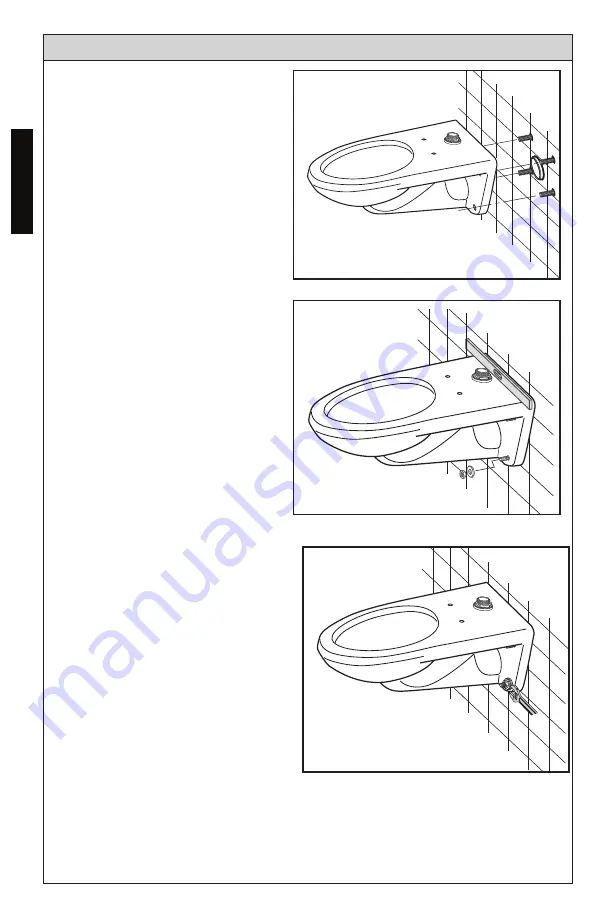
ill. 6

ill. 5

ill. 4

6.  Place the toilet on the carrier 

bolts. 

7.  Place the loosened washers 

and threaded caps on the 
carrier bolts. 

8.  Check that the toilet is level. 
9.  Firmly hand tighten the 

threaded caps and washers 
on the bolts that contain the 
mounting nuts and washers. 
Then use a wrench to 
tighten approximately  
1/4 turn.  
 

CAUTION: 

Do not over 

tighten the nuts, this can 
break the china.  

10.  Install flush valve according 

to the manufacturer’s 
instructions.

11.  Turn the water supply back 

on and flush toilet several 
times and check for water 
leakage.

12.  Caulk the edges of the toilet 

to finish the installation.

INSTALLATION PROCEDURE

Summary of Contents for CT708U(G)

Page 1: ...visit our web site http www totousa com If you have questions regarding warranty policy or coverage please con tact TOTO U S A Inc Customer Service Department 1155 Southern Road Morrow GA 30260 888 29...

Page 2: ...ding principle Congratulations on your choice TABLE OF CONTENTS Thanks for Choosing TOTO 3 Included Parts 3 Common Tools Needed 4 Before Installation 4 Installation Procedure 4 Warranty 7 Rough In Dim...

Page 3: ...lation Please leave instructions for customers These instructions contain maintenance and warranty information TOTO reserves the right to update the product design without notice COMMON TOOLS NEEDED 1...

Page 4: ...nuts so that the faces of the rubber washers are 1 16 1 6 mm in front of the finished wall see ill 2 The carrier should support the toilet and not the wall WARNING Top and bottom mounting surfaces mu...

Page 5: ...ers on the bolts that contain the mounting nuts and washers Then use a wrench to tighten approximately 1 4 turn CAUTION Do not over tighten the nuts this can break the china 10 Install flush valve acc...

Page 6: ...lid proof of purchase is required TOTO encourages warranty registration upon purchase to create a record of Product ownership at http www totousa com Product registration is completely voluntary and f...

Page 7: ...ested Dimension 1 16 1 7mm Wall Gap 18 1 2 470mm 24 7 8 632mm 9 229mm 5 1 2 140mm 6 3 8 162mm 16 406mm Finished Wall Must be flat surface Finished Floor 2 3 4 70mm 1 16 1 7mm Wall Gap 15 3 8 390mm 12...

Page 8: ...iry For product warranty registration TOTO U S A Inc recommends online warranty registration Please visit our web site http www totousa com If you have questions regarding warranty policy or coverage...

Reviews: