12
Installing the Ovation Jukebox
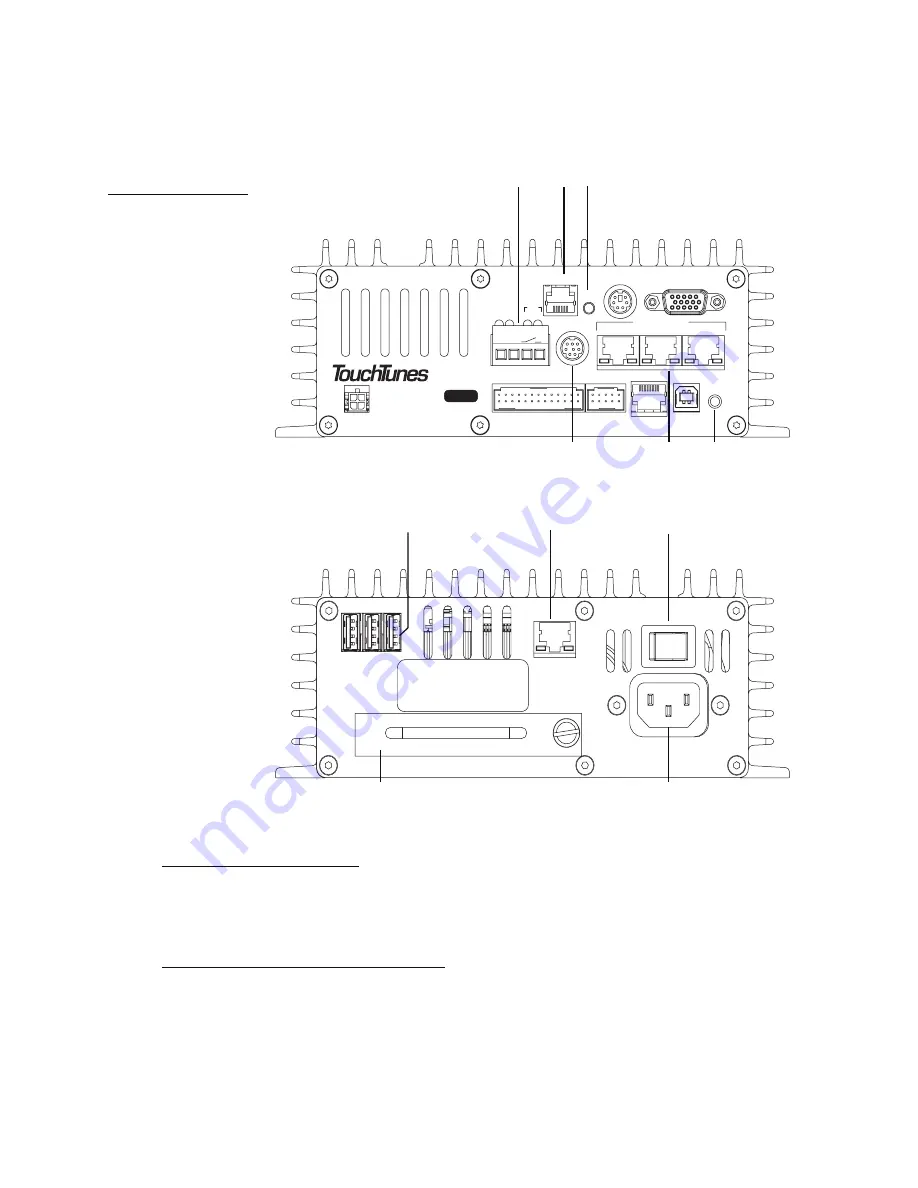
To conserve space, the MJS has connections on both its top and bottom panels. Refer to the
following diagrams to identify all components and connections on the MJS for your jukebox.
Power off the Ovation
1. If necessary, ground yourself by touching an exposed piece of metal in the jukebox case.
2. Turn the MJS system power switch to OFF.
Install the hard drive in the MJS
Install the hard drive for the Ovation in its MJS.
1. Locate the hard drive for the jukebox.
The hard drive for a TouchTunes jukebox is contained in an enclosure.
Figure 6
Layout of MJS
a) Microphone connector b) Phone line connector c) Reset button d) Auxiliary audio input connector
e) Audio Out ports f) Manager button
g) USB ports h) Network/Broadband port i) MJS System power switch j) Hard drive
k) MJS power receptacle
VIDEO
KBD
TELCO
AUDIO OUT
1
3
LINE IN
RST
USB
DMX
MNG
COM1
MIC
1 2
P
W
R
D
I
A
G
HD
TO CTL
P/N: 300114-
2
SW
(-) (+)
Top Panel
a
b
c
d
e
f
NETWORK
2
USB
1
3
ON
OFF
Serial No.
ACT
LNK
100 - 120VAC
50/60Hz 2.0A MAX.
NO USER-SERVICEABL E PARTS INSIDE
Bottom Panel
g
h
i
j
k
Summary of Contents for Gem3 Ovation
Page 1: ......
Page 42: ...36 Activating the Jukebox...


