16
Installing the Ovation Jukebox
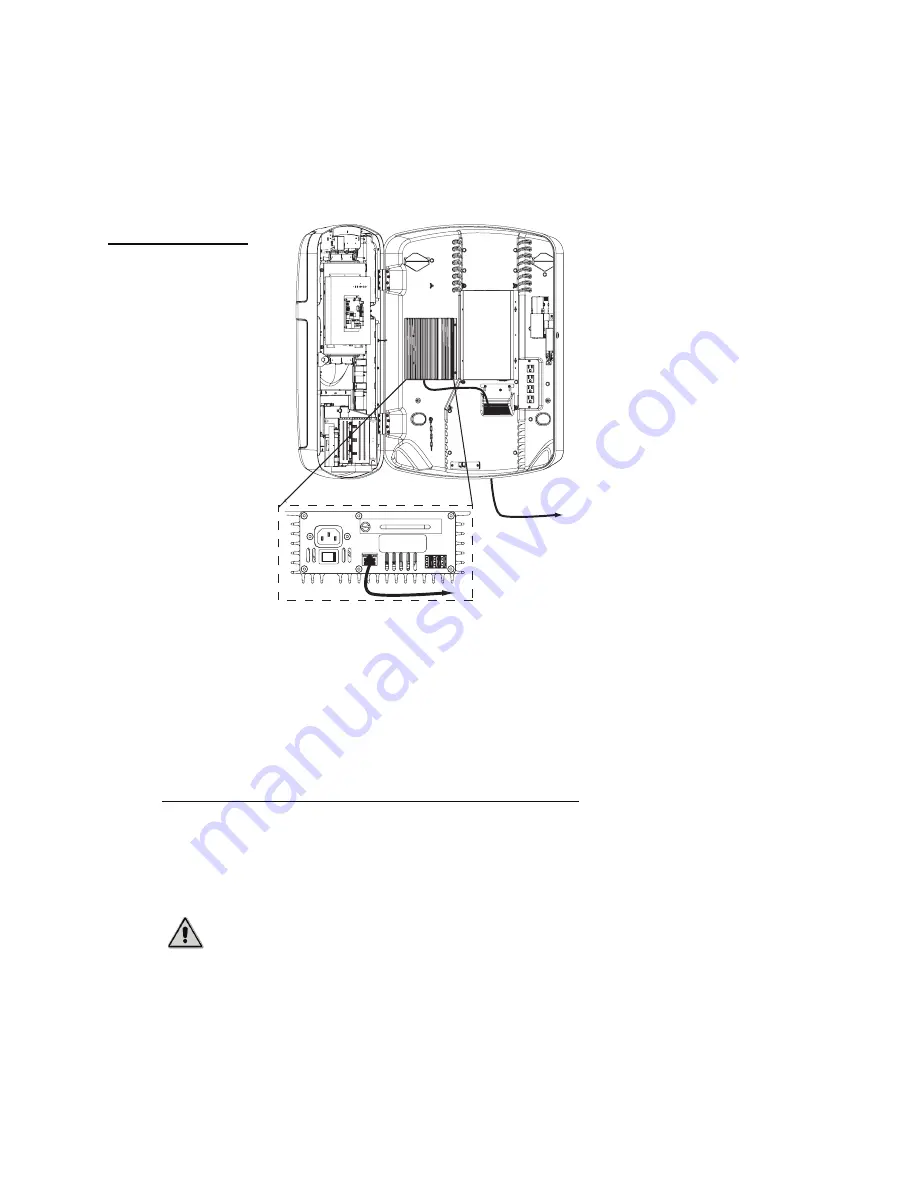
3. Route the free end of the cable in to the jukebox through the cable channel and then pass it
through the opening underneath the wire-relief strain bracket.
4. Connect the free end of the cable to the port labelled
NETWORK
on the bottom panel of the
MJS.
The physical connection from the jukebox to the broadband network is now complete. You
will later configure the communications settings for the broadband network so the Ovation
can contact the TouchTunes server using this connection.
Tip:
You can also set up a dial-up connection for a jukebox to provide redundancy in case of
communications problems with the broadband network. To set up this type of connection,
see “Connect the Ovation to the telephone network” below.
Connect the Ovation to the telephone network
You use the following procedures to attach the USB modem to the Ovation and then connect
the modem to the telephone network. The USB modem is required for establishing dial-up
connections between the jukebox and the TouchTunes server over the telephone network.
To install the USB modem in the jukebox:
1. Unpack the USB modem.
Figure 11
Connecting the Ovation
jukebox to a broadband
network
Caution:
The MJS on your jukebox may have an open RJ-11 port marked TELCO. Do not
connect the telephone line to this port, as it is disabled on TouchTunes jukeboxes running
Gen 3 system software. Use the USB Modem to connect the jukebox to the telephone
network instead.
to
Router
to Router
MJS Bottom View (enlarged)
LNK
ACT
ON
OFF
NETWORK
USB
Serial No.
1
2
3
50/60 Hz 2.0A MAX
100 - 120 VAC
NO USER SERVICEABLE P
AR
TS INSIDE
Summary of Contents for Gem3 Ovation
Page 1: ......
Page 42: ...36 Activating the Jukebox...


