Installing Virtuo
Installing the Hard Drive
Virtuo Installation and Setup Guide
55
Installing the Hard Drive
Before you install the hard drive, familiarize yourself with the layout of the central computer in your Virtuo. Refer to
Computer
to identify the components and connections on the computer for your Virtuo.
To install the hard drive
1.
Unlock and open Virtuo, as described in
Opening Virtuo
.
2.
Ground yourself by touching an exposed piece of metal in the Virtuo case.
3.
Ensure that the computer is powered OFF at the switch on the power supply.
4.
Locate the hard drive for Virtuo.
The hard drive for a TouchTunes Virtuo is contained in an enclosure. The hard drive and its enclosure are shipped
separately from the main Virtuo hardware. If the hard drive has not yet arrived at the location, contact the vendor
or distributor.
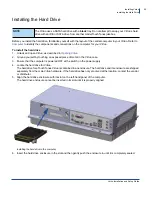
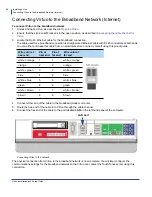
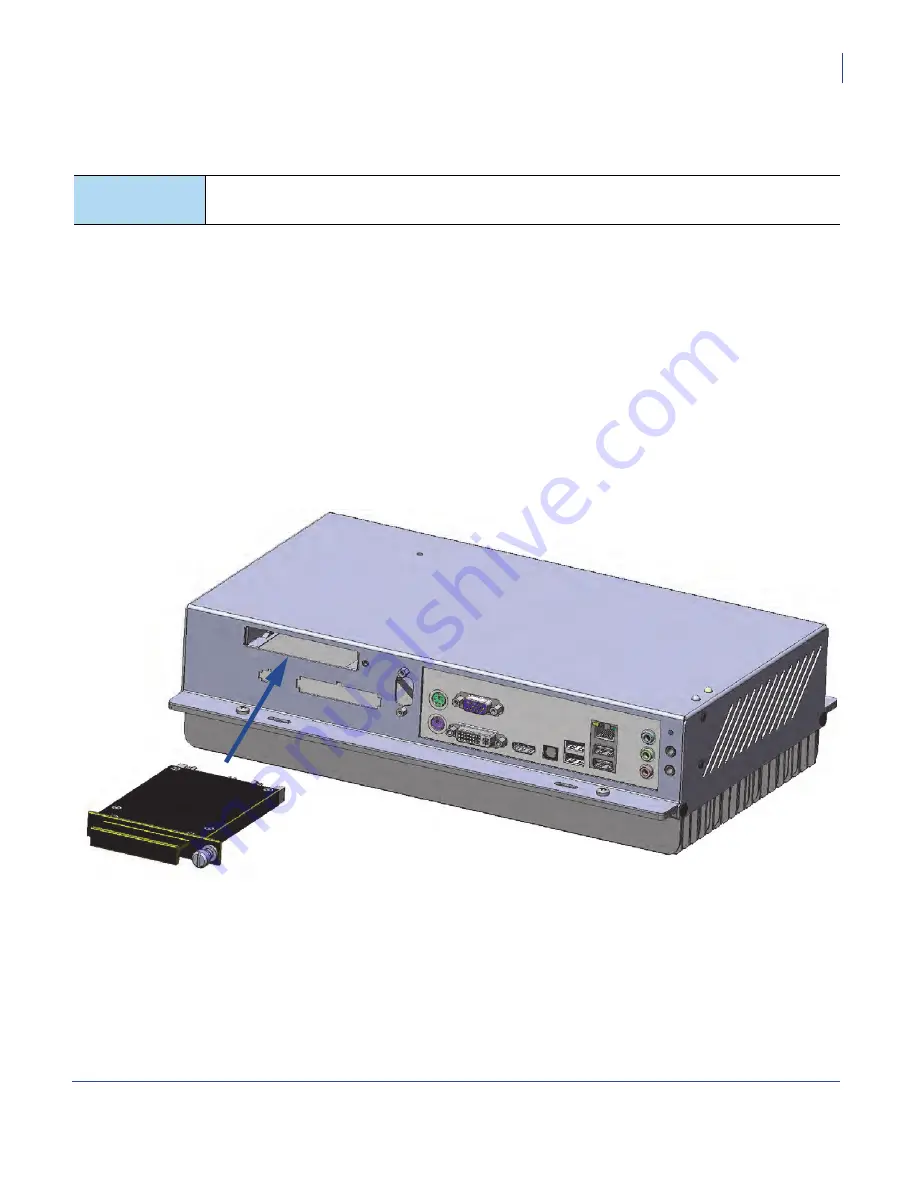
5. Align the hard drive enclosure with its slot on the left-hand panel of the computer.
The hard drive enclosure cannot be inserted in its slot until it is properly aligned.
Installing the hard drive in the computer
6.
Insert the hard drive enclosure in the slot and then gently push the enclosure in until it is completely seated.
NOTE
The Virtuo uses a SATA hard drive with a
black
tray. Do not attempt to swap your Virtuo’s hard
drive with an IDE or SATA drive from another model TouchTunes jukebox.

