10
❏
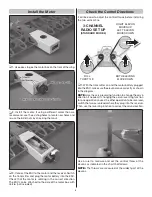
5. Install the propeller. Tighten the prop nut.
❏
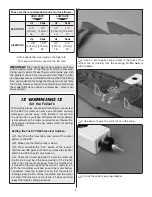
6. Apply Velcro to the bottom of the motor box and the
motor battery.
❏
7. Place the motor battery in the motor box. DO NOT
connect the battery to the ESC.
Apply the Decals
❏
1. Be certain the model is clean and free from oily
fi ngerprints and dust. Prepare a dishpan or small bucket
with a mixture of liquid dish soap and warm water – about
½ teaspoon of soap per gallon of water. Submerse one of
the decals in the solution and peel off the paper backing.
Note: Even though the decals have a “sticky-back” and are
not the water transfer type, submersing them in soap and
water allows accurate positioning and reduces air bubbles
underneath.
❏
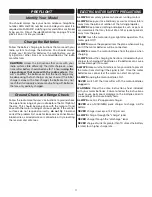
2. Position the decal on the model where desired. Holding
the decal down, use a paper towel to wipe most of the water
away.
❏
3. Use a piece of soft balsa or something similar to
squeegee remaining water from under the decal. Apply the
rest of the decals the same way.
Check the C.G. (Center of Gravity)
DO NOT OVERLOOK THIS IMPORTANT PRCEDURE.
A model that is not properly balanced will be unstable and
possibly unfl yable.
The CG is 1-1/4" (31mm) to 1-7/8" (47mm) from leading edge.
❏
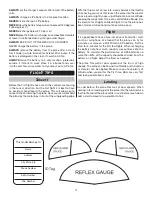
1. Mark the C.G. range on the top of the motor box.
❏
2. With the plane ready to fl y, motor battery installed, use
a Great Planes C.G. Machine or apply narrow (1/16" [2mm])
strips of tape at the front and rear C.G. locations so you will
be able to feel them when lifting the model with your fi ngers
to check the C.G. location.
Do not at any time balance the
model outside this C.G. range.
❏
3. If the CrazE Wing does not balance within the
recommended range, reposition the battery to get the model
to balance. Once the correct battery location has been
determined, mark the location on the inside of the fuselage
so that the battery can be installed in the same location
every time. If the plane still does not balance after moving
the battery, use Great Planes Stick-on Segmented weights
to balance the plane.


