10
Assembly:
1. Remove the protective cover from the blade of the chopper.
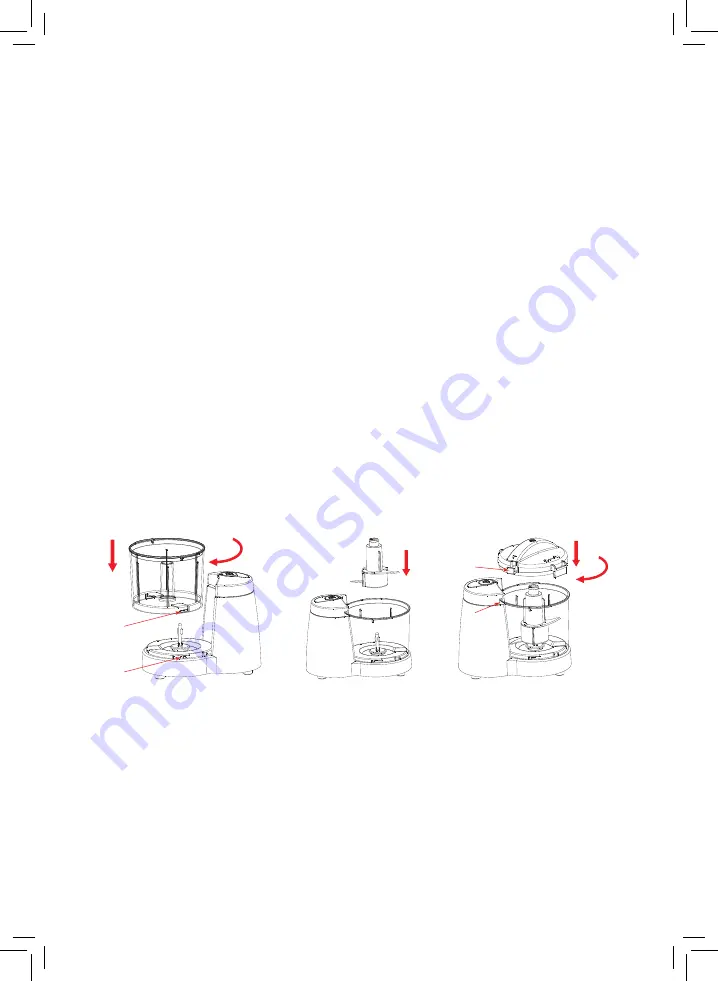
2. Install the food bowl onto the chopper body as shown in Figure 1.
3. Align the position A with the position B. Lock the bowl in place by turning it
clockwise to the stop end of the locking slot.
4. Fix the blade unit in the food bowl as shown in Figure 2.
5. Line up the flanges on the drive shaft with the slots in the plastic shaft of
the blade unit. Put the blade unit onto the drive shaft by grasping the upper
plastic end of the blade unit until it is inserted into place.
6. Add food to the bowl (not more than the maximum indicated level).
7. Place the lid onto the food bowl as shown in Figure 3.
8. Lock the lid in place by turning it clockwise to the “lock” mark. The Lid locking
tab (also position C) will then be inserted into the lid locking slot (also position
D) entirely.
Note:
The chopper does not start until the lid has been locked in place.
9. Check that the power cord is not damaged
10. Make sure your electricity supply is the same as the one shown on the
appliance.
11. Plug in the appliance and slide the switch button downwards with one hand,
slightly hold the food bowl with the other hand while it is operating.
The appliance will start working.
12. After you have completed chopping, Release the switch button, then unplug
the mini chopper from outlet.
Remember to remove all packaging and take away the chopping blade protective
cover.
CAUTION:
The blades are sharp. Handle carefully. Please refer to the products
safety advice.
WARNING:
The continuous operating time of the unit must be less than 15
seconds.
5 - Using Your Appliance
A
B
C
D
Fig 1
Fig 2
Fig 3


