7
8
❍
30-Minute Epoxy (Tower Hobbies #TOWR3350)
❍
ProWood glue (Great Planes #GPMR6160, optional)
❍
Hand or Electric Drill
❍
Drill Bits: 1/16", 5/64", 3/32", 1/8", 5/32", 3/16", 1/4"
❍
Sealing Iron (Top Flite #TOWR3250)
❍
Heat Gun (Top Flite #TOWR3200)
❍
Hobby Saw (X-acto
®
Razor Saw)
❍
Hobby Knife, #11 Blades
❍
Razor Plane (Master Airscrew)
❍
Pliers
❍
Screw Drivers (Phillips and Slot tip)
❍
Round file (or similar)
❍
T-Pins
❍
String
❍
Straightedge with scale
❍
Masking Tape (required for construction)
❍
Sandpaper (coarse, medium, fine grit)*
❍
T-Bar Sanding Block (or similar)
❍
Wax paper or Plan Protector
❍
Lightweight Balsa Filler such as Hobbico HobbyLite
™
❍
Isopropyl Rubbing Alcohol (70%)
❍
Dremel Multi-Pro
®
or similar (optional)
*NOTE: On our workbench, we have four 11" T-Bar sanders,
equipped with #50, #80, #150 and #220-grit sandpaper. This
setup is all that is required for almost any sanding task. Custom
sanding blocks can be made from balsa for sanding hard-to-
reach spots. We also keep some #320-grit wet-or-dry sandpaper
handy for finish sanding before covering.
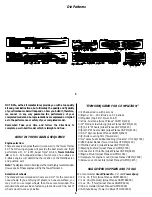
Common abbreviations used in this book and on the plan
Elev. = Elevator
Fuse = Fuselage
LE = Leading Edge (Front of a wing)
Ply = Plywood
Stab = Stabilizer
TE = Trailing edge (Rear of Wing)
" = Inches
Types of wood
BALSA
BASSWOOD
PLYWOOD
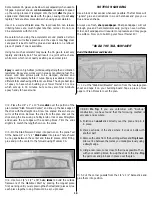
GET READY TO BUILD
• Unroll the plan sheets. Reroll the plans inside out to make
them lie flat. If you have a small building space, you may fold
or cut the plans to fit onto your building surface.
• Remove all parts from the box. As you do, figure out the name
of each part by comparing it with the plans and the parts list
included with this kit. Using a felt tip or ball point pen, lightly
write the part name or size on each piece to avoid confusion
later. Use the die-cut patterns shown on pages 4 and 5 to
identify the die-cut parts and mark them before removing
them from the sheet. Save all leftovers. If any of the die-cut
parts are difficult to punch out, do not force them! Instead, cut
around the parts with a hobby knife. After punching out the
die-cut parts, use your bar sander or sanding block to lightly
sand the edges to remove any die-cutting irregularities.
• As you identify and mark the parts, separate them into
groups, such as fuse (fuselage), wing, fin, Stab (Stabilizer),
and hardware.
NOTES ON USING GLUES
There are two types of glue recommended for building this
model, which are CA and Epoxy.
CA (cyanoacrylate) glue is used for general construction. It is
available in a variety of viscosities. We recommend you have the
following two types...
Thin CA: Has a viscosity similar to water and is used to glue
together parts fitting together very well and which do not require
repositioning after glue is applied. Thin CA is especially effective
for gluing balsa to balsa. It can be used to glue hardwoods such
as plywood, spruce or basswood, but it is usually necessary to
fillet the joint later with medium CA. Thin CA has the ability to
“wick” into joints. This means it will be drawn into very fine gaps
between parts. This characteristic makes thin CA very useful for
a lot of tasks, such as gluing seams already clamped together or
installing CA hinges. Thin CA usually sets very rapidly, so do not
expect to move parts at all after glue is applied. This rapid
reaction may also produce annoying fumes and heat. Always use
CA glues in a well-ventilated area.
Medium CA: Used in general construction for parts which have
gaps, require slight repositioning or involve hardwoods. Medium
CA can be used to make small fillets between parts in high stress
areas. Medium CA is a very good general purpose glue and many
people use it for the majority of their building. The Tower Trainer
40 uses Medium CA in many areas, so it is suggested that you have
a 2 oz. bottle to make sure there is enough to complete the kit.
★★★★
Pro Tip: Zipper top food storage bags are handy to
store your parts as you sort, identify, and separate them into
sub-assemblies.

