23
❏
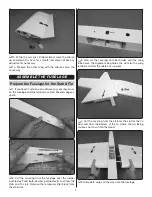
3. Supporting the inner edge of the canopy as you sand,
use a bar-sander with coarse sandpaper to smooth the edges
and trim the high spots from around the base of the canopy.
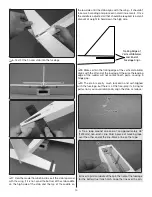
❏
4. Use fi ner sandpaper to smooth the trimmed edge of
the canopy and remove any fl ashing left from the coarser
sandpaper. Wash the canopy in soapy water and rinse
thoroughly, then dry.
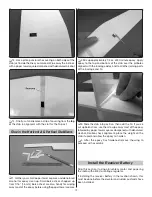
❏
5. Test-fi t the canopy to the fuselage just to make sure it
sits down correctly and to see about where you will attach
it – no particular measurements are needed and any spot
that “looks about right” is suitable, but you’ll want the canopy
centered laterally. Use a 1/16" or 3/32" [1.5 mm or 2 mm] brass
tube sharpened on the end or a same-size drill to cut a hole
in the top of the fuselage under the canopy to equalize the
air inside the canopy with the air outside to prevent fogging.
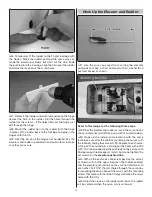
❏
6. Before attaching the canopy, be certain the covering
over the top of the fuselage in the canopy area is tight and
bonded to the wood underneath. It may be a good idea to
go over this area again with a covering iron.
❏
7. Glue the canopy into place – do not use CA because
it will fog the canopy. Just about any other kind of glue
is okay, but Zap Adhesives Formula 560 Canopy Glue is
recommended because it washes off easily (before it dries),
won’t affect the plastic, and dries clear.
❏
8. Position the canopy and hold it down with tape until
the glue dries.
Attach the Side-Force Generators
The side-force generators (or
tip plates
) are optional. Basically,
the tip plates make the wing more effi cient and therefore the
Uproar V2 actually
feels
lighter in the air. They also assist
with knife-edge fl ight and reduce “wing rocking” at reduced
speeds. The tip plates may be desirable (or not) for different
kinds of fl ying. You may try the Uproar V2 with and without
the tip plates to see which confi guration you prefer.
Cut the covering from the screw holes in the tip plates and
the end of the wings. Fasten the tip plates with M4 x 15
button-head cap screws lightly wetted with threadlocker.
Apply the Decals
❏
1. For precision decal placement and to eliminate air
bubbles, spray the back of the decal with window cleaner,
position the decal, then squeegee out the solution with a
piece of soft balsa.
❏
2. Additional trim accents/colors may be added from
iron-on fi lm or self-adhesive fi lm.

