background image

356

2. SETUP

IS300h/250_Navi_EE

FOR PBAP COMPATIBLE
Bluetooth

®

 PHONES

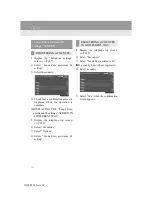
When “Automatic contact/history

transfer” is set to on (

P.351)

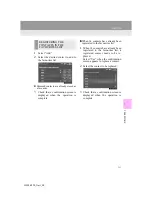
1

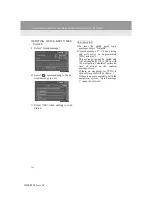
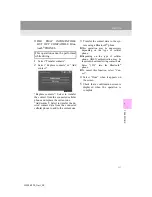
Select “Transfer contacts”.

Contacts are transferred automatically.

2

Check that a confirmation screen is
displayed when the operation is

complete.

This operation may be unnecessary

depending on the type of cellular

phone.

Depending on the type of cellular

phone, OBEX authentication may be

required when transferring contact data.
Enter “1234” into the Bluetooth

®

phone.

If another Bluetooth

®

 device is con-

nected when transferring contact data,

depending on the telephone, the con-
nected Bluetooth

®

 device may need to

be disconnected.

Depending on the type of Bluetooth

®

phone being connected, it may be nec-

essary to perform additional steps on

the phone.

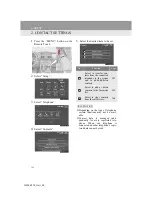
When “Automatic contact/history

transfer” is set to off (

P.351)

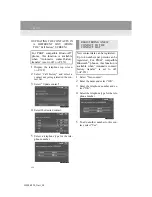
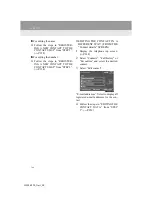
1

Follow the steps in “FOR PBAP IN-
COMPATIBLE BUT OPP COM-
PATIBLE Bluetooth

®

 PHONES”

from “STEP 1”. (

P.357)

TRANSFER CONTACTS 

FROM TELEPHONE

Operation methods differ between

PBAP compatible and PBAP incom-

patible but OPP compatible
Bluetooth

®

 phones.

If your cellular phone is neither

PBAP nor OPP compatible, the con-

tacts cannot be transferred.

Summary of Contents for IS300h

Page 1: ...EE 1 QUICK GUIDE 9 2 BASIC FUNCTION 33 3 NAVIGATION SYSTEM 89 4 AUDIO VISUAL SYSTEM 189 5 SPEECH COMMAND SYSTEM 271 6 PERIPHERAL MONITORING SYSTEM 283 7 TELEPHONE 321 8 CONNECTED SERVICES 373 INDEX 397 TABLE OF CONTENTS ...

Page 2: ... efficient manner Map database is made based on AISIN AW maps whose information source comes from NAVTEQ maps The calculated routes may not be the shortest nor the least traffic congested Your own personal local knowledge or short cut may at times be faster than the calculated routes The navigation system s database includes Point of Interest categories to allow you to easily select destinations s...

Page 3: ... of injury to yourself and others NOTICE This is a warning against anything which may cause damage to the vehicle or its equipment if the warning is ignored You are informed about what you must or must not do in order to avoid or reduce the risk of damage to your vehicle and its equipment SYMBOLS USED IN ILLUSTRATIONS Safety symbol The symbol of a circle with a slash through it means Do not Do not...

Page 4: ...n s supplementary operations are de scribed Information Useful information for the user is described 1 DESTINATION SEARCH 3 STARTING ROUTE GUIDANCE 1 When an arrow facing the desired point is selected the map scrolls in that direc tion After inputting the destination the screen changesanddisplays themaplo cation of the selected destination and the road preference zIf a destination has already been...

Page 5: ...y rely on voice guidance Use it just for reference If the system cannot deter mine the current position correctly there is a possibility of incorrect late or non voice guidance The data in the system may occasionally be incomplete Road conditions includ ing driving restrictions no left turns street closures etc frequently change Therefore before following any instruc tions from the system look to ...

Page 6: ...NDEX 30 1 BASIC INFORMATION BEFORE OPERATION 34 INITIAL SCREEN 34 HOW TO USE THE Remote Touch 36 HOME SCREEN OPERATION 38 ENTERING LETTERS AND NUMBERS LIST SCREEN OPERATION 40 SCREEN ADJUSTMENT 45 LINKING MULTI INFORMATION DISPLAY AND NAVIGATION SYSTEM 47 2 NETWORK SETTINGS 48 REGISTERING CONNECTING Bluetooth DEVICE 48 SETTING Bluetooth DETAILS 54 CONNECTING TO INTERNET VIA Bluetooth DEVICE 64 CON...

Page 7: ...TRAFFIC AND PARKING SETTINGS 173 6 TIPS FOR THE NAVIGATION SYSTEM 182 GPS GLOBAL POSITIONING SYSTEM 182 MAP DATABASE VERSION AND COVERED AREA 185 1 BASIC OPERATION 190 QUICK REFERENCE 190 SOME BASICS 192 2 RADIO OPERATION 200 AM FM DAB RADIO 200 3 MEDIA OPERATION 207 CD 207 DVD 213 USB MEMORY 220 iPod 225 Bluetooth AUDIO 232 AUX 238 VTR 241 4 AUDIO VISUAL REMOTE CONTROLS 244 STEERING SWITCHES 244 ...

Page 8: ...HANDS FREE SYSTEM FOR CELLULAR PHONES 322 QUICK REFERENCE 322 SOME BASICS 323 CALLING ON THE Bluetooth PHONE 328 RECEIVING ON THE Bluetooth PHONE 336 TALKING ON THE Bluetooth PHONE 337 Bluetooth PHONE MESSAGE FUNCTION 340 2 SETUP 347 TELEPHONE SETTINGS 347 CONTACT SETTINGS 354 3 WHAT TO DO IF 367 TROUBLESHOOTING 367 1 CONNECTED SERVICES 374 CONNECTED SERVICES OVERVIEW 374 SETTINGS REQUIRED FOR USI...

Page 9: ...STATUS DISPLAY 16 1 Setup SCREEN 18 2 Information SCREEN 20 1 REGISTERING HOME 22 2 REGISTERING QUICK ACCESS 24 3 OPERATION FLOW GUIDING THE ROUTE 26 4 SETTING HOME AS THE DESTINATION 28 1 FUNCTION INDEX 30 1 BASIC FUNCTION 2 QUICK REFERENCE 3 NAVIGATION OPERATION 4 FUNCTION INDEX QUICK GUIDE ...

Page 10: ...10 IS300h 250_Navi_EE 1 BASIC FUNCTION 1 Remote Touch INFORMATION The above illustration is for a left hand drive vehicle The button positions are reversed for right hand drive vehicles ...

Page 11: ...the Menu screen 12 button Press to change the scale of the map and to scroll the list screen 36 42 95 button Press to display the home screen 14 38 Remote Touch knob Move in the desired direction to select a func tion letter and screen button Press to enter the selected function letter or screen button 36 ...

Page 12: ...12 1 BASIC FUNCTION IS300h 250_Navi_EE 2 Menu SCREEN Press the MENU button on the Remote Touch to display the Menu screen ...

Page 13: ...ontrol screen Owner s Manual Select to display the navigation screen 90 92 Select to display the hands free operation screen 322 Select to display the Information screen 20 Select to display the fuel consumption screen Owner s Manual Select to display the Setup screen 18 Select to adjust the contrast and brightness of the screens turn the screen off etc 45 ...

Page 14: ...an display multiple information screens such as the naviga tion system screen audio system screen and fuel consumption screen simulta neously When a screen is selected the selected screen is switched to a full screen display The home screen can be set to either a three way split screen or a two way split screen For details about setting the home screen P 38 ...

Page 15: ...UNCTION 1 QUICK GUIDE IS300h 250_Navi_EE Two way split screen No Function Page Displays the condition of the Wi Fi and Bluetooth connection 16 Select to change the display items area and the home screen lay out 38 ...

Page 16: ...ed The condition of the Bluetooth connection Gray Blue No connection Poor Good An antenna for the Bluetooth connection is built into the instrument panel The condition of the Bluetooth connection may deteriorate and the system may not func tion when a Bluetooth phone is used in the following conditions and or places The cellular phone is obstructed by certain objects such as when it is behind the ...

Page 17: ...e by radio waves No Service is dis played Rm is displayed when receiving in a roaming area While roaming display Rm top left on the icon The receiving area may not be displayed depending on the type of telephone you have The amount of bat tery charge left Empty Full The amount displayed does not always correspond with the amount displayed on the Bluetooth device The amount of battery charge left m...

Page 18: ...18 IS300h 250_Navi_EE 2 QUICK REFERENCE 1 Setup SCREEN The items shown on the Setup screen can be set Press the MENU button on the Remote Touch then select Setup to display the Setup screen ...

Page 19: ...nd Bluetooth audio devices 54 Select to set Wi Fi connection settings 67 Select to set radio and external media settings 246 Select to access the page which enables the setting of the average speed displayed screen contents POI categories etc 168 Select to set the telephone sound contacts message settings etc 347 Select to set traffic information and parking information 173 Select to set vehicle i...

Page 20: ...CE IS300h 250_Navi_EE 2 Information SCREEN This screen can be used to display traffic information parking lot information etc Press the MENU button on the Remote Touch then select Info to dis play the Information screen ...

Page 21: ... a list 107 Using TPEG information that is received the location and avail able spaces of a parking lot can be checked The parking lot can also be set as a destination 111 Select to display a Street View 389 Select to view information on the selected point 391 Can only be used when receiving RDS TMC or TPEG Transport Protocol Ex perts Group information Depending on the country or area receiving RD...

Page 22: ... 3 NAVIGATION OPERATION IS300h 250_Navi_EE 1 REGISTERING HOME Press the MENU button on the Remote Touch Select Nav Select Menu Select Destination Select Home Select Yes 1 2 3 4 5 6 3 NAVIGATION OPERATION ...

Page 23: ...EE There are different kinds of meth ods to search for your home P 114 Select Enter Registration of home is complete Registering home in a different way P 149 Editing the name location telephone number and icon P 150 Setting home as the destination P 117 7 8 ...

Page 24: ...TION OPERATION IS300h 250_Navi_EE 2 REGISTERING QUICK ACCESS Press the MENU button on the Remote Touch Select Nav Select Menu Select Destination Select one of the quick access screen buttons Select Yes 1 2 3 4 5 6 ...

Page 25: ...fferent kinds of meth ods to search for quick access P 114 Select Enter Registration of quick access is com plete Registering quick access in a differ ent way P 151 Editing the name location telephone number and icon P 152 Setting quick access as the destina tion P 118 7 8 ...

Page 26: ...00h 250_Navi_EE 3 OPERATION FLOW GUIDING THE ROUTE Press the MENU button on the Remote Touch Select Nav Select Menu Select Destination There are different kinds of meth ods to search for a destination P 114 Select Enter 1 2 3 4 5 6 ...

Page 27: ...GATION OPERATION 1 QUICK GUIDE IS300h 250_Navi_EE Select Start Selecting routes other than the one rec ommended P 131 Guidance to the destination is dis played on the screen and can be heard via voice guidance 7 ...

Page 28: ...28 3 NAVIGATION OPERATION IS300h 250_Navi_EE 4 SETTING HOME AS THE DESTINATION Press the MENU button on the Remote Touch Select Nav Select Menu Select Destination Select Home Select Enter 1 2 3 4 5 6 ...

Page 29: ...GATION OPERATION 1 QUICK GUIDE IS300h 250_Navi_EE Select Start Selecting routes other than the one rec ommended P 131 Guidance to the destination is dis played on the screen and can be heard via voice guidance 7 ...

Page 30: ...ated travel arrival time to the destination 135 Selecting the map mode 97 Displaying traffic information 107 Searching for destinations Page Searching for the destination 116 Changing the search area 117 Before starting or during route guidance Page Starting route guidance 129 Editing the route 142 Viewing the entire route map 147 Suspending route guidance 133 Adjusting route guidance volume 81 De...

Page 31: ...e 84 Hands free system for cellular phone Page Registering connecting a Bluetooth phone 48 Making a call on a Bluetooth phone 328 Receiving a call on the Bluetooth phone 336 Speech command system Page Operating the system with your voice 272 Peripheral monitoring system Page Viewing behind the rear of the vehicle 284 ...

Page 32: ...32 4 FUNCTION INDEX IS300h 250_Navi_EE ...

Page 33: ...h AUDIO PLAYER FOR THE FIRST TIME 50 PROFILES 52 2 SETTING Bluetooth DETAILS 54 Bluetooth setup SCREEN 55 Detailed Bluetooth settings SCREEN 62 3 CONNECTING TO INTERNET VIA Bluetooth DEVICE 64 SETTING INTERNET CONNECTION 64 4 CONNECTING TO INTERNET VIA Wi Fi 67 Wi Fi SETTINGS SCREEN 68 Wi Fi FUNCTION OPERATING HINTS 71 1 GENERAL SETTINGS 73 GENERAL SETTINGS SCREEN 74 2 VOICE SETTINGS 81 VOICE SETT...

Page 34: ...ew seconds the CAUTION screen will be displayed After about 5 seconds the CAU TION screen automatically switches to the home screen Select Show map or press the button on the Remote Touch to display the home screen Images shown on the initial screen can be changed to suit individual preferences P 76 CAUTION When the vehicle is stopped with the engine running the hybrid system operating always appl...

Page 35: ...reen When the vehicle reaches a previous ly set driving distance or date speci fied for a scheduled maintenance check the Information screen will be displayed when the navigation system is turned on This screen goes off if the screen is not operated for several seconds To prevent this screen from being dis played again select Do not show this info again To register maintenance information P 84 RES...

Page 36: ...ear from the screen if it is not moved for 6 seconds Operation of the Remote Touch knob will cause the pointer to reappear Press the button on the Remote Touch to zoom in on the map screen and the button to zoom out These buttons can also be used to scroll up and down on list screens When is displayed on the screen select to return to the previous screen Press the MENU button on the Remote Touch t...

Page 37: ... as doing so may cause it to change colour emit a strange odor or stop functioning Do not subject the Remote Touch to excessive pressure or strong impact as the knob may bend or break off Do not allow coins contact lenses or other such items to become caught in the Remote Touch as this may cause it to stop functioning Items of clothing may rip if they become caught on the Remote Touch knob If your...

Page 38: ... dis play 1 Select 2 Check that Customize home screen is displayed The home screen can display multi ple information screens such as the navigation system screen audio sys tem screen and fuel consumption screen simultaneously CUSTOMIZING THE HOME SCREEN The display items area on the home screen and the home screen layout can be changed No Function Page Select to change the dis play items area 39 S...

Page 39: ... the desired item 2 Select the desired area CHANGING THE HOME SCREEN LAYOUT 1 Select Change layout 2 Select the desired screen layout INFORMATION When the selected item is already being displayed and another area is selected for that item the item that it is replacing will be displayed in the original item s location ...

Page 40: ...tered via the screen ENTERING LETTERS AND NUMBERS No Function Select to enter desired characters Select to erase one character Se lect and hold to continue erasing characters Select to change character and keyboard types P 41 Select to enter characters in lower case or in upper case Select to display other symbols INFORMATION Keyboard character is automatically changed with the search area P 117 ...

Page 41: ... if the maximum number of characters is entered or matching items can be dis played on a single list screen CHANGING CHARACTER AND KEYBOARD TYPE INFORMATION Depending on the conditions data is being entered it may not possible to change keyboard characters LIST SCREEN DISPLAYING THE LIST The list screen may be displayed af ter entering characters INFORMATION The number of matching items is shown o...

Page 42: ...e the ap propriate screen button to scroll through the list Icon Function Select to skip to the next or pre vious page Select and hold or to scroll through the displayed list This indicates the displayed screen s position If appears to the right of an item name the complete name is too long to display Select to scroll to the end of the name Select to move to the begin ning of the name INFORMATION ...

Page 43: ...t displayed on the screen can be sorted in the order of distance from the current location date category etc CHARACTER JUMP BUTTONS IN LISTS Some lists contain character screen buttons ABC DEF etc which allow a direct jump to list entries that begin with the same letter as the character screen button INFORMATION Every time the same character screen button is selected the list starting with the sub...

Page 44: ...e list of memory points that are reg istered in the selected group will be dis played All group Select to close the dis played items and display all groups 2 Select the desired group DISPLAYING THE GROUP LIST It is possible to display the desired group items in the memory point list ...

Page 45: ...r day or night mode For information regarding audio vi sual screen adjustment P 198 No Function Page Select to turn the screen off To turn it on press any button on the audio panel or on the Remote Touch Select to turn day mode on off 46 Select to adjust the screen display 46 Select to adjust the cam era display INFORMATION When the screen is viewed through polarized sunglasses a rainbow pat tern ...

Page 46: ...able when the headlight is switched on INFORMATION If the screen is set to day mode with the headlight switch turned on this condition is memorized even with the engine hybrid system turned off ADJUSTING THE CONTRAST BRIGHTNESS The contrast and brightness of the screen can be adjusted according to the brightness of your surroundings Screen button Function Contrast Select to strengthen the contrast...

Page 47: ...PLAY AND NAVIGATION SYSTEM The following functions of the navigation system are linked with the multi in formation display in the instrument cluster Navigation Audio etc These functions can be operated using multi information display control switches on the steering wheel For details refer to Owner s Manual ...

Page 48: ...U button on the Remote Touch 3 Select Telephone Operations up to this point can also be performed by pressing the switch on the steering wheel REGISTERING A Bluetooth PHONE FOR THE FIRST TIME To use the hands free system it is necessary to register a Bluetooth phone with the system Once the telephone has been regis tered it is possible to use the hands free system This operation cannot be performe...

Page 49: ...etooth device us ing your Bluetooth device A PIN code is not required for SSP Secure Simple Pairing compatible Bluetooth devices Depending on the type of Bluetooth device being con nected a message confirming registra tion may be displayed on the Bluetooth device s screen Respond and operate the Bluetooth device according to the confirmation message 7 Check that the following screen is displayed w...

Page 50: ...e guidance on the screen to try again REGISTERING A Bluetooth AUDIO PLAYER FOR THE FIRST TIME To use the Bluetooth Audio it is necessary to register an audio player with the system Once the player has been registered it is possible to use the Bluetooth Audio This operation cannot be performed while driving For details about registering a Bluetooth device P 55 ...

Page 51: ...tion is not available when the Bluetooth connection setting of your audio player is set to off 2 Press the MENU button on the Remote Touch 3 Select Audio 4 Select Source 5 Select Bluetooth 6 Select Connect 7 Follow the steps in REGISTER ING A Bluetooth DEVICE from STEP 1 P 56 Bluetooth is a registered trademark of Bluetooth SIG Inc ...

Page 52: ...nts Recom menda tions Blue tooth Phone HFP Hands Free Profile Hands free system Ver 1 0 Ver 1 6 OPP Object Push Profile Transferring the contacts Ver 1 1 Ver 1 1 PBAP Phone Book Access Profile Ver 1 0 Ver 1 1 MAP Message Access Profile Bluetooth phone message Ver 1 0 DUN Dial up Networking Profile Connected service Ver 1 1 PAN Personal Area Networking Ver 1 0 Blue tooth Au dio Player A2DP Advanced...

Page 53: ...SIG Inc INFORMATION If your cellular phone does not support HFP registering the Bluetooth phone or using OPP PBAP MAP DUN or PAN profiles individually will not be possible If the connected Bluetooth device version is older than recommended or incom patible the Bluetooth device function may not work properly ...

Page 54: ...on on the Remote Touch 2 Select Setup 3 Select Bluetooth Bluetooth is a registered trademark of Bluetooth SIG Inc 4 Select the desired item to be set No Function Page Select to set up Blue tooth device 55 Select to display Bluetooth setup infor mation 62 Select to set internet con nection 64 ...

Page 55: ...SPLAYING THE Bluetooth setup SCREEN IN A DIFFERENT WAY 1 Display the telephone top screen P 328 2 Select Connect telephone Bluetooth is a registered trademark of Bluetooth SIG Inc Bluetooth setup SCREEN Function Page Registering a Bluetooth device 56 Deleting a Bluetooth device 57 Connecting a Bluetooth device 58 Editing the Bluetooth device information 60 ...

Page 56: ...see the manual that comes with it To cancel the registration select Can cel 3 Register the Bluetooth device us ing your Bluetooth device A PIN code is not required for SSP Secure Simple Pairing compatible Bluetooth devices Depending on the type of Bluetooth device being con nected a message confirming registra tion may be displayed on the Bluetooth device s screen Respond and operate the Bluetooth...

Page 57: ... available 5 Select OK when the connection status changes from Connecting to Connected If an error message is displayed follow the guidance on the screen to try again 1 Select Remove 2 Select the desired device 3 Select Yes when the confirmation screen appears 4 Check that a confirmation screen is displayed when the operation is complete DELETING A Bluetooth DEVICE INFORMATION When deleting a Blue...

Page 58: ... is displayed when the connection is com plete If an error message is displayed follow the guidance on the screen to try again CONNECTING A Bluetooth DEVICE Up to 5 Bluetooth devices Tele phones HFP and audio players AVP can be registered If more than 1 Bluetooth device has been registered select which device to connect to If the desired Bluetooth device is not on the list select Add to regis ter ...

Page 59: ...egistered trademark of Bluetooth SIG Inc RECONNECTING THE Blue tooth PHONE If a Bluetooth phone is disconnected on purpose such as turning it off this does not happen Reconnect the Blue tooth phone manually To turn auto connection mode on set Bluetooth power to on P 63 Leave the Bluetooth device in a lo cation where the connection can be established When the auto connection has failed or Bluetooth...

Page 60: ...s informa tion can be displayed on the screen The displayed information can be ed ited No Information The name of the Bluetooth de vice Can be changed to a desired name P 61 Device address is unique to the de vice and cannot be changed The telephone number of the Bluetooth phone Compatibility profile of the Bluetooth device Select to set the Bluetooth audio player connection method P 61 Select to ...

Page 61: ...player to the audio system Depending on the audio player the Vehicle or Device connection method may be best As such refer to the manual that comes with the audio player To reset the connection method select Defaults INFORMATION If 2 Bluetooth devices have been registered with the same device name the devices can be distinguished referring to the device s address Depending on the type of telephone...

Page 62: ...nd changed No Information Page Select to set Bluetooth connection on off 63 Displays system name Can be changed to a de sired name 63 PIN code used when the Bluetooth device was registered Can be changed to a desired code 63 Device address is unique to the device and cannot be changed Select to set the telephone connection status display on off Select to set the connec tion status display of the a...

Page 63: ...power is off The Bluetooth device is disconnected and the system will not connect to it next time Bluetooth is a registered trademark of Bluetooth SIG Inc 1 Select System name 2 Enter a name and select OK 1 Select PIN code 2 Enter a PIN code and select OK CHANGING Bluetooth power INFORMATION While driving the auto connection state can be changed from off to on but cannot be changed from on to off ...

Page 64: ... an account that is obtained from the website Lexus pre pares for its customers 6 Select Country Bluetooth is a registered trademark of Bluetooth SIG Inc SETTING INTERNET CONNECTION To use the internet via Bluetooth device it is necessary to register a Bluetooth device with the system Once the device has been registered it is possible to use the internet via Bluetooth device For details about regi...

Page 65: ...mobile network pro vider s information and perform a com munication connection test If the setting cannot be performed auto matically the Detail settings screen will be displayed P 66 11When the cellular phone has been connected successfully Data con nection successful will be dis played on the screen The online search and importing memory points function will be available Before performing a comm...

Page 66: ...ed into Script separate the first and second items with a semi colon If the navigation system does not have mobile network provider set ting information for the country or mobile network provider that has been selected or if you select Oth er for either country or mobile net work provider the Detail settings screen will be displayed Contact your mobile network provider to ob tain the contract info...

Page 67: ...Fi 1 Press the MENU button on the Remote Touch 2 Select Setup 3 Select Wi Fi 4 Select the items to be set Wi Fi is a registered mark of the Wi Fi Alliance Using the Wi Fi function this sys tem can connect to the internet which allows the use of the connect ed services traffic information etc ...

Page 68: ...lliance Wi Fi SETTINGS SCREEN No Function Page Select to turn the Wi Fi function on off 68 Displays connected net work name Select to search for available networks that can be connected 69 Select to connect quickly to a WPS compatible Wi Fi device 70 Select to set the detailed Wi Fi settings 70 TURNING Wi Fi FUNCTION ON OFF When turned on Available net works and Easy setup can be se lected ...

Page 69: ...ast is marked with Details Select to display details about the network Add Wi Fi network Select to add a Wi Fi network that is not currently dis played ADDING A Wi Fi NETWORK 1 Select Add Wi Fi network 2 Enter the network name and select OK 3 Select the security type 4 Enter the password and select OK Wi Fi is a registered mark of the Wi Fi Alliance CONNECTING TO A NETWORK Available networks can b...

Page 70: ...he Wi Fi Alliance CONNECTING QUICKLY If a Wi Fi device is Wi Fi Protected Setup compatible it can be con nected to more quickly DETAILED Wi Fi SETTINGS No Function Select to change the listing order of your preferred networks and to delete networks from the list P 71 Select to set automatic connec tion to network on off When set to on the system will automati cally connect to the preferred net wor...

Page 71: ... be changed Wi Fi FUNCTION OPERATING HINTS CAUTION Use Wi Fi devices only when safe and legal to do so Your audio unit is fitted with Wi Fi antennas People with implanted pacemakers or cardiac defibrillators should maintain a reasonable distance between themselves and the Wi Fi antennas The radio waves may affect the oper ation of such devices Before using Wi Fi devices users of any electrical med...

Page 72: ... Fi ICON Reception level appears on the right upper side of the screen P 16 SPECIFICATIONS INFORMATION Communication standards 802 11b 802 11g 802 11n Security WEP WPA WPA2 Wi Fi Protected Setup WPA WPA2 and Wi Fi Protected Setup are registered mark of the Wi Fi Alliance ...

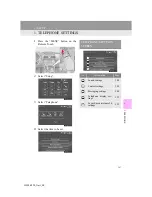
Page 73: ... IS300h 250_Navi_EE 3 OTHER SETTINGS 1 GENERAL SETTINGS 1 Press the MENU button on the Remote Touch 2 Select Setup 3 Select General 4 Select the items to be set Settings are available for system time operation sounds etc ...

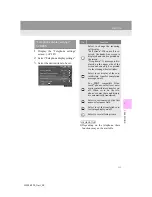
Page 74: ...fuel consump tion Select to customize the startup screen off images P 76 Select to set automatic screen changes from the audio air condi tioning control screen to the home screen on off When set to on the screen will automatically return to the home screen from the audio air conditioning control screen after 20 seconds Select to change the screen button colour Select to set the selection sounds on...

Page 75: ...are versions For details contact your Lexus dealer Select to display the software in formation Notices related to third party software used in this product are enlisted This includes in structions for obtaining such soft ware where applicable Select to update Gracenote data base versions For details contact your Lexus dealer No Function SYSTEM TIME SETTINGS Used for changing time zones and the on ...

Page 76: ...USTOMIZING THE STARTUP AND SCREEN OFF IMAGES An image can be copied from a USB memory and used as the startup and screen off Images When the engine power switch is in ACCESSORY or IGNITION ON ON mode the initial screen will be displayed P 34 When Screen off on the Display screen is selected the screen is turned off and the desired screen off image that is set is displayed To turn the screen off P ...

Page 77: ...NG IMAGES 1 Press the button to release the lock and lift the armrest 2 Open the cover and connect a USB memory Turn on the power of the USB memory if it is not turned on 3 Close the console box 4 Select Copy from USB No Function Page Select to copy images from a USB memory 77 Select to delete images 79 Select to set an image as the startup or screen off image 79 ...

Page 78: ...n 6 Select Yes when the confirmation screen appears INFORMATION When saving image files to a USB memory to be transferred to the navi gation system save the images in a folder named Image I m a g e case sensitive If a different folder name is used the navigation system will not recognize the image files The compatible file extensions are JPG and JPEG An image s file name including file extension c...

Page 79: ...ct the desired items to be set DELETING TRANSFERRED IM AGES 1 Select Delete images 2 Select the images to be deleted and select Delete 3 Select Yes when the confirmation screen appears No Function Select to set an image as the start up image Select to set an image as the screen off Image Select to set an image as both the startup and screen off image ...

Page 80: ...onal data 3 Select Delete 4 Select Yes when the confirmation screen appears Registered or changed personal settings will be deleted or returned to their default conditions For example General settings Navigation settings Audio settings Telephone settings Connected service settings DELETING PERSONAL DATA ...

Page 81: ... 3 OTHER SETTINGS 2 BASIC FUNCTION IS300h 250_Navi_EE 2 VOICE SETTINGS 1 Press the MENU button on the Remote Touch 2 Select Setup 3 Select Voice 4 Select the items to be set Voice guidance etc can be set ...

Page 82: ...me of voice guidance Select to set the voice recognition prompts on off Select to set the voice guidance during audio visual and or air conditioning system use on off Select to set the voice guidance during route guidance on off Select to set the desired guidance tone Select to reset all setup items ...

Page 83: ...ch 2 Select Setup 3 Select Vehicle 4 Select the desired screen button to be set Settings are available for mainte nance vehicle customization and Lexus parking assist sensor No Function Page Select to set mainte nance 84 Select to set vehicle customization Owner s Man ual Select to set Lexus parking assist sensor 318 ...

Page 84: ...o set the condition of parts or components Select to add new information items separately from provided ones When set to on the indicator will illuminate The system is set to give maintenance information with the Information screen P 35 Select to cancel all conditions which have been entered Select to reset the items which have expired conditions Select to register edit dealer in formation P 85 IN...

Page 85: ...distance until the next maintenance check Select to cancel the conditions which have been entered Select to reset the conditions which have expired INFORMATION For scheduled maintenance informa tion please refer to Lexus Service Booklet Lexus Warranty Booklet or Owner s Manual Depending on driving or road condi tions the actual date and distance maintenance should be performed may differ from the ...

Page 86: ...p to the desired point P 101 and select OK EDITING TELEPHONE NUM BER 1 Select Tel no 2 Enter the telephone number and se lect OK No Function Page Select to enter the name of a dealer 86 Select to enter the name of a dealer member 86 Select to set the location 86 Select to set the tele phone number 86 Select to set the dis played dealer as a desti nation 129 Select to delete the dealer information ...

Page 87: ...87 3 OTHER SETTINGS 2 BASIC FUNCTION IS300h 250_Navi_EE ...

Page 88: ...TRAFFIC AND TRAFFIC PREDICTION INFORMATION 107 PARKING INFORMATION 111 1 DESTINATION SEARCH SCREEN 114 2 SEARCH OPERATION 116 SELECTING THE SEARCH AREA 117 SETTING HOME AS DESTINATION 117 SETTING QUICK ACCESS AS DESTINATION 118 SEARCHING BY ADDRESS 118 SEARCHING BY POI 121 SEARCHING BY MAP 122 SEARCHING BY MEMORY POINTS 122 SEARCHING FROM PREVIOUS DESTINATIONS 123 SEARCHING BY INTERSECTION 124 SEA...

Page 89: ...G UP HOME 149 SETTING UP QUICK ACCESS 151 SETTING UP MEMORY POINTS 153 SETTING UP AREA TO AVOID 160 SETTING UP ROUTE TRACE 163 BACKUP TO A USB MEMORY 165 COPYING FROM A USB MEMORY 167 1 NAVIGATION SETTINGS 168 NAVIGATION SETTINGS SCREEN 169 2 TRAFFIC AND PARKING SETTINGS 173 TRAFFIC AND PARKING SETTINGS SCREEN 174 1 GPS GLOBAL POSITIONING SYSTEM 182 LIMITATIONS OF THE NAVIGATION SYSTEM 182 2 MAP D...

Page 90: ...ge 2D north up 2D heading up or 3D heading up symbol Indicates whether the map orientation is set to north up or heading up In 3D map only a heading up view is available 96 GPS mark Global Posi tioning System Shows that the vehicle is receiving signals from the GPS 182 Status bar Displays the condition of Wi Fi and Blue tooth connections the level of reception and the amount of battery charge left...

Page 91: ...e traffic information bar as selected Current position button Select to display the current position address or repeat the voice guidance Menu Select to utilize functions such as setting a destination and registering a memory point 92 Zoom in out button Select to magnify or reduce the map scale When either button is selected the map scale indicator bar appears at the bottom of the screen 95 Scale ...

Page 92: ...0_Navi_EE NAVIGATION MENU SCREEN This screen is used for functions such as setting a destination and registering memory points Press the MENU button on the Remote Touch Select Nav and then Menu to display the navigation menu screen ...

Page 93: ... to view route overview 142 Select to enable changes to Home Memory points Quick access Area to avoid etc 148 Select to set the desired map configuration 97 Select to set the Points of Interest to be displayed on the screen 102 Select to start stop recording the route trace 104 Select to register the current position or the cursor position as a memory point Can be changed to a desired name icon et...

Page 94: ...ON While driving the current position mark is fixed on the screen and the map moves The current position is automatically set as the vehicle receives signals from the GPS Global Positioning System If the current position is not correct it is automatically corrected after the vehicle receives signals from the GPS After 12 volt battery disconnection or on a new vehicle the current posi tion may not ...

Page 95: ...ar directly Select to display the entire route if the destination has been set 1 Select to display the city map To return to the normal map display select MAP SCALE INFORMATION Press the button on the Remote Touch to zoom in on the map screen and the button to zoom out When the map scale is at the mini mum range a one way street is dis played by CITY MAP The city map is available for some major ci...

Page 96: ...When in 2D map mode The direction of vehicle travel is always up A red arrow indicates north Heading up symbol When in 3D map mode The direction of vehicle travel is always up A red arrow indicates north ORIENTATION OF THE MAP The orientation of the map can be changed between 2D north up 2D heading up and 3D heading up by selecting the orientation symbol dis played at the top left of the screen ...

Page 97: ...e selected SWITCHING MAP CONFIGURATIONS No Function Page Select to display the sin gle map screen 98 Select to display the dual map screen 98 Select to display the compass mode screen 99 Select to display the turn list screen 140 Select to display the ar row screen 140 Select to display the mo torway information screen 138 Select to display the in tersection guidance screen or the guidance screen ...

Page 98: ... map Editing right map 1 Select any point on the right side map 2 Select the desired item The right side map can be edited No Function Page Select to change the ori entation of the map 96 Select to display POI icons 102 Select to show traffic in formation 175 Select to change the map scale 95 ...

Page 99: ...itude and lat itude coordinates and the compass to make sure that the vehicle is headed in the direction of the destination When the vehicle travels out of the coverage area the guidance screen changes to the compass mode screen SCREEN SCROLL OPERATION Use the scroll feature to move the de sired point to the centre of the screen for looking at a point on the map screen that is different from the c...

Page 100: ...N AREA TO AVOID A specific location on the map screen can be set as an area to avoid using the scroll function INFORMATION If a destination is entered in the area to avoid or the route calculation can not be made without running through the area to avoid a route passing through the area to be avoided may be shown Up to 10 locations can be registered as areas to avoid ...

Page 101: ...AVIGATION SYSTEM 1 Select one of the 8 directional arrows to move the cursor to the desired point ADJUSTING LOCATION IN SMALL INCREMENTS The exact target location can be ad justed in small increments by select ing one of the 8 directional arrows ...

Page 102: ...on the map screen Their location can also be set as a destination and used for route guidance No Information Function Page Displays up to 5 selected POI icons on the map screen Select to turn the POI icons on the map screen off Displays up to 6 POI icons as favourite POI categories 170 Select to display other POI categories if the de sired POIs cannot be found on the screen 103 Select to search fo...

Page 103: ... POI categories To add more POI categories select More DISPLAYING THE LOCAL POI LIST 1 Select List nearest POI s 2 Select the desired POI On this route Select to search for POIs along the route When set to on the indicator will illuminate 3 Check that the selected POI is dis played on the map screen P 99 POIs that are within 20 miles 30 km of the current position will be listed from among the sele...

Page 104: ...e 2 A confirmation screen will be dis played Yes Select to keep the recorded route trace No Select to erase the recorded route trace ROUTE TRACE Up to 124 miles 200 km of the trav eled route can be stored and retraced on the display This feature is avail able when the map scale is 30miles 50 km or less START RECORDING THE ROUTE TRACE To edit the route trace name or con firm the start point etc P 1...

Page 105: ...rmation Destination information Traffic information Parking information DISPLAYING INFORMATION ABOUT THE ICON WHERE THE CURSOR IS SET When the cursor is placed over an icon on the map screen the name bar is displayed on the upper part of the screen If Info appears on the right side of the name bar the detailed in formation can be displayed ...

Page 106: ...formation can be ac quired by scanning the QR code with a cellular phone Select to delete a destination Select to display detailed infor mation INFORMATION Even when traffic parking informa tion is not currently being received traffic information and Info will be displayed for a while after traffic information has been received STANDARD MAP ICONS Icon Information Town with 1 million people Town wi...

Page 107: ... TPEG TFP Traffic Flow Prediction and TPEG PKI Live Parking Information using DAB TPEG TEC TPEG TEP and TPEG PKI via the internet by using Wi Fi or a cellular phone For detailed information about con nection methods for a Wi Fi device or cellular phone P 48 67 Receiving information using a cellu lar phone In order to use this service a Bluetooth DUN PAN compatible cellular phone with sufficient ne...

Page 108: ...red traffic event A list of traffic information and the country in which it can be received is displayed On current road Select to display traffic information for the current road No Function Select to display a list of current traffic information Select to display a map with pre dictive traffic data TRAFFIC INFORMATION Traffic events near the current posi tion or the cursor position can be viewed...

Page 109: ...TRAFFIC EVENTS NOTIFICATION TRAFFIC INFORMATION ON THE MAP SCREEN On map screen On motorway screen If urgent traffic information is de tected around the current position a pop up message is displayed on the screen Select Yes to display the traffic information Traffic information such as traffic congestion accidents and road clo sures are displayed on the map screen For setting traffic informa tion...

Page 110: ... Function The icons show traffic incident road repair traffic obstacles etc Select to display the traffic infor mation The colour of the arrow changes depending on the traffic informa tion received Red Closed road accident etc Orange Traffic congestion Green Normal traffic flow Note that roads that are not covered by traffic information are also shown in green The indicator is displayed when traff...

Page 111: ... 3 Select Parking information 4 Select the desired parking lot PARKING INFORMATION The location and available spaces of parking lots can be checked These parking lots can also be set as a des tination No Information Function Parking lot name Parking fee Distance from current position Sort P 112 Parking lot search P 113 ...

Page 112: ...een set Add to and Replace will be displayed Add to Select to add a destination Replace Select to delete the existing desti nation s and set a new one 129 Select to display the map of the parking Select to display detailed information SORTING No Function Select to sort in the order of dis tance from the current location Select to sort parking lots in the order of most available spaces Select to so...

Page 113: ...lect the location or area to be searched SEARCHING FOR PARKING LOT No Function A search around the current posi tion can be performed A search around the currently set destination can be performed The size of the search area around the set location can be selected Select to change pages ...

Page 114: ...e Destination screen No Function Page Select to search for a destination by address 118 Select to search for a destination by point of interest 121 Select to search for a destination by online search The navigation system can use an internet search engine to set a destination using the most up to date information After setting the search engine to be used for Online search the screen but ton name ...

Page 115: ...t to search for a destination by intersection 124 Select to search for a destination by motorway entrance exit 125 Select to search for a destination by UK NL postal code 128 Select to search for a destination by coordinates 126 Select to search for a destination by telephone number 126 Select to search for a destination by point of interest near cursor 127 Select to set a destination by home 117 ...

Page 116: ...SEARCH OPERATION 1 Press the MENU button on the Remote Touch 2 Select Nav 3 Select Menu 4 Select Destination 5 Search for a destination There are different kinds of methods to search for a destination P 114 6 The destination map is displayed P 129 ...

Page 117: ... name and se lect OK 4 Select the desired search area 1 Display the Destination screen P 116 2 Select Home SELECTING THE SEARCH AREA INFORMATION Included countries may be different by map version or sales countries For map database information and updates P 185 SETTING HOME AS DESTINATION To use this function it is necessary to register a home address P 150 ...

Page 118: ...house number 4 Select Search SETTING QUICK ACCESS AS DESTINATION To use this function it is necessary to register quick access to the quick ac cess screen buttons 1 5 P 152 SEARCHING BY ADDRESS No Function Page Select to enter the search area 117 Select to enter the town name 119 Select to enter the street name 120 Select to enter the house number Select to reset the town street name and house num...

Page 119: ...erent way P 119 3 Select the desired town name Select to display a map of the central area of the desired town SELECTING A TOWN IN A DIF FERENT WAY 1 Select Option 2 Select the desired item 3 Select the desired town name ENTERING A TOWN NAME No Function Page Select to enter the postal code 120 Select from the last 5 towns Select from the nearest 5 towns ...

Page 120: ...elect the desired postal code 1 Select Street 2 Enter the street name and select OK 3 Select the desired street name If the same address exists in more than 1 town a screen requesting the town name to be entered or selected will be displayed Enter name Select to enter a town name to narrow down the listed items ENTERING A STREET NAME ...

Page 121: ...arrow down a town When entering the name of a specific POI and there are 2 or more sites with the same name the list screen is dis played NARROWING DOWN CATEGO RIES 1 Select Category 2 Select the desired category List all categories Select to display all POI categories NARROWING DOWN A TOWN 1 Select Town 2 Enter the town name and select OK Option Select to select a town in a different way P 119 3 ...

Page 122: ...play the Destination screen P 116 2 Select Memory 3 Select the desired memory point Stored routes Select to select a stored route established and downloaded from the Lexus portal site P 123 SEARCHING BY MAP By selecting Map the last dis played location is displayed again on the map screen You can search for a destination from this map SEARCHING BY MEMORY POINTS ...

Page 123: ...n P 116 2 Select Previous 3 Select the desired destination Previous start point Select to display the start point map of the previous guid ed route Delete Select to delete the previous destination P 124 This feature is available when a route established and downloaded from Lexus portal site is stored in the nav igation system P 385 SEARCHING FROM PREVIOUS DESTINATIONS INFORMATION The previous star...

Page 124: ...elect Delete 3 Select Yes when the confirmation screen appears 1 Display the Destination screen P 116 2 Select Intersection 3 Enter the name of the first intersect ing street and select OK 4 Select the desired street name 5 Enter the name of the second inter secting street and select OK 6 Select the desired street name SEARCHING BY INTERSECTION ...

Page 125: ...ect the desired motorway 5 Select Entrance or Exit 6 Select the desired entrance or exit name Enter name Select to enter an en trance or exit name to narrow down the listed items INFORMATION If the same 2 streets cross at more than 1 intersection the screen changes and displays the menu to select the town name where the streets intersect SEARCHING BY MOTORWAY ENTRANCE EXIT ...

Page 126: ...ne number and select OK Select to change the search ar ea P 117 If there is more than 1 site with the same number the list screen will be displayed and select desired item SEARCHING BY COORDINATES Searching by latitude and longitude coordinates is available using both DMS format for example 12 34 56 and DEG format for ex ample 12 345678 SEARCHING BY TELEPHONE NUMBER INFORMATION To set a memory poi...

Page 127: ...f POIs are dis played only when the current position is set as the search point On this route Select to search for POIs along the route When set to on the indicator will illuminate SEARCHING BY POI NEAR CURSOR The destination can be set by select ing the search point and the POI cat egory It is possible to display the names of POIs located within ap proximately 20 miles 30 km from the selected sea...

Page 128: ...own name 3 Select the desired town name 1 Display the Destination screen P 116 2 Select UK Postal code or NL Postal code 3 Enter the postal code and select OK 4 Select the desired code SEARCHING BY UK NL POSTAL CODE Search by postal code is only avail able when the United Kingdom or Netherlands is set as the search area ...

Page 129: ...d has been changed the route guidance may not indicate such changed infor mation INFORMATION The route for returning may not be the same as that for going The route guidance to the destination may not be the shortest route or a route without traffic congestion Route guidance may not be available if there is no road data for the speci fied location When setting the destination on a map with a scale...

Page 130: ...rence 130 Select to determine the map location of destina tion If a destination has already been set Add to and Replace will be displayed Add to Select to add a destination Replace Select to delete the existing desti nation s and set a new one If the searched point has been precisely identified based on a detailed ad dress appears on the point INFORMATION Even if the motorway indicator is dimmed t...

Page 131: ...n Destination point Type of route and its dis tance Distance of the entire route Select the desired route from 3 possible routes 132 Select to change the route 142 Select to start guidance If Start is selected until a beep sounds demo mode will start Press the or MENU but ton on the Remote Touch to end demo mode Select to display traffic prediction information 110 Select to display the Street View...

Page 132: ...ct to display the recommend ed route Select to display the fuel efficient route Select to display the route that is the shortest distance to the set destination Select to display the information about the 3 routes No Information Time necessary for the entire trip Distance of the entire trip Distance of the toll road Distance of the motorway Distance of the ferry Distance of the car train ...

Page 133: ...133 2 DESTINATION SEARCH 3 NAVIGATION SYSTEM IS300h 250_Navi_EE 1 Select Menu on the map screen 2 Select Suspend guidance 1 Select Resume guidance SUSPENDING GUIDANCE RESUMING GUIDANCE ...

Page 134: ... turning di rection Current position Route information bar P 135 Route information change button P 135 INFORMATION If the vehicle goes off the guidance route the route is searched again For some areas the roads have not been completely digitized in our data base For this reason the route guid ance may select a road that should not be traveled on When arriving at the set destination the destination...

Page 135: ...e map screen No Function Page Select to display the cur rent street name Select to display the esti mated arrival time 135 Select to display the esti mated travel time Select to display the traf fic information bar 137 When the vehicle is on the guidance route the distance with the estimated travel arrival time to the destination is displayed When driving on the guidance route with more than 1 des...

Page 136: ...Displays the estimated arrival time Displays the estimated travel time INFORMATION When the vehicle is on the guidance route the distance measured along the route is displayed Travel time and arrival time are calculated based on the set vehicle speed information P 170 However when the vehicle is not on the guidance route the dis tance displayed is the linear distance between the current position a...

Page 137: ...displayed up to 65 miles 100 km away from the cur rent position When traffic information is received the traffic information bar is dis played The colour of the arrow indicates specific road conditions Red indi cates a closed road accident etc Or ange indicates a traffic jam Blue indicates normal traffic flow Note that roads that are not covered by traffic information are also shown in blue No Inf...

Page 138: ...lose to a motorway exit Distance and time from the cur rent position to the road traffic fa cilities Select to display the nearest road traffic facilities from the current position Select to display the distance to the next and subsequent parking areas and parking area POIs Select to scroll to farther road traffic facilities Select to scroll to closer road traf fic facilities WHEN APPROACHING MOTO...

Page 139: ...uidance point INFORMATION If Automatic zoom is set to on these screens are not displayed P 168 WHEN APPROACHING INTERSECTION When the vehicle approaches an in tersection the intersection guidance screen will be displayed No Information Function Next street name Lane guidance Select to hide the intersection guidance screen To return to the intersection guidance screen se lect Distance to the inters...

Page 140: ...p config uration screen P 97 2 Check that the arrow screen is dis played TURN LIST SCREEN No Information Function Next street or destination name Turn direction Distance between turns ARROW SCREEN On this screen information about the next turn on the guidance route can be viewed No Information Function Exit number or street name Turn direction Distance to the next turn ...

Page 141: ... especially when you are driving on IPD roads roads that are not com pletely digitized in our database The route guidance may not have the updated information such as the direction of a one way street INFORMATION If a voice guidance command cannot be heard select on the map screen to hear it again To adjust the voice guidance volume P 81 Voice guidance may be made early or late If the system canno...

Page 142: ...142 3 ROUTE GUIDANCE IS300h 250_Navi_EE 3 EDITING ROUTE 1 Press the MENU button on the Remote Touch 2 Select Nav 3 Select Menu 4 Select Route ...

Page 143: ...nal destination in the same way as a destination search P 114 4 Select Add destination here to in sert the new destination into the route No Function Page Select to set search con ditions 145 Select to set detours 145 Select to set road prefer ences 146 Select to add destina tions 143 Select to delete destina tions 144 Select to reorder desti nations 144 Select to display route overview 147 ADDING...

Page 144: ...ete 3 Select Yes when the confirmation screen appears When more than 1 destination is set a list will be displayed on the screen Delete all Select to delete all destina tions on the list If more than 1 destination has been set the system will recalculate the route s to the set destination s as necessary REORDERING DESTINATIONS When more than 1 destination has been set the arrival order of the des ...

Page 145: ...can be set DETOUR SETTING During the route guidance the route can be changed to detour around a section of the route where a delay is caused by road repairs an accident etc No Function Select to detour within 1 mile of the current position Select to detour within 3 miles of the current position Select to detour within 5 miles of the current position Select to detour on the entire route Select to m...

Page 146: ...position indicates the location of a traffic jam caused by road re pairs an accident etc This route indicates the detour sug gested by the system When the vehicle is on a motorway the detour distance selections are 5 15 and 25 miles or 5 15 and 25 km if units are in km The system may not be able to calcu late a detour route depending on the selected distance and surrounding road conditions ROAD PR...

Page 147: ...d to reach the destination 147 Select to change the route 142 Select to start guidance The turn list on the guidance route can be viewed No Information Current position Distance to the next turn Turn direction at the intersection Select to display the map of the selected point INFORMATION However not all road names in the route may appear on the list If a road changes its name without requiring a ...

Page 148: ...NU button on the Remote Touch 2 Select Nav 3 Select Menu 4 Select My memory Points or areas on the map screen can be registered The registered points can be used on the Destination screen P 114 Registered areas to avoid will be avoided when the system searches for a route ...

Page 149: ...set the memory points 153 Select to set quick ac cess 151 Select to set areas to avoid 160 Select to set route traces 163 Select to copy from a USB memory 167 Select to backup to a USB memory 165 SETTING UP HOME If a home has been registered that in formation can be recalled by select ing Home on the Destination screen P 117 No Function Page Select to register home 150 Select to edit home 150 Sele...

Page 150: ...Edit 2 Select the desired item to be edited 3 Select OK REGISTERING HOME EDITING HOME No Function Page Select to change the icon to be displayed on the map screen 155 Select to edit the home name 156 Select to display the home name on the map screen When set to on the indi cator will illuminate Select to edit location in formation 156 Select to edit the tele phone number 156 ...

Page 151: ...P 148 2 Select Quick access 3 Select the desired item DELETING HOME SETTING UP QUICK ACCESS If quick access has been registered that information can be recalled by using the quick access screen buttons on the Destination screen P 118 No Function Page Select to register quick access 152 Select to edit quick ac cess 152 Select to delete quick ac cess 153 ...

Page 152: ...s 3 Select the desired item to be edited 4 Select OK REGISTERING QUICK ACCESS INFORMATION Up to 5 preset destinations can be reg istered EDITING QUICK ACCESS No Function Page Select to change the icon to be displayed on the map screen 155 Select to edit the quick access name 156 Select to display the quick access name on the map screen When set to on the indi cator will illuminate Select to edit l...

Page 153: ...splay the My memory screen P 148 2 Select Memory points 3 Select the desired item DELETING QUICK ACCESS SETTING UP MEMORY POINTS Points or areas on the map screen can be registered No Function Page Select to register memo ry points 154 Select to edit memory points 154 Select to delete memory points 157 Select to register external points 385 Select to edit or delete stored routes 158 ...

Page 154: ... When registering establishments that were set as destinations using an online search select Previous EDITING MEMORY POINTS The icon name location telephone number and or group of a registered memory point can be edited No Function Page Select to change the icon to be displayed on the map screen 155 Select to edit the memory point name 156 Select to display the memory point name on the map screen ...

Page 155: ...und is selected 1 Select the With sound tab 2 Select the desired sound icon Select to play the sound When Bell with direction is selected select an arrow to adjust the direction and select OK A sound for some memory points can be set When the vehicle ap proaches the location of the memory point the selected sound will be heard INFORMATION The bell sounds only when the vehi cle approaches this poin...

Page 156: ...HANGING THE LOCATION 1 Select Location 2 Scroll the map to the desired point P 101 and select OK CHANGING TELEPHONE NUM BER 1 Select Tel no 2 Enter the number and select OK SETTING THE GROUP 1 Select Group 2 Select the group the memory point is to be registered with Memory point groups can be set and changed ...

Page 157: ...he group to be edited 2 Select Edit name 3 Enter the group name and select OK To delete group 1 Select Delete group 2 Select the group to be deleted and se lect delete 3 Select Yes when the confirmation screen appears 1 Select Delete 2 Select the memory point to be delet ed and select Delete 3 Select Yes when the confirmation screen appears DELETING MEMORY POINTS ...

Page 158: ... to be edited EDITING STORED ROUTES Destinations of stored routes can be changed and deleted Also the arriv al order of destinations can be changed Importing stored routes P 385 No Function Page Select to edit the route name 156 Select to edit the loca tions 156 Select to reorder destina tions 159 Select to delete destina tions 159 ...

Page 159: ...wn to change the arrival order Then select OK DELETING DESTINATIONS 1 Select Delete 2 Select the destination to be deleted and select Delete 3 Select Yes when the confirmation screen appears 1 Select Stored routes 2 Select Delete 3 Select the stored route to be deleted and select Delete 4 Select Yes when the confirmation screen appears DELETING STORED ROUTES ...

Page 160: ...d screen appears P 161 SETTING UP AREA TO AVOID Areas to be avoided because of traf fic jams construction work or other reasons can be registered as Area to avoid No Function Page Select to register areas to avoid 160 Select to edit areas to avoid 161 Select to delete areas to avoid 162 REGISTERING AREA TO AVOID INFORMATION If a destination is entered in the area to avoid or the route calculation ...

Page 161: ...size of a registered area can be edited No Function Page Select to turn the area to avoid function on off When set to on the indi cator will illuminate Select to edit the name of the area to avoid 162 Select to display the name of the area to avoid on the map screen When set to on the indi cator will illuminate Select to edit the area lo cation 162 Select to edit the area size 162 ...

Page 162: ...elect Location 2 Scroll the map to the desired point P 101 and select OK CHANGING THE AREA SIZE 1 Select Area size 2 Select either or to change the size of the area to be avoided and select OK 1 Select Delete 2 Select the area to be deleted and se lect Delete 3 Select Yes when the confirmation screen appears DELETING AREA TO AVOID ...

Page 163: ...lect the desired item 1 Select Edit 2 Select the desired route trace SETTING UP ROUTE TRACE Route traces P 104 can be edited or deleted No Function Page Select to edit route trac es 163 Select to delete route traces 164 EDITING ROUTE TRACES The route trace name can be edited and start and end points can be con firmed ...

Page 164: ... route trace to be deleted and select delete 3 Select Yes when the confirmation screen appears No Function Select to edit route trace names P 164 Select to display registered route traces on the map screen When set to on the indicator will illuminate Select to confirm the start point on the map screen Select to confirm the end point on the map screen DELETING ROUTE TRACES ...

Page 165: ... if it is not turned on 3 Close the console box 4 Display the My memory screen P 148 5 Select Backup to USB BACKUP TO A USB MEMORY Memory points registered in the nav igation system can be copied to a USB memory A password must first be set in order to back up data P 166 Exporting memory point data is for your back up use only and distribu tion or usage in other system is strictly prohibited ...

Page 166: ...word INFORMATION In the following situations the mem ory point cannot be backed up to a USB memory When the memory point was regis tered using UK Postal code or NL Postal code When the memory point was regis tered using connected service SETTING PASSWORD Once a password has been set it will be requested not only to back up da ta but also when copying memory points from a USB memory to the navigati...

Page 167: ...a confirmation screen is displayed when the operation is complete COPYING FROM A USB MEMORY Memory points that have been backed up can be downloaded to the navigation system using a USB memory To use this function it is necessary to connect a USB memory to the sys tem P 165 INFORMATION Memory points that are located out side of the map s data range cannot be registered A maximum of 500 memory poin...

Page 168: ...168 IS300h 250_Navi_EE 5 SETUP 1 NAVIGATION SETTINGS 1 Press the MENU button on the Remote Touch 2 Select Setup 3 Select Navigation 4 Select the items to be set ...

Page 169: ... off Select to set the automat ic zooming function on off When the vehicle approaches a guidance point Select to set display of cautionary messages on off e g When the route includes traffic restric tions or seasonally re stricted roads Select to set display of pop up messages on off Select to adjust the cur rent position mark manu ally Miscalculation of the distance caused by tyre replacement can...

Page 170: ...y List all categories Select to display all POI categories 5 Select the desired POI icon AVERAGE SPEED The speed that is used for the calcu lation of the estimated travel time and estimated arrival time can be set INFORMATION The displayed time to the destination is the approximate driving time that is calculated based on the selected speeds and the actual position along the guidance route The tim...

Page 171: ...djust the direc tion of the current position mark and select OK CURRENT POSITION TYRE CHANGE CALIBRATION The current position mark can be ad justed manually Miscalculation of the distance caused by tyre replace ment can also be adjusted For additional information on the accuracy of a current position P 182 When driving the current position mark will be automatically corrected by GPS signals If GPS...

Page 172: ...utomatically started The tyre change calibration function will be used when replacing the tyres This function will adjust mis calculation caused by the circumfer ence difference between the old and new tyres INFORMATION If this procedure is not performed when the tyres are replaced the cur rent position mark may be incorrectly displayed ...

Page 173: ...ARKING SETTINGS 1 Press the MENU button on the Remote Touch 2 Select Setup 3 Select Info 4 Select Traffic or Parking 5 Select the items to be set Settings are available for displaying traffic information icons receivable traffic stations parking information icons etc ...

Page 174: ...ect to set display of traffic information icon 175 Select to set the avoid traffic events function auto manual 176 Select to set a detoured route search on off When traffic jams etc are predicted Select to set selection of traffic stations auto man ual 177 The selected station is displayed Select to receive TPEG traffic information 177 Select to enable the roaming function of TPEG traffic informa ...

Page 175: ...ll off Select to cancel all the selec tions Traffic information can set to be received auto matically or to receive RDS TMC traffic infor mation only 180 Select to set display of parking icons on the map screen on off Select to receive parking lot information 180 Select to enable the roaming function of parking lot information 181 Select to reset all setup items No Function Page SHOW TRAFFIC INFO ...

Page 176: ...ther or not to change routes when traf fic information of the guidance route has been received In this mode a screen will appear to ask if you wish to reroute P 176 Select to not reroute when traffic information for the guidance route has been received When the navigation system calcu lates a new route the following screen will be displayed No Function Select to start route guidance us ing the new...

Page 177: ...on again 1 Display the Traffic info settings screen P 173 2 Select Live update Internet Wi Fi 1 Bluetooth 2 1 Wi Fi is a registered mark of the Wi Fi Alliance 2 Bluetooth is a registered trademark of Bluetooth SIG Inc RDS TMC STATION If Manual is selected traffic sta tions must be searched for before be ing memorized SETTING TPEG TRAFFIC INFORMATION UPDATE FREQUENCY TPEG traffic information can be...

Page 178: ... frequently Select to update automatically less frequently Select to update manually P 178 Select to cancel TPEG traffic in formation reception via Wi Fi or a Bluetooth device Traffic and parking lot information can be updated on the map screen No Function Select to update the traffic infor mation Select to update the parking lot information Select to update the traffic and parking lot information...

Page 179: ... The roaming function of TPEG traf fic information received via a Blue tooth device can be enabled for roaming situations when outside the geographical coverage area of your mobile network provider This in formation can be set to update auto matically or manually No Function Select to update automatically more frequently Select to update automatically less frequently Select to update manually P 17...

Page 180: ...e set to receive automatically or to re ceive RDS TMC traffic information only No Function Select to automatically select a traffic information source When both RDS TMC and TPEG are available TPEG traffic informa tion will be selected automatical ly Select to receive only RDS TMC traffic information SETTING PARKING LOT INFORMATION UPDATE FREQUENCY Parking lot information can be re ceived via Wi Fi...

Page 181: ...G PARKING LOT INFORMATION ROAMING The roaming function of parking lot information received via a Blue tooth device can be enabled for roaming situations when outside the geographical coverage area of your mobile network provider This in formation can be set to update auto matically or manually No Function Select to update automatically Select to update manually P 178 Select to cancel parking lot i...

Page 182: ... tall buildings trucks or even the placement of objects on the instrument panel may obstruct the GPS signals The GPS satellites may not send signals due to repairs or improvements being made to them Even when the navigation system is re ceiving clear GPS signals the vehicle position may not be shown accurately or inappropriate route guidance may occur in some cases LIMITATIONS OF THE NAVIGATION SY...

Page 183: ...ions When the tyre pressure in any of the 4 tyres is not correct Inappropriate route guidance may occur in the following cases When turning at an intersection off the designated route guidance If you set more than 1 destination but skip any of them auto reroute will display a route returning to the desti nation on the previous route When turning at an intersection for which there is no route guida...

Page 184: ...the navigation system may not be com plete or may not be the latest version After replacing a tyre P 172 INFORMATION This navigation system uses tyre turn ing data and is designed to work with factory specified tyres for the vehicle Installing tyres that are larger or smaller than the originally equipped diameter may cause inaccurate dis play of the current position The tyre pressure also affects ...

Page 185: ...N SYSTEM 3 NAVIGATION SYSTEM IS300h 250_Navi_EE 2 MAP DATABASE VERSION AND COVERED AREA 1 Press the MENU button on the Remote Touch 2 Select Setup 3 Select Navigation MAP DATA Coverage areas and legal informa tion can be displayed ...

Page 186: ...e for a fee Contact your Lexus dealer for further information ABOUT THE MAP DATA Map data for the navigation system is contained in a SD card that is in serted in the SD card slot located at the bottom of the audio control pan el Do not eject the SD card as doing so may deactivate the navigation sys tem NOTICE Do not edit or delete the map data on the SD card as doing so may deacti vate the naviga...

Page 187: ...187 6 TIPS FOR THE NAVIGATION SYSTEM 3 NAVIGATION SYSTEM IS300h 250_Navi_EE ...

Page 188: ...LECTING AN AUDIO SOURCE 193 DISC SLOT 194 USB AUX PORT 195 SOUND SETTINGS 196 AUDIO SCREEN ADJUSTMENT 198 SPEECH COMMAND SYSTEM 199 1 AM FM DAB RADIO 200 OVERVIEW 200 PRESETTING A STATION 203 MANUAL TUNING 203 RDS RADIO DATA SYSTEM 204 TIME SHIFT OPERATION DAB 206 1 BASIC OPERATION 2 RADIO OPERATION ...

Page 189: ...uetooth DEVICE 236 LISTENING TO Bluetooth AUDIO 236 6 AUX 238 OVERVIEW 238 7 VTR 241 OVERVIEW 241 VTR OPTIONS 243 1 STEERING SWITCHES 244 1 AUDIO SETTINGS 246 AUDIO SETTINGS SCREEN 247 1 OPERATING INFORMATION 256 RADIO 256 DVD PLAYER AND DISC 258 iPod 263 FILE INFORMATION 264 TERMS 266 ERROR MESSAGES 268 3 MEDIA OPERATION 4 AUDIO VISUAL REMOTE CONTROLS 5 SETUP 6 TIPS FOR OPERATING THE AUDIO VISUAL...

Page 190: ...ecting a preset station and adjusting the sound balance are carried out on the screen Using the instrument panel Press the RADIO or MEDIA button to display the audio visual screen Using the Remote Touch Press the MENU button on the Remote Touch then select Audio to display the audio visual screen ...

Page 191: ...ry 220 Playing an iPod 225 Playing a Bluetooth device 232 Using the AUX port 238 Playing the VTR 241 Using the steering wheel audio switches 244 Audio system settings 246 INFORMATION The illustration is for left hand drive vehicles The button positions and shapes will differ for right hand drive vehicles Also the display and button positions will differ depending on the type of the sys tem ...

Page 192: ...is a class 1 laser product classified under the Safety of laser products IEC 60825 1 2007 and contains a class 1M laser module To ensure continued safety do not remove any covers or attempt to gain access to the inside of the product Refer all servicing to qualified personnel NOTICE To prevent the 12 volt battery from being discharged do not leave the audio visual system on longer than necessary w...

Page 193: ... audio control mode changes RADIO button To display the radio operation screen MEDIA button To display the exter nal media operation screen Using the Remote Touch 1 Press the MENU button on the Remote Touch 2 Select Audio 3 Select Source 4 Select the desired source SELECTING AN AUDIO SOURCE INFORMATION Dimmed screen buttons cannot be operated ...

Page 194: ..._Navi_EE 1 Select Source 2 Select Reorder 3 Select the desired audio source then or to reorder 1 Insert a disc into the disc slot After insertion the disc is automati cally loaded REORDERING THE AUDIO SOURCE DISC SLOT INSERTING A DISC ...

Page 195: ...ower of the device if it is not turned on 3 Close the console box EJECTING A DISC NOTICE Never try to disassemble or oil any part of the DVD player Do not insert anything other than a disc into the slot INFORMATION The player is intended for use with 4 7 in 12 cm discs only When inserting a disc gently insert the disc with the label facing up USB AUX PORT There are 2 USB ports and an AUX port in t...

Page 196: ...he first two connected devices will be recognized To operate the Video functions such as iPod video or VTR a 4 pole AUX cable is necessary However depend ing on the cable specifications the video function may not work prop erly For more information contact any authorized Lexus dealer or repairer or another duly qualified and equipped professional SOUND SETTINGS DSP CONTROL No Function The system a...

Page 197: ...E A good balance of the left and right stereo channels and of the front and rear sound levels is also important Keep in mind that when listening to a stereo recording or broadcast changing the right left balance will increase the volume of 1 group of sounds while decreasing the volume of another No Function Select or to adjust high pitched tones Select or to adjust mid pitched tones Select or to a...

Page 198: ...splay on the option screen AUDIO SCREEN ADJUSTMENT SCREEN SIZE SETTINGS The screen size can be selected for each type of media No Function Select to display a 4 3 screen with either side in black Select to enlarge the image hori zontally and vertically to full screen Select to enlarge the image by the same ratio horizontally and verti cally CONTRAST BRIGHTNESS COLOUR AND TONE ADJUSTMENT The bright...

Page 199: ...een colour of the screen Tone Select to strengthen the tone of the screen Tone Select to weaken the tone of the screen Contrast Select to strengthen the contrast of the screen Contrast Select to weaken the contrast of the screen Brightness Select to brighten the screen Brightness Select to darken the screen INFORMATION Depending on the audio source some functions may not be available SPEECH COMMAN...

Page 200: ...ERVIEW The radio operation screen can be reached by the following methods Using the instrument panel Press the RADIO button to display the audio control screen Using the Remote Touch Press the MENU button on the Remote Touch then select Audio to display the audio control screen ...

Page 201: ...201 2 RADIO OPERATION 4 AUDIO VIDEO SYSTEM IS300h 250_Navi_EE CONTROL PANEL ...

Page 202: ...o jump forward backwards Press to turn mute on off Press to move up down the preset stations ensembles Press to move up down the station list Press and hold 0 8 sec or more to seek up down available stations ensembles continuously while the button is being pressed Press to select a radio mode While in a radio mode pressing the RADIO button changes radio modes Power Volume knob Turn to adjust volum...

Page 203: ...s heard The station s frequency will be dis played in the screen button To change the preset station to a differ ent one follow the same procedure AM FM 1 Select Manual 2 Tune the desired station PRESETTING A STATION Up to 6 preset stations can be regis tered MANUAL TUNING No Function Select to seek up down for a sta tion Select to step up down frequen cies ...

Page 204: ...ion Select to set the desired ensem ble Select to set the desired service RDS RADIO DATA SYSTEM Depending on the availability of RDS infrastructure the service may not function properly AF ALTERNATIVE FREQUENCY FUNCTION A station providing good reception is automatically selected if current re ception worsens ...

Page 205: ...N TA TRAFFIC ANNOUNCEMENT FUNCTION The tuner will automatically seek a station that regularly broadcasts traf fic information and the station broad casts when the traffic information program starts INFORMATION When TA is set to On P 248 the radio will begin seeking a TP sta tion When the program ends the initial operation resumes The volume level when receiving the traffic announcement is memorize...

Page 206: ...old or to fast forward rewind TIME SHIFT OPERATION DAB The service you are currently listen ing to can be re listened to at any time INFORMATION The times at which playback is possi ble depend on the bit rate of the DAB station to be recorded the amount of DAB unit memory and the time at which reception of the broadcast began ...

Page 207: ...tion screen can be reached by the following methods Inserting a disc P 194 Using the instrument panel Press the MEDIA button to display the audio control screen Using the Remote Touch Press the MENU button on the Remote Touch then select Audio to display the audio control screen Audio CD MP3 WMA AAC disc ...

Page 208: ...208 3 MEDIA OPERATION IS300h 250_Navi_EE CONTROL PANEL ...

Page 209: ...ct to display the audio setting screen Select to set random playback Select to set repeat playback Shows progress Select to play pause Select to select a folder Tune Scroll knob Turn to select a track file Turn to move up down the list Press to play pause Press to select a track file Press and hold to fast forward rewind Press to select a media mode While in a media mode pressing the MEDIA button ...

Page 210: ... DA files and MP3 WMA AAC files only the CD DA files can be played back If a CD TEXT disc is inserted the title of the disc and track will be displayed Up to 32 characters can be displayed If the disc contains no CD TEXT only the track number would be displayed on the screen ...

Page 211: ... Select Each time is selected the mode changes as follows random 1 disc random off PLAYING AN AUDIO CD REPEATING The track currently being listened to can be repeated INFORMATION When is selected RPT appears on the screen RANDOM ORDER Tracks can be automatically and ran domly selected INFORMATION When is selected RAND appears on the screen ...

Page 212: ...h time is selected the mode changes as follows random 1 folder random folder random 1 disc random off PLAYING AN MP3 WMA AAC DISC REPEATING The file or folder currently being lis tened to can be repeated INFORMATION Each time is selected RPT FLD RPT appears on the screen RANDOM ORDER Files or folders can be automatically and randomly selected INFORMATION Each time is selected RAND FLD RAND appears...

Page 213: ...ack condition of some DVD discs may be determined by the DVD software producer This DVD player plays a disc as the software producer in tended As such some functions may not work properly Be sure to read the instruction manual that comes with the individual DVD disc P 258 OVERVIEW The DVD operation screen can be reached by the following methods Inserting a disc P 194 Using the instrument panel Pre...

Page 214: ...214 3 MEDIA OPERATION IS300h 250_Navi_EE CONTROL SCREEN CONTROL PANEL ...

Page 215: ... pause Select to slow forward Select to play pause Select to stop the video screen Select to rewind Select to display the menu control key Select to display full screen video Tune Scroll knob Turn to select a chapter Press to play pause Press to select a chapter Press and hold to fast forward rewind Press to select a media mode While in a media mode pressing the MEDIA button changes media modes Pr...

Page 216: ...e star tled by louder sound effects or when you change to a different audio source The louder sounds may have a significant impact on the human body or pose a driving hazard Keep this in mind when you adjust the volume INFORMATION According to the DVD disc some menu items can be selected directly For details see the manual that comes with the DVD disc provided separately If appears on the screen w...

Page 217: ...isplay the title search screen 218 Select to display the pre determined scene on the screen and start playing Select to display the audio selection screen 218 Select to display the subti tle selection screen 218 Select to display the angle selection screen 219 Select to change the screen size 198 Select to display the im age quality adjustment screen 198 ...

Page 218: ...dio language is changed The languages available are restricted to those available on the DVD disc 1 Select Subtitle 2 Each time Change is selected the language the subtitles are displayed in is changed The languages available are restricted to those available on the DVD disc When Hide is selected the subtitles can be hidden SEARCHING BY TITLE CHANGING THE AUDIO LANGUAGE CHANGING THE SUBTITLE LANGU...

Page 219: ... Select Angle 2 Each time Change is selected the angle is changed The angles available are restricted to those available on the DVD disc CHANGING THE ANGLE The angle can be selected for discs that are multi angle compatible when the angle mark appears on the screen ...

Page 220: ...y operation screen can be reached by the following methods Connecting a USB memory P 195 Using the instrument panel Press the MEDIA button to display the audio control screen Using the Remote Touch Press the MENU button on the Remote Touch then select Audio to display the audio control screen ...

Page 221: ...221 3 MEDIA OPERATION 4 AUDIO VIDEO SYSTEM IS300h 250_Navi_EE CONTROL PANEL ...

Page 222: ...reen select Now playing on the list screen Select to display the audio settings screen Select to set random playback Select to set repeat playback Shows progress Select to play pause Tune Scroll knob Turn to select a track file Turn to move up down the list Press to play pause Press to select a track file Press and hold to fast forward rewind Press to select a media mode While in a media mode pres...

Page 223: ...his may damage the USB memory or the terminal etc Do not leave your portable player in the car In particular high temperatures inside the vehicle may damage the portable player Do not push down on or apply unnecessary pressure to the portable player while it is connected as this may damage the portable player or its terminal Do not insert foreign objects into the port as this may damage the portab...

Page 224: ...is selected the mode changes as follows random 1 folder album random folder album random all folder album random off USB AUDIO REPEATING The file track or folder album cur rently being listened to can be re peated INFORMATION Each time is selected RPT FLD RPT appears on the screen RANDOM ORDER Files tracks or folders albums can be automatically and randomly select ed INFORMATION Each time is selec...

Page 225: ...operly For more information contact any authorized Lex us dealer or repairer or another duly qualified and equipped professional OVERVIEW The iPod operation screen can be reached by the following methods Connecting an iPod P 195 Using the instrument panel Press the MEDIA button to display the audio control screen Using the Remote Touch Press the MENU button on the Remote Touch then select Audio to...

Page 226: ...226 3 MEDIA OPERATION IS300h 250_Navi_EE CONTROL PANEL ...

Page 227: ...de selec tion screen To return to the top screen select Now playing on the list screen Select to display the audio settings screen Select to set random playback Select to set repeat playback Shows progress Shows progress Select to play pause Select to play pause Select to display the option screen 231 Select to fast forward Select to rewind Select to display full screen video Tune Scroll knob Turn...

Page 228: ...lect a media mode While in a media mode pressing the MEDIA button changes media modes Power Volume knob Turn to adjust volume Press to turn the audio system on off Press and hold to restart the audio system Power Volume knob Turn to adjust volume Press to turn the audio system on off Press and hold to restart the audio system No Function Audio Video ...

Page 229: ...ge the portable player or its terminal INFORMATION The system can only output the sound while driving When an iPod is connected using a genuine iPod cable the iPod starts charging its battery Depending on the iPod the video sound may not be able to be heard Depending on the iPod and the songs in the iPod iPod cover art may be displayed This function can be changed to On or Off P 250 It may take ti...

Page 230: ...cted the mode changes as follows track shuffle album shuffle off iPod AUDIO REPEATING The track currently being listened to can be repeated INFORMATION When is selected RPT appears on the screen RANDOM ORDER Tracks or albums can be automati cally and randomly selected INFORMATION Each time is selected Shuf fle ALB Shuffle appears on the screen ...

Page 231: ...hange iPod VIDEO To change to iPod video mode select Browse on the iPod audio screen then select the Videos tab and se lect the desired video file iPod VIDEO OPTIONS No Function Page Select to change the screen size 198 Select to display the im age quality adjustment screen 198 Select to change audio settings 246 ...

Page 232: ... not support Bluetooth the Bluetooth audio system will not function OVERVIEW The Bluetooth audio operation screen can be reached by the following meth ods Depending on the type of portable player connected some functions may not be available and or the screen may look differently than shown in this manual Connecting a Bluetooth audio device P 236 Using the instrument panel Press the MEDIA button t...

Page 233: ...233 3 MEDIA OPERATION 4 AUDIO VIDEO SYSTEM IS300h 250_Navi_EE CONTROL SCREEN CONTROL PANEL ...

Page 234: ...y the playlist screen To return to the top screen select Now playing on the list screen Select to set random playback Select to set repeat playback Shows progress Select to play Select to pause Tune Scroll knob Turn to select a track Turn to move up down the list Press to play pause Press to select a track Press and hold to fast forward rewind Press to select a media mode While in a media mode pre...

Page 235: ...FORMATION Depending on the Bluetooth device that is connected to the system the music may start playing when selecting while it is paused Conversely the music may pause when selecting while it is playing In the following conditions the system may not function The Bluetooth device is turned off The Bluetooth device is not connected The Bluetooth device has a low battery It may take time to connect ...

Page 236: ...control screen 2 For more information P 58 1 Select Each time is selected the mode changes as follows track repeat album repeat off CONNECTING A Bluetooth DEVICE To use the Bluetooth audio system it is necessary to register a Blue tooth device with the system LISTENING TO Bluetooth AUDIO REPEATING The track or album currently being listened to can be repeated INFORMATION Each time is selected RPT ...

Page 237: ...h 250_Navi_EE 1 Select Each time is selected the mode changes as follows album random all track random off RANDOM ORDER Tracks or albums can be automati cally and randomly selected INFORMATION Each time is selected RAND ALB RAND appears on the screen ...

Page 238: ...creen can be reached by the following methods Connecting a device to the AUX port P 195 Using the instrument panel Press the MEDIA button to display the audio control screen Using the Remote Touch Press the MENU button on the Remote Touch then select Audio to display the audio control screen ...

Page 239: ...dio source selection screen Select to display the audio setting screen Press to turn mute on off Press to select a media mode While in a media mode pressing the MEDIA button changes media modes Power Volume knob Turn to adjust volume Press to turn the audio system on off Press and hold to restart the audio system ...

Page 240: ... close the armrest as this may damage the portable audio device or the terminal etc Do not leave portable audio device in the vehicle The temperature inside the vehi cle may become high resulting in damage to the player Do not push down on or apply unnecessary pressure to the portable audio device while it is connected as this may damage the portable audio device or its terminal Do not insert fore...

Page 241: ... properly For more information contact any authorized Lex us dealer or repairer or another duly qualified and equipped professional OVERVIEW The VTR operation screen can be reached by the following methods Connecting a device to the AUX port P 195 Using the instrument panel Press the MEDIA button to display the audio control screen Using the Remote Touch Press the MENU button on the Remote Touch t...

Page 242: ...audio setting screen Select to display the option screen P 243 Select to display full screen video Press to turn mute on off Press to select a media mode While in a media mode pressing the MEDIA button changes media modes Power Volume knob Turn to adjust volume Press to turn the audio system on off Press and hold to restart the audio system ...

Page 243: ... 4 AUDIO VIDEO SYSTEM IS300h 250_Navi_EE 1 Select Options 2 Select the desired settings to change VTR OPTIONS No Function Page Select to change the screen size 198 Select to display the im age quality adjustment screen 198 ...

Page 244: ...em can be adjusted using the switches on the steering wheel No Switch MODE switch switch Volume control switch Mode Operation Function AM FM Radio DAB AUX VTR Press Change audio modes Press and hold 0 8 sec or more Mute CD MP3 WMA AAC disc DVD USB iPod BT audio Press Change audio modes Press and hold 0 8 sec or more Pause ...

Page 245: ...vice list up down Stations screen Ensemble seek up down Manual tuning screen Press and hold 0 8 sec or more Ensemble seek up down continuously while the switch is being pressed Manual tuning screen CD Press Track up down MP3 WMA AAC disc Press File up down Press and hold 0 8 sec or more Folder up down DVD Press Chapter up down USB Press File Track up down Press and hold 0 8 sec or more Folder Albu...

Page 246: ...246 IS300h 250_Navi_EE 5 SETUP 1 AUDIO SETTINGS 1 Press the MENU button on the Remote Touch 2 Select Setup 3 Select Audio 4 Select the items to be set Detailed audio settings can be pro grammed ...

Page 247: ...detailed sound settings 196 Select to set detailed FM radio settings 248 Select to set detailed DAB settings 248 Select to set the iPod au dio signal input settings 249 Select to set the video sig nal format settings 249 Select to set detailed cov er art settings 250 Select to set detailed DVD settings 250 ...

Page 248: ...lly selected if current reception worsens Select to switch to a broadcasting station within the same local pro gram network Select on off to set the FM Radio text feature DAB SETTINGS No Function Select on off to set L band in the tune range When Off is select ed the physical channel range for tuning operations is limited to Band III excluding for preset op erations When On is selected the physica...

Page 249: ...46 2 Select iPod settings 3 Select Video sound input 4 Select a screen button for the desired setting 1 Display the audio setting screen P 246 2 Select External video settings 3 Select Video signal switch 4 Select a screen button for the desired setting iPod SETTINGS EXTERNAL VIDEO SETTINGS ...

Page 250: ...When Default is selected all menus are initialized COVER ART SETTINGS No Function Select on off to set the cover art display in DISC mode Select on off to set the cover art display in USB mode Select on off to set the priority of the Gracenote database in USB mode Select on off to set the cover art display in iPod mode Select on off to set the priority of the Gracenote database in iPod mode INFORM...

Page 251: ...en select Other and enter a language code P 252 ANGLE MARK 1 Select Angle mark 2 Select On or Off PARENTAL LOCK 1 Select Parental lock 2 Enter the 4 digit personal code on the Key code screen 3 Select a parental level 1 8 on the Select restriction level screen AUTO START 1 Select Auto start playback 2 Select On or Off SOUND DYNAMIC RANGE 1 Select Sound dynamic range 2 Select MAX STD or MIN The aud...

Page 252: ...anguage to be heard or read can be selected by entering a language code Code Language 0514 English 1001 Japanese 0618 French 0405 German 0920 Italian 0519 Spanish 2608 Chinese 1412 Dutch 1620 Portuguese 1922 Swedish 1821 Russian 1115 Korean 0512 Greek 0101 Afar 0102 Abkhazian 0106 Afrikaans 0113 Amharic 0118 Arabic 0119 Assamese 0125 Aymara 0126 Azerbaijani 0201 Bashkir 0205 Byelorussian 0207 Bulg...

Page 253: ... Gaelic 0712 Galician 0714 Guarani 0721 Gujarati 0801 Hausa 0809 Hindi 0818 Croatian 0821 Hungarian Code Language 0825 Armenian 0901 Interlingua 0905 Interlingue 0911 Inupiak 0914 Indonesian 0919 Icelandic 0923 Hebrew 1009 Yiddish 1023 Javanese 1101 Georgian 1111 Kazakh 1112 Greenlandic 1113 Cambodian 1114 Kannada 1119 Kashmiri 1121 Kurdish 1125 Kirghiz 1201 Latin 1214 Lingala 1215 Laotian 1220 Li...

Page 254: ...Kirundi 1815 Romanian 1823 Kinyarwanda 1901 Sanskrit 1904 Sindhi 1907 Sango 1908 Serbo Croatian 1909 Sinhalese 1911 Slovak Code Language 1912 Slovenian 1913 Samoan 1914 Shona 1915 Somali 1917 Albanian 1918 Serbian 1919 Siswati 1920 Sesotho 1921 Sundanese 1923 Swahili 2001 Tamil 2005 Telugu 2007 Tajik 2008 Thai 2009 Tigrinya 2011 Turkmen 2012 Tagalog 2014 Setswana 2015 Tongan 2018 Turkish 2019 Tson...

Page 255: ...255 5 SETUP 4 AUDIO VIDEO SYSTEM IS300h 250_Navi_EE 2209 Vietnamese 2215 Volapük 2315 Wolof 2408 Xhosa 2515 Yoruba 2621 Zulu Code Language ...

Page 256: ...ever this does not indicate a malfunction RADIO Usually a problem with radio recep tion does not mean there is a problem with the radio it is just the normal result of conditions outside the vehi cle For example nearby buildings and terrain can interfere with FM recep tion Power lines or telephone wires can interfere with AM signals And of course radio signals have a limit ed range The farther the...

Page 257: ...ass level may reduce static and flutter ing Station swapping If the FM signal be ing listened to is interrupted or weak ened and there is another strong station nearby on the FM band the radio may tune in the second station until the orig inal signal can be picked up again Fading AM broadcasts are reflected by the upper atmosphere especially at night These reflected signals can inter fere with tho...

Page 258: ... the DVD player skip If moisture gets into the DVD player the discs may not be able to be played Remove the discs from the player and wait until it dries Use only discs marked as shown above The following products may not be playable on your player SACD dts CD Copy protected CD DVD audio Video CD DVD RAM DVD PLAYER AND DISC CAUTION DVD players use an invisible laser beam which could cause hazardou...

Page 259: ...e shown in the illus trations The use of such discs may damage the player or it may be impossible to eject the disc This system is not designed for use of Dual Discs Do not use Dual Discs because they may cause damage to the player Do not use discs with a protection ring The use of such discs may dam age the player or it may be impossi ble to eject the disc Do not use printable discs The use of su...

Page 260: ... RW discs that have not been subject to the finalizing process a process that allows discs to be played on a conventional CD player cannot be played It may not be possible to play CD R CD RW discs recorded on a music CD recorder or a personal computer because of disc characteristics scratches or dirt on the disc or dirt condensation etc on the lens of the unit It may not be possible to play discs ...

Page 261: ...re are cases when it can not be used MARKS SHOWN ON DVD VID EO DISCS DVD VIDEO DISCS This DVD player conforms to NTSC PAL colour TV formats DVD video discs conforming to an other format such as SECAM cannot be used Code Country All All countries 2 Except for Russia 5 Russia NTSC PAL Indicates NTSC PAL format of co lour TV Indicates the number of audio tracks Indicates the number of language subti ...

Page 262: ... replaced with oth er scenes Level 1 DVD video discs for children can be played Level 2 7 DVD video discs for chil dren and G rated movie can be played Level 8 All types of the DVD video discs can be played Multi angle feature The same scene can be enjoyed from different angles Multi language feature The subtitle and audio language can be selected Region codes The region codes are pro vided on DVD...

Page 263: ...eneration The 30 pin connector works with iPhone 4S iPhone 4 iPhone 3GS iPhone 3G iPhone iPod touch 1st through 4th generation iPod classic and iPod nano 1st through 6th genera tion USB works with iPhone 5 iPhone 4S iPhone 4 iPhone 3GS iPhone 3G iPhone iPod touch 1st through 5th gen eration iPod classic and iPod nano 1st through 7th generation The following iPod iPod nano iPod classic iPod touch a...

Page 264: ... USB DISC Compatible file format audio MP3 WMA AAC Folders in the device Maxi mum300 0 Maxi mum192 Files in the de vice Maxi mum999 9 Maxi mum255 Files per folder Maxi mum255 File type Frequency kHz MP3 files MPEG 1 LAYER 3 32 44 1 48 MP3 files MPEG 2 LSF LAY ER 3 16 22 05 24 WMA files Ver 7 8 9 9 1 9 2 32 44 1 48 AAC files MPEG4 AAC LC 11 025 12 16 22 05 24 32 44 1 48 File type Bit rate kbps MP3 ...

Page 265: ...WMA AAC tag that is used in the same way as an ID3 tag WMA AAC tags carry information such as track title and artist name The emphasis function is available only when playing MP3 WMA files recorded at 32 44 1 and 48 kHz This system can play back AAC files encoded by iTunes The sound quality of MP3 WMA files generally improves with higher bit rates In order to achieve a reasonable level of sound qu...

Page 266: ... MP3 file This embedded information can include the track number track title the artist s name the album title the music genre the year of production comments cover art and other data The contents can be freely edited using software with ID3 tag editing functions Although the tags are restricted to a number of char acters the information can be viewed when the track is played back WMA files can co...

Page 267: ...tion mark and file extension Each folder must contain fewer than 8 hierar chies Playlists created using WINAMP software have a playlist file extension m3u MP3 is an audio compression standard determined by a working group MPEG of the ISO International Stan dard Organization MP3 compresses audio data to about 1 10 the size of that on conventional discs WMA Windows Media Audio is an audio compressio...

Page 268: ... DVD region code is not set properly USB USB error This indicates a problem in the USB memory or its connection No music files found This indicates that no MP3 WMA AAC files are included in the USB memory iPod iPod error This indicates a problem in the iPod or its con nection No music files found This indicates that there is no music data in the iPod No video files found This indicates that no vid...

Page 269: ... THE AUDIO VISUAL SYSTEM 4 AUDIO VIDEO SYSTEM IS300h 250_Navi_EE INFORMATION If the malfunction is not rectified Take your vehicle to any authorized Lexus dealer or repairer or another duly qualified and equipped professional ...

Page 270: ...270 6 TIPS FOR OPERATING THE AUDIO VISUAL SYSTEM IS300h 250_Navi_EE ...

Page 271: ... 3 5 6 7 5 8 4 IS300h 250_Navi_EE 1 SPEECH COMMAND SYSTEM 272 USING THE SPEECH COMMAND SYSTEM 272 SPEECH COMMAND SYSTEM OPERATION 273 2 COMMAND LIST 280 1 SPEECH COMMAND SYSTEM OPERATION SPEECH COMMAND SYSTEM ...

Page 272: ...oper ated from the Main menu screen USING THE SPEECH COMMAND SYSTEM STEERING SWITCH MICROPHONE INFORMATION Wait for the confirmation beep before speaking a command Speech commands may not be recog nized if Spoken too quickly Spoken at a low or high volume The roof or windows are open Passengers are talking while speech commands are spoken The air conditioning speed is set high The air conditioning...

Page 273: ...ect the desired command Speech commands are marked with Some commonly used com mands are displayed on the screen 3 Say or select the command displayed on the screen SPEECH COMMAND SYSTEM OPERATION OPERATION FROM THE SHORTCUTS Voice guidance for the speech com mand system can be skipped by pressing the talk switch Saying Help or selecting prompts voice guidance to offer examples of commands and ope...

Page 274: ...POIs registered names in the contacts list etc can be said in the place of the next to the com mands P 280 For example Say Find nearby Restau rants Call John Smith etc If a desired outcome is not shown or if no selections are available perform one of the following to return to the previ ous screen Say Go back Select Go back To cancel voice recognition select Cancel or press and hold the talk switc...

Page 275: ...rec ognized voice guidance will say Pardon and speech command reception will restart If a speech command cannot be rec ognized 2 consecutive times the speech command guidance system will say To restart voice recognition push the talk switch Then voice recognition will be suspended The voice recognition prompt can be set to on or off when Voice prompts is selected This setting can also be changed o...

Page 276: ...only the city name was said at step 3 say the street name If the street name is not unique select the appropriate number from the displayed address list Say the desired city name or city name and street name that belongs to the set country in the place of the Not just the city name but the city name and street name can be said at the same time If both are said at the same time and the street name ...

Page 277: ... Play song name or Play playlist name Say the desired name in the place of the A confirmation screen will be dis played showing the recognition results If multiple matching items are found a selection screen will be displayed 3 Say Play or select Play The system starts playing music INFORMATION To change the country to be searched say Change country when the screen to say the city name is dis play...

Page 278: ...ist a name candidate list will be displayed on the screen If the desired name is not dis played on the top of the screen say the number of the name from the candidate list to select a name from the candidate list INFORMATION A USB memory or iPod must be con nected to enable track searching and playback P 220 225 When a USB memory or iPod is con nected recognition data is created so tracks can be s...

Page 279: ...not be used Check the Bluetooth phone con nection 2 Say the telephone number In the same manner as it is displayed on the screen Dial number after say ing Dial say the telephone number Say the telephone number one digit at a time For example if the telephone number is 2345678 Say two three four five six seven eight As the system cannot recognize addi tional numbers say the complete num ber without...

Page 280: ...led Commands that have O in the shortcuts menu column can be recognized from the Shortcuts screen Basic Navi For example Restaurant Hospital etc Recognizable speech commands and their actions are shown below Voice recognition language can be changed P 73 Command Action Help Prompts voice guidance to offer examples of com mands and operation methods Go back Returns to the previous screen Command Ac...

Page 281: ...o the said telephone type of the contact from the contact list O Dial number Places a call to the said telephone number O Command Action Short cuts menu Play artist name Plays tracks from the selected artist O Play album name Plays tracks from the selected album O Play song name Plays the selected track O Play playlist name Plays tracks from the selected playlist O ...

Page 282: ...ING PRECAUTIONS 284 SCREEN DISPLAY 286 USING THE SYSTEM WHEN PERPENDICULAR PARKING 287 USING THE SYSTEM WHEN PARALLEL PARKING 288 SWITCHING THE PARKING MODE SCREEN 289 2 PERPENDICULAR PARKING ESTIMATED COURSE LINE DISPLAY MODE 290 SCREEN DESCRIPTION 290 PARKING 292 1 LEXUS PARKING ASSIST MONITOR ...

Page 283: ...BJECTS 307 6 THINGS YOU SHOULD KNOW 309 IF YOU NOTICE ANY SYMPTOMS 309 1 LEXUS PARKING ASSIST SENSOR 311 TYPES OF SENSORS 311 LEXUS PARKING ASSIST SENSOR SWITCH 311 DISPLAY 312 THE DISTANCE DISPLAY AND BUZZER 313 DETECTION RANGE OF THE SENSORS 314 SENSOR DETECTION INFORMATION 314 LEXUS PARKING ASSIST SENSOR FAILURE WARNING 316 2 LEXUS PARKING ASSIST SETTING 318 SETTING AN ALERT VOLUME 319 SETTING ...

Page 284: ...emental device intended to assist the driver when backing up When backing up be sure to visually check all around the vehicle both directly and using the mirrors before pro ceeding If you do not you may hit another vehicle and could possibly cause an accident Pay attention to the following pre cautions when using the parking as sist monitor CAUTION Never depend on the parking assist monitor entire...

Page 285: ... cases On icy or slick road surfaces or in snow When using tyre chains When the trunk is not closed com pletely On roads that are not flat or straight such as curves or slopes In low temperatures the screen may darken or the image may become faint The image could distort when the vehicle is moving or you may become unable to see the image on the screen Be sure to visually check all around the vehi...

Page 286: ...fted to the R position while the engine power switch is in IGNITION ON ON mode No Display Function Display mode switch screen button Switches the display mode Parking mode switch screen button Switches the parking mode between perpen dicular parking and parallel parking assist screens Narrow mode screen on off button Switch the narrow mode on and off P 289 Lexus parking assist sensor If an obstacl...

Page 287: ...ide line display mode USING THE SYSTEM WHEN PERPENDICULAR PARKING Use any of the following modes when perpendicular parking for ex ample when parking in a garage Estimated course lines are displayed which move in accordance with the operation of the steering wheel The steering wheel return points parking assist guide lines are dis played Distance guide lines only are dis played ...

Page 288: ...NG THE DISPLAY MODE Distance guide line dis play Parking assist guide line display mode Estimated course line display mode USING THE SYSTEM WHEN PARALLEL PARKING Screen display and beep sounds pro vide an estimation of the point at which you should turn the steering wheel when parallel parking If the position the vehicle is to be parked in is narrower than usual narrow mode can be used ...

Page 289: ...e switches as follows 1 Select the parking mode switch screen button With each select the perpendicular parking and parallel parking assist screen switches as follows SWITCHING TO NARROW MODE Caution screen Normal mode Narrow mode I agree SWITCHING THE PARKING MODE SCREEN Perpendicular parking Estimated course line display mode Parking assist guide line display mode Parallel parking ...

Page 290: ...ourse lines when the vehicle is going straight ahead Estimated course lines Show an estimated course when the steering wheel is turned Distance guide lines Show distance behind the vehicle when the steering wheel is turned The guide lines move in conjunction with the esti mated course lines The guide lines display points approximately 1 5 ft 0 5 m red and approximately 3 ft 1 m yel low from the ce...

Page 291: ...sing the mirrors before proceeding If the steering wheel is straight and the vehicle width extension guide lines and the estimated course lines are not in alignment have the vehicle inspected by any authorized Lexus dealer or repairer or another duly qualified and equipped profes sional The vehicle width extension guide lines are wider than the actual width of the vehi cle When backing up be sure ...

Page 292: ...vehicle width extension guide lines are with in the left and right dividing lines of the parking space Vehicle width extension guide line 4 Once the vehicle width extension guide lines and the parking space lines are parallel straighten the steering wheel and back up slowly until the vehicle has completely en tered the parking space 5 Stop the vehicle in an appropriate place and finish parking PAR...

Page 293: ...he approximate position of the steering wheel when parking Distance guide lines Show distance behind the vehicle Display points approximately 1 5 ft 0 5 m red from the edge of the bumper CAUTION The position of the guide lines displayed on the screen may change in accordance with the number of passengers the amount of cargo etc Be sure to visually check all around the vehicle both directly and usi...

Page 294: ...ing line 3 Turn the steering wheel all the way to the right and back up slowly 4 Once the vehicle is parallel with the parking space straighten the steer ing wheel and back up slowly until the vehicle has completely entered the parking space 5 Stop the vehicle in an appropriate place and finish parking PARKING When parking in a space which is in the reverse direction to the space de scribed in the...

Page 295: ...ING STEP 5 A curved blue line is displayed Keep the steer ing wheel in the same position and back up until the curved blue line meets the right corner of the parking space PARKING STEP 7 When it meets the right corner of the parking space turn the steering wheel in the opposite di rection as far as it will go PARKING STEP 8 Keeping the steering wheel in that position check your surroundings visual...

Page 296: ...imately 3 ft 1 m of space between your vehicle and the parked vehicle A position in which you are half a vehi cle s length ahead of the parked vehicle Roughly half a vehicle s length Desired parking space Approx 3 ft 1 m Parked vehicle Your vehicle PARKING The following example describes the procedure for pulling into a parking space on the right For pulling into a parking space on the left substi...

Page 297: ...steering wheel straight back up slowly to a position at which the black and yellow vertical pole just overlaps the rear end of the parked vehicle Then stop the vehi cle Black and yellow vertical pole Back the vehicle up to here 5 Turn the steering wheel with the ve hicle stopped until the blue outline meets the desired parking space If the extended line from the blue out line is displayed the para...

Page 298: ...ne do not use the parallel parking assist When positioning the blue outline over the parking space be sure to position it so that the extended blue line may not cross the tyre of the vehicle parked in front of the empty space If the extended line of the blue outline is crossing the parked vehicle your vehicle may be too close Check that there is a gap of approximately 3 ft 1 m between your vehicle...

Page 299: ...is moved while backing up Shift the shift lever out of the R position and restart from the procedure 1 7 A curved blue line will appear on the screen Keep the steering wheel in its current position and back up slowly Stop when the curved blue line meets the corner of the desired park ing space Curved blue line CAUTION When backing up be careful not to hit any obstacles with your vehicle Back the v...

Page 300: ...e road or the shoulder straighten the steering wheel Check your surroundings visually and with the mirrors then back up using the distance guide lines as a reference and stop When the vehicle is approximately in the desired parking location the paral lel parking assist is complete CAUTION When backing up be careful not to hit any obstacles with your vehicle Back the vehicle up slowly INFORMATION T...

Page 301: ... the steering wheel to its original position If the message is displayed before the outline is positioned over the desired parking space it is likely that the vehi cle is too far away from the shoulder Check that there is a gap of approxi mately 3 ft 1 m between your vehicle and the parked vehicle Normal mode Narrow mode If the engine power switch is turned off when the parking assist monitor is c...

Page 302: ... park ing assist mode 2 Confirm the warning on the Cau tion screen If you agree select I agree To cancel narrow mode se lect 3 When the system is switched to nar row mode the indicator on will be turned on Select again to switch the sys tem to the normal mode OPERATING NARROW MODE ...

Page 303: ...er of the rear area of the vehi cle Screen Displayed area Corners of bumper INFORMATION The area displayed on the screen may vary according to vehicle orientation conditions Objects which are close to either cor ner of the bumper or under the bumper cannot be displayed The camera uses a special lens The distance of the image that appears on the screen differs from the actual dis tance Items which ...

Page 304: ... detach disas semble or modify it This may cause incorrect operation Do not strongly rub the camera lens If the camera lens is scratched it cannot transmit a clear image Do not allow organic solvent car wax window cleaner or glass coat to adhere to the camera If this hap pens wipe it off as soon as possible If the temperature changes rapidly such as when hot water is poured on the vehicle in cold ...

Page 305: ...ear to be so Be sure to check visually The distance guide lines give a distance guide for flat road surfaces In any of the following situations there is a mar gin of error between the guide lines on the screen and the actual distance course on the road DIFFERENCES BETWEEN THE SCREEN AND THE ACTUAL ROAD WHEN THE GROUND BEHIND THE VEHICLE SLOPES UP SHARPLY The distance guide lines will appear to be ...

Page 306: ...ts will appear to be closer than they actually are In the same way there will be a margin of error be tween the guidelines and the actual distance course on the road WHEN ANY PART OF THE VEHICLE SAGS When any part of the vehicle sags due to the number of passengers or the distribution of the load there is a margin of error between the guide lines on the screen and the actual dis tance course on th...

Page 307: ...stance guide lines When approaching a three di mensional object that extends out ward such as the flatbed of a truck be careful of the following ESTIMATED COURSE LINES Visually check the surroundings and the area behind the vehicle In the case shown below the truck appears to be outside of the estimated course lines and the vehicle does not look as if it hits the truck However the rear body of the...

Page 308: ... the vehicle On the screen it appears that a truck is park ing at point B However in reality if you back up to point A you will hit the truck On the screen it appears that A is closest and C is furthest away However in reality the dis tance to A and C is the same and B is farther than A and C Positions of A B and C C A B C A B ...

Page 309: ...tc is adhering to the camera Sunlight or headlights are shining directly into the camera The vehicle is under fluo rescent lights sodium lights mercury lights etc Back up while visually checking the vehicle s sur roundings Use the moni tor again once conditions have been improved The procedure for adjusting the picture quality of the parking assist monitor is the same as the procedure for adjustin...

Page 310: ...se causes it does not indicate a malfunction Back up while visually checking the vehicle s surroundings The estimated course lines move even though the steering wheel is straight There is a malfunction in the signals being output by the steering sensor Have the vehicle inspected by any authorized Lexus dealer or repairer or anoth er duly qualified and equipped professional Guide lines are not dis ...

Page 311: ...ed There is a malfunction in the signals being output by the steering sensor Stop the vehicle and turn the steering wheel as far as it will go to the left and right If this does not resolve the symptom have the vehicle inspected by any autho rized Lexus dealer or re pairer or another duly qualified and equipped pro fessional On the system initializa tion screen select to display the operating pro ...

Page 312: ...312 1 LEXUS PARKING ASSIST MONITOR IS300h 250_Navi_EE ...

Page 313: ...ns the Lexus parking assist sen sor on off When on the indicator light comes on to inform the driver that the system is operational The distance to obstacles measured by the sensors is communicated via the display and a buzzer when paral lel parking or maneuvering into a ga rage Always check the surrounding area when using this system TYPES OF SENSORS If equipped LEXUS PARKING ASSIST SENSOR SWITCH...

Page 314: ... mute the buzzer sounds The graphic is automatically displayed when an obstacle is detected The screen can be set so that the graphic is not displayed P 318 When the vehicle is moving back ward A simplified image is displayed on the right upper corner of the screen when an obstacle is detected DISPLAY When the sensors detect an obstacle the graphic is shown on the multi in formation display and na...

Page 315: ...st Continuous Level 1 2 3 4 Display example Buzzer Slow Medium Fast Continuous Level 1 2 3 4 Front corner sensors 1 6 to 1 3 ft 50 to 40 cm 1 3 to 1 0 ft 40 to 30 cm 1 0 ft 30 cm or less Front centre sensors 3 3 to 1 6 ft 100 to 50 cm 1 6 to 1 3 ft 50 to 40 cm 1 3 to 1 0 ft 40 to 30 cm 1 0 ft 30 cm or less Rear corner sensors 2 0 to 1 5 ft 60 to 45 cm 1 5 to 1 0 ft 45 to 30 cm 1 0 ft 30 cm or less...

Page 316: ... other loud noises producing ultrasonic waves There is another vehicle equipped with parking assist sensors in the vicinity A sensor is coated with a sheet of spray or heavy rain The vehicle is equipped with a fender pole or radio antenna Towing eyelets are installed A bumper or sensor receives a strong impact The vehicle is approaching a tall or right angled curb In harsh sunlight or intense cold...

Page 317: ...though sensors which are func tioning properly continue to detect obstacles never use the Lexus park ing assist if one more sensor s may be malfunctioning NOTICE Notes when washing the vehicle Do not apply intensive bursts of water or steam to the sensor area Doing so may result in the sensor malfunctioning As the parking assist sensor might be malfunctioning in the following cases have it checked...

Page 318: ... given in either of the following operations Changing to another screen Turning off the main switch for the Lexus parking assist sensor WHEN SNOWFLAKES OR MUD GETS ON THE SENSORS INFORMATION If this screen appears remove the for eign matter from the sensor If the failure warning does not go off even after the foreign matter is removed the parking assist sensor may be malfunctioning Have it checked...

Page 319: ...S300h 250_Navi_EE 6 PERIPHERAL MONITORING SYS If this screen appears have the parking assist sensor checked by any autho rized Lexus dealer or repairer or another duly qualified and equipped professional WHEN THE SENSOR IS MALFUNCTIONING ...

Page 320: ...50_Navi_EE 2 LEXUS PARKING ASSIST SETTING 1 Press the MENU button on the Remote Touch 2 Select Setup 3 Select Vehicle 4 Select LEXUS park assist 5 Select the desired button The volume of the beeps turning on or off of the display etc can be set ...

Page 321: ...alue 1 Display the LEXUS park assist set tings screen P 318 2 Select Display off to turn off the parking sonar display SETTING AN ALERT VOLUME The alert volume can be adjusted SETTING A PARKING SONAR DISPLAY Parking sonar display can be set to on or off INFORMATION Although Display off is selected if the obstacle is detected during the Lexus parking assist monitoring the warning appears on the rig...

Page 322: ...8 2 Select Front or Rear Selecting Front or Rear to switch the distance for the front or back sen sors display and tone indication from long distance to short distance or from short distance to long distance SETTING A DISPLAY AND TONE INDICATION Front and back sensors display and tone indication can be set ...

Page 323: ...KING ON THE Bluetooth PHONE 337 INCOMING CALL WAITING 339 6 Bluetooth PHONE MESSAGE FUNCTION 340 RECEIVING A MESSAGE 341 CHECKING MESSAGES 342 REPLYING TO A MESSAGE QUICK REPLY 343 CALLING THE MESSAGE SENDER 345 1 TELEPHONE SETTINGS 347 TELEPHONE SETTINGS SCREEN 347 Sound settings SCREEN 348 Messaging settings SCREEN 349 Telephone display settings SCREEN 351 Lexus Euro assistance 24 settings SCREE...

Page 324: ... button on the Remote Touch and select Telephone or the switch on the steering wheel Function Page Telephone operation Registering connecting Bluetooth device 48 Calling on the Bluetooth phone 328 Receiving on the Bluetooth phone 336 Talking on the Bluetooth phone 337 Message function Using the Bluetooth phone message function 340 Setting up a telephone Telephone settings 347 Contact settings 354 ...

Page 325: ...of such devices Before using Bluetooth devices users of any electrical medical device other than implanted pacemakers and implanted cardiac defibrillators should consult the manufacturer of the device for information about its operation under the influence of radio waves Radio waves could have unex pected effects on the operation of such medical devices NOTICE Do not leave your cellular phone in t...

Page 326: ...REGISTERING CONNECTING A Bluetooth PHONE To use the hands free system for cel lular phones it is necessary to regis ter a cellular phone with the system P 48 Bluetooth PHONE CONDITION DISPLAY The condition of the Bluetooth phone appears on the upper right side of the screen P 16 USING THE TELEPHONE SWITCH MICROPHONE By pressing the telephone switch a call can be received or ended without taking yo...

Page 327: ...LAR PHONES 7 TELEPHONE IS300h 250_Navi_EE Microphone The microphone is used when talking on the telephone SPEECH COMMAND SYSTEM Press this switch to operate the speech command system The speech command system and its list of commands can be operated P 272 ...

Page 328: ...speak at the same time the other party may not hear what has been said This is not a malfunction Keep call volume down Otherwise the other party s voice may be audible outside the vehicle and voice echo may increase When talking on the telephone speak clearly towards the microphone The other party may not hear you clearly when Driving on an unpaved road Mak ing excessive traffic noise Driving at h...

Page 329: ...story data Favourites data Image data All telephone settings Message settings WHEN SELLING OR DISPOSING OF THE VEHICLE A lot of personal data is registered when the hands free system is used When selling or disposing of the ve hicle initialize the data P 80 INFORMATION Once initialized the data and settings will be erased Pay much attention when initializing the data ...

Page 330: ...en can be dis played by pressing the switch on the steering wheel After a Bluetooth phone has been registered a call can be made using the hands free system There are sev eral methods by which a call can be made as described below How to make a call list Page By favourites list 329 By call history 329 By contacts list 331 By dial pad 333 By e mail SMS MMS 345 By POI call 105 SOS 334 By off hook sw...

Page 331: ... top screen P 328 2 Select Call history 3 Select or the desired contact from the list BY FAVOURITES LIST Calls can be made using registered contacts which can be selected from a contact list P 362 BY CALL HISTORY Up to 45 call history items missed incoming and outgoing can be se lected from the Call history screen No Function All calls missed incoming or outgoing Calls that were missed Calls that ...

Page 332: ... ber continuously only the most recent call is listed in call history When a telephone number registered in the contact list is received the name is displayed Number withheld calls are also mem orized in the system International telephone calls may not be made depending on the type of cel lular phone you have The list should group together con secutive entries with the same tele phone number and s...

Page 333: ...luetooth PHONES When Automatic contact history transfer is set to on P 351 1 Select Contacts Contacts are transferred automatically 2 Check that a confirmation screen is displayed when the operation is complete BY CONTACTS LIST Calls can be made by using contact data which is transferred from a reg istered cellular phone P 354 Up to 2500 contacts maximum of 4 telephone numbers and e mail ad dresse...

Page 334: ...Contacts 2 Select the desired item No Function Select to always transfer all the contacts from a connected cellu lar phone automatically Select to transfer all the contacts from a connected cellular phone only once Select to cancel transferring This operation cannot be performed while driving No Function Select to transfer the contacts from the connected cellular phone and replace the current one ...

Page 335: ...ter the telephone number 3 Select or press the switch on the steering wheel 4 Check that the Call screen is dis played INFORMATION If your cellular phone is neither PBAP nor OPP compatible the con tacts cannot be transferred Depending on the type of Bluetooth phone It may be necessary to perform addi tional steps on the telephone when transferring contact data The registered image in the contact l...

Page 336: ... 4 Check that the Call screen is dis played 1 Display the telephone top screen P 328 2 Select SOS 3 Select 112 4 Check that the Call screen is dis played The current location of the vehicle is displayed on the screen BY OFF HOOK SWITCH Calls can be made using the latest call history item SOS 112 EMERGENCY CALL SUPPORT This feature is used to make a 112 emergency call This function is not available...

Page 337: ...Euro assistance 24 4 Select 5 Check that the Call screen is dis played The current location of the vehicle is displayed on the screen ROADSIDE ASSIST This feature is used to make a call to Lexus roadside assist service The call has to be placed from a country where Lexus roadside assist service is available To use this function it is necessary to register a country P 352 ...

Page 338: ...switch on the steering wheel To adjust the volume of a received call Turn the Power Volume knob or use the volume control switch on the steer ing wheel INCOMING CALLS When a call is received this screen is displayed with a sound INFORMATION During international telephone calls the other party s name or number may not be displayed correctly depending on the type of cellular phone you have The incom...

Page 339: ... voice to the other party Select to adjust your voice volume that the other party hears from their speaker 339 Select to send tones This button only appears when a number that con tains a w is dialed in hands free mode 338 Select to hang up the telephone INFORMATION When cellular phone call is changed to hands free call the hands free screen will be displayed and its func tions can be operated on ...

Page 340: ...t consists of numbers and the characters p or w e g 056133w0123p 1 When the p pause tone is used the tone data up until the next pause tone will be automatically sent after 2 sec onds have elapsed When the w pause tone is used the tone data up until the next pause tone will be auto matically sent after a user operation is performed Release tones can be used when auto mated operation of a telephone...

Page 341: ...e switched TRANSMIT VOLUME SETTING INFORMATION The sound quality of the voice heard from the other party s speaker may be negatively impacted To reset the transmit volume select Default Transmit volume is dimmed when mute is on INCOMING CALL WAITING When a call is interrupted by a third party while talking this screen is dis played INFORMATION This function may not be available depending on the ty...

Page 342: ...ges screen is displayed Received messages can be forward ed from the connected Bluetooth phone enabling checking and reply ing using the navigation system Depending on the type of Bluetooth phone connected received messages may not be transferred to the mes sage inbox If the telephone does not support the message function this function can not be used Function Page Receiving a message 341 Checking...

Page 343: ... to call the message sender INFORMATION Depending on the cellular phone used for receiving messages or its registra tion status with the navigation sys tem some information may not be displayed The pop up screen is separately avail able for incoming e mail and SMS MMS messages under the following conditions E mail Incoming E mail display is set to Full screen P 349 E mail notification popup is set...

Page 344: ...age Select to have messages read out To cancel this function select Stop When Automatic message read out is set to on messages will be automatically read out P 349 Select to make a call to the send er INFORMATION Depending on the type of Bluetooth phone being connected it may be necessary to perform additional steps on the telephone Messages are displayed in the appropriate connected Bluetooth pho...

Page 345: ...ssage 4 Select the desired message 5 Select Send While the message is being sent a sending message screen is displayed To cancel sending the message select Cancel 6 Check that a confirmation screen is displayed when the operation is complete If an error message is displayed follow the guidance on the screen to try again REPLYING TO A MESSAGE QUICK REPLY 15 messages have already been stored ...

Page 346: ...To reset the edited quick reply messages select Defaults Quick message 1 I am driving and will arrive in approximately ETA minutes This message cannot be edited and will automatically fill in ETA with the navigation calculated estimated time of arrival on the confirm message screen If there are waypoints set ETA to the next waypoint will be shown If there is no route currently set in the navigatio...

Page 347: ... desired number 4 Check that the Call screen is dis played CALLING FROM A NUMBER WITHIN A MESSAGE 1 Display the Messages screen P 340 2 Select the desired message 3 Select the text area 4 Select corresponding to the de sired number Identified telephone numbers contained in the message are displayed CALLING THE MESSAGE SENDER Calls can be made to an e mail SMS MMS message sender s telephone number ...

Page 348: ...0h 250_Navi_EE 5 Check that the Call screen is dis played CALLING FROM THE INCOM ING MESSAGE SCREEN P 341 INFORMATION A series of numbers may be recognized as a telephone number Additionally some telephone numbers may not be recognized such as those for other countries ...

Page 349: ...he MENU button on the Remote Touch 2 Select Setup 3 Select Telephone 4 Select the item to be set TELEPHONE SETTINGS SCREEN No Information Page Sound settings 348 Contact settings 354 Messaging settings 349 Telephone display set tings 351 Lexus Euro assistance 24 settings 352 ...

Page 350: ...ne Select or to adjust the ringtone volume Select or to adjust the message readout volume Select to set the desired incoming SMS MMS tone Select or to adjust the in coming SMS MMS tone volume Select to set the desired incoming e mail tone Select or to adjust the in coming e mail tone volume Select or to adjust the de fault volume of the other party s voice Select to reset all setup items INFORMATI...

Page 351: ... read status on telephone on off Select to change the incoming SMS MMS display Full screen When an SMS MMS message is received the in coming SMS MMS display screen is displayed and can be operated on the screen Drop down When an SMS MMS message is received a mes sage is displayed on the upper side of the screen and can only be oper ated via the steering wheel switch es Select to change the incomin...

Page 352: ...reen P 328 2 Select Messages 3 Select Options Select to set display of messaging account names on the inbox tab on off When set to on messaging ac count names used on the cellular phone will be displayed Select to reset all setup items INFORMATION Depending on the telephone these functions may not be available No Function ...

Page 353: ...layed on the upper side of the screen and can only be operated via the steering wheel switches Select to set display of the con tact history transfer completion message on off For PBAP compatible Blue tooth phones select to set auto matic contact history transfer on off When set to on the tele phone s contact data and history are automatically transferred Select to sort contacts by the first name ...

Page 354: ... settings SCREEN IN A DIFFERENT WAY 1 Display the telephone top screen P 328 2 Select Favourites 3 Select Options 4 Select Lexus Euro assistance 24 setting 1 Display the telephone top screen P 328 2 Select Favourites 3 Select Lexus Euro assistance 24 If a country has not been registered 4 Select a country 5 Select Yes when the confirmation screen appears Lexus Euro assistance 24 settings SCREEN RE...

Page 355: ...250_Navi_EE 7 TELEPHONE If a country has already been regis tered 4 Select the registered country s screen button 5 Select another country to replace the existing country 6 Select Yes when the confirmation screen appears ...

Page 356: ...rom the connected telephone to the system and to add edit delete contacts 355 Select to add or delete contacts to the favourites list 362 Select to clear contacts from the call history 366 INFORMATION Depending on the type of telephone certain functions may not be avail able Contact data is managed inde pendently for every registered tele phone When one telephone is connected another telephone s r...

Page 357: ...tory transfer is set to off P 351 DISPLAYING THE Contacts SCREEN IN A DIFFERENT WAY 1 Display the telephone top screen P 328 2 Select Contacts 3 Select Options 4 Select Manage contacts Contacts SCREEN No Function Page Select to transfer con tacts from the connected telephone 356 Select to add new con tacts to the contact list 358 Select to edit contacts in the contact list 359 Select to delete con...

Page 358: ...th phone If another Bluetooth device is con nected when transferring contact data depending on the telephone the con nected Bluetooth device may need to be disconnected Depending on the type of Bluetooth phone being connected it may be nec essary to perform additional steps on the phone When Automatic contact history transfer is set to off P 351 1 Follow the steps in FOR PBAP IN COMPATIBLE BUT OPP...

Page 359: ... connected cellular phone to add to the current one 3 Transfer the contact data to the sys tem using a Bluetooth phone This operation may be unnecessary depending on the type of cellular phone Depending on the type of cellular phone OBEX authentication may be required when transferring contact data Enter 1234 into the Bluetooth phone To cancel this function select Can cel 4 Select Done when it app...

Page 360: ... Enter the name and select OK 3 Enter the telephone number and se lect OK 4 Select the telephone type for the tele phone number 5 To add another number to this con tact select Yes For PBAP compatible Bluetooth phones this function is available when Automatic contact history transfer is set to off P 351 REGISTERING A NEW CONTACT TO THE CONTACT LIST New contact data can be registered Up to 4 numbers...

Page 361: ...ot yet registered in the con tact list 3 Select Add to contacts 4 Follow the steps in REGISTER ING A NEW CONTACT TO THE CONTACTS LIST from STEP 2 P 358 1 Select Edit contact 2 Select the desired contact 3 Select corresponding to the de sired name or number EDITING THE CONTACT DATA For PBAP compatible Bluetooth phones this function is available when Automatic contact history transfer is set to off ...

Page 362: ...CONTACT TO THE CONTACTS LIST from STEP 3 P 358 EDITING THE CONTACT IN A DIFFERENT WAY FROM THE Contact details SCREEN 1 Display the telephone top screen P 328 2 Select Contacts Call history or Favourites and select the desired contact 3 Select Edit contact E mail addresses Select to display all registered e mail addresses for the con tact 4 Follow the steps in EDITING THE CONTACT DATA from STEP 3 ...

Page 363: ... P 328 2 Select Contacts Call history or Favourites and select the desired contact 3 Select Delete contact 4 Select Yes when the confirmation screen appears DELETING THE CONTACT DATA For PBAP compatible Bluetooth phones this function is available when Automatic contact history transfer is set to off P 351 INFORMATION Multiple data can be selected and deleted at the same time INFORMATION When a Blu...

Page 364: ...creen P 328 2 Select Contacts 3 Select Options 4 Select Manage favourite From the Favourites screen 1 Display the telephone top screen P 328 2 Select Favourites 3 Select Options 4 Select Manage favourites Favourites SCREEN Up to 14 contacts maximum of 4 numbers per contact can be regis tered in the favourites list No Function Page Select to add contacts to the favourites list 363 Select to delete ...

Page 365: ...ion is complete When 14 contacts have already been registered to the favourites list 1 When 14 contacts have already been registered to the favourites list a registered contact needs to be re placed Select Yes when the confirmation screen appears to replace a contact 2 Select the contact to be replaced 3 Check that a confirmation screen is displayed when the operation is complete REGISTERING THE C...

Page 366: ...g of the desired contact list name to be registered in the favourites list When selected grey is changed to yellow and the contact is regis tered in the favourites list From the Contact details screen 1 Display the telephone top screen P 328 2 Select Contacts or Call history and select the desired contact 3 Select Add favourite 4 Check that a confirmation screen is displayed when the operation is ...

Page 367: ...ayed when the operation is complete DELETING CONTACTS IN THE FAVOURITES LIST IN A DIF FERENT WAY From the Contacts screen 1 Display the telephone top screen P 328 2 Select Contacts 3 Select yellow at the beginning of the contact list name to be deleted from the favourites list When selected yellow is changed to grey and the data is deleted from the list DELETING THE CONTACTS IN THE FAVOURITES LIST...

Page 368: ...n the operation is complete 1 Display the Contacts screen P 354 2 Select Delete call history 3 Select the desired history 4 Select the desired contact and select Delete 5 Select Yes when the confirmation screen appears 6 Check that a confirmation screen is displayed when the operation is complete Delete call history SCREEN For PBAP compatible Bluetooth phones this function is available when Automa...

Page 369: ...EE 7 TELEPHONE DELETING CALL HISTORY IN A DIFFERENT WAY 1 Display the telephone top screen P 328 2 Select Call history and select the desired tab 3 Select Delete 4 Follow the steps in Delete call his tory SCREEN from STEP 4 P 366 ...

Page 370: ...ge Cellular phone This system The hands free sys tem or Bluetooth device does not work The connected de vice may not be a compatible Bluetooth cellular phone For a list of specific devices which op eration has been confirmed on this system check with your Lexus dealer The Bluetooth version of the con nected cellular phone may be older than the specified version Use a cellular phone with Bluetooth ...

Page 371: ...in formation remains on either this sys tem or the cellular phone Delete the existing registration infor mation from both this system and the cellular phone then register the cellular phone you wish to connect to this sys tem 57 A Bluetooth con nection cannot be made Another Bluetooth device is already connect ed Manually connect the cellular phone you wish to use to this system 58 Bluetooth func ...

Page 372: ...emains on either this sys tem or the cellular phone Delete the existing registration infor mation from both this system and the cellular phone then register the cellular phone you wish to connect to this sys tem 57 Symptom Likely cause Solution Page Cellular phone This system A call cannot be made received Your vehicle is in a No Service area Move to where No Service no longer appears on the dis p...

Page 373: ...ur Lexus dealer Automatic contact transfer function on this system is set to off Set automatic con tact transfer func tion on this system to on 351 Passcode has not been entered on the cellular phone Enter the passcode on the cellular phone if requested default passcode 1234 Transfer operation on the cellular phone has not com pleted Complete transfer operation on the cellular phone ap prove trans...

Page 374: ... message noti fications are not displayed Notification of SMS MMS E mail reception on this system is set to off Set notification of SMS MMS E mail reception on this system to on 349 Automatic message transfer function is not enabled on the cellular phone Enable automatic transfer function on the cellular phone Symptom Likely cause Solution Page Cellular phone This system The Bluetooth connection s...

Page 375: ... de vices that may emit radio waves The cellular phone is the most likely cause of the symp tom Turn the cellular phone off remove and reinstall the battery pack and then restart the cel lular phone Enable the cellular phone s Bluetooth con nection Disable the Wi Fi connection of the cellular phone Stop the cellular phone s security software and close all applications Before using an ap plication ...

Page 376: ...79 VIEWING POI DETAILS 383 4 IMPORTING MEMORY POINTS AND STORED ROUTES 385 REGISTERING AN EXTERNAL POINT AS A MEMORY POINT AND ROUTES FROM THE INTERNET 385 PROCEDURE FOR DOWNLOADING MEMORY POINTS AND ROUTES FROM A USB MEMORY 386 5 Street View 389 6 Panoramio 391 1 CONNECTED SERVICE SETTINGS 393 CONNECTED SERVICE SETTINGS SCREEN 394 1 CONNECTED SERVICES 2 SETUP CONNECTED SERVICES Not all connected ...

Page 377: ... be set as a destination Importing memory points and routes Establishments that were searched using a personal computer can be set as a destination and can be registered as mem ory points Street View The Street View of the desired location can be viewed Panoramio User s pictures comments and other information can be viewed on a map No Name Operation Navigation Enter a keyword Lexus portal site Con...

Page 378: ...m puter and Lexus por tal site Access Lexus portal site and search POIs and routes Lexus portal site The POIs and routes are saved at Lexus portal site USB memory The POIs and routes are saved to the USB memory Navigation Via the internet the POIs are downloaded to the naviga tion system Via the USB memory the POIs and routes are download ed to the navigation system For details about Lexus portal ...

Page 379: ... using a cellular phone to con nect to the internet observe the fol lowing precautions In order to use this service a Bluetooth DUN PAN compati ble cellular phone with sufficient network coverage and a SIM card with a contract that allows access to the internet are required When using the connected ser vices depending on your tele phone subscription some related fees might apply When a cellular ph...

Page 380: ...ted service 5 Check that navigation identification is displayed OBTAINING LEXUS PORTAL SITE ACCOUNT Before using connected services it is necessary to first access Lexus portal site www my lexus eu via a person al computer etc and create an ac count Navigation identification is required to obtain an account Check the identification before accessing Lexus portal site CHECKING NAVIGATION IDENTIFICAT...

Page 381: ...378 1 CONNECTED SERVICES IS300h 250_Navi_EE CONNECTING TO INTERNET The system must be connected to the internet to use this service Via a Bluetooth device P 48 Via Wi Fi P 67 ...

Page 382: ...e Remote Touch 2 Select Nav 3 Select Menu 4 Select Destination 5 Select Online search ONLINE SEARCH New establishments or establish ments that are not registered in the navigation system can be set as a destination In order to perform an online search the system must already be connect ed to the internet P 378 ...

Page 383: ...viously searched destination the last dis played map or one of the current destinations 382 No Function Displays search results Up to 20 search results are downloaded at a time Unsupported characters will not be displayed on the list Highlighted advertisements may be displayed at the top of the search result list Select to display the previous or next screen If there are no more results in the cur...

Page 384: ...ation 383 Select to set as a destina tion If a destination has already been set Add to and Replace will be displayed Add to Select to add a destination Replace Select to delete the existing desti nation s and set a new one 129 Select to display the Street View 389 INFORMATION After establishments acquired using Online search have been set as a destination once they can be saved as a memory point P...

Page 385: ... 1 CONNECTED SERVICES IS300h 250_Navi_EE SELECTING A PREVIOUS WORD TO SEARCH 1 Select History 2 Select the desired word Delete Select to delete previous search words 1 Select Where SELECTING A SEARCH AREA ...

Page 386: ...on by address or location Select to set a location by a previ ously selected destination P 123 Select to set a location by using the last displayed map Select to set a location by using a current destination Select to change pages VIEWING POI DETAILS No Function Page Select to view the POI s details If supported by your search provider the feedback function will be displayed 384 Select a desired p...

Page 387: ...layed 3 Select Submit EVALUATING THE INFORMATION Your rating of the selected POI can be submitted If the information is in correct you can notify the search provider by selecting the appropriate button No Function Select to enter your rating Select to notify the search provid er of incorrect information ...

Page 388: ... be downloaded via the internet b After saving the POIs and routes at Lexus portal site download them to a USB memory The POIs and routes can then be downloaded via the USB memo ry When downloading POIs and routes to the navigation system both proce dures are performed in the vehicle For details about POI and route searches on Lexus portal site and downloading POIs and routes to a USB memory refer...

Page 389: ...d on To edit memory points and routes P 154 158 INFORMATION Setting Automatic memory point download to Yes will automati cally download external points P 393 If a screen related to a memory point is changed to before automatic memory point download begins automatic memory point download will be cancelled If memory points which have the same name are already stored in the navigation system the syst...

Page 390: ...ter the password For instructions on setting a password P 166 If there are multiple memory points stored on the USB memory select the memory points and routes to be copied and select Start 6 Check that a progress bar is being displayed while the data copy is in progress To cancel this function select Can cel 7 Check that a confirmation screen is displayed when the operation is complete ...

Page 391: ...ints and routes will be displayed at a time Memory points acquired from Lexus portal site can only be registered with the registered navigation system at the time of acquirement In some cases memory points and routes may not be able to be imported If this occurs Unable to read memory point data Device ID error will be displayed If memory points and routes which have the same name are already store...

Page 392: ...r to per form Street View the system must already be connected to the internet P 378 No Function Select to set a Street View loca tion by address or location Select to set a Street View loca tion by a previously selected des tination P 123 Select to set a Street View loca tion by using the current position Select to set a Street View loca tion by using the last displayed map Select to set a Street...

Page 393: ...eck that the picture is displayed Select to change pictures Up to 6 pictures per location can be dis played INFORMATION The Street View function can also be selected from the following screens Starting route guidance screen P 131 Online search result screen P 381 This function is not available while driving ...

Page 394: ...ired point P 101 and select Users pictures on a map comments and other information can be viewed In order to perform Panoramio the system must already be connected to the internet P 378 No Function Select to set a location by ad dress P 118 Select to set a location by using the current position Select to set a location by using the last displayed map Select to set a location by using a current des...

Page 395: ...nify or reduce the map scale Select to display the previous 6 pictures Select to update the thumbnails screen Up to 6 pictures are dis played Select to download up to another 6 pictures when there are more than 6 pictures available No Function Select to view user comments Select to set as a destination P 129 If a destination has al ready been set Add to and Replace will be displayed Add to Select ...

Page 396: ...2 SETUP 1 CONNECTED SERVICE SETTINGS 1 Press the MENU button on the Remote Touch 2 Select Setup 3 Select Navigation 4 Select Connected service 5 Select the items to be set 6 Select Save The following detailed connected service settings can be set ...

Page 397: ...or No For memory points and routes to be automatically downloaded auto connection needs to be set to Yes When connecting in a roaming area the display of the roam ing warning can be set on or off by selecting Yes or No When connecting to Lexus portal site the required portal user name and password can be remembered by selecting Yes or No When Yes is selected the user name and password does not nee...

Page 398: ...creen appears Online search history can be deleted P 395 When a different user uses the navigation system the user name and password can be changed P 396 Your Lexus portal site user name and password can be de leted from the navigation sys tem P 396 Select to reset all setup items No Function SELECTING A SEARCH ENGINE The desired search engine can be set Before using a new search engine the terms ...

Page 399: ... the desired password and se lect OK In order for the new user name and password to be applied to the naviga tion system the system needs to con nect to Lexus portal site 1 Display the Connected service set tings screen P 393 2 Select Delete username and pass word 3 Select Yes when the confirmation screen appears CHANGING USER NAME AND PASSWORD DELETING USER NAME AND PASSWORD ...

Page 400: ...397 1 2 3 4 5 6 7 8 IS300h 250_Navi_EE INDEX ...

Page 401: ...udio screen adjustment 198 Basic operation 192 Disc slot 194 Selecting an audio source 193 Sound settings 196 Speech command system 199 System on off 192 USB AUX port 195 Audio settings 246 Audio visual operating information 256 DVD player and disc 258 Error messages 268 File audio 264 iPod 263 Radio 256 Terms 266 AUX 238 Control screen panel 238 AUX port 195 238 Average speed 170 ...

Page 402: ...ed Bluetooth settings 62 Setting internet connection 64 C Calibration 171 Call 328 Call history 329 Dial pad 333 Favourites list 329 Off hook switch 334 Phonebook 331 SOS 334 Calling on the Bluetooth phone 328 Camera display 45 286 290 293 303 CD 207 Control screen panel 207 Playing an audio CD 211 Playing an MP3 WMA AAC disc 212 Cellular phone 322 Command list 280 Compass 97 Connected services 37...

Page 403: ...on search 116 Address 118 Coordinates 126 Home 117 Intersection 124 Map 122 Memory 122 Motorway ent exit 125 POI 121 POI near cursor 127 Previous 123 Quick access 118 Search area 117 Telephone no 126 UK Postal code or NL Postal code 128 Detour 145 Dial pad 333 Disc slot 194 DSP 196 Dual map 97 DVD 213 Control screen panel 214 DVD options 217 DVD player and disc 258 ...

Page 404: ...Route overview 147 Search condition 145 E mail 340 Entering letters and numbers 40 F Favourites 362 Favourites list 329 File audio 264 FM 200 Function index 30 G General settings 73 GPS Global Positioning System 182 Guiding the route 26 134 141 H Hands free system 322 Troubleshooting 367 Heading up 96 Home 28 117 149 Home screen 14 38 Status display 16 ...

Page 405: ... 225 Music 230 Video 231 K Keyboard 40 L Lexus parking assist monitor 284 Driving precautions 284 Parallel parking 288 Perpendicular parking 287 Precautions 303 Screen 286 Switching the parking mode 289 Lexus parking assist setting 318 Lexus parking assist sensor 311 Detection range 314 Display 312 Distance display and buzzer 313 Failure warning 316 Information 314 Sensors 311 Switch 311 List scre...

Page 406: ...POI icons 102 Route trace 104 MEDIA button 193 Memory 122 Memory points 122 153 MENU button 10 Menu screen 12 Message 340 Calling the message sender 345 Checking 342 Receiving 341 Replying 343 MMS 340 Motorway 138 Motorway ent exit 125 MP3 207 264 266 My memory 148 Area to avoid 160 Backup to a USB memory 165 Copying from a USB memory 167 Home 149 Memory points 153 Quick access 151 Route trace 163...

Page 407: ...tory 366 Favourites 362 Manage contacts 354 POI 121 POI category 102 127 170 POI icons 102 POI near cursor 127 Previous 123 Profiles 52 Q Quick access 118 151 R Radio 200 256 Control screen panel 200 Presetting a station 203 RDS Radio Data System 204 Time shift 206 Tuning 203 RADIO button 193 RDS Radio Data System 204 RDS TMC 107 173 Receiving on the Bluetooth phone 336 Incoming calls 336 Register...

Page 408: ...ending 133 Route guidance screen 134 Arrow screen 140 Intersection 139 Motorway 138 Turn list 140 Route overview 147 Route trace 104 163 S Scale 95 Screen adjustment 45 Camera display 45 Screen off 45 Screen off image 76 Screen size 198 Scrolling the map 99 SD card 186 Search area 117 Search condition 145 Search engine 381 395 Sending tones 337 Sensors 311 Setup screen 18 ...

Page 409: ... 75 T TA Traffic announcement 205 248 Talking on the Bluetooth phone 337 Incoming call waiting 339 Telephone 322 Troubleshooting 367 Telephone no 126 Telephone settings 347 Lexus Euro assistance 24 settings 352 Messaging settings 349 Sound settings 348 Telephone display settings 351 Time shift 206 Time zone 75 TPEG 107 173 Traffic and parking settings 173 Traffic bar 135 Traffic information 107 Tr...

Page 410: ...l code 128 USB memory 220 Control screen panel 220 USB AUX port 195 V Vehicle 83 Dealer setting 85 Maintenance 84 Voice guidance prompts 141 Voice settings 81 VTR 241 Control screen panel 241 VTR options 243 W Wi Fi 67 Operating hints 71 WMA 207 264 266 ...

Page 411: ...408 IS300h 250_Navi_EE Map database information and updates ...

Page 412: ...409 IS300h 250_Navi_EE ...

Page 413: ...410 IS300h 250_Navi_EE Certification ...

Page 414: ...1 IS300h 250_Navi_EE Gracenote the Gracenote logo and logotype Powered by Gracenote MusicID Playlist Plus and MediaVOCS are either registered trademarks or trademarks of Gracenote Inc in the United States ...

Page 415: ...412 IS300h 250_Navi_EE ...

Reviews: