background image

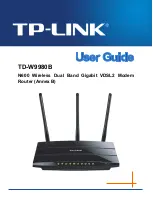
TD-W9980B 

N600 Wireless Dual Band Gigabit VDSL2 Modem Router (Annex B) User Guide 


Package Contents 

The following contents should be found in your package: 


One TD-W9980B N600 Wireless Dual Band Gigabit VDSL2 Modem Router (Annex B) 


One Power Adapter for TD-W9980B N600 Wireless Dual Band Gigabit VDSL2 Modem Router 
(Annex B) 


Quick Installation Guide 


One RJ45 cable 


Two RJ11 cables 


One VDSL splitter 


One Resource CD for TD-W9980B N600 Wireless Dual Band Gigabit VDSL2 Modem Router 
(Annex B), including: 


This User Guide 


Other Helpful Information 


Note: 

Make sure that the package contains the above items. If any of the listed items are damaged or 
missing, please contact your distributor. 

Summary of Contents for TD-W9980B

Page 1: ...TD W9980B N600 Wireless Dual Band Gigabit VDSL2 Modem Router Annex B...

Page 2: ...are trademarks or registered trademarks of their respective holders No part of the specifications may be reproduced in any form or by any means or used to make any derivative such as translation tran...

Page 3: ...mplies with part 15 of the FCC Rules Operation is subject to the following two conditions 1 This device may not cause harmful interference 2 This device must accept any interference received including...

Page 4: ...deration None Only for indoor applications Note Please don t use the product outdoors in France Canadian Compliance Statement This device complies with Industry Canada license exempt RSS standard s Op...

Page 5: ...NMB 003 du Canada This device complies with RSS 210 of Industry Canada This Class B device meets all the requirements of the Canadian interference causing equipment regulations Cet appareil num rique...

Page 6: ...nnect the product or the power adapter from the power source Don t disassemble the product or make repairs yourself You run the risk of electric shock and voiding the limited warranty If you need serv...

Page 7: ...99 519 EC Directives 2011 65 EU The above product is in conformity with the following standards or other normative documents EN 300 328 V1 8 1 EN 301 489 1 V1 9 2 EN 301 489 17 V2 2 1 EN 55022 2010 AC...

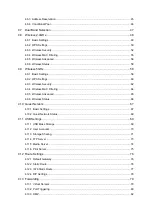
Page 8: ...nnecting the Modem Router 8 Chapter 3 Quick Installation Guide 9 3 1 TCP IP Configuration 9 3 2 Quick Installation Guide 10 Chapter 4 Configuring the Modem Router 16 4 1 Login 16 4 2 Status 16 4 3 Qui...

Page 9: ...ecurity 62 4 9 4 Wireless MAC Filtering 64 4 9 5 Wireless Advanced 65 4 9 6 Wireless Status 66 4 10 Guest Network 67 4 10 1 Basic Settings 67 4 10 2 Guest Network Status 69 4 11 USB Settings 69 4 11 1...

Page 10: ...96 4 19 IP MAC Binding 97 4 19 1 Binding Settings 97 4 19 2 ARP List 98 4 20 Dynamic DNS 99 4 21 Diagnostic 99 4 22 System Tools 100 4 22 1 System Log 100 4 22 2 Time Settings 101 4 22 3 Manage Contr...

Page 11: ...dapter for TD W9980B N600 Wireless Dual Band Gigabit VDSL2 Modem Router Annex B Quick Installation Guide One RJ45 cable Two RJ11 cables One VDSL splitter One Resource CD for TD W9980B N600 Wireless Du...

Page 12: ...speed makes it ideal for handling multiple data streams at the same time which ensures your network stable and smooth The performance of this 802 11n wireless Router will give you the unexpected netw...

Page 13: ...iable ESD and surge protect function with quick response semi conductive surge protection circuit High speed and asymmetrical data transmit mode provides safe and exclusive bandwidth Compatible with a...

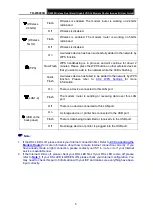
Page 14: ...router is powered on Off The modem router is off Please ensure that the power adapter is connected correctly DSL On DSL line is synchronized and ready to use Flash The DSL negotiation is in progress O...

Page 15: ...nected to this LAN port Flash The modem router is sending or receiving data over this LAN port Off There is no device connected to this LAN port USB on the back panel On A storage device or printer ha...

Page 16: ...With the modem router powered on use a pin to press and hold the Reset button for at least 5 seconds And the modem router will reboot to its factory default settings Method two Restore the default set...

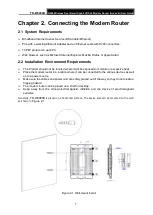
Page 17: ...ents The Product should not be located where it will be exposed to moisture or excessive heat Place the modem router in a location where it can be connected to the various devices as well as to a powe...

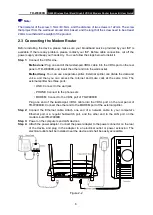
Page 18: ...l socket Method two You can use a separate splitter External splitter can divide the data and voice and then you can access the Internet and make calls at the same time The external splitter has three...

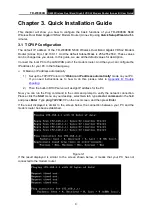
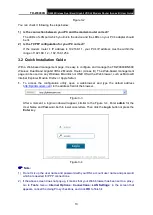
Page 19: ...can configure the IP address for your PC in the following way Obtain an IP address automatically 1 Set up the TCP IP Protocol in Obtain an IP address automatically mode on your PC If you need instruct...

Page 20: ...page can be used on any Windows Macintosh or UNIX OS with a Web browser such as Microsoft Internet Explorer Mozilla Firefox or Apple Safari 1 To access the configuration utility open a web browser and...

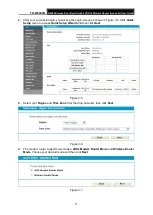
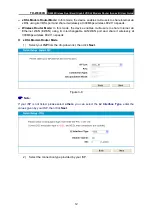
Page 21: ...n as shown in Figure 3 5 Click Quick Setup menu to access Quick Setup Wizard and then click Next Figure 3 5 3 Select your Region and Time Zone from the drop down list then click Next Figure 3 6 4 The...

Page 22: ...ode In this mode the device enables multi users to share Internet via Ethernet WAN EWAN using its interchangeable LAN WAN port and share it wirelessly at 300Mbps wireless 802 11n speeds xDSL Modem Rou...

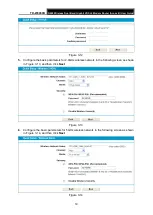
Page 23: ...Username and Password provided by your ISP After confirming the password click Next to continue Figure 3 10 Wireless Router Mode 1 Select the connection type provided by your ISP Figure 3 11 2 Here w...

Page 24: ...3 12 5 Configure the basic parameters for 2 4GHz wireless network in the following screen as shown in Figure 3 13 and then click Next Figure 3 13 6 Configure the basic parameters for 5GHz wireless net...

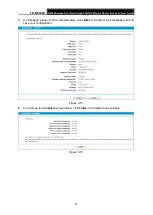
Page 25: ...Router Annex B User Guide 7 On this page please confirm all parameters Click Back to modify or click the Save button to save your configuration Figure 3 15 8 You will see the Complete screen below cl...

Page 26: ...n 4 1 Login After your successful login you will see the twenty two main menus on the left of the Web based management page On the right there are the corresponding explanations and instructions The d...

Page 27: ...TD W9980B N600 Wireless Dual Band Gigabit VDSL2 Modem Router Annex B User Guide Figure 4 1 4 3 Quick Setup Please refer to Section 3 2 Quick Installation Guide 17...

Page 28: ...share it wirelessly at 300Mbps wireless 802 11n speeds Wireless Router Mode In this mode the device enables multi users to share Internet via Ethernet WAN EWAN using its interchangeable LAN4 WAN port...

Page 29: ...ble in the screen similar to Figure 4 3 4 5 1 1 VDSL WAN Settings For VDSL mode there are four different connection types which are Static IP Dynamic IP PPPoE and Bridge You can select the correspondi...

Page 30: ...ou can select the corresponding types according to your needs PTM Configuration Enable VLAN ID Check the box to enable the Virtual LAN ID VLAN ID 1 4049 This indicates the VLAN group and the valid ran...

Page 31: ...your ISP DNS Server Secondary DNS Server Here you can set DNS Server at least one manually The Route will use this DNS Server for priority Enable IPv6 Check the box to enable IPv6 IPv6 Address Enter...

Page 32: ...e check box If another Router exists in your network you don t need to select the option Enable Fullcone NAT It is a type of NAT if not enabled the default NAT will act Enable SPI Firewall A SPI firew...

Page 33: ...nfiguration for client devices such as the modem router The default value is disabled and if you are not sure please contact your ISP or just leave it Get IP with Unicast This is disabled by default T...

Page 34: ...traffic send or receive the connection will be automatically on Authentication Type Select the Authentication Type from the drop down list the default method is AUTO_AUTH and you can leave it as a def...

Page 35: ...e it Use IP address specified by ISP Choose Use IP address specified by ISP you can enter the IP address provided by your ISP Set DNS Server manually Choose Set DNS Server manually you can set DNS Ser...

Page 36: ...N Service in the next screen shown in Figure 4 10 Figure 4 10 DSL Modulation Type DSL Modulation Type The modem router supports two modulation types ADSL and VDSL you can select the corresponding type...

Page 37: ...Select ATM Qos Type provided by ISP and the type is UBR by default WAN Service Setup Enable IPv4 Check the box to enable IPv4 IP Address Enter the IP address in dotted decimal notation provided by yo...

Page 38: ...required by your ISP Enable NAT This technology translates the IP addresses of a local area network to a different IP address for the Internet If this modem router is hosting your network s connectio...

Page 39: ...check box If another Router exists in your network you don t need to select the option Enable Fullcone NAT It is a type of NAT if not enabled the default NAT will act Enable SPI Firewall A SPI firewal...

Page 40: ...le this When the modem router is connected right but IPv6 address cannot get you can select this box Set IPv6 DNS Server manually Choose Set IPv6 DNS Server manually you can set IPv6 DNS Server manual...

Page 41: ...The default MTU value is 1500 Bytes It is not recommended that you change the default value unless required by your ISP Enable Fullcone NAT It is a type of NAT if not enabled the default NAT will act...

Page 42: ...TD W9980B N600 Wireless Dual Band Gigabit VDSL2 Modem Router Annex B User Guide Figure 4 14 5 IPoA If your ISP provides an IPoA connection select IPoA option for the Connection Type on the screen 32...

Page 43: ...r Secondary DNS Server Type in your preferred DNS server Default Gateway Select a WAN Interface from the drop down list as the IPv4 default gateway 6 Bridge If you select this type of connection the m...

Page 44: ...Enable the Virtual LAN Ports feature Virtual LAN VLAN is a group of devices on one or more LANs that are configured so that they can communicate as if they were attached to the same LAN Because VLANs...

Page 45: ...y the default group has IP interface Click the Add button You can add a new interface group in the next screen For example you want LAN1 and LAN3 to be a group called Group 1 over br_ptm_1_0 WAN inter...

Page 46: ...Subnet Mask DHCP Server These settings allow you to configure the modem router s Dynamic Host Configuration Protocol DHCP server function The DHCP server is enabled by default for the modem router s E...

Page 47: ...be automatically assigned a new dynamic IP address The default is 1440 minutes The detailed configuration about DHCP server please refer to section 4 6 DHCP Server 4 5 4 IPv6 LAN Settings Choose menu...

Page 48: ...is selected please complete the following parameters Figure 4 22 Prefix Delegated WAN Connection Select a WAN connection form the drop down list to assign prefix 2 If Static is selected please complet...

Page 49: ...ng Protocol L2TP is the method used to enable Point to Point sessions via the Internet on the Layer Two level To allow L2TP tunnels to pass through the modem router click Enable IPSec Passthrough Inte...

Page 50: ...ature can be selected when you meet the physical connection problem Please check the proper settings with your Internet service provider Figure 4 26 DSL Modulation Type Select the DSL operation Modula...

Page 51: ...ously Click Add New Connection in Figure 4 27 and then you will enter the screen shown in Figure 4 28 Figure 4 28 IPSec Connection Name Enter a name for your VPN Remote IPSec Gateway Address URL Enter...

Page 52: ...e Remote LAN For example Input 192 168 2 1 in Device1 Input 192 168 1 1 in Device2 IP Subnetmask Enter the subnetmask of the remote LAN For example Input 255 255 255 0 in both Device1 and Device2 Key...

Page 53: ...of the security firewall in the clear When using aggressive mode some configuration parameters such as Diffie Hellman groups and PFS can not be negotiated resulting in a greater importance of having...

Page 54: ...ess must be 192 168 1 100 or greater but smaller than 192 168 1 254 End IP Address Enter a value for the DHCP server to end with when issuing IP addresses The End IP Address must be smaller than 192 1...

Page 55: ...s automatically 2 You have to disable NAT of the WAN connections or the DHCP Relay may not take effect 3 If you select Disabled the DHCP function will not take effect Click the Save button to save you...

Page 56: ...X XX XX XX XX XX format and IP address in dotted decimal notation of the computer for which you want to reserve an IP address 3 Click the Save button Figure 4 33 To modify or delete an existing entry...

Page 57: ...nt to delete the entry click the Delete 5 Modify the information 6 Click the Save button Click the Enable Disable Selected button to make selected entries enabled disabled Click the Delete Selected bu...

Page 58: ...a n Choose this option and then the modem router will only work in 5GHz frequency This band is less crowded and is used for time sensitive music video streaming or gaming Using this band can avoid int...

Page 59: ...e Select the desired mode 11b only Select if all of your wireless clients are 802 11b 11g only Select if all of your wireless clients are 802 11g 11n only Select only if all of your wireless clients a...

Page 60: ...can also use the search function to select the SSID to join BSSID to be bridged The BSSID of the AP your modem router is going to connect to as a client You can also use the search function to select...

Page 61: ...To add a new device If the wireless adapter supports Wi Fi Protected Setup WPS you can establish a wireless connection between wireless adapter and modem router using either Push Button Configuration...

Page 62: ...eans the client device has successfully connected to the modem router III Enter the modem router s PIN on your client device Use this method if your client device asks for the modem router s PIN numbe...

Page 63: ...default Authentication Type You can choose the type for the WPA WPA2 Personal security on the drop down list The default setting is Auto which can select WPA PSK or WPA2 PSK authentication type automa...

Page 64: ...ype for the WPA WPA2 Personal security on the drop down list The default setting is Auto which can select WPA PSK or WPA2 PSK authentication type automatically based on the wireless station s capabili...

Page 65: ...s Disabled MAC Address The wireless station s MAC address that you want to filter Status The status of this entry either Enabled or Disabled Description A simple description of the wireless station To...

Page 66: ...stations cannot access the Modem router you can configure the Wireless MAC Address Filtering list by following these steps 1 Click the Enable button to enable this function 2 Select the radio button A...

Page 67: ...and is recommended DTIM Interval This value determines the interval of the Delivery Traffic Indication Message DTIM A DTIM field is a countdown field informing clients of the next window for listening...

Page 68: ...PSK WPA2 WPA2 PSK AP UP AP DOWN Disconnected Received Packets Packets received by the station Sent Packets Packets sent by the station To update this page and to show the current connected wireless st...

Page 69: ...s clients are 802 11a When 802 11a mode is selected only 802 11a wireless stations can connect to the Router 11n only Select only if all of your wireless clients are 802 11n When 802 11n mode is selec...

Page 70: ...he modem router to its default Gen New PIN Click this button and then you can get a new random value for the modem router s PIN You can ensure the network security by generating a new PIN Add device Y...

Page 71: ...p 1 Keep the default WPS Status as Enabled and click the Add device button in Figure 4 47 then the following screen will appear Figure 4 49 Step 2 Enter the PIN number from the client device in the fi...

Page 72: ...lent Privacy Figure 4 50 Disable Wireless Security If you do not want to use wireless security check this radio button But it s strongly recommended to choose one of the following modes to enable secu...

Page 73: ...ort that radius service used RADIUS Server Password Enter the password for the Radius Server Group Key Update Period Specify the group key update interval in seconds The value should be 30 or above En...

Page 74: ...thentication Type Be sure to click the Save button to save your settings on this page 4 9 4 Wireless MAC Filtering Choose menu Wireless 5GHz Wireless MAC Filtering you can control the wireless access...

Page 75: ...reless station A with MAC address 00 1D 0F 11 22 33 and the wireless station B with MAC address 00 0A EB 00 07 5F are able to access the modem router but all the other wireless stations cannot access...

Page 76: ...ulticast messages When the modem router has buffered broadcast or multicast messages for associated clients it sends the next DTIM with a DTIM Interval value You can specify the value between 1 255 Be...

Page 77: ...and to show the current connected wireless stations click on the Refresh button 4 10 Guest Network There are two submenus under the Guest Network menu Basic Settings and Guest Network Status Click an...

Page 78: ...word You can enter ASCII characters between 8 and 63 characters or 8 to 64 Hexadecimal characters Group Key Update Period Specify the group key update interval in seconds The value should be 30 or abo...

Page 79: ...ts sent by the station You cannot change any of the values on this page To update this page and to show the current connected wireless stations click on the Refresh button 4 11 USB Settings There are...

Page 80: ...le button to share the volume Click Disconenct to safely remove the USB storage device that is connected to USB port Note Before removing the USB storage device you should click Disconnect to make sur...

Page 81: ...field 4 Re enter the password in the Confirm password field 5 Click the Set button and then a new entry will be added in the table To delete an existing user account please click Delete in the Action...

Page 82: ...e specified folder User Access The authorization of the user is displayed users mean Super Users who have the full access permission to all activated volumes and share folders Grey users mean the user...

Page 83: ...FTP Server Choose menu USB Settings FTP Server you can create an FTP server that can be accessed from the Internet or your local network Figure 4 61 Server Status Indicates the FTP Server s current s...

Page 84: ...ected button to enable or disable the selected entries Click the Delete Selected button to delete the selected entries Note 1 The max share folders number is 10 If you want to share a new folder when...

Page 85: ...p down list In this case the media server will auto scan the share folders Note The max share folders number is 6 If you want share a new folder when the numbers has been reached to be 6 you can delet...

Page 86: ...from the drop down list as the system default gateway Figure 4 66 Click the Add Interface button you can add WAN Interfaces Click the Save button to save your settings 4 12 2 Static Route Choose Route...

Page 87: ...box or else the default Use Interface will be adopted for the Static Route Status Select Enabled or disabled from the drop down list 3 Click Save to save your settings as shown in Figure 4 68 To modi...

Page 88: ...option for Interface will adopt the default IPv6 Gateway address for the IPv6 Static Route Interface Select the Interface name from the drop down list or else the default Interface will be adopted fo...

Page 89: ...rtual servers can be used for setting up public services on your LAN A virtual server is defined as a service port and all requests from Internet to this service port will be redirected to the compute...

Page 90: ...tion in the Status drop down list Click the Save button Figure 4 73 Note It is possible that you have a computer or server that has more than one type of available service If so select another service...

Page 91: ...d If the Common Service Port does not have the application you need enter the Trigger Port and the Open Ports manually 3 Select the protocol used for Trigger Port from the Trigger Protocol drop down l...

Page 92: ...ows 1 A local host makes an outgoing connection to an external host using a destination port number defined in the Trigger Port field 2 The modem router records this connection opens the incoming port...

Page 93: ...matically discovered by the UPnP service application on the LAN Figure 4 77 Current UPnP Status UPnP can be enabled or disabled by clicking the Enable or Disable button This feature is enabled by defa...

Page 94: ...me of surfing Figure 4 78 Enable Parental Control Check the box if you want this function to take effect This function is disabled by default MAC Address of Parental PC In this field enter the MAC add...

Page 95: ...iption Here displays the description of the rule and this name is unique LAN Host Here displays the host selected in the corresponding rule Target Here displays the target selected in the correspondin...

Page 96: ...Deny or Allow to deny or allow your entry 7 In the Status field select Enabled or Disabled to enable or disable your entry 8 In the Direction field select IN or OUT from the drop down list for the di...

Page 97: ...the MAC address 3 Click the Save button to complete the settings Click the Delete Selected button to delete the selected entries in the table 4 15 3 WAN Host Choose menu Firewall WAN Host and then you...

Page 98: ...In Description field create a unique description for the host e g Host_1 2 Enter the URL address in the Add URL Address field and then click the Add button The URL address will be shown in the Detail...

Page 99: ...lect the day or days you need 4 In time field you can select all day 24 hours or you may enter the Start Time and Stop Time in the corresponding field 5 Click Save to complete the settings Click the C...

Page 100: ...nd this name is unique IPv6 LAN Host Here displays the LAN host selected in the corresponding rule Target Here displays the target selected in the corresponding rule Schedule Here displays the schedul...

Page 101: ...d button to make selected entries enabled or disabled Click the Delete Selected button to delete selected entries 4 16 2 IPv6 LAN Host Choose menu IPv6 Firewall IPv6 LAN Host and then you can view and...

Page 102: ...y To add a new entry please follow the steps below 1 Click the Add New button and you will see the screen as shown in Figure 4 93 Figure 4 93 2 Create a unique description for the host e g Host_1 in t...

Page 103: ...select all day 24 hours or you may enter the Start Time and Stop Time in the corresponding field 5 Click Save to save the settings Click the Clear Schedule button to clear your settings in the table...

Page 104: ...elect a WAN connection from the drop down list Only the connected WAN connections can be shown in the drop down list Configuration Type Select a configuration type for this tunnel Auto means to obtain...

Page 105: ...tunnel 6RD Prefix Length The length of the 6RD prefix Border Relay IPv4 Address The IPv4 address of the border relay router of 6RD tunnel Note In this type there should not have any IPv6 WAN connectio...

Page 106: ...N port Description This is the information about the rules such as address range Priority Priority of Bandwidth Control rules 1 stands for the highest priority while 8 stands for the lowest priority T...

Page 107: ...lick any of them and you will be able to scan or configure the corresponding function The detailed explanations for each submenu are provided below 4 19 1 Binding Settings This page displays the IP MA...

Page 108: ...desired entry in the table 2 Click Edit as desired on the Edit column Click the Enable Disable Selected button to make selected entries enabled or disabled Click the Delete Selected button to delete...

Page 109: ...omain name no matter what your IP address is Before using this feature you need to sign up for DDNS service providers such as www dyndns org The Dynamic DNS client service provider will give you a pas...

Page 110: ...stem Log Time Settings Manage Control CWMP Settings SNMP Settings Backup Restore Factory Defaults Firmware Upgrade Reboot and Statistics Click any of them and you will be able to configure the corresp...

Page 111: ...og Settings Click to set the logs in the screen shown in Figure 4 108 Figure 4 108 Save Locally If Save Locally is selected events will be recorded in the local memory Minimum Level Select the Minimum...

Page 112: ...NTP Servers so it can get time automatically once it connects the Internet To set time manually 1 Select your local time zone 2 Enter the Date in Year Month Day format 3 Enter the Time in Hour Minute...

Page 113: ...nction in the screen The modem router offers CWMP feature The function supports TR 069 protocol which collects information diagnoses the devices and configures the devices automatically via ACS Auto C...

Page 114: ...y planning and report generating Figure 4 112 An SNMP Agent is an application running on the modem router that performs the operational role of receiving and processing SNMP messages sending responses...

Page 115: ...efaults Choose menu System Tools Factory Defaults and then and you can restore the configurations of the modem router to factory defaults on the following screen Figure 4 114 Click the Restore button...

Page 116: ...by the modem router rather than the configuration you can try to upgrade the firmware 2 When you upgrade the modem router s firmware you may lose its current configurations so before upgrading the fir...

Page 117: ...the drop down list The Packets Statistic interval indicates the time section of the packets statistic Click Reset All to reset the values of all the entries to zero Click Delete All to delete all entr...

Page 118: ...smitting rate Max transmitting rate SYN Tx The number of TCP SYN packets transmitted to the WAN per second at the specified Packets Statistics interval It is shown like current transmitting rate Max t...

Page 119: ...0 ports LEDs Power DSL Internet Wireless 2 4GHz Wireless 5GHz WPS 1 2 3 4 LAN USB on the back panel Network Medium 10Base T UTP category 3 4 5 cable 100Base TX UTP category 5 5e cable 1000Base TX UTP...

Page 120: ...ccess the web based configuration page 1 Configure your computer s IP Address For Mac OS X Click the Apple icon on the upper left corner of the screen Go to System Preferences Network Select Airport o...

Page 121: ...el in the search box and press Enter then you will go to Control Panel Click View network status and tasks Change adapter settings Right click Ethernet and then select Properties Double click Internet...

Page 122: ...log on to the Web Management page of the modem router If you can try the following steps If you cannot please set your computer referring to T3 then try to see if you can access the Internet If the p...

Page 123: ...24hrs 7 days a week Germany Austria Tel 49 1805 875 465 German Service 49 1805 TPLINK 43 820 820 360 Fee Landline from Germany 0 14EUR min Landline from Austria 0 20EUR min E mail support de tp link...

Reviews: