
Quick Start Guide
*Images may differ from actual products.
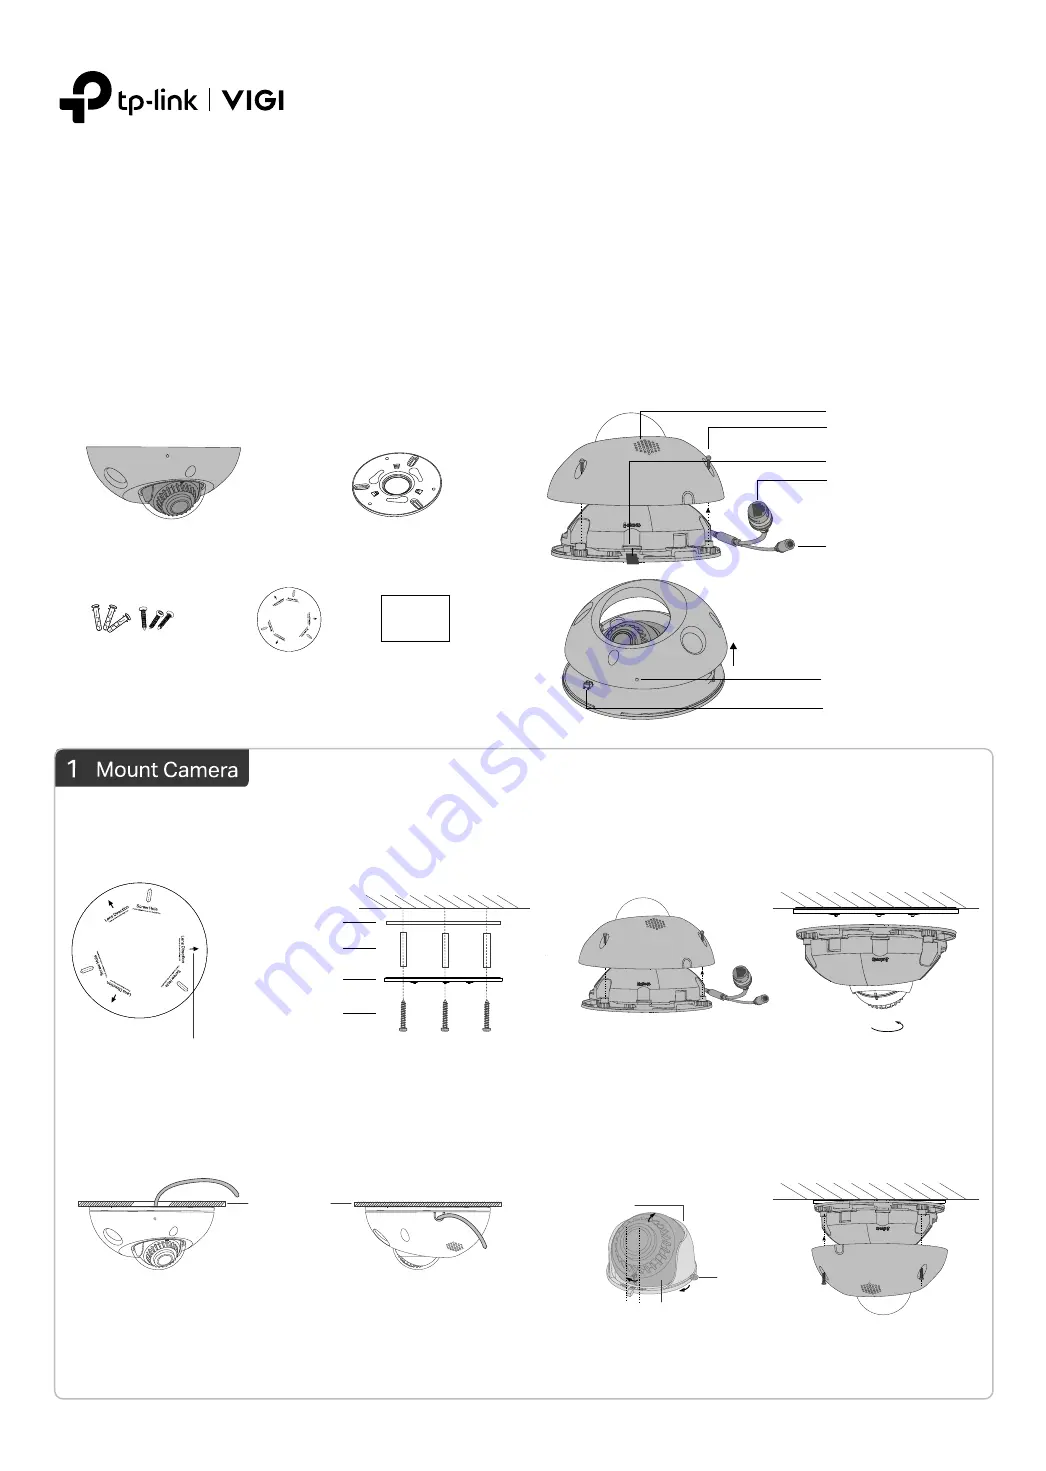
Appearance
Power Supply Interface
(12V DC)
RJ45 Ethernet Port
(supports PoE)
Micro SD Slot
Side Screws
Speaker
Package Contents
Network Camera
Mounting Bracket
Quick Start Guide
Anchors and Screws
Quick
Start
Guide
•
Make sure your power supply matches your camera.
The camera’s standard power supply is 12V DC or
PoE (802.3af/at). The power source should meet LPS,
PS2, and other requirements according to IEC
62368-1.
•
Make sure that the wall is strong enough to
withstand 4 times the weight of the camera and
mounting bracket.
• If you are uncertain or uncomfortable performing the
installation, consult a qualified electrician.
Safety First:
Mounting Template
2. Decide how to route the cable through the ceiling/wall.
4. Loosen the lens screw, rotate the lens base to adjust the
angle of the lens as desired, and then tighten the lens screw.
Tighten the side screws to secure the cover.
3. Loosen the three screws on the side of the camera to
remove the cover. Push the camera upwards and rotate
the camera clockwise to snap it into the mounting bracket
.
1. Stick the mounting template to the desired mounting place.
Drill 3 screw holes according to the template, then install the
mounting bracket.
3MP Mini Dome Network Camera
Reset Button
Microphone
Mounting Template
Mounting Bracket
Point one of the arrows on the
mounting template in the direction
of the lens and stick it to the
ceiling/wall.
Lens Base
Dome
Anchor
Self-tapping Screw
Install mounting bracket
Reinstall the cover
Adjust lens angle
Snap the camera into
the bracket
Press for 5 seconds to reset the
camera to factory settings.
Note: You can also slightly adjust the direction of the dome, but make sure that the
arrow symbol on the dome does not exceed the notch on the lens base.
Remove the cover
Ceiling or Wall
Route the cable through the
round hole in the middle of
the upper mounting bracket
Knock out the cable hole on the
side and route the cable from
the side
Lens Screw
Loosen to remove the cover.


