background image

 Date : 27/07/2015


BIRDY WPs-r2 

Ref : User manual


Version 1.0.1


Page 

5/12 


3.  Symbols description 

 
According  to  the  chosen 

menu,  keys  may  have  different  meanings.  That’s  the  reason  why  a 

symbol is displayed above the keys on the screen in order to give the meaning of the keys. 


4.  Menus description 


Menu 

Description 


Profile : 

profile selection  


Technical menu 

: composed by 7 sub-menus among which : 

Version 

: EEPROM and software versions indication 

Battery level 

: battery tension level indication 


Time / alarm clock setting 

: time and alarm clock setting 


Ringtone selection 

: selection of the ringtone 


Vibrator 

: selection of the vibrator functionning mode  


Zoom

 : 

selection of the characters’ display size 


Language : 

selection of the pager language  


Keyboard : 

composed by 2 sub-menus  


Keyboard locking :

 activation or inactivation of the keyboard locking  

    Keyboard sound 

: activation or inactivation of the keyboard sounds  


Switch off 

: BIRDY WPs shut down  


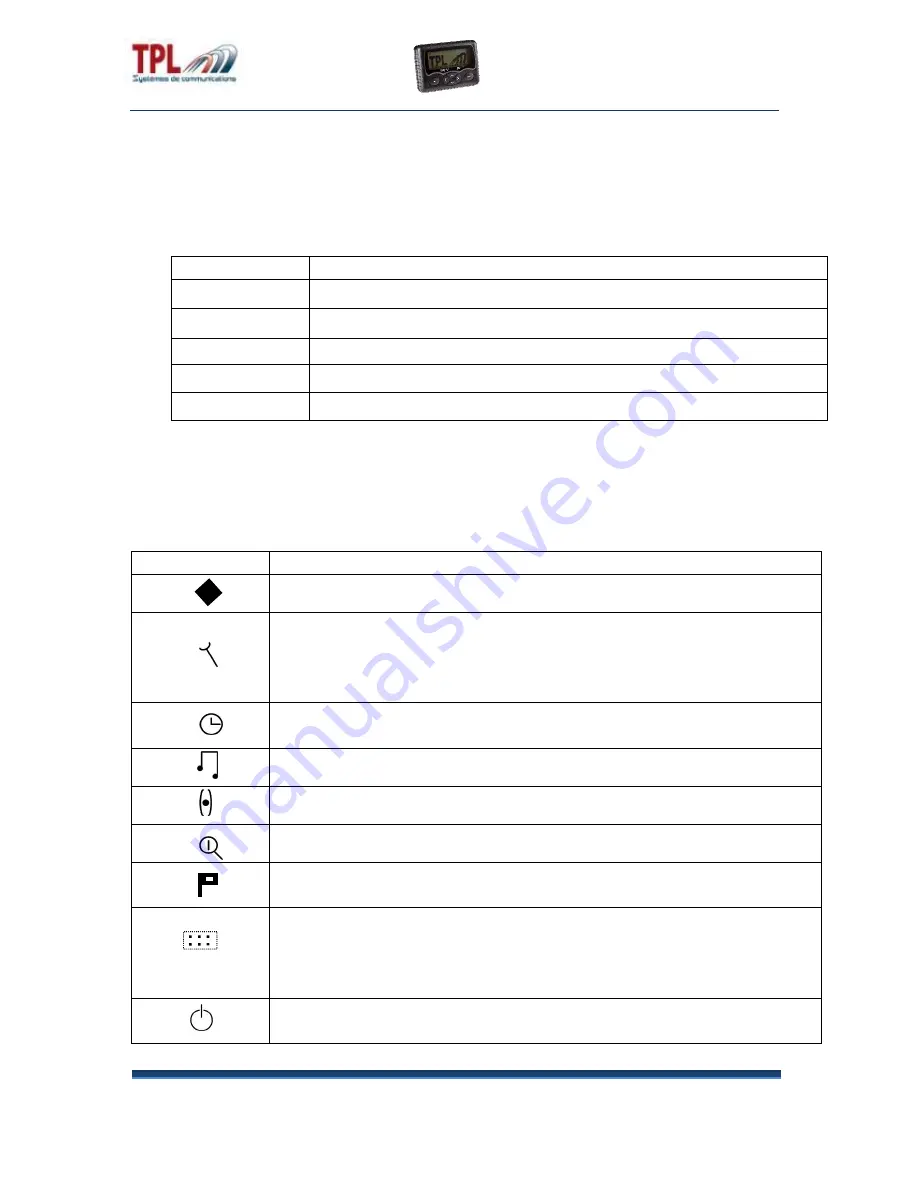
Symbol  

Description 


The key relates to the « validation » function 


The key relates to the « cancellation » function 


The key relates to the « sound testing » function  

↑ ↓ 

Possible using of keys  

 and 


< > 

Possible using of keys  

 and 


Summary of Contents for BIRDY WPs-r2

Page 1: ...User Manual BIRDY WPs r2 Firmware Version 1 0 1 ...

Page 2: ...5 Addition clip fitting Paragraph III Software Version Management Process Vx y z z is incremented for minor modification such as grammar error detail addition format change and as a general manner are the draft versions prior to official versions y is incremented for validated official versions x is incremented for major modifications such as provision or feature addition ...

Page 3: ...lip fitting on the rear case of the pager 7 IV Using 8 1 Switching on BIRDY WPs 8 2 Switching off BIRDY WPs 8 3 Reading a received message 8 4 Erasing all the messages 8 5 Identities management 8 6 Time setting 9 7 Winter summer time 9 8 Alarm setting 9 9 Quiet period setting 9 10 Low battery warning 10 11 Choice of ring 10 12 Vibrate 10 13 Zoom 10 14 Charger light 11 15 Keyboard sound 11 16 Langu...

Page 4: ...f User manual Version 1 0 1 Page 4 12 I BIRDY WPs R2 presentation 1 Mechanical presentation 2 Icons description Power on indicator light Alert message in memory Active ringtone Read alert message Programmed alarm clock Battery level ...

Page 5: ... level indication Time alarm clock setting time and alarm clock setting Ringtone selection selection of the ringtone Vibrator selection of the vibrator functionning mode Zoom selection of the characters display size Language selection of the pager language Keyboard composed by 2 sub menus Keyboard locking activation or inactivation of the keyboard locking Keyboard sound activation or inactivation ...

Page 6: ...Date 27 07 2015 BIRDY WPs r2 Ref User manual Version 1 0 1 Page 6 12 II Important information Open the Birdy WPs R2 with a coin of 2 euros cents Insert the battery in the indicated direction ...

Page 7: ...Date 27 07 2015 BIRDY WPs r2 Ref User manual Version 1 0 1 Page 7 12 III Clip fitting on the rear case of the pager ...

Page 8: ...umber with date and time 3 The remaining part of the displayed text is the received message 4 If the text is long press keys to scroll the message text 5 Key enables to save or erase the message 4 Erasing all the messages 1 Press key 2 Go to ERASE ALL menu thanks to keys 3 Press key 4 Press again to confirm 5 Identities management 1 Press key 2 Press key to go to TECHNICAL MENU 3 Press key 4 Press...

Page 9: ... key to go to the CLOCK SETTING menu 3 Press key to go to SUMMER TIME or WINTER TIME 4 Press key to confirm menu 5 Press key to activate 8 Alarm setting 1 Press key to access menu 2 Press key to go to the CLOCK SETTING menu 3 Press key to go to ALARM SETTING 4 Press key to access menu 5 Press key or to set time 6 Press key to confirm 9 Quiet period setting 1 Press key to access menu 2 Press key to...

Page 10: ...ey to access menu 2 Press key to go to the CHOICE OF RING menu 3 Press key to confirm 4 Press key to choose ring 5 Press key to listen to a ring tone 5 Press key to confirm 12 Vibrate 1 Press key to access menu 2 Press key to go to the VIBRATE menu 3 Press key to confirm 4 Press key to choose profile 5 Press key to confirm 13 Zoom 1 Press key to access menu 2 Press key to go to the ZOOM menu 3 Pre...

Page 11: ...ress key to go the KEYBOARD SOUND menu 5 Press key to confirm 16 Language 1 Press key to access menu 2 Press key to go to the LANGUAGE menu 3 Press key to confirm 4 Press key to choose language 5 Press key to confirm 17 Technical menu Version 1 Press key to access menu 2 Press key to go to the technical menu 3 Press key to go the menu VERSION and check the version LCD contrast 1 Press key to acces...

Page 12: ...1 Press key to access menu 2 Press key to go to the technical menu 3 Press key to go to the BATTERY LEVEL and check Autotest 1 Press key to access menu 2 Press key to go to the technical menu 3 Press key to go to the AUTOTEST 5 Press key to confirm 18 User profile 1 Press key to access menu 2 Press key to confirm PROFILE menu 2 Press keys to choose one profile 4 Press once more on to confirm the p...

Reviews: