background image

11 |


4.5


Logger menu 

 download all data to 

PC… 

After selecting this menu option a wizard appears 
where you can:


Set the download folder.


Select a template in which the settings of the 
oven, the probe layout and the paint type are 
defined.


Select the batches to be downloaded.


4.6


Logger menu 

 download express


Ideal Finish Analysis can speed up the printing of a 
report at the click of a single button. Switch 
Industrial Physics Ideal Finish Analysis to advanced 
mode to enable your line operators to print a report 
based on a template for specific processes.


4.7


Logger menu 

 Real 

Time…


Use this option to view and analyze data the mo- 
ment they are measured.


4.8


Logger menu 

 User 

settings…


use this option to specify the following settings in 
Ideal Finish Analysis.


Select the logging interval time


Specifying the time


-


Check the Synchronize check box. This will set 
the data logger time to the PC time


Setup the batch names


-


Double click on the current name to enter a new 
batch name


Set the paint types in your logger


Set the cure specifications for the report


Configure the properties when logging data in 
Real Time.


-


Enter a description of the object you are 
measuring and enter a description of the 
location where the measuring takes place.


4.9


Logger menu 

 Configure & 

Test…


In order for the data logger to communicate with 
a computer, use the USB cable to connect it to an 
available port on the computer. once connected,


communication can be tested by taking the follow- 
ing steps:


Step  1. 

Connect  the  data  logger  to  the  computer 

using the cable that comes with the logger.


Step 2. 

Choose Configure & Test…¹ from the logger 

menu.


Step 3. 

The logger starts measuring automatically, 

displaying the measurements² in a pop-up 
window.


Step 4. 

Click More to see information about the 

connected logger, click OK or Cancel to 
close the pop-up window.


¹ If an error message is displayed, switch to another 
USB port. If all ports display an error mes- sage, make 
sure that the rechargeable battery is charged and 
the data logger is powered on.


² Measurements will be shown even when no 
probes are connected. This is normal behavior and 
are the internal cold junction temperature measure- 
ments.


Summary of Contents for CurveX4

Page 1: ...CurveX4 CX4005 CX4010 IMPORTANT Before taking this instrument in use we this manual carefully strongly advise you to read Operating Instructions V1 0 0522...

Page 2: ......

Page 3: ...with the operating instructions shall be excluded from thewarrantyaswellasmechanicalinterferenceby the customer or by third parties with CurveX 4 and relatedequipmentwithoutIndustrialPhysics written...

Page 4: ...e and Protective Measureswhennot inuse 4 Getting Started 8 4 1 Quick start 4 2 Memory batches 4 3 CurveX 4 tasks 4 4 Downloading Data And Configuring The CurveX 4 4 5 Logger menu download all data to...

Page 5: ...in this manual should have been read and understood acknowledged as evidenced by their signature 1 4 Dangers This instrument has been designed and constructed in accordance with state of the art tech...

Page 6: ...ty and dangers on the instrument are in readablecondition In case of danger the instrument has to be switched off by means of the on off switch at the left back side of the instrument or by unplugging...

Page 7: ...ssibly photographed and reported to the relevant insurers or in the case of sales deliveredtocustomersworks tothesupplier 3 4 StorageandProtectiveMeasureswhennot in use The instrument must be stored i...

Page 8: ...robes to the input points at position 7 of the CurveX 4 Step 3 Attach the sensors to the object to be measured Step 4 Press and hold down the Power button position 1 for one second to switch on the Cu...

Page 9: ...aint LED Red partial cure Orange active Green full cure 6 Battery LED Shows battery status when powered on Red 25 Orange 25 to 75 Green 75 7 Thermocouple connectors 1 4 Connect up to four probes 8 USB...

Page 10: ...play You will have to use Ideal Finish Analysis to download data and change the settings of the logger The license key and memory stick with the Ideal Finish Analysis software are part of the CurveX 4...

Page 11: ...Set the paint types in yourlogger Set the cure specifications for the report Configure the properties when logging data in Real Time Enter a description of the object you are measuring and enter a de...

Page 12: ...ure 2 Thermocouple K Connector Usage The position of the sensors on the object can be stored inIdealFinishAnalysis Thepositionwillthen also be available in thereports Remark Make sure that the probe c...

Page 13: ...is part in order to align the sensor element with the surface to ensure good contact Take the clamp between your thumb and forefinger Check which jaw has the sensor element and place the probe at the...

Page 14: ...heetforthe maximum time and temperatureuse 6 1 Preparing for measurement Step1 Makesurethe box is at room temperature Step 2 Place the CurveX 4 data logger with the probesalreadyconnected insidethebox...

Page 15: ...erve the elasticity of the rubber gasket 6 3 Precautions Batteries in carry on baggage aircraft cabin The battery employed in our CurveX 4 is a standard set of 2 AA batteries The batteries employed in...

Page 16: ...y 32 MB required hard Disk space 128 MB After300cycles charge from 0 to100 the batterywillretain acapacity of 80 Ingeneralsuchbatteryneedreplacementafterapprox 2yearscontinuoususe 7 1 CurveX 4 package...

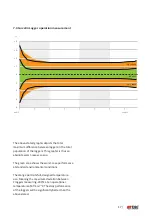
Page 17: ...graphic is thus an absolute worst case scenario The green zone shows the worst case performance at standard environmental conditions Theorange part is its full designed temperature use Meaning the max...

Page 18: ...roduct whether inthis manual or other wise is correct we haveno control over either the quality or condition of the product orthemanyfactors affecting the use and application of the product Therefore...

Page 19: ...19...

Page 20: ...20 www industrialphysics com...

Reviews: