CAMON LS14 Lawn Scarifier
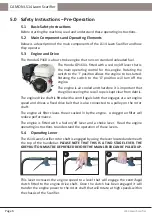
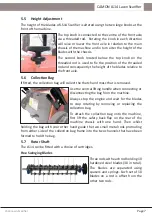
LS14 Lawn Scarifier
Page 19
Continue this until each section has been filled with a blade and springs and
the rod is showing through the last spider.
Renew and spread the split pins to secure the rod.
Repeat this process with the remaining two rods.
Re-attach rotor to the chassis as described in section 7.4.1.
Fixed Blade Cartridge
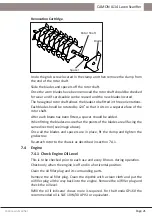
Undo the grub screw located in the clamp and then remove the clamp from
the end of the rotor shaft.
Slide the blades and spacers off the rotor shaft.
Once the worn blades have been removed the rotor shaft should be checked
for wear and if serviceable can be reused and the new blades located.
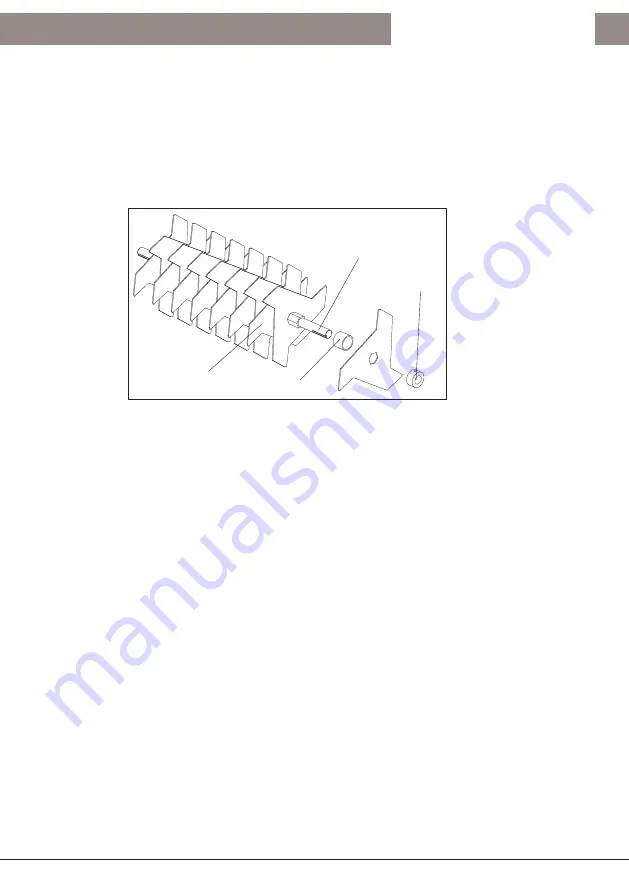
The hexagonal rotor shaft allows the blades to be fitted in three orientations.
Each blade should be rotated by 120
o
so that it sits on a separate face of the
rotor shaft.
After each blade has been fitted, a spacer should be added.
When fitting the blades ensure that the points of the blades are all facing the
same direction (see image above).
Once all the blades and spacers are in place, fit the clamp and tighten the
grubscrew.
Re-attach rotor to the chassis as described in section 7.4.1.
Rotor Shaft
Spacer
Blade
Clamp


