36
TRAK Machine Tools
Southwestern Industries, Inc.
ProtoTRAK SMX, K2, K3 & K4 & Retrofit Safety, Installation, Maintenance, Service and Parts List Manual
Every Four Months:
1.
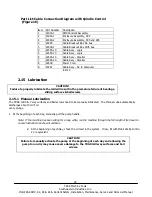
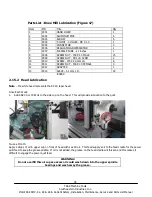
Apply a good grade of general-purpose grease through the grease fittings on the back of the head. This grease
lubricates the Low range gear set and the feed change gears respectively.
2.
Lubricate vari-disk on spindle motor by means of grease fitting on motor shaft.
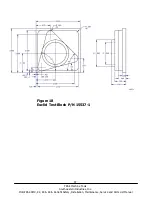
2.16 ProtoTRAK SMX Euclid Block Procedure
The test part should be machined at the completion of the installation.
The material for the Euclid block test part is found in the toolbox.
Material Specification: Aluminum, 6061-T6 or T4
Blank Size: (minimum dimensions) 3 x 3 x 1”, provided in tool box
Tool: .750 end mill, 2 flute, high speed steel,
sharp
Coolant: Flood coolant or Cool-Tool
1.
Mount vise and indicate the back jaw parallel to the table within .0005”.
2.
Clamp material in vice with a minimum of .800” above the vise jaws.
3.
Load in the Euclid block program from the ProtoTRAK SMX flash disk, which is Part Number Euclid 2 axis.PT4. It
is found under the PT4 folder followed by the SWI TEST PROGRAMS folder.
4.
Use an edge finder to set Absolute 0 on X and Y. Absolute zero is the front left corner of the block as viewed
from in front of the machine.
5.
Load the .750 end mill and set Z Absolute 0 at the top of the part.
6.
Begin to run the program. Set the spindle to 2000 RPM and follow the instructions on the control for SETTING Z
and CHECKING Z. The part will be machined in the following sequence:
Event #
Description
Depth of Cut
1
Circle pocket – cuts middle circle
-0.250”
2
Circle frame – cuts outer 1.830 diameter circle
-0.250”
3
Circle frame – cuts material from corners remaining on Euclid block -0.250”
4
Roughs material in upper right-hand corner
-0.500”
5-12
Cuts triangle on Euclid block with finish cut
-0.500”
13
Rectangular frame – cuts outer 2.750” rectangle
-0.750”
7.
After the program run, the program will locate to the following position.
X = 1.318
Y = 1.318
8.
Mount a dial indicator in the quill and check the circles.
9.
Check the runout of the sides of the square frame.
10.
Inspect the machined surfaces for smoothness.

