3270 3319 Rev B
6
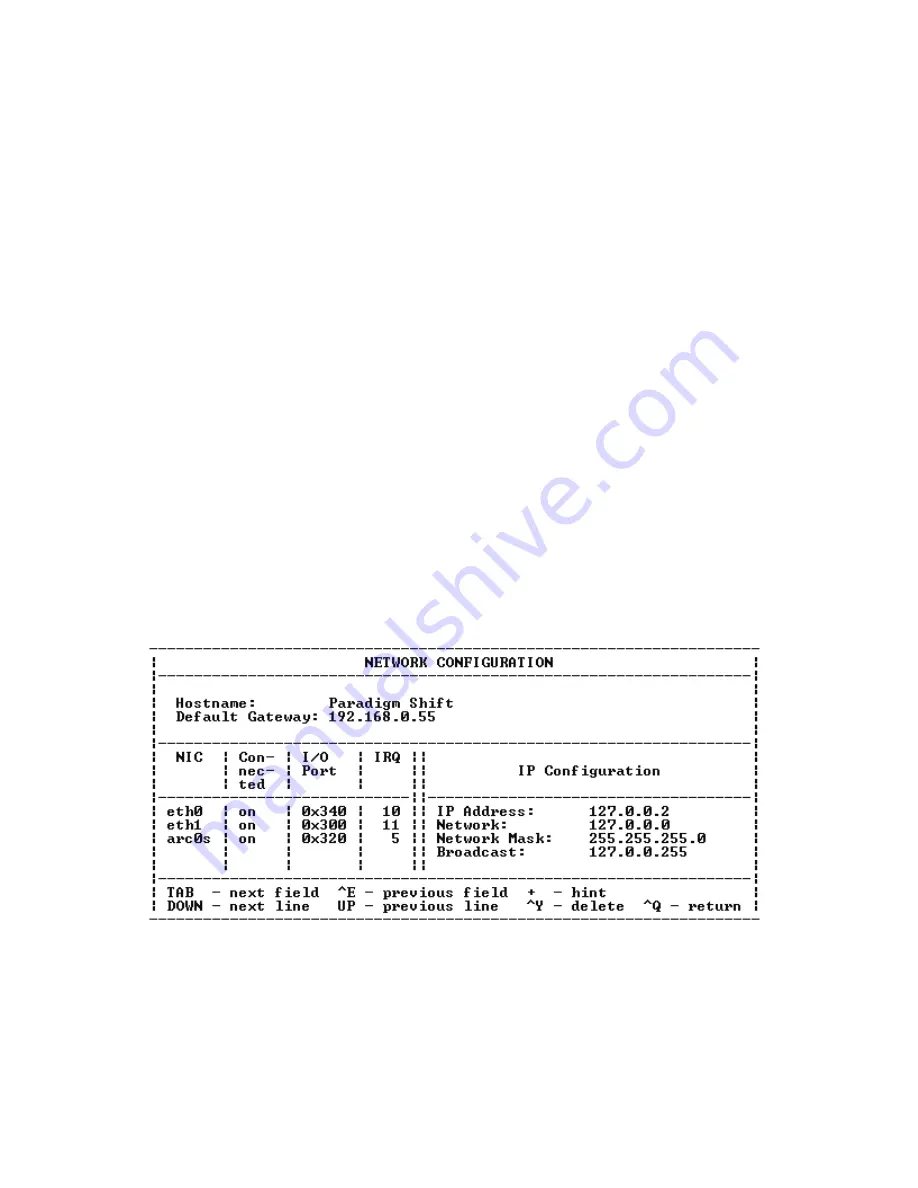
Configure eth1 from the NETWORK
CONFIGURATION screen
The configuration of NIC Ethernet 1 (eth1) applies
to the router. Normally, eth1 is preconfigured, but if
you have to configure it, use the following procedure.
At most, you should only have to configure eth1
once. Configure eth1 at the NETWORK
CONFIGURATION screen:
1.
At the setup menu (Figure 4 on page 4), use the
TAB
key to move the cursor to Network
Configuration.
2.
Press
ENTER
. The NETWORK
CONFIGURATION screen displays (Figure 7).
Note:
The bottom of the NETWORK
CONFIGURATION screen shows the navigation
commands. The most commonly used commands
are
TAB
,
+
, and
^
Q
(
CTRL
key and
Q
key pressed
simultaneously). The
^
Q
(return) command
steps the display back through the program.
3.
Use the
TAB
key to move the cursor to eth0.
4.
Press the down arrow key to move the cursor to
eth1.
5.
Use the
TAB
key to move the cursor to the IP
Address field in the IP Configuration column.
6.
Type the IP address that the manufacturer used
to configure the router. Or, use the screen
default.
7.
Press the
TAB
key to move the cursor to the
Network field in the IP Configuration column.
8.
Type the same address that you entered in the
IP Address field, but substitute a
0
for the last
number.
9.
Press the
TAB
key to move the cursor to the
Network Mask field in the IP Configuration
column.
10. Type the address that you received from the
network administrator.
11. Press the
TAB
key to move the cursor to the
Broadcast field in the IP Configuration column.
12. Type the same address that you entered in the
IP Address field, but substitute 255 for the last
number.
13. Use the
^
Q
command to return to the setup
menu (Figure 4 on page 4).
14. Go to
Configure arc0 from the NETWORK
Figure 7:
Sample NETWORK CONFIGURATION screen for eth1


