Service and Repair
CDQ-SVX01A-EN
17
WARNING
Hazardous Voltage!
Disconnect all electric power,
including remote disconnects before
servicing. Follow proper lockout/
tagout procedures to ensure the
power can not be inadvertently
energized. Failure to disconnect
power before servicing could result
in death or serious injury.
Seal Adjustment
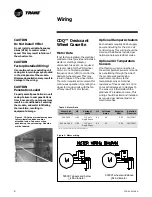
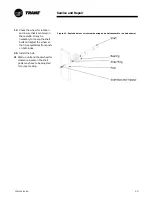
Neoprene brush seals are located on
both sides of the cassette around the
wheel perimeter and the center
diameter posts (see Figure 24). The
seals are designed to come in
contact with the wheel and require
no maintenance other than
adjustment. The seals consist of a
metal and neoprene clip that grips to
the metal posts or panels. These
clips can be manually adjusted.
To minimize air that bypasses the
wheel the perimeter seals should be
adjusted such that air gaps are not
visible around the wheel. Do not over
compress the seal against the
perimeter as this may cause the
wheel not to turn or overload the
motor. To minimize air the leaks from
one side to the next the diameter
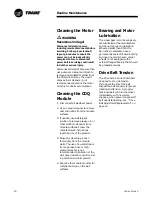
seals should be adjusted to come in
full contact with the wheel face (see
Figure 25).
Figure 24. Neoprene brush seals are
located around wheel perimeter and
center diameter posts.
Figure 25. Adjust seals to fully contact
wheel face to minimize leaks.
Drive Motor and
Pulley Replacement
1. Disconnect all electrical power.
2. Remove the belt from the pulley
and temporarily position it
around the wheel rim.
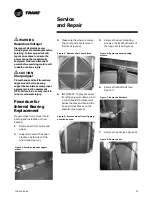
3. Measure and record the distance
from the inner edge of the pulley
to the mounting wall.
4. Loosen the set screw in the wheel
drive pulley using an Allen
wrench and remove the pulley
from the motor drive shaft.
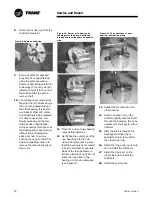
5. While supporting the weight of
the drive motor in one hand,
loosen and remove the four
mounting bolts.
6. Install a replacement motor with
the hardware kit supplied.
7. Install the pulley and adjust it to
the distance recorded in the
previous step.
8. Tighten the set screw to the drive
shaft.
9. Stretch the belt over the pulley
and engage it in the groove.

