20
CVHS-SVN04E-EN
Reassembly
It is important to remove used O-rings and gaskets and
clean joints before reassembling the compressor with new
O-rings. All necessary replacement O-rings are supplied
by the factory when the separable shell option is ordered.
Use the following procedure to reattach the
compressor/motor assembly to the chiller.
1. Remove the protective covers on all compressor,
condenser, evaporator, and economizer connections.
Clean all mating surfaces using Loctite
®
“Chisel”
cleaner or CRC
®
Industrial Gasket Remover.
Completely remove old sealing compound from O-ring
grooves. Use Loctite “N” primer for final surface
preparation.
2. Refer to CTV-SB-66F (
General Service Bulletin:
CenTraVac O-Ring and Flange Sealant
) for proper
installation of gaskets, O-Rings, and Loctite sealant.
Install a new O-ring on the compressor discharge
connection mating surfaces. Use Loctite 515 “Gasket
Eliminator” to lubricate the O-ring and provide
additional sealing. This is the only sealing compound
recommended by Trane for use on O-ring joints. To use
this sealing compound, apply a light bead
(approximately 1/8-in. in diameter) to the O-ring
groove, insert the O-ring and then apply a light bead to
the O-ring. Also apply a 1/8-in. bead of sealing
compound between the O-ring groove and the screw
hole circle. The parts can now be assembled.
Note:
Trim 3/8-in. off the 2-1/8-in. copper compressor
drain line to allow clearance when
reassembling.
3. Lift the compressor/motor assembly into place. Be
sure to caulk or paint the compressor base plate to
protect the bare metal. Install two new roll pins into the
compressor casting. Align the pins into the
compressor mounting base. Insert the hex head
screws in the compressor base and discharge flange
connections.
4. Tighten the compressor base and discharge flange hex
head screws. See
for screw torque
specifications.
5. Remove the lifting equipment.
6. Set up dial indicators on the compressor end of the
compressor/motor assembly. See
. The dial
indicators are used to monitor horizontal and vertical
movement of the compressor/motor assembly when
the suction elbow retaining hex head screws are
tightened. Support the dial indicators from the
condenser or from a floor stand.
7. Clean the suction elbow flange surfaces and O-ring
grooves per
. For the evaporator to suction
elbow joint, use Loctite 515 per
elbow to compressor joint, use 1/8-in. GORE-TEX
®
Joint Sealant placed approximately 1/8-in. in board of
the O-ring groove. This is used in addition to the
O-ring. Also use 1/8-in. GORE-TEX on wrap pipe to
second stage inlet connection in the same manner as
on the section elbow to compressor joint.
As an option, Loctite 515 may be used in place of
GORE-TEX. However, great care must be taken to
prevent the sealant from entering the first stage IGV
housing. Refer to CTV-SB-66F (
General Service
Bulletin: CenTraVac O-Ring and Flange Sealant
).
NOTICE
Equipment Damage!
Failure to remove the strain relief with the sensor could
result in equipment damage. Do NOT attempt to pull
sensor bulb through the strain relief; always remove
the entire strain relief with the sensor.
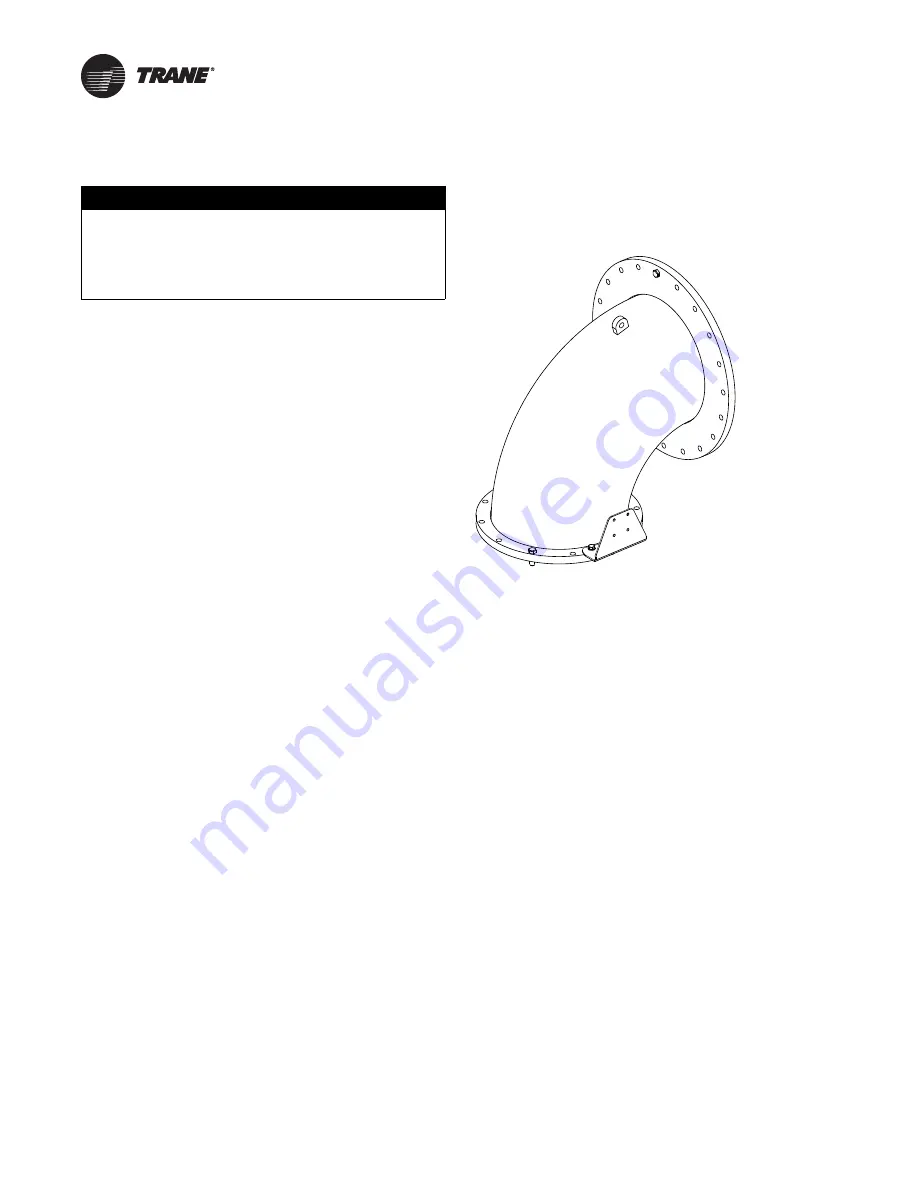
Figure 20.
Suction elbow flange screws
(a)
(a) For flange tightening sequences, refer to


